Thursday, February 27, 2014
Chocolate Coconut Bread Pudding
Here in Utah we have a local favorite place to eat called Kneaders. It's kind of a bakery/cafe type that's real homemade. A few years ago I stopped in to one of the locations and decided to try their German Chocolate Bread Pudding, because I have a hard time resisting things with chocolate and coconut, and I was in heaven!! It was one of the most delicious things I have ever tasted. I have only been back once to have it again and I have sorely missed it.
When we moved to our current house I decided to give it a try at the one closer to us, but it was not the same. Needless to say, I was disappointed but I set out, bound and determined, to make my own that was equally delicious. I searched for a while but was never satisfied with what I found, until one day I was back in to Kneaders for lunch. I got the girl behind the counter chatting about the bread pudding and she gave away some of the secrets about each of their flavors. When she mentioned that the chocolate coconut one was made with croissants it was like a light went off in my head. That was what I needed to finish my recipe that I had started.
So, without further delay, I give you this delicious dessert you are sure to crave as much as I have.
Chocolate Coconut Bread Pudding
4-5 large croissants, day old (*I always look for them first on the day-old bakery rack, you'll get them cheaper too!)
1/2 cup full-fat coconut milk, plus more for drizzling
3/4 cup half and half or heavy cream
4 eggs
1/3 cup sugar
1 tsp. vanilla (can add a drop or two of coconut extract if you want more coconut flavor)
1/2 cup semi-sweet or dark chocolate chips, plus more for sprinkling
1/2 cup shredded, sweetened coconut
shaved coconut for garnish, if desired
Spray a 9-inch or similar baking dish with cooking spray (I happened to use an 8.5x11-inch baking dish). Cut croissants into chunks and place in prepared baking pan. Sprinkle 1/2 cup chocolate chips and 1/2 cup shredded coconut over the croissants. Shake the pan a little so they can distribute a little.
In a mixing bowl, whisk together milk, cream, eggs, sugar and vanilla. Pour over the top of croissants, pushing them down into the milk mixture a little bit to get them soaking it up. Let it stand about 10-30 minutes. Preheat oven to 350 degrees F.
Bake in preheated oven about 25-30 minutes. *Optional: While bread pudding is baking, put a handful of shaved coconut in a skillet and toast until lightly golden. Set aside.
When bread pudding is done cooking, remove from oven and sprinkle a small handful of chocolate chips over the top as well as the toasted coconut. Allow to cool. Serve warm with an extra drizzle of coconut milk, if desired.
Tuesday, February 25, 2014
Spinach, Tomato & Goat Cheese Stuffed Spaghetti Squash
Quite a while back my mom brought me some garden spoils and I have to admit this squash sat in my pantry for longer than I'd like to admit! I almost never cook spaghetti squash just because I never think about it and I'm pretty sure my girls would stick their noses up at it. Luckily it's a hard winter squash and lasts just about forever.
As I have been cleaning out my pantry the past couple of months, I decided it was time to use up that squash. It kept making me feel guilty every time I would open up the pantry door and see it there on the shelf. So I cooked it up with some of my favorite ingredients and it turned out fabulous. The spaghetti squash seemed to cook a bit quicker than other winter squashes so this dish makes for a quick and healthy dinner that's pretty no-fuss.
Spinach, Tomato & Goat Cheese Stuffed Spaghetti Squash
serves 2-4
1 medium spaghetti squash
olive oil
about 2 cups fresh baby spinach, chopped
2 roma tomatoes, diced
few slices of red onion
2-3 oz. goat cheese
2 Tbsp. pepitas
4 fresh basil leaves, chiffonade
smoked paprika
salt & pepper
Preheat oven to 425 degrees F. Split squash length-wise, scrape out seeds and place, cut side down, on a baking sheet. Bake for about 25-30 minutes or until squash starts to shred when a fork is scraped across it's flesh.
Flip squash over so cut side is now facing up. Scrape through most of the squash with a fork creating shreds of squash but leaving it in the peel. Drizzle with olive oil and sprinkle with salt and pepper and a pinch of smoked paprika. Over each half of squash crumble goat cheese, chopped spinach, tomatoes and some red onion. Drizzle another bit of olive oil over the top, sprinkle salt and pepper and more paprika, if desired. Return to oven and bake another 10-15 minutes.
While squash is baking, toast pepitas with a pinch of salt in a small frying pan over medium heat until they start popping and turn golden brown in color. Set aside.
Once squash is done baking, remove from oven and top with fresh basil and toasted pepitas. Serve warm.
SOURCE: Slightly adapted from BS' In The Kitchen
Labels:
Meatless,
Quick n' Easy,
Vegetables
Sunday, February 23, 2014
Menu Plan Monday
I know menu planning is kind of hit and miss here on the blog, but that's how we roll these days. There are some times I'm super organized early in the week and other times we just fly by the seat of our pants. Hopefully this will be one of the weeks I'm more rather than less organized. Everything just runs smoother when mom is organized.
As always, I've got some new recipes and some beloved oldie favorites. I have to say, I'm really looking forward to Tuesday's dinner: Marsala Chicken and Barley Stew and biscuits. Mmmm, my mouth is already watering!! I've actually also made myself a lunch and breakfast menu so I can make sure to use up what I've got this week. I'll list a few of those at the bottom.
Dinner Menu February 24- March 2
Monday
Broccoli in Garlic Sauce over rice
Nappa Cabbage Salad
steamed peas and fresh sweet peppers
Tuesday
Marsala Chicken, Mushroom and Barley Stew
Exploding Biscuits
Wednesday
The Perfect Hamburger
Steak Fries
Salad
Thursday
Leftovers
Friday
Sweet Pepper, Tomato and Feta Pizza
Saturday
Penne Gorgonzola with Roasted Chicken
Salad
Sunday
Borscht
Artisan Bread
Other things going on:
Orange Ricotta Muffins
Peaches and Cream Steel Cut Oats
Lemon Raspberry Baked Oatmeal
Strawberry Basil and Goat Cheese Panini
Apple and Smoked Cheddar Quesadillas
Labels:
Menus
Wednesday, February 19, 2014
Pasta with Roasted Red Pepper Sauce
First of all, I have news!! I got a new camera. Well, new to me anyway, and I'm so excited to learn how to use it. Hopefully you will see an improvement in my shots and my food will look even more appealing!
Now on to this delicious sauce. I love, love LOVE roasted red peppers. I like them raw and cooked in stuff like stir-fry too, but I really love them roasted. They just have this sweet, slightly tangy taste that is just beautiful. Slap them on wraps, sandwiches, burgers, pitas, pizzas, put them in hummus or other dips, or even in soup.
Roasted red peppers are obviously the star of this deliciously velvety pasta sauce. The flavor is not too bold, a little creamy, a little crunchy with punches of flavor here and there from fresh basil. If you're not a fan of goat cheese, you can switch it out for feta or even parmesan.
Pasta with Roasted Red Pepper Sauce
3 red peppers
2 Tbsp. pine nuts
2 Tbsp. olive oil
1/2 medium onion
2-3 cloves garlic, minced
1 cup chicken or vegetable broth
1/2 cup heavy cream or half and half
fresh basil leaves, torn or chopped
2-3 oz. goat cheese
salt and pepper, to taste
3/4 lb. pasta
Roast red peppers either under the broiler or on your grill until charred, flipping halfway so you get both sides. Place in ziploc bag or container with a lid and allow to cool and sweat. Peel charred skins off, remove seeds and set aside.
Lightly toast pine nuts in a frying pan over medium-high heat.
Place pine nuts and roasted peppers in a blender and blend until smooth.
Bring a large pot of water to boil and drop pasta. Cook according to package directions.
In a large skillet, heat olive oil over medium heat and add onion. Cook until soft and translucent. Add garlic and cook another minute. Add pepper puree, broth and cream. Stir to combine and salt and pepper to taste. Crumble in goat cheese and stir to melt. Remove from heat, add fresh basil, check for seasoning again and adjust as necessary.
Drain pasta and stir into sauce. Top with more fresh basil, if desired or a couple scratches of parmesan.
SOURCE: Pioneer Woman
Now on to this delicious sauce. I love, love LOVE roasted red peppers. I like them raw and cooked in stuff like stir-fry too, but I really love them roasted. They just have this sweet, slightly tangy taste that is just beautiful. Slap them on wraps, sandwiches, burgers, pitas, pizzas, put them in hummus or other dips, or even in soup.
Roasted red peppers are obviously the star of this deliciously velvety pasta sauce. The flavor is not too bold, a little creamy, a little crunchy with punches of flavor here and there from fresh basil. If you're not a fan of goat cheese, you can switch it out for feta or even parmesan.
Pasta with Roasted Red Pepper Sauce
3 red peppers
2 Tbsp. pine nuts
2 Tbsp. olive oil
1/2 medium onion
2-3 cloves garlic, minced
1 cup chicken or vegetable broth
1/2 cup heavy cream or half and half
fresh basil leaves, torn or chopped
2-3 oz. goat cheese
salt and pepper, to taste
3/4 lb. pasta
Roast red peppers either under the broiler or on your grill until charred, flipping halfway so you get both sides. Place in ziploc bag or container with a lid and allow to cool and sweat. Peel charred skins off, remove seeds and set aside.
Lightly toast pine nuts in a frying pan over medium-high heat.
Place pine nuts and roasted peppers in a blender and blend until smooth.
Bring a large pot of water to boil and drop pasta. Cook according to package directions.
In a large skillet, heat olive oil over medium heat and add onion. Cook until soft and translucent. Add garlic and cook another minute. Add pepper puree, broth and cream. Stir to combine and salt and pepper to taste. Crumble in goat cheese and stir to melt. Remove from heat, add fresh basil, check for seasoning again and adjust as necessary.
Drain pasta and stir into sauce. Top with more fresh basil, if desired or a couple scratches of parmesan.
SOURCE: Pioneer Woman
Labels:
Pasta,
Quick n' Easy
Friday, February 14, 2014
Thai Steak Salad
It is very seldom that we eat beef, even less that we eat steak. I absolutely love this salad though and thought this weekend would be perfect for a little splurge. I have had the original version of this recipe for probably almost 10 years. It was in one of my most favorite Cooking Light Cookbooks. What attracted me at first was the beautiful picture in the cookbook. The bright purple cabbage and orange carrots contrasted against a bed of lovely greens.
This salad also has three of my favorite fresh herbs: basil, cilantro and mint. While I have eaten them and love them separately, they are amazing all together in this salad. It is a HUGE burst of flavor going on in your mouth! The dressing uses a bit of Thai fish sauce which adds great flavor in small amounts. If you're not a fan of fish sauce or can't find it, this Ginger Lime Dressing is a good substitute. It is my all time favorite dressing and use it on my Asian Slaw whenever I make it.
Thai Steak Salad
for the marinade:
1 flank steak (or ribeye or sirloion)
2 Tbsp. soy sauce
2 Tbsp. red cooking wine (can also use sherry or red wine vinegar)
2 cloves garlic, minced
2 tsp. brown sugar
2 Tbsp. olive oil
for the salad:
1 small nappa cabbage, shredded
1/4 small red cabbage, shredded
2-3 cups baby spinach
2 large carrots, peeled and small-diced (julienned or shredded works too)
1/2 (or more) fresh cilantro leaves
1/2 cup (or more) fresh basil leaves
1/2 (or more) fresh mint leaves
for the dressing:
1/4 cup fresh lime juice (about 1-2 limes depending on how big and how juicy)
1 Tbsp. brown sugar
2 Tbsp. soy sauce
1 Tbsp. fish sauce
2 tsp. fresh minced garlic
1 Tbsp. Sriracha (sweet chili sauce)
garnish:
chopped peanuts
Combine marinade ingredients and place in a ziploc bag along with steak and marinate for at least 30 minutes, up to 2 hours.
Combine salad dressing ingredients and set aside.
In a large salad bowl, combine salad ingredients and set aside.
When you are ready to cook the steak, drizzle 1-2 tablespoons of olive oil in a large grill pan and heat over medium-high heat. Cook steak about 4-5 minutes per side, or until desired degree of doneness. Remove from heat and let rest at least 5 minutes. Slice steak across the grain in thin slices.
When ready to serve, toss the salad with a little bit of the dressing. Divide salad between plates and top with sliced steak and chopped peanuts.
SOURCE: Adapted from Cooking Light and Pioneer Woman
Labels:
Asian,
Beef,
Quick n' Easy,
Salads,
Vegetables
Friday, February 7, 2014
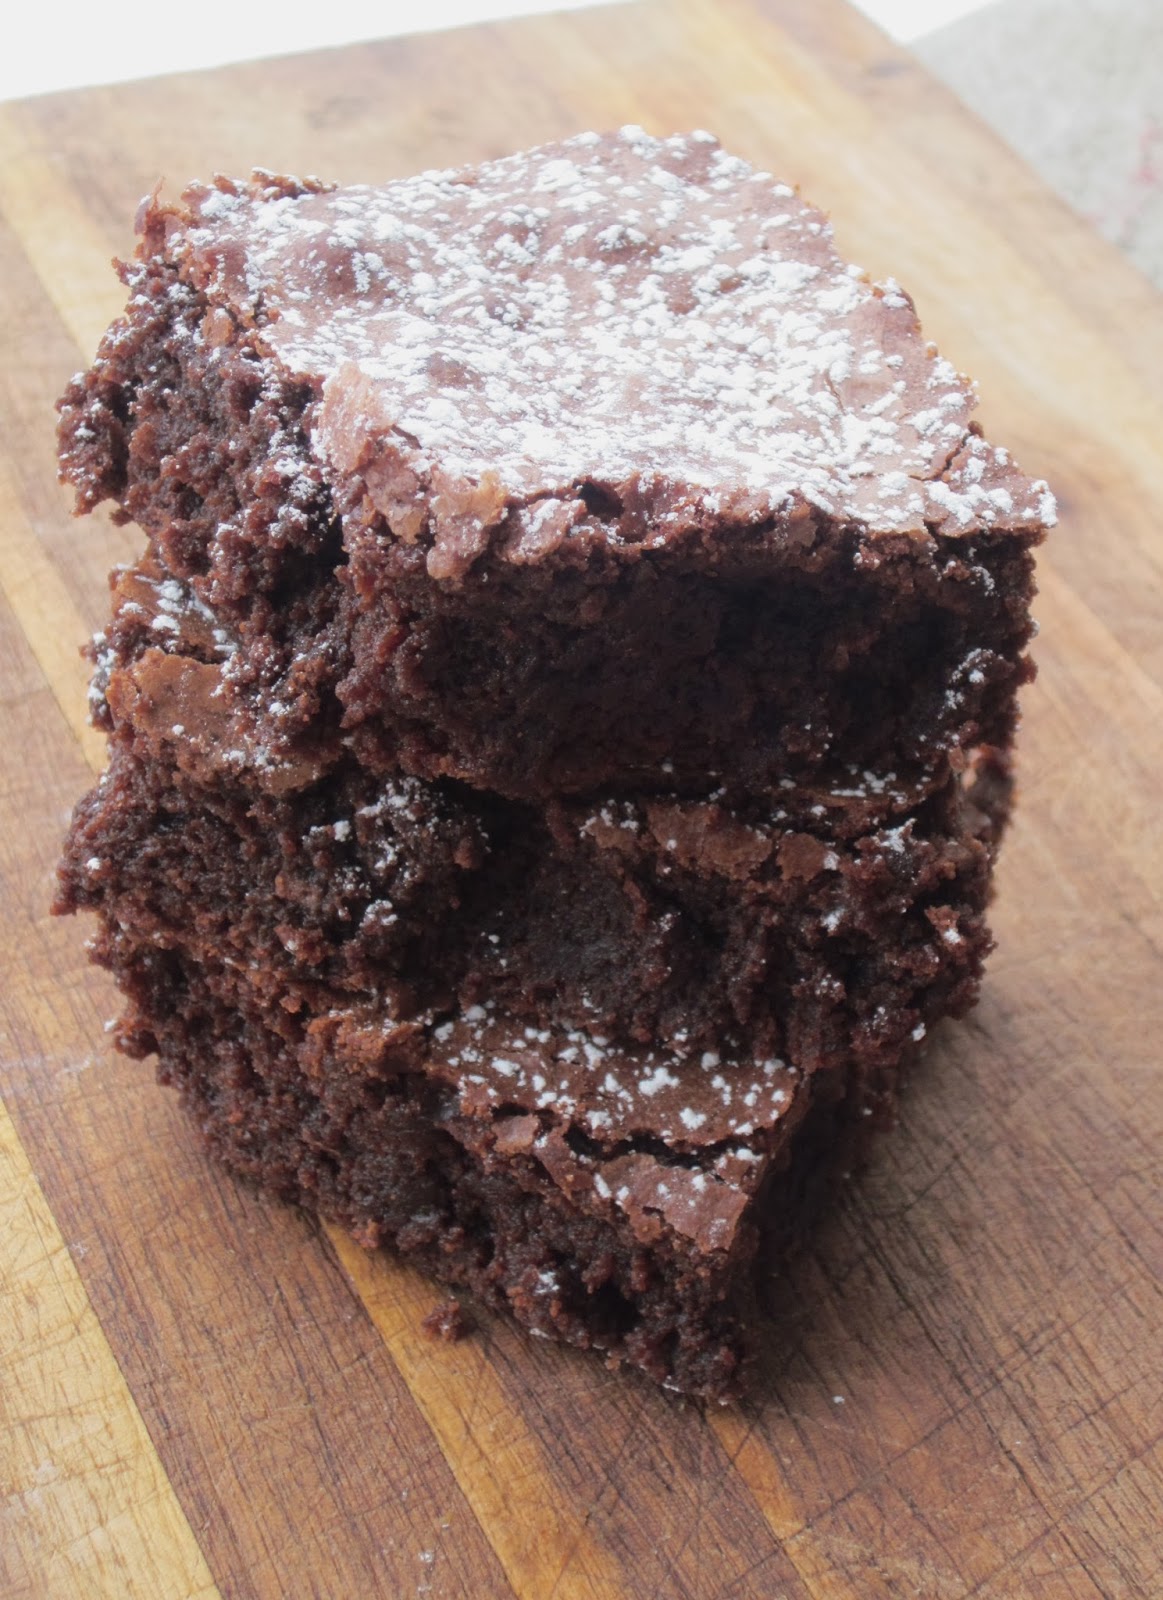
One Bowl Brownies (AKA: The Baked Brownie)
For years, my go-to treat, when I needed a chocolate fix or even just a sweet fix, was brownies, and not the scratch kind. I used brownie box mixes forever, mostly because of convenience, but also, I was hard-pressed to find a homemade recipe that was as thick and fudgey and ooey-gooey as the box mix kind. By the way, if you're more of a cake-like brownie lover, this may not be the brownie for you.
I was SOOOO excited when I found this recipe a few years. Not only did they fit my high expectations for a homemade brownie, they were so easy and I only had to dirty ONE bowl. SCORE! If you've never checked out the Baked Cookbook you should. It has some amazing dessert recipes that are a little off the cuff. Amazing.
So, if you're in the mood for a quick treat this weekend, whip these up in your favorite mixing bowl and just try and wait until they are cool enough to dig in...I dare ya.
The Baked Brownie
3/4 cup flour
1/2 tsp. salt
5.5 oz dark chocolate, chopped (I like to use Trader Joe's Pound Plus bars)
1/2 cup butter, cut into chunks
3/4 cup granulated sugar
1/4 cup brown sugar
1 Tbsp. cocoa powder
1 tsp. vanilla
*3 eggs
Preheat oven to 350 degrees F. Grease an 8 or 9 inch baking pan and set aside.
In a microwave-safe bowl, place butter and chopped dark chocolate. Microwave on 50% power, 30 seconds at a time, stirring after each interval, until smooth.
Add sugars, cocoa powder and vanilla and whisk to combine. Make sure mixture isn't too hot, then add eggs and whisk to combine again.
Sift in flour and salt. Stir until just combined. Pour batter into prepared baking pan and bake 28-30 minutes, rotating pan half way through baking time. Brownies are done when toothpick inserted in center comes out just the tiniest bit sticky.
Place brownies on a wire rack until completely cooled.
*If doubling recipe for a 9x13-inch pan, only use 5 eggs.
SOURCE: Slightly adapted from Baked: New Frontiers in Baking, by Matt Lewis & Renato Poliafito
Monday, February 3, 2014
Black Bean Soup
This has been a favorite of ours for a few years. I had actually kind of forgotten about it until my 5 year old started asking me about "that bean soup that you crush the tortilla chips in." It took me a minute to remember which bean soup she was talking about, because I was kind of shocked she was actually asking for bean soup!
I LOVE this soup for a couple of reasons. First, it comes together so quickly and second, my kids don't fuss about it because there's no chunky things in it they have to fish out haha! (Not because they're not there though, because it's pureed they just can't tell.) So sneaky, I love it.
The day after I made this soup my 5 year old asked me if there were any leftovers she could have for dinner. She was ecstatic when I told her there was and then she ate two bowls full. This is my daughter who LOVES junk food and candy, who will snoop out and find ANY piece of candy in the house if there is one. This soup is definitely a keeper!
Black Bean Soup
1 Tbsp. olive oil
2 medium carrots, diced
2 celery ribs, diced
1 small onion, diced
4 large cloves garlic, minced
1 3.5-oz can green chilies
1/2 tsp. chili powder
1/4 tsp. cumin
1/2 tsp. dried oregano
2 15-oz cans black beans, rinsed and drained
4 cups beef broth
1 bay leaf
1 lime, juiced
salt and pepper, to taste
optional toppings: sour cream, tortilla chips, shredded cheese, chopped cilantro, diced avocado
Heat olive oil in a large stockpot over medium-high heat. Add carrots, celery and onion; saute about 5-6 minutes, or until onions are translucent and soft. Add garlic and saute another 60 seconds. Add green chilies, chili powder, cumin and oregano and cook about 1-2 minutes, until the spices are fragrant. Add beans, broth and bay leaf. Bring to a boil and simmer, uncovered, about 20 minutes.
Remove soup from heat. Remove bay leaf from the soup. Using a stick blender, puree the soup to your liking (you can leave is as chunky or smooth as you'd like). Alternately you can work in batches pureeing it in a blender. Squeeze in fresh lime juice and add in salt and pepper to taste. Check for seasoning and adjust as necessary.
Ladle hot soup into bowls and add toppings as desired.
SOURCE: Our Best Bites
Labels:
Beans n' Legumes,
Quick n' Easy,
Soups
Wednesday, January 29, 2014
Caprese Baked Egg Cups
Along with pancakes and oatmeal, eggs are another thing we make the most of for breakfast around here. They are quick, easy and filling, especially along slide some nice crusty bread. While during the week I usually keep it to scrambled eggs, on the weekend I like to indulge a little.
My first experience with baked eggs were these Fontina and Spinach Baked Eggs. Boy did they make my mouth water! I probably ate them every day for like a week. Since then I have discovered and fallen in love with Trader Joe's smoked mozzarella and this new version of baked eggs. Caprese anything and you have me drooling. Although these eggs aren't quite as quick to make as scrambled, they don't take more than a few minutes extra to prepare. And bonus, it'll make a party in your mouth with every bite!!
Caprese Baked Egg Cups
makes 4 small ramekins
4 eggs
1 pint grape tomatoes
3-4 oz. fresh mozzarella cheese (I like to use smoked mozzarella from Trader Joe's)
8-10 fresh basil leaves, chopped
2 tsp. cream or milk
softened butter
Preheat oven to 350 degrees F.
Butter the insides of 4 ramekins. Crack an egg in each and add half teaspoon of cream to. Season with salt and pepper. Add some tomatoes, cheese and basil.
Set ramekins on a baking sheet and bake for about 5-8 minutes. Turn on broiler and bake another 5 minutes or so for firmer yolks, less time for more runny yolks.
Serve warm with crusty bread.
SOURCE: How Sweet It Is
Labels:
Breakfast,
Quick n' Easy,
Tomatoes
Monday, January 27, 2014
Spinach, Artichoke and Pesto Pizza
We've had a long-standing tradition of having homemade pizza every Friday night and it's one of our family traditions that I absolutely LOVE! When I was teaching school I always used to tell my students on Friday that it was party day because it was the weekend. I couldn't wait to get home and celebrate, veg and make yummy food. Although over the years our Friday nights have changed, we eventually settled into the Friday night pizza night, which I'm sure we'll keep for years to come.
On pizza night I usually make two pizzas. My girls are still not adventurous when it comes to toppings, so I just stick with homemade sauce and mozzarella. Thank goodness my hubby is a good sport because I always try to make something different for us to share. MOST of the time, it works out great. Tonight was no exception. This pizza was fabulous!! Maybe it's because it's slathered with pesto, I LOVE all things basil, or the combination of toppings, but it really hit the spot. You'll love it!
Spinach, Artichoke and Pesto Pizza
1 recipe Perfect Pizza Crust
1 recipe Basil Pesto (about 1/2 cup)
1 cup fresh spinach, chopped
1 14-oz can artichoke hearts, drained and chopped
1 cup shredded mozzarella
1/2 cup shredded parmesan
Prepare pizza crust according to directions.
Preheat baking stone* and oven to 450 degrees F for about 15-20 minutes.
Once dough has risen and doubled in size, roll it out on a pizza peel generously dusted with corn meal. You can also roll it out on parchment paper. Spread the pesto over the dough, leaving about a 1-inch border. Layer the spinach, artichokes, mozzarella and parmesan cheeses. Slide dough onto pizza stone and bake 8-10 minutes or until lightly golden. Cool slightly before cutting into it.
*If you don't have a baking stone, you can use an inverted cookie sheet.
SOURCE: Adapted from Two Peas and Their Pod
Labels:
pizza
Sunday, January 26, 2014
Menu Plan Monday
I don't know if I even dare make a menu for this week! I've been living off of smoothies the past couple of days because I am sick yet again. This is getting pretty old...being sick, not drinking smoothies. I still love my smoothies! This is one of the huge reasons I don't enjoy winter though. I don't even mind the cold so much or the snow, but I haven't even been able to go out and play in it with my kids!! I did finally break down and bundle up to take my 2 year old on a walk today. It was 19 degrees but we stayed warm and the sun was welcome! I'll have to do that more this week. Need that vitamin D.
Well, I'm still trying to clean out both my freezers and pantry. It's going pretty well but I've still got a long way to go. My shopping trips have been mostly produce, milk and eggs and I hope to stick to that in the coming weeks. My hubby started grad school this month so he's gone two nights a week so I'm trying to keep most of the meals simple and kid-friendly. We'll see.
Weekly Menu - January 27-February 1
Monday
Easy Sesame Peanut Noodles
Asian Slaw
Tuesday
Spaghetti Squash with Spinach, Tomato and Goat Cheese (probably homemade mac and cheese for the kids)
salad
Wednesday
Broccoli and Ham Bread Pudding
fresh fruit
Thursday
Baked potato bar
salad
steamed veggies
Friday
Grilled Fontina and Arugula Pizza
Saturday
Hamburgers
salad
fruit
Sunday
BLT pasta
salad
steamed veggies
Well, I'm still trying to clean out both my freezers and pantry. It's going pretty well but I've still got a long way to go. My shopping trips have been mostly produce, milk and eggs and I hope to stick to that in the coming weeks. My hubby started grad school this month so he's gone two nights a week so I'm trying to keep most of the meals simple and kid-friendly. We'll see.
Weekly Menu - January 27-February 1
Monday
Easy Sesame Peanut Noodles
Asian Slaw
Tuesday
Spaghetti Squash with Spinach, Tomato and Goat Cheese (probably homemade mac and cheese for the kids)
salad
Wednesday
Broccoli and Ham Bread Pudding
fresh fruit
Thursday
Baked potato bar
salad
steamed veggies
Friday
Grilled Fontina and Arugula Pizza
Saturday
Hamburgers
salad
fruit
Sunday
BLT pasta
salad
steamed veggies
Labels:
Menus
Friday, January 24, 2014
Banana Bread Baked Oatmeal
I usually keep a bunch of bananas on my counter, some not quite ripe, some ready to eat and the rest ready to use in smoothies or baked goods. When I bake with bananas I like to make sure they are nice and almost black, so I let them sit out a good long time. I always say the blacker the better.
Lately we haven't been eating bananas as quickly as we usually do so my black ones were piling up. I didn't really feel in the mood to make bread or muffins and was trying to keep the sweets at bay, so I was kind of at a loss as to what to make. Then I thought about breakfast for the week and realized some mashed banana would go great mixed into our regular baked oatmeal.
I like to make breakfast fresh for my girls before school so I had to get up a little early the morning I made this, but it was so worth it!! The smell that filled the house was amazing. It really did smell like banana bread baking. The end result was so delicious, nice and moist and a little crunchy on top. I even thought about sprinkling a little coarse sugar on top for brulee but was short on time, so I'll have to save it for next time.
This oatmeal is easily doubled to fit a 9x13 pan. I sometimes like to make a big pan and eat on it for the next few days.
Banana Bread Baked Oatmeal
1 cup mashed banana (about 2 large)
1/2 milk
1 egg
1/4 cup brown sugar
1 tsp. vanilla
scant 1/4 cup coconut oil, melted (or butter)
1/2 tsp. salt
1 1/2 tsp. baking powder
1 tsp. cinnamon
2 cups rolled oats
1/4 cup chopped pecans
Preheat oven to 350 degrees F. Spray an 8 or 9 inch baking pan with cooking spray and set aside.
In a mixing bowl, combine banana, milk, egg, brown sugar, vanilla and coconut oil. Whisk until well combined. Stir in the rest of the ingredients and pour into prepared baking pan. Bake 28-30 minutes or until slightly golden on top.
Serve warm. Top with a splash of milk, extra pecans and sliced banana, if desired. Store leftovers in an airtight container in the fridge.
Labels:
Breakfast
Thursday, January 23, 2014
Chili-Lime Chicken Taquitos
I seriously can't believe I have not posted about these taquitos until now. They have become the number one thing requested for dinner lately. I don't even know how I stumbled upon making them the first time around, but they were a HUGE hit from the get-go. After that my oldest daughter has consistently asked to have them for dinner about once a week. Thankfully they are so quick and easy to throw together and just take a few simple ingredients; you're sure to have most of them on hand.
Chili-Lime Chicken Taquitos
3 cups shredded cooked chicken
1 Tbsp. chili powder
juice of 1 lime
1/4 cup chopped cilantro
1 cup shredded Monterrey Jack cheese (mozzarella or Mexican blend is good too)
salt and pepper
uncooked flour tortillas
sour cream
guacamole
salsa
Cook chicken using your preferred method. For a quick and easy method, add uncooked chicken to a pot with 3 cups water, 1/4 tsp. salt, 8 black peppercorns, half an onion, quartered, and a bay leaf. Bring to a boil, reduce heat and cover. Cook 20 minutes or until done. Remove from pot, cool and shred.
Add shredded chicken, chili powder, lime juice and cilantro to a large skillet. Gently warm over medium heat. Stir and taste for seasoning. Add salt and pepper as necessary. Stir in cheese and remove from heat.
Lay out one uncooked tortilla at a time. Place 3-4 tablespoons of filling along one end, pushing it out to the edges. Roll up and place seam side down on a baking sheet. Continue with remaining filling and tortillas. Make sure you leave a little space in between each taquito so they will be cooked all around. Using a pastry brush, lightly brush olive oil over the tops of each taquito (you could also use an olive oil spritzer). Sprinkle a pinch of coarse salt over each.
Labels:
Chicken,
Kid-Friendly,
Mexican,
Quick n' Easy
Monday, January 20, 2014
Crockpot Pork Posole
I seriously under-use my crockpot. I don't even know why, but I just don't ever think of things to cook in it. It really is a wonderful way to cook up something warm and cozy, especially during the winter time when comfort food, warm and tasty are key words!
Anyway, I love soups and I love the flavors of Mexican-types foods; one of my favorites! So this posole is right up my alley. It is nice and brothy with tender pork and veggies. Also delightfully contrasted with a little bit of crunch from some freshly shredded cabbage and radishes. Everything is topped with cilantro, avocado and a squeeze of fresh lime juice. What's not to love!!
Crock Pot Pork Posole
2-3 lb. pork shoulder roast
16-oz chicken stock
1 onion, sliced
1/2 head of garlic (no need to remove paper)
1-2 large jalapenos, cut in half and seeded
3 bay leaves
1 Tbsp. dried oregano
1 1/2 cups diced roma tomatoes
1 30-oz can hominy (yellow or white)
2 large carrots, diced
juice of a lime
salt and pepper
Garnishes:
thinly sliced radishes
shredded green cabbage
diced avocado
lime wedges
chopped cilantro
Cut roast into 3-4 pieces and place in crock pot. Liberally season with salt and pepper. Layer onion, garlic and jalapenos over it. Add the chicken stock, bay leaves and oregano. Cook on high until roast is tender and falls apart.
Remove roast from crock pot and cool long enough to shred it. Remove jalapeno and garlic, taking off skins. Finely dice both and return to crock along with carrots, tomatoes, hominy and shredded pork. Cook another half hour or so, or until carrots are tender.
Add lime juice. Check for seasoning and add salt and pepper as desired.
Ladle hot soup into bowls and garnish as desired.
SOURCE: Adapted from Foodie Crush
Labels:
Crock pot,
Mexican,
Pork,
Quick n' Easy,
Soups
Wednesday, January 15, 2014
Triple Berry Orange Smoothie
Wow, it's been a while since I posted a new recipe. The holidays are always a LONG and busy time around here since all three of my daughter's birthdays come in between Thanksgiving, Christmas and New Years. By the time January rolls around, I just want to sleep for a month and not eat a bite of cake again....well until the next birthday rolls around anyway.
Speaking of birthday cakes, I think I finally nailed a homemade version of box mix birthday cake (after three birthday parties, haha) that tastes phenomenal and is also light and fluffy. Unfortunately I was not in the blogging mode when I made them and will have to wait until April for the next birthday to blog about it. Super delish though!
Anyway, I digress. I don't really make new years resolutions because they always seem to get broken. I rather like to take every day and make the best of it as I can. But, if you're the resolution-making type and have made a goal to eat better or even if you just like smoothies, this post is for you!
I whipped this up one afternoon for my kids' lunch, trying to keep it sweet and fruity enough, while still being healthy. It was delicious! I love the berry combination, and bananas always make things nice and smooth. I used half milk and half water since I was serving it to my kids, but you could certainly just use all milk or all water, depending on your tastes. I also only used 1 handful of spinach when serving to my kids, but for me, I usually put in 2 big ones!
Triple Berry Orange Smoothie
1/2 cup milk (any kind)
1/2 cup water
1 ripe banana
1 orange, peeled
1/2 cup frozen blueberries
1/2 cup frozen raspberries
1/2 cup frozen strawberries
2 large handfuls spinach or other greens
1 Tbsp. ground flax
Put all ingredients in blender in order listed and blend until smooth and creamy. Adjust liquid as desired.
*NOTE: If you don't think your blender would blend up the whole orange, you can just use the fresh juice.
Labels:
Figure Friendly,
Fruit,
Quick n' Easy,
Smoothies
Sunday, December 8, 2013
Menu Plan Monday Week 49 (2013)
Oh man it's been a while since I got a menu put together and actually posted it!! I've been flying by the seat of my pants when it comes to cooking dinner the past few months. Mostly because I was tired of my kids not eating much of what I was making and I just didn't want the struggle. Now, they seem to be coming around (kids do that every once in a while), at least for the time being, so I'm getting organized in the kitchen again. Let's make this work!!
Dinner Menu Week 49 (2013)
Monday
Taquitos (my girls DIE over these and eat them for every meal until they are gone!! I've got to get the recipe up soon.)
salad
veggies and dip
Tuesday
Lentil Veggieballs with Lemon Pesto Dipping Sauce
Sweet Kale Salad
Wednesday
Chipotle Sweet Potato Soup
Thai Coconut Rice
sauteed brussels sprouts
Thursday
Caprese Grilled Chicken
Salad
Fruit
baked steak fries
Friday
Christmas Party
Saturday
Leftovers
Sunday
Garlic Naan
Hummus
Minted Yogurt Dipping Sauce
Salad
Dinner Menu Week 49 (2013)
Monday
Taquitos (my girls DIE over these and eat them for every meal until they are gone!! I've got to get the recipe up soon.)
salad
veggies and dip
Tuesday
Lentil Veggieballs with Lemon Pesto Dipping Sauce
Sweet Kale Salad
Wednesday
Chipotle Sweet Potato Soup
Thai Coconut Rice
sauteed brussels sprouts
Thursday
Caprese Grilled Chicken
Salad
Fruit
baked steak fries
Friday
Christmas Party
Saturday
Leftovers
Sunday
Garlic Naan
Hummus
Minted Yogurt Dipping Sauce
Salad
Labels:
Menus
Monday, December 2, 2013
Cranberry Egg Nog Scones with White Chocolate Glaze
I don't think it is possible for me to EVER get tired of making and eating scones. After pancakes, it's my next passion. They are my Saturday morning thing that I look forward to most of the week; that and sleeping in FINALLY!
I bought some egg nog on a whim since it was on sale and I usually can't get enough during the season, so I thought it would be perfect to throw into some scones. My daughters totally agreed too. They suggested I add white chocolate chips, I wanted fresh cranberries, so I did cranberries and a white chocolate chip glaze. (I did, however, make a batch for the girls with just white chocolate chips since I knew they wouldn't eat the ones with cranberries.) The verdict: delish! It just doesn't get much better than this when eating things in season.
Cranberry Egg Nog Scones with White Chocolate Glaze
2 cups whole wheat flour (half whole wheat half white is ok too)
1 Tbsp. baking powder
1/4 tsp. salt
1/3 cup sucanat (or other sugar)
1/4 tsp. cinnamon
1/4 tsp. nutmeg
pinch of allspice
6 Tbsp. cold butter, cut into cubes
1 1/2 cups fresh cranberries, coarsely chopped
1 cup egg nog
1/8 tsp. rum extract
for the glaze:
2 oz white chocolate chips
3/4 cup powdered sugar
2 Tbsp. milk
Preheat oven to 400 degrees F.
In a mixing bowl fitted with a blade attachment, add the flour, baking powder, salt, sucanat and spices. Pulse a couple times to blend. Add butter and whiz until mixture becomes a coarse meal. Alternately you could use a pastry blender or two knives to cut butter in.
Pour flour mixture into a regular mixing bowl and add cranberries. Toss to coat. Add egg nog and rum extract and stir until mixture comes together. It will be shaggy. Turn dough onto floured surface. Fold dough over about 3-4 times and pat out into about 3/4-1-inch thickness. Use a biscuit cutter to cut out scones. Place scones on silicone or parchment lined baking sheet. Pat scraps together gently and cut out the rest of the dough.
Bake for 12-15 minutes or until lightly golden. Remove from oven and cool on wire rack. While scones are cooling, make the glaze.
For the white chocolate glaze, melt the chocolate chips in a microwave safe bowl for twenty second increments at 50% power or less, stirring in between. Add the milk and gently whisk it with the melted chocolate. Warm in microwave a few seconds, if necessary. Add powdered sugar and whisk until smooth. Drizzle on cooled scones.
Scones are best eaten fresh. You can freeze any cut out scones you do not want to bake by placing them on a plate or large tray and putting them in the freezer for a couple of hours. Transfer to an airtight container to store. When ready to bake, place frozen scones on baking sheet, as above, adding about 5 minutes to bake time.
Friday, November 22, 2013
Creamy Spinach and Sun-Dried Tomato Pasta with Chicken Sausage
This was the result of my most recent "dinner on the fly," episodes in my kitchen a couple weeks ago. While I make a menu most of the time and try to stick to it, things inevitably get in the way (i.e., kids don't eat, go out, bring home pizza, etc.).
I grabbed this spinach and feta chicken sausage on a whim one afternoon of shopping and didn't really intend to use it that same night but ended up doing so because a) it wasn't frozen and b) my husband would be excited I was finally cooking some meat! My dinners as of late have been pretty meatless. My kids just aren't eating much these days, so I've been really trying to SIMPLIFY when it comes to dinner. Now, I'll admit I went out and bought a box of Ramen because I was so fed up with them not eating what I made, but it was reserved only for when I was really desperate. But they've been eating quesadillas, potatoes, eggs and toast, you know whatever that was at least semi-nutritious, to get by for the time being.
I was really pleased with how this pasta turned out. It was pretty much finished in the time it took to cook the pasta. That's a score on a busy weeknight!! It also reminds me of one of my faves, Chicken Milano, but with more Mediterranean flavors rather than Italian. Here's your next dinner on the fly.
Creamy Spinach and Sun-Dried Tomato Pasta with Chicken Sausage
olive oil
1 package (about 12-16 oz) Spinach and Feta Chicken Sausage (such as Al Fresco brand)
1/4 cup sliced onion
1 clove garlic, minced
1/2 cup sun-dried tomatoes
1 cup chicken broth
1/4 cup white cooking wine (optional)
1 cup half and half or heavy cream
1/4 cup goat cheese, crumbled (can substitute feta)
8 oz. fettuccine or linguine
2 large handfuls of fresh baby spinach, chopped
fresh herbs for garnish
1/4 cup toasted pine nuts
salt and pepper, to taste
Bring a large stock pot of salted water to a boil. Drop pasta and cook according to package directions.
Meanwhile, in a large chef's pan or other pan with high sides, heat a drizzle of olive oil over medium high heat. Slice sausage links on the bias and cook until browned on each side. Remove to a plate. Add another drizzle of olive oil, reduce the heat to medium and add the onions. Saute about 7-10 minutes, until tender and just starting to brown. Add the garlic at the last minute. Return sausage to pan. Add tomatoes, broth and cooking wine and let simmer until tomatoes are tender; about 5-7minutes. Add cream and heat through then remove from heat.
Drain pasta and add to pan with sausage and cream sauce. Toss with spinach and goat cheese. Allow to stand for about 5 minutes, stirring to wilt the spinach and melt the goat cheese a bit. Salt and pepper, to taste. Top with toasted pine nuts. Serve warm.
Labels:
main dishes,
Pasta,
Quick n' Easy
Wednesday, November 20, 2013
Tomato Cobbler with Gruyere Biscuits
When I think of cobbler I think of warm comfort food. And, I'm sure like many others, I usually associate cobbler with sweet and berries rather than salt and savory. Well, I was looking for ideas to use up a bunch of cherry tomatoes and this idea totally intrigued me! While I don't usually like roasted tomatoes, roasted cherry tomatoes, on the other hand, are just delicious!
This is a beautiful cobbler with caramelized onions a splash of balsamic with the sweet warm tomatoes that burst in your mouth and a little hint of heat from some red pepper. The biscuits on top are light and fluffy marbled with creamy Gruyere cheese. This is a perfect dish for a cold night when you're needing some comfort! It would also be beautiful in little ramekins, as individual portions, as well.
Tomato Cobbler
for the biscuits:
1 cup all-purpose flour1 cup whole wheat flour
2 Tbsp. baking powder
1 Tbsp. sugar
1/2 tsp. salt
1/2 tsp. ground black pepper
6 Tbsp. unsalted butter, cold and cut into cubes
1/2 cup shredded Gruyere cheese (you could easily substitute Swiss, goat cheese or even blue cheese)
3/4 cup cold buttermilk
For the tomato filling:
2 Tbsp. olive oil
1 Tbsp. unsalted butter
2 large onions, sliced
3 cloves garlic, minced
2 Tbsp. balsamic vinegar
2 pounds cherry tomatoes
1/4 cup coarsely chopped basil
3 Tbsp. all-purpose flour
1/2 tsp. red pepper flakes
salt and coarsely ground black pepper
To make the Biscuits: In a mixing bowl, fitted with a metal blade, pulse together flours, baking powder, sugar, and salt. Add cold butter and whiz until mixture forms a coarse meal. Alternately you can cut the butter in with a pastry blender or two knives. Pour mixture into a regular mixing bowl, toss in shredded cheese and stir to combine.
Create a small well in the center of the flour mixture. Add buttermilk all at once. With a fork, quickly bring together the wet and dry ingredients. The dough will be a bit shaggy. Turn dough out onto a lightly floured work surface. Knead about 10 times, bringing it together into a disk. Wrap dough in plastic wrap and refrigerate until the filling is assembled.
To make the tomato Filling: Place rack in the upper third of the oven and preheat oven to 375 degrees F.
Add olive oil and butter to a medium saute pan over medium heat. Add sliced onions and season with salt and pepper. Cook and brown onions, stirring occasionally, until caramelized, about 18 to 20 minutes. Add garlic and cook for one minute more. Remove pan from heat, add balsamic vinegar and set aside.
In a large bowl, toss together clean cherry tomatoes, chopped basil, flour, and red pepper flakes. Add caramelized onions and toss together until everything is lightly and evenly coated in flour. Season with salt and pepper.
Pour the tomato and onion filling into an 8-inch or similar baking dish. Place in the oven and bake filling for 25 minutes.
Near the end of the 25 minutes, remove the biscuit dough from the fridge. On a lightly floured work surface, roll out biscuit dough into a 3/4 or 1-inch thickness. Cut into squares or use a biscuit cutter to make rounds.
Remove the partially cooked filling from the oven and carefully place 6-8 biscuits on top of the tomato filling in the pan. Brush biscuit tops with buttermilk and sprinkle with salt and pepper. Reshape and re-roll excess biscuit dough to make extra biscuits at another time, or just cook them up on the side. (The shaped biscuit dough freezes very well.)
Return warm filling and biscuit dough to oven and bake for 17-20 minutes, until the biscuits are golden brown and cooked through, and the tomato mixture is bubbling.
Remove from the oven and allow to cool for about 15 minutes before serving. Tomato Cobbler is best served warm. Reheat leftovers under the broiler (watch carefully!)
SOURCE: Joy The Baker
Labels:
Tomatoes
Monday, November 18, 2013
Lemon Chicken and Orzo Soup
Wow, last week was such a doozie!! Everyone was sick at my house, except my hubby. My first-grader did not go a day of school and my preschooler missed 2 out of 3 days of her school. I think I was in my pajamas most of that time, maybe only venturing out three whole times, only once doing my hair and makeup (sorry neighbors who had to see that, just keeping it real for ya!).
After so many days of nursing my sick ones (and my sick self) back to health all I wanted was a big ol' bowl of chicken soup. Duh, I don't know why I didn't make it in the beginning of the week, then I could have eaten on it that whole time and not had to make a single other thing, haha!
As I stared at my big bag of lemons on the counter I remembered this soup that I had been wanting to make for years. I mean, like it's been bookmarked in my Cooking Light Cook Book for I don't know how long; I don't know what the heck the hold up was.
This soup is just as delicious and comforting as it looks and really is a cinch to throw together; even when you're sick!!
Lemon Chicken and Orzo Soup
olive oil
1/2 medium onion, diced
2 carrots, peeled and diced
1 rib celery, diced
3 cloves garlic, minced
4 chicken thighs, skins removed
1/2 cup white cooking wine
6 cups chicken stock
zest and juice of 2 lemons
1 tsp. dried oregano
1 bay leaf
1 cup orzo pasta
1/4 cup fresh parsley, chopped
salt and pepper to taste
In a large stockpot, heat a small drizzle of olive oil over medium-high heat. Add chicken thighs and cook about 3-4 minutes per side; remove to a plate. Reduce heat to medium and heat another tablespoon or so of olive oil. Add onion, carrot and celery. Cook 5-7 minutes or until onion is tender and translucent. Add garlic and cook 30-60 seconds. Add cooking wine and deglaze the pan, letting it cook about a minute or two.
Return chicken back to pot, along with the stock, lemon juice and zest, oregano and bay leaf. Bring to a boil, reduce to a simmer and cook about 15 minutes, or until chicken is cooked through. Remove chicken from pot and bring stock back up to a boil. Add orzo pasta and cook about 6-8 minutes.
Allow chicken to cool just long enough that it can be handled, then shred it. Once orzo is finished cooking, add the shredded chicken back in, keeping the soup on the burner until heated through. Remove soup from burner, take out bay leaf and stir in chopped parsley. Taste for seasoning and add salt and pepper as desired.
Serve warm. Store leftovers in an airtight container in the refrigerator for about 5 days. Soup will thicken upon cooling and the orzo will start soaking up the liquid. When reheating soup, just add a little extra water.
Wednesday, November 13, 2013
Chocolate Zucchini Muffins
I came up with these muffins a few months ago when I was looking for something I could keep on hand for my kids' lunches that was easy, healthy and that they would actually eat. I figure you add chocolate to anything and they'll eat it right? Actually these muffins are pretty healthy, full of good fats that my growing kids need and whole grains. I actually really like adding the oats to my muffins and even pancakes because it helps make them light and fluffy.
When I make these I usually do a double batch then throw 2/3 of them in the freezer and just grab them when I'm making lunch in the morning. I don't even have to defrost them, they're ready to eat by the time lunch rolls around. I've also made them mini, which are even more fun to eat (just make sure to half the bake time).
Chocolate Zucchini Muffins
1/4 cup coconut oil, melted
1/3 cup unrefined sugar (I used sucanat)
1 egg
1 tsp. vanilla
1/4 cup Greek yogurt (I always use full fat)
1/2 cup milk (I used almond milk)
1 cup whole wheat flour
1/2 oat flour (I just blend regular oats in my spice grinder or blender)
3 Tbsp. cocoa powder
1/2 tsp. baking soda
1/2 tsp. salt
1 1/2 cups shredded zucchini, drained or squeezed of excess water
Preheat oven to 425 degrees F. Line muffin tins with muffin liners and set aside.
In mixing bowl, combine oil, sugar, egg, vanilla, yogurt and milk. Whisk until well incorporated. (Sometimes if the milk and yogurt are too cold, it will make the coconut oil start solidifying. In order to avoid this, I sometimes will add the oil last, after I've added the dry ingredients, OR use a more refined olive oil -as opposed to extra virgin-that has little taste.) Add dry ingredients and stir to combine, then gently fold in the zucchini.
Spoon or scoop batter into prepared muffin pan, dividing the batter evenly. Muffin wells should be about 3/4 full. Bake for 12-15 minutes. Cool in the pan slightly then remove to a wire rack to cool completely. Store in an airtight container.
Monday, November 11, 2013
Tomato-Basil Bread Pudding
So, about a year ago we took a family vacation to Vegas. Well, it was more like, my husband went down there to run the Vegas Ragnar and the stipulation was that we could come and hang out while he was racing. Since I had 3 young children to tote around all by myself most of the time, we didn't really venture out much. But we had fun hanging in the hotel, in fact my girls still rave about what a blast they had down there.
Whenever I'm on vacation I LOVE to watch Food Network because we don't have cable. One of the nights I was watching Giada and she made this mouth watering bread pudding. I jotted down notes furiously (please tell me I'm not the only one who does this!!) and couldn't wait to make it when I got home.
Well, here we are almost exactly a YEAR later and I'm just now getting to it. But better late than never because this is so delicious!! I mean, anything with tomatoes and fresh basil and I'm a gonner, but it was pretty spectacular with that artisan bread too. That's one thing I will suggest. Don't skimp on the bread, it's one of the things that really make this dish. If you make this artisan bread, you'll see it couldn't be easier, but if you can't or don't want to I suggest you buy a good quality crusty loaf from a bakery.
Tomato-Basil Bread Pudding
1 recipe Artisan Bread, day old and cubed (or about 8 oz. of crusty bread)
1/4 cup diced onion
2 gloves garlic, minced
12 oz cherry or grape tomatoes, halved (I forgot to halve mine, oops!)
1 cup fresh basil
5 oz. freshly grated parmesan cheese (about 1 cup)
2 cups whole milk
6 eggs
1 tsp. salt
1/2 tsp. freshly ground black pepper
Preheat oven to 375 degrees F. Butter a 9x13-inch baking pan. Add bread cubes and set aside.
In a large skillet, over medium-high heat, add a couple drizzles of olive oil, then add the onions. Saute 4-5 minutes, until tender. Then add the garlic and saute for about 30 seconds. Add in the tomatoes, season with a little salt and pepper and let cook about 2 minutes, until slightly softened. Remove from heat. Add tomatoes, basil and parmesan cheese to bread and toss to combine.
In a mixing bowl, whisk together milk, eggs, salt and pepper. Pour over bread mixture, folding it in gently, where needed. Sprinkle with extra parmesan, if desired. You can also let it sit for about a half hour to absorb some of the liquid, but it's not necessary. Bake for about 40-45 minutes, until custard is set and top is slightly golden.
Cool slightly, cut and serve.
SOURCE: Giada de Laurentiis, via Food Network
Labels:
Bread,
Quick n' Easy,
Tomatoes
Thursday, November 7, 2013
Maple Bacon Pumpkin Risotto
Sorry if you don't like pumpkin because I've got another one for ya! This one, however, is a savory pumpkin dish that is every bit delicious as just about any pumpkin dessert.
I started making risotto years ago and I just love it. Although it seems like a fancy and potentially difficult dish, I attest to you, it is not...although you could make it so (mmm brown butter lobster risotto!!).
This risotto uses simple ingredients (doesn't everyone use pumpkin on a daily basis in the fall?) that when combined, burst with flavor in your mouth!! Top that with some crispy bacon and you'll be licking the bowl clean.
Maple Bacon Pumpkin Risotto
1/2 lb. bacon
2 cups apple cider
2 cups veggie broth
1 cup water
1 1/2 cups leeks, sliced and rinsed
4 cloves garlic, minced
2 cups arborio rice (or other short-grain rice)
1 cup white cooking wine
1/4 tsp. fresh nutmeg
1/2 tsp. salt
few cracks of ground pepper
1 cup pumpkin puree
1-2 tsp. maple syrup
1 Tbsp. butter
1/2 cup freshly grated parmesan cheese
fresh herbs for garnish
Place bacon on baking sheet and cook under broiler 5 minutes. Flip and bake cook another 4-5 minutes. Remove from pan to a paper towel-lined plate.
In a medium saucepan, combine apple cider, veggie broth and water. Heat until warm and keep over very low heat.
In a large saucepan, drizzle about 1-2 tablespoons olive oil. Add leeks and cook over medium-high heat until tender. Add garlic, saute about 30 seconds, then add the rice and saute another 30 seconds or so. Add the wine and cook until almost evaporated. Reduce heat to medium. Add about 1/2 cup of the warm broth mixture, stir in and let cook until just about evaporated, stirring occasionally. Continue until rice is al dente and most or all of the broth mixture is gone (you may not need all of it; if you need more, just add a little warm water)/ This will take about 25-30 minutes.
When rice is finished cooking, add the nutmeg, salt, pepper, pumpkin, maple syrup, butter and parmesan cheese. Stir to combine well. Taste to check for seasoning and adjust as necessary. Garnish with fresh herbs and crumbled bacon. Serve warm.
SOURCE: Adapted from Pineapple & Coconut
Tuesday, November 5, 2013
Pumpkin Cinnamon Rolls with Apple Cider Glaze
Cinnamon rolls and soup. Yep, that's what I start craving when it starts getting cold and gloomy outside. I think I've already made cinnamon rolls like four times in the past couple of months!! Luckily I have great neighbors that are willing to take them off my hands so I don't eat them all!
You probably remember reading last month on my facebook page that I like to try new kinds of cinnamon rolls every October. Pumpkin rolls definitely AREN'T a new concept but I can't believe I haven't made them until now and let me tell you I may just have to make them again. Soon.
I had some fresh apple cider in the fridge so decided to use that in the glaze but if you don't have any, feel free to use any of the options I listed at the end of the post.
Pumpkin Cinnamon Rolls
for the dough:
5 cups flour
1 1/2 Tbsp. yeast
1/2 cup sugar
2 tsp. salt
1 tsp. cinnamon
pinch of cloves
pinch of nutmeg
1/2 cup butter, softened
3 eggs
1 cup pumpkin puree
1/2-3/4 cup whole milk
for the filling:
1/3 cup butter, softened
1 cup brown sugar
1 tsp. cinnamon
pinch of nutmeg
pinch of cloves
1 cup chopped pecans, plus more for garnish
for the glaze:
1/2 cup butter, softened
1/2 cup apple cider (fresh is best)
2-4 Tbsp. whole milk
~ 4 cups powdered sugar
pinch of apple pie spice
To prepare the dough, place flour, yeast, sugar, salt and spices in a mixing bowl fitted with a dough hook. Pulse to combine. In a small mixing bowl, whisk together butter, eggs, pumpkin and milk and add to the mixing bowl with the dry ingredients. Mix on medium speed for about a minute, then check to see if dough looks right (it should be a little sticky, more so than bread, but not incredibly and definitely NOT dry). Mix for about 5 minutes. Remove dough and place in an oiled bowl, cover and let rise until doubled in bulk.
Divide dough in half and roll out into a long rectangle. Mix together filling ingredients, except pecans. Spread half of the butter across the dough, leaving about an inch on the upper edge. Sprinkle half of the filling over the dough and about half a cup of pecans. Roll dough away from you, stopping at the edge to pull it over towards you and sealing it shut. Slice into about 1-inch slices either with a knife or a clean piece of floss. Place rolls into prepared pans. Repeat with other half of dough and filling.
*Grease your pans. Depending on what kind of pans you use and how thick you cut your rolls will determine how many pans you need. I used 4 9-inch rounds and a lasagna-size tray this time.
Cover rolls with a light tea towel and allow to rise until almost doubled. Preheat oven to 375 degrees F and bake rolls for 13-15 minutes or until lightly golden.
Allow rolls to cool. Prepare frosting. Whisk together butter, cider, milk, pie spice and enough powdered sugar to reach desired consistency; start with 4 cups. Slather on cooled rolls and garnish with extra chopped pecans, if desired.
*For an alternate frosting, substitute the apple cider for milk, omit the apple pie spice and add either vanilla or maple extract. OR, you could also substitute cream cheese for the butter if you prefer cream cheese frosting.
Labels:
Bread,
Desserts,
Fall Baking,
Pumpkin
Thursday, October 31, 2013
Pumpkin Coconut Baked Oatmeal
Can I tell you, we eat A LOT of oats around here. Like, I buy my oats by the 50 lb bag! My oldest loves oats in almost any form, so I try to do them a couple different ways. I mostly do steel cut oats and regular old fashion oats, but I still need some variety. Baked oats was next. I used to make it a lot more often and decided to start making it again. It's no surprise all the girls loved it!
Well, 'tis the season to make everything either pumpkin or apple flavored so I decided to hang towards pumpkin on this one, since I made lots of puree this year. And I adore coconut, especially in my granola and since oatmeal is kind of like granola, it totally works.
I LOVED the results of this oatmeal. It turns out nice and tender but a little crunchy on top. And, of course, all those warm spices swimming through it. I decided to serve mine up with a splash of milk and topped with some chocolate chips and chopped pecans. But pumpkin seeds and cranberries would also be delish, whatever you're craving.
Pumpkin Baked Oatmeal
3/4 cup canned coconut milk
1 egg
1/4 cup oil (I used coconut, melted)
1/2 cup pumpkin puree
1 tsp. vanilla
1/4 cup brown sugar
1/2 tsp. salt
1 1/2 tsp. baking powder
1 tsp. cinnamon
pinch of ground nutmeg
pinch of ground cloves
1/2 cup coconut, shredded or shaved
3 cups rolled oats
Preheat oven to 350 degrees F. Grease a 9-inch baking dish and set aside.
In a mixing bowl, combine coconut milk, egg, melted coconut oil, pumpkin puree, vanilla and brown sugar. Whisk until smooth and well-incorporated. Add the rest of the ingredients and stir to coat evenly. Spread into greased baking dish and bake 25-27 minutes or until slightly golden on top.
Serve warm with any desired mix-ins (i.e. milk, pumpkin seeds, walnuts, pecans, chocolate chips, coconut, cranberries etc.)
Labels:
Breakfast,
Kid-Friendly,
Quick n' Easy
Monday, October 28, 2013
Sweet Tomato Marinara
Raise your hand if you STILL have tomatoes from your garden you don't know what to do with? Well, I don't...anymore. I had to pick the last of them about 3 weeks ago and they were all green. Then all of a sudden this last week they all ripened at the same time.
Lately we've gone a little over board on the Fresh Tomato Soup, although my girls devour it and would still probably eat it every day, so I wanted to see if I could make yet ANOTHER pasta sauce that I just couldn't live with out. Score!
All the sauces I make and have made I still like, but for different reasons. This one is thick and rich, and slightly sweet with a hint of fennel. I like LOTS of sauce on my pasta, but hate when it just puddles under the noodles as soon as it's poured on. Not a problem here, this sauce ain't goin' nowhere!
Sweet Tomato Marinara
makes about 1 1/2 quarts
1 Tbsp. olive oil
1 small sweet onion
6 cloves garlic, minced
about 3 lbs fresh roma tomatoes, peeled and pureed (about 6 cups pureed)
2/3 cup red cooking wine, or cranberry or pomegranate juice
1 6-oz can tomato paste
1 1/2 Tbsp. balsamic vinegar
1 Tbsp. brown sugar
1 tsp. fennel seed (I ground mine in my mortar and pestle a bit)
salt and pepper
In a large saucepan or pot, heat olive oil over medium high heat. Add onions and saute about 5 minutes until tender and translucent. Add garlic and saute another minute. Add tomato puree, cooking wine (or juice), tomato paste, vinegar, brown sugar and fennel. Add a pinch of salt and pepper and bring to a boil. Simmer for about 20-25 minutes until sauce is thickened to your liking, stirring occasionally. Check for seasonings and add salt and pepper as necessary. Serve warm with your favorite pasta.
Store in airtight container for about a week in the fridge and about 3 months in the freezer.
Lately we've gone a little over board on the Fresh Tomato Soup, although my girls devour it and would still probably eat it every day, so I wanted to see if I could make yet ANOTHER pasta sauce that I just couldn't live with out. Score!
All the sauces I make and have made I still like, but for different reasons. This one is thick and rich, and slightly sweet with a hint of fennel. I like LOTS of sauce on my pasta, but hate when it just puddles under the noodles as soon as it's poured on. Not a problem here, this sauce ain't goin' nowhere!
Sweet Tomato Marinara
makes about 1 1/2 quarts
1 Tbsp. olive oil
1 small sweet onion
6 cloves garlic, minced
about 3 lbs fresh roma tomatoes, peeled and pureed (about 6 cups pureed)
2/3 cup red cooking wine, or cranberry or pomegranate juice
1 6-oz can tomato paste
1 1/2 Tbsp. balsamic vinegar
1 Tbsp. brown sugar
1 tsp. fennel seed (I ground mine in my mortar and pestle a bit)
salt and pepper
In a large saucepan or pot, heat olive oil over medium high heat. Add onions and saute about 5 minutes until tender and translucent. Add garlic and saute another minute. Add tomato puree, cooking wine (or juice), tomato paste, vinegar, brown sugar and fennel. Add a pinch of salt and pepper and bring to a boil. Simmer for about 20-25 minutes until sauce is thickened to your liking, stirring occasionally. Check for seasonings and add salt and pepper as necessary. Serve warm with your favorite pasta.
Store in airtight container for about a week in the fridge and about 3 months in the freezer.
Labels:
Home Canning and Preserving,
Pasta,
Tomatoes
Thursday, October 24, 2013
Chicken Fajitas
Ohhhh! I forgot how much I LOVE fajitas. I love ordering them in restaurants where they come sizzling to the table in their own personal skillets, warm tortillas on the side. Then topping them with a healthy dose of guac and sour cream, maybe even some fresh pico de gallo. MMM! My mouth is watering just thinking about it.
Fajitas can be pretty versatile and generic, so getting the marinade right is key. The marinade for these fajitas is delicious and bursting with flavor! I got the recipe from my sister ages ago and our families just love them.
Chicken Fajitas
for the marinade:
juice of 1 lime
1/3 cup water
2 Tbsp. oil
2 cloves garlic, minced
1 1/2 tsp. salt
3 tsp. red wine vinegar
2 tsp. soy sauce
1/2 tsp. chili powder
1/2 tsp. cayenne pepper
1/2 tsp. liquid smoke
1/4 tsp. ground black pepper
pinch of onion powder
for the fajitas:
1 1/2 lbs chicken breasts (about 2-3), butterflied
1 small onion, julienned
3 colored peppers, julienned
8 oz. mushrooms, sliced
1 tsp. soy sauce
juice of half a lime
salt & pepper
6-8 8-inch flour tortillas
Garnishes:
sliced avocado
guacamole
sour cream
diced tomatoes
In a mixing bowl, whisk together marinade ingredients. Pour into shallow baking dish, add chicken and cover with plastic wrap or place marinade and chicken in a zip top bag, pushing out the air as you seal it. Refrigerate and let marinate for 2-3 hours.
When you're ready to prepare the fajitas, chop and gather veggies and preheat either indoor grill pan or outdoor grill. Remove chicken from marinade and place on the grill*. Cook until no longer pink, about 3 minutes per side. Remove from heat and let sit for about 5 minutes. Slice.
While chicken is cooking, heat a large saute pan with a tablespoon of olive oil. Add onions and mushrooms and saute about 4-5 minutes, then add peppers and soy sauce and continue cooking until peppers are crisp tender. Remove from heat, squeeze lime juice over the top and salt and pepper, to taste.
To serve, place chicken and veggies in a warm tortilla and top with garnishes of choice.
*Alternately you can slice the chicken before it's cooked and marinate it, then saute it in a frying pan before you cook the veggies.
Fajitas can be pretty versatile and generic, so getting the marinade right is key. The marinade for these fajitas is delicious and bursting with flavor! I got the recipe from my sister ages ago and our families just love them.
Chicken Fajitas
for the marinade:
juice of 1 lime
1/3 cup water
2 Tbsp. oil
2 cloves garlic, minced
1 1/2 tsp. salt
3 tsp. red wine vinegar
2 tsp. soy sauce
1/2 tsp. chili powder
1/2 tsp. cayenne pepper
1/2 tsp. liquid smoke
1/4 tsp. ground black pepper
pinch of onion powder
for the fajitas:
1 1/2 lbs chicken breasts (about 2-3), butterflied
1 small onion, julienned
3 colored peppers, julienned
8 oz. mushrooms, sliced
1 tsp. soy sauce
juice of half a lime
salt & pepper
6-8 8-inch flour tortillas
Garnishes:
sliced avocado
guacamole
sour cream
diced tomatoes
In a mixing bowl, whisk together marinade ingredients. Pour into shallow baking dish, add chicken and cover with plastic wrap or place marinade and chicken in a zip top bag, pushing out the air as you seal it. Refrigerate and let marinate for 2-3 hours.
When you're ready to prepare the fajitas, chop and gather veggies and preheat either indoor grill pan or outdoor grill. Remove chicken from marinade and place on the grill*. Cook until no longer pink, about 3 minutes per side. Remove from heat and let sit for about 5 minutes. Slice.
While chicken is cooking, heat a large saute pan with a tablespoon of olive oil. Add onions and mushrooms and saute about 4-5 minutes, then add peppers and soy sauce and continue cooking until peppers are crisp tender. Remove from heat, squeeze lime juice over the top and salt and pepper, to taste.
To serve, place chicken and veggies in a warm tortilla and top with garnishes of choice.
*Alternately you can slice the chicken before it's cooked and marinate it, then saute it in a frying pan before you cook the veggies.
Labels:
Chicken,
Quick n' Easy,
Vegetables
Thursday, October 17, 2013
Thai Butternut Soup
If you haven't started making soup, it's time to get on that!! We're having it at least once a week by now and I love it. Soups are generally "soup-er" (haha) easy to make, take few ingredients and stretch a long way. Plus, they can be pretty cheap as well. This meal was literally pennies to make. My mom gave me the squash, I used my own homemade stock and already had most of the rest of the ingredients already. I only had to spend about $2.50 on the coconut milk and fresh lime. I also served the soup with some Artisan Bread, which is also pennies to make, which made for a delicious and very filling meal!
If you like curry even a bit, you're going to love this soup! This is reminiscent of some of my most favorite curry dishes and so quick and easy!!
Thai Butternut Soup
2 Tbsp. coconut oil
1 small onion, sliced
4 cloves garlic, minced
1 tsp. grated fresh ginger
1-2 Tbsp. red curry paste
2-3 cups veggie stock
1 medium butternut squash, roasted
1 14-oz can full-fat coconut milk
juice of 1 lime
salt and pepper to taste
garnishes:
chopped cilantro
chopped peanuts or dollop of natural peanut butter
splash of fish sauce
*Do ahead. Preheat oven to 400 degrees F. Chop squash in quarters and rub with a little oil (I used coconut). Place on a silicone-lined baking sheet and bake until soft; about 25-30 minutes. Cool, then scrape out the flesh and set aside. Discard skins.
In a large pot over medium-high heat, melt coconut oil and add onion. Saute until soft and starting to turn brown and caramelize, about 10 minutes. Add garlic, ginger and curry paste, stir and cook another 5 minutes or so. Add in squash and about 2 cups of the stock and increase the heat a bit. Bring to a low bubble and simmer about 5-10 minutes.
Use an immersion blender to puree soup, otherwise use an upright blender working in batches to puree a bit at a time. Return puree to pot and add coconut milk, lime juice and salt and pepper to taste. Stir until well-incorporated. Check for seasoning and add more stock if necessary.
Serve warm. Garnish as desired.
SOURCE: slightly adapted from How Sweet It Is
Labels:
Soups,
Vegetables
Thursday, October 10, 2013
One Pot Pasta
I'm sure many of you have seen this one pot wonder flying around Pinterest. I think it was originally posted on the Martha Stewart website, but regardless of where it started it's absolutely genius! I think this is the first meal all of my kids have both liked and eaten. Hubby and I loved it to. It's absolutely full of flavor and fits in that category of comfort foods for me. Nice and warm, slightly soupy and hey, there's fresh basil!! Can't go wrong with that. The only thing this was lacking was a nice crusty sourdough baguette. I'm kicking myself for not making one.
Prep is a cinch, pretty much just chuck everything in the pot. I used fresh tomatoes, so chopping them took a few extra minutes. Canned tomatoes, however are a suitable substitute. The pasta cooks in about 10 minutes so I'd call this dinner in 15!
One Pot Pasta
12-oz linguini
12-oz cherry or grape tomatoes, quartered
1 onion, thinly sliced
4 cloves garlic, thinly sliced
1/4 tsp. red pepper flakes (optional)
2 sprigs fresh basil, chopped
2 Tbsp. olive oil
salt and pepper
4 1/2 cups chicken stock
Combine pasta (break in half if necessary), tomatoes, onion, garlic, red-pepper flakes, basil, oil, pinch of salt and pepper, and stock in a large pot. Bring to a boil over high heat. Boil mixture, stirring and turning pasta frequently with tongs, until pasta is al dente and water has nearly evaporated, about 9 minutes. Check for seasonings and adjust as necessary.
Divide pasta among serving bowls, garnish with parmesan cheese, if desired, and extra basil. Serve warm.
SOURCE: Martha Stewart
Labels:
Pasta,
Quick n' Easy
Saturday, October 5, 2013
Mini Pumpkin Spice Scones with Chocolate Ganache Glaze
It's not a lazy Saturday morning around here without scones. They have pretty much been my go-to weekend breakfast indulgence and I love them!! Now that it's fall my thoughts naturally gravitate towards pumpkin and spice...and everything nice, haha! No really though, I keep thinking of things I can stick pumpkin into...pasta, pancakes, ice cream, muffins, soup....ya know, and pretty much everything.
These little scones scream fall and will remind you of your favorite pumpkin chocolate chip muffin. Not too sweet and decadently drenched in dark chocolate these are sure to become your favorite weekend treat too.
Mini Pumpkin Spice Scones with Chocolate Ganache Glaze
1 cup whole wheat flour
1 cup all purpose flour
1/2 cup oat flour
3 Tbsp. sugar
1 Tbsp. baking powder
1/2 tsp. salt
3/4 tsp. cinnamon
1/2 tsp. nutmeg
1/4 tsp. ground ginger
1/4 tsp. ground cloves
6 Tbsp. unsalted butter, chilled and cut into cubes
3/4 cup pumpkin puree
1 tsp. vanilla extract
1/2 cup heavy cream
for the ganache:
1 oz. good quality dark chocolate, chopped
1 oz. heavy cream
Preheat oven to 425 degrees F.
In large work bowl of a food processor fitted with steel blade, add flours, baking powder, sugar, salt and spices. Pulse a few times to combine. Add butter and whiz until mixture resembles a coarse meal. Alternately, you can use a mixing bowl and cut butter in using a pastry blender or 2 knives.
In a mixing bowl, whisk together the cream, pumpkin puree and vanilla extract. Add flour mixture to pumpkin mixture. Stir with a spoon until a dough forms. Use your hands to bring it together. Turn onto a floured surface and knead gently, only about 3 or 4 times, adding a bit more flour, if needed. Do not over-work or dough will be chewy.
Divide dough in half. Pat each half into about a 6-inch circle. Cut each circle into 6 wedges.
Place scones on un-greased baking sheet, or baking sheet lined with a silicone mat. Bake until lightly brown, 12 to 15 minutes. Cool on wire rack for at least 10 minutes.
While scones are cooling, make ganache. Place chopped chocolate in a small bowl. In a separate bowl, heat heavy cream about 20 seconds in the microwave. Pour over chocolate, cover and let sit about 2-3 minutes. Remove cover and stir until smooth. Cool 2-3 minutes in the fridge then spoon over scones. Allow ganache to set and enjoy!
Subscribe to:
Posts (Atom)