Showing posts with label Cookies. Show all posts

Wednesday, June 10, 2015

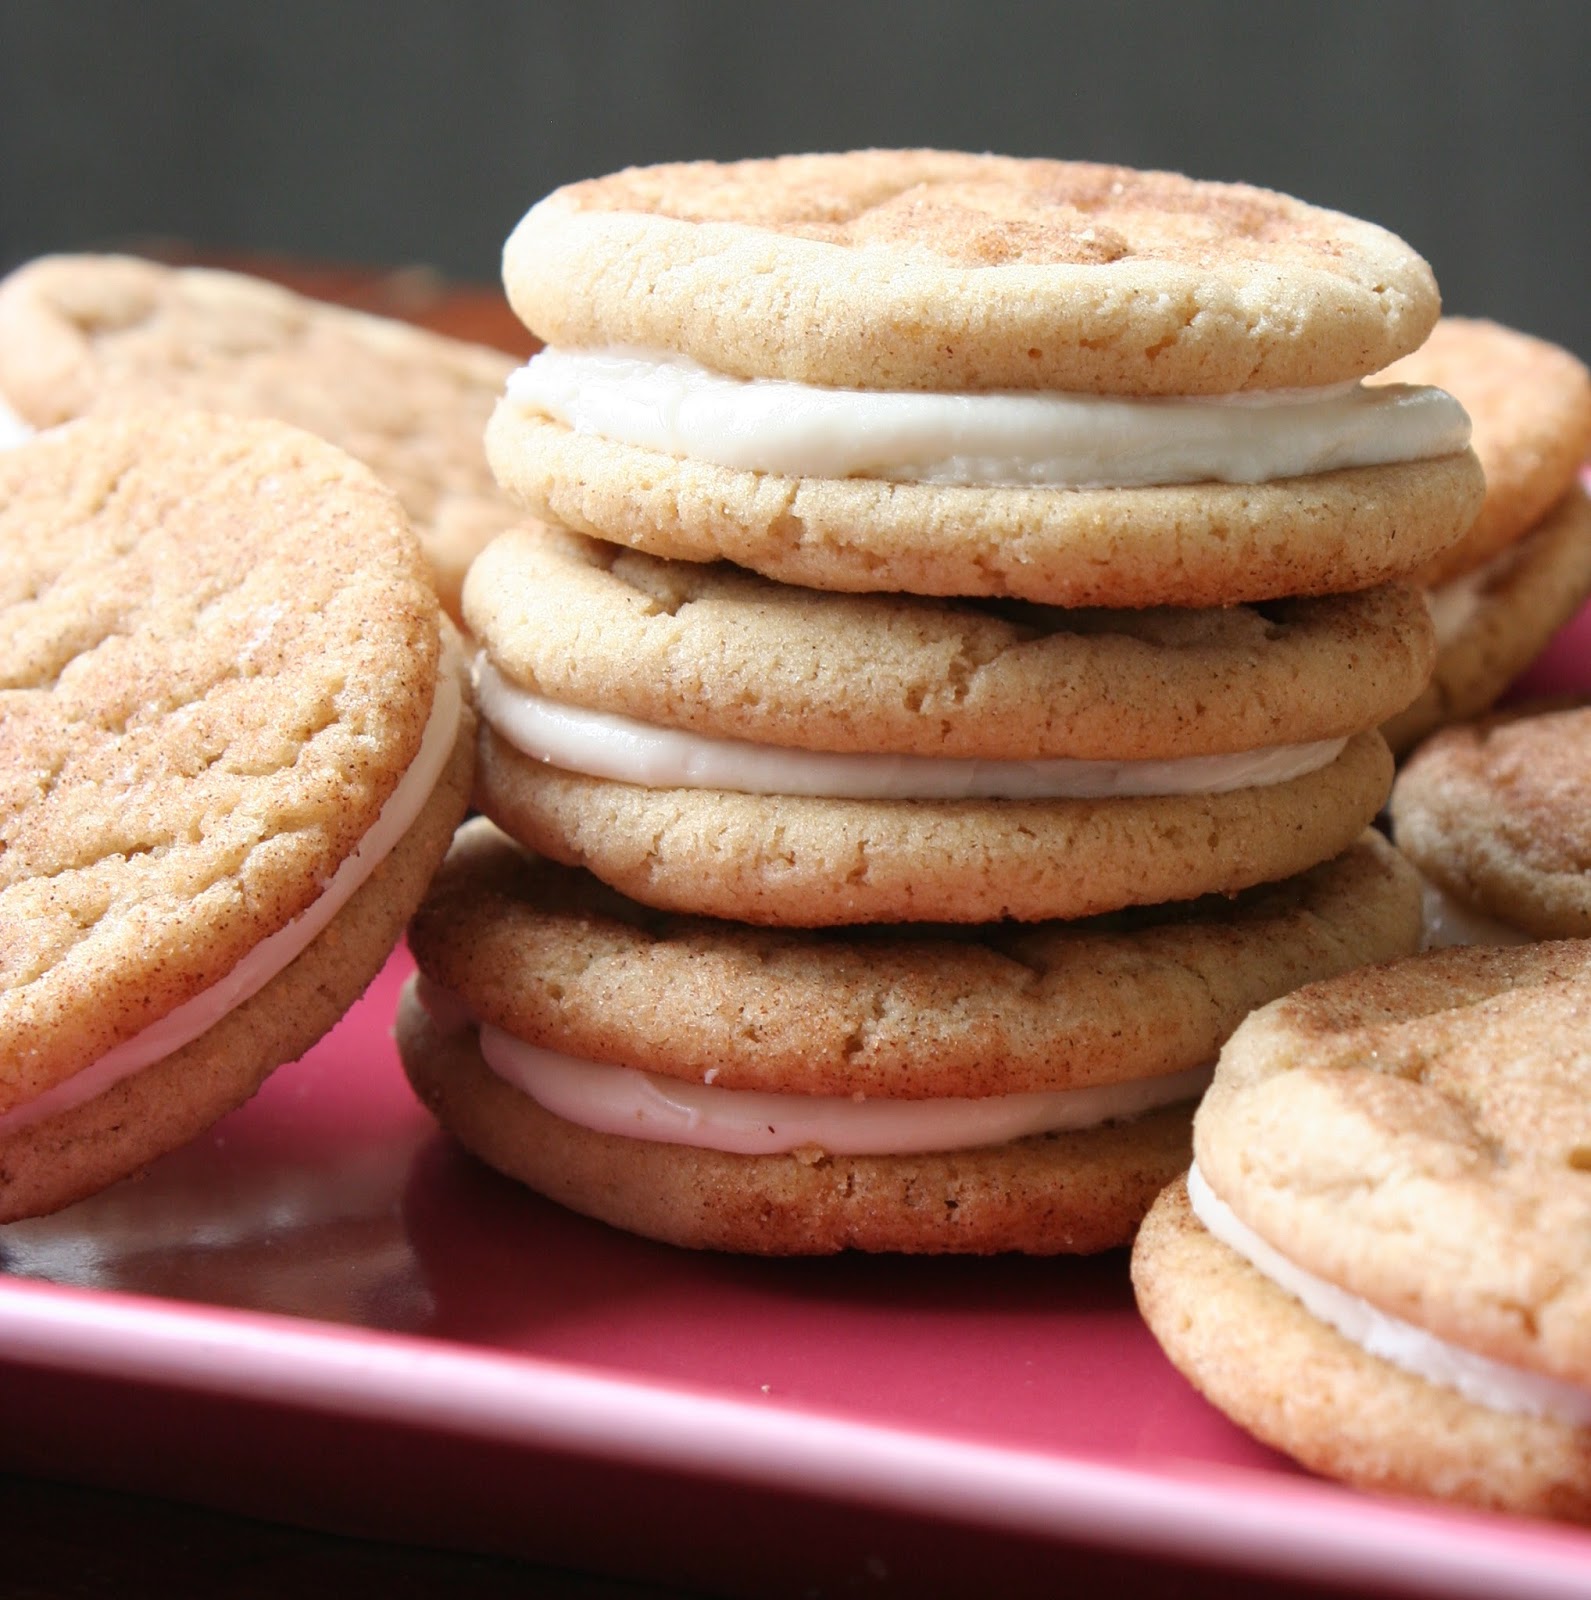
Snickerdoodle Sandwich Cookies with Marshmallow Buttercream Filling


Hello to the most amazing creation ever made!! No seriously this is NO joke.  When it comes to cookies I'm a die-hard chocolate chip cookie lover, homemade of course, and fresh out of the oven.  I like other cookies too, but I'm picky.  So, when I tried a cookie similar to this at a local restaurant I was seriously blown away.  I had never tried anything like it.  The flavor combination is out of this world!  And totally genius, if you ask me. The cinnamon-y and slightly salty cookie with the sweetness of the marshmallow buttercream.  OH. MY.

So, without further ado, I give you the Snickerdoodle Sandwich cookie with Marshmallow Buttercream Filling.

Snickerdoodle Sandwich Cookies with Marshmallow Buttercream Filling
for the cookies: 
1 cup unsalted butter, room temperature
3/4 cup granulated sugar
1/2 cup brown sugar
1 large egg, plus 1 yolk
1 Tbsp. vanilla extract
1 tsp. baking soda
1 tsp. cream of tartar
1/2 tsp. salt
1 tsp. cinnamon
2 3/4 cups all-purpose flour

for the cinnamon sugar mixture:
2 Tbsp. granulated sugar
1 1/2 tsp. cinnamon

 For the frosting:
1/2 cup unsalted butter, room temperature 
1 Tbsp. vanilla extract
1 7-oz jar marshmallow fluff
3 cups powdered sugar
1-2 tsp. milk, if necessary


Preheat oven to 325 degrees F.

In the bowl of a stand mixer, beat butter and sugars until light and fluffy, about 2-3 minutes.  Add in egg, yolk and  vanilla and beat for another minute, scraping down the sides as necessary.

In a separate bowl, sift together baking soda, cream of tartar, salt, cinnamon and flour.  Gradually add it to the butter and sugar and beat until well incorporated.

Mix the cinnamon sugar in a small bowl.  Using a small cookie scoop or a spoon, scoop out dough  and roll into a ball, about 1-inch.  Roll the tops of each dough ball in the cinnamon sugar mixture then place them on a cookie sheet, about 9 to a pan.  Do not over crowd.

Bake about 10-12 minutes, turning cookie sheet halfway through baking. Try not to underbake them, as you will need them to be sturdy while spreading the frosting.  Cool cookies completely on a wire rack.  You can even place them in the fridge so they are more firm.

To make frosting, place butter in the bowl of a stand mixer.  Whip until creamy. Add in marshmallow fluff and beat 2-3 minutes, then add in vanilla.  Add in the powdered sugar, 1 cup at a time, until fully incorporated. Beat another 2-3 minutes.  If frosting is too thin, add a little more sugar, if it's too thick add a little milk, 1 teaspoon at a time. (You will most likely have extra frosting.  Nothing that another batch of cookies later won't remedy...or there's always a spoon or a graham cracker.)

To make sandwich cookies, frost the bottom of one cookie then top with another.  Continue until you've used all the cookies.  Store in an airtight container either on the counter or in the fridge (I actually like mine chilled so I keep them in the fridge.)

Tuesday, January 27, 2015

The Best Brown Butter Chocolate Chip Cookies


Who doesn't love a warm chocolate chip cookie right out of the oven? Mmm, there's almost nothing better (except maybe the cookie dough). Just when I think I've got all the chocolate chip cookie recipes I'll ever need, I try a new one that goes in the recipe box.

I was craving chocolate chip cookies like MAD the other day and for some reason wanted to try a new recipe.  Although I absolutely love my current go-to Brown Butter Chocolate Chip Cookies and these Peanut Butter Oatmeal Chocolate Chip Cookies (my hubby's favorite), there was just something about this recipe that drew me to it.  I had to try it!  The method is similar to the brown butter CCCs and hey, the recipe is from Joy the Baker, so I knew I couldn't go wrong there. 

I've learned a few things over the years from baking many, many, MANY batches of cookies. So if you find a recipe with similar methods, you're sure to have a winner.

1-Whip it, whip it real good!!!  When you cream the sugar and butter, don't just beat until it's combined, beat it for a good 3-4 minutes until it's light and fluffy.  It spreads out the sugar granules and incorporates air into the dough resulting in a more tender cookie.

2-Use a combination of both white and brown sugars.  I learned this a long time ago from Alton Brown on "Good Eats."  All white sugar will make a crispy cookie that spreads more, while adding brown sugar helps add a little moisture as well as chewiness.

3-Chill!  You don't have to chill the dough very long (20 minutes) but chilling the dough will help the cookies from spreading too quickly.

4-Low and slow.  Don't be tempted to turn up the heat! Use a gentle heat (350 degrees) and slightly underbake and you'll have a soft, moist and chewy cookie.

5-Use a chocolate bar instead of chocolate chips.  Chocolate chips have stabilizers that keep them from melting as easily as a chocolate bar.  Plus by chopping up a bar of chocolate, you not only get chunks of chocolate but little shards throughout the whole cookie, thus chocolate in every bite.


The Best Brown Butter Chocolate Chip Cookies
1 cup butter (2 sticks), room temperature
1 cup brown sugar, packed
2 tsp. vanilla
1 tsp. molasses
1/2 cup granulated sugar
1 egg
1 egg yolk
2 1/4 cup all-purpose flour
1 tsp. baking soda
1 tsp. salt
1 cup semi-sweet or dark chocolate, chopped
1 cup pecans, roughly chopped
1/2 cup sweetened, flaked coconut, toasted

Place 1 of the sticks of butter in a small saucepan.  Melt the butter over medium heat, swirling the pan occasionally.  Once it's melted, it'll start foaming then it'll start popping. Keep a close eye on it, continuing to swirl.  Once the butter starts smelling nutty and the brown bits on the bottom turn amber in color, remove it from the heat.  Allow to cool completely.

In the mean time spread the coconut out on a cookie sheet and place under the broiler until just starting to brown.  Don't take your eye off it.  It can go from toasted to completely burned in a matter of seconds!  Remove from oven and set aside to cool.

In a stand mixer, fitted with a paddle attachment, cream the remaining stick of butter with the brown sugar about 3-4 minutes, stopping to scrape the sides as necessary.  Mix in the vanilla and molasses.

Add the cooled browned butter and the granulated sugar and cream another 2 minutes until light and fluffy.  Add egg and egg yolk one at a time and mix.  Add in flour, baking soda and salt and mix until mixture it uniform.  Gently fold in chopped chocolate, toasted coconut and pecans.

Scrape the dough out onto plastic wrap and flatten into a disc.  Refrigerate about 20-30 minutes.  Alternately, you can scoop out all the dough into balls ahead of time, then refrigerate the balls. 

Preheat oven to 350 degrees F.

Once dough is chilled, scoop dough out onto cookie sheets, either using a small cookie scoop or making about 2-inch balls.  Place 9 balls per cookie sheet.  Bake 12-15 minutes, until tops just start to get golden.  Remove from oven, cool a minute or two on the cookie sheet the cool completely on a wire rack.


SOURCE: Joy The Baker

Saturday, March 2, 2013

Chocolate Dipped Orange Shortbread Cookies


It's Saturday and you know what weekends are good for?  Saturdays are good for sleeping in.  They're good for eating a stack of nice fluffy warm pancakes with chocolate chips, of course, and a healthy drizzle of syrup (cause if it's during the week, we eat the whole wheat variety with very little syrup, haha). Saturdays are also good for long walks, cartoons, playing at the park and taking on a new baking project!

I love to spend my weekends in the kitchen trying new things; things I wouldn't normally attempt during the week with schedules and early mornings and such.  It just so happens that these cookies were one of those baking projects I got to play with a few weeks ago. And it was so fun!

Did you know you could make your own candied citrus?  It is actually pretty easy and most of the effort that is involved is waiting. Orange is probably my second favorite citrus, with lemon being first.  But orange and dark chocolate is a combination I cannot resist!!

These little shortbread cookies are simply to die for and worth every bit of effort that go into them!  Although not difficult to make, mostly what you need in making these is TIME!  So clear out your Saturday and make some room for this delicious treat.


Chocolate Dipped Orange Shortbread Cookies
1 cup (2 sticks) unsalted butter (room temperature)
1/2 cup powdered  sugar
2 cups all-purpose flour
1/2 tsp.  salt
1 cup candied orange peel (chopped), recipe below
zest of 1 orange
1 Tbsp.  orange juice
1/2 Tbsp.  vanilla extract
8 ounces dark chocolate (chopped)

 
In a mixing bowl fitted with a whisk attachment, cream the butter and the sugarAdd vanilla, orange zest and juice and mix to combine.  Remove whisk attachment and replace with paddle attachment.  Add flour and salt and mix until it starts forming larger clumps. Fold in candied orange peel.
 
Form the dough into a log, wrap it in plastic and let it chill in the fridge for at least an hour.
 
Cut the log into 1/4 inch thick slices and place on a parchment lines baking pan with one inch of space between them. Bake in a preheated 325F oven until they just start to turn lightly golden brown on top, about 15-20 minutes. Cool completely (or they will be too fragile to dip!!).
 
Melt the chocolate in a double boiler or in a microwave-safe bowl in 30 second increments on half power.  Stirring after each increment.  
 
Dip the cookies into the chocolate and place on a sheet of parchment paper and let cool until the chocolate sets.


Candied Orange Peel
3 oranges
2 cup water
2 cups sugar, divided

Cut the top and bottom from the orange, then cut the peel each orange into 4 vertical pieces and remove from orange in one piece. Cut the peel into thin strips.

Bring a pot of water to boil, reduce the heat to medium and cook the peels in boiling water for 15 minutes, drain and rinse.

Bring 2 cups water and 1 cup of the sugar to a boil over medium heat in a sauce pan. Add the peel, reduce the heat to medium-low and simmer until the peels are tender, about 45 minutes.

Drain and toss the peels in the remaining 1 cup of sugar. Note: You want to drain the orange peels well. If you just throw them straight from the syrup into the sugar, the sugar will clump up.

Place the peels on a cooling rack and let them sit until the coating is dry, anywhere from 24-48 hours.


SOURCE: Closet Cooking

Monday, February 18, 2013

Almond Joy Cookies


Chocolate and coconut are two of my favorite flavors, especially when paired together.  When they came together in this cookie, it was pretty much cookie nirvana for me.  Now I have my other two favorites.  THIS CCC was my first love, then along came THIS one, which I could not get enough of for like ever!!  But, I think these Almond Joy Cookies have earned their place in my top three...and I don't think they are going anywhere.

These cookies are both chewy and a little crunchy, the best of both worlds! I used coconut oil as part of the fat which not only gives it that little crunch on the outside but lends more nutrition than butter (not that I'm trying to make a "healthy" cookie here though).

If you like chocolate and coconut, this is the combo for you!!

Almond Joy Cookies
1/2 cup  butter, softened
1/2 cup virgin coconut oil (it will have a slight coconut scent and flavor)
1 1/2 cups sugar
2 eggs
1/4 tsp. almond extract
2 1/4 cups flour
1 tsp baking soda
1 tsp salt
2 cups sweetened shredded coconut
1 cup dark chocolate chips
1 cup slivered or sliced almonds

Preheat oven to 350 degrees F.

In a mixing bowl fitted with a paddle attachment, cream together butter and coconut oil until light and fluffy.  Add sugar and continue beating another minute or so.  Add eggs, one at a time,  until incorporated, then almond extract.  Sift together flour, soda and salt and add it to the rest of the ingredients.  Mix until just incorporated.  Add in coconut, chocolate chips and almonds last and gently stir in the dough, until evenly distributed.

Using a small scoop, drop dough onto cookie sheet, 8 or 9 to a pan. Bake for about 10 minutes.
Allow to cool a few minutes on the cookie sheet, then remove to a wire rack to cool completely.


SOURCE: Adapted from Heather Christo Cooks

Sunday, December 16, 2012

Soft Gingersnaps with Egg Nog Glaze


Are you in the holiday spirit yet?  For me, getting in the holiday spirit means fun with family and friends and, of course, lots of baking (mostly goodies).  Every year we have to make our favorites, but I also like to try a few new things as well.  These were one of those few new things. 
I love the warm spices of fall, so anything with ginger, cinnamon, nutmeg, and cloves will call my name.  Gingersnaps are one of my favorite holiday cookies, but I don't always love how crunchy they are. That's why these cookies are so perfect.  They have the warm, delicious flavor of gingersnaps but all in a soft, chewy cookie.

Soft Gingersnaps with Egg Nog Glaze
2 1/3 cup flour
1 tsp. baking powder
1/4 tsp. salt
1 tsp. ground cinnamon
1/2 tsp.ground cloves
1/8 tsp. ground nutmeg
3/4 cup butter, room temperature
1 cup sugar
1 egg
1 tsp. vanilla
1/4 cup molassas

Preheat oven to 375 degrees F.

In a mixing bowl, combine flour, baking powder, salt, cinnamon, cloves and nutmeg.  Set aside.

In the bowl of a stand mixer, beat the butter and sugar until light and fluffy, about 2-3 minutes.  Add egg and vanilla and mix to combine.  Add molassas and mix.

With a small scoop, drop dough onto cookie sheet.  Bake about 10-12 minutes (a minute or two less for non-stick pans).  Remove from oven and allow to cool on cookie sheet abouty 2 minutes, then remove them to a wire rack to cool completely.  Drizzle with egg nog glaze.


Egg Nog Glaze
1 Tbsp. unsalted butter, melted
1 cup powdered sugar
2-3 Tbsp. egg nog
1/2 tsp. vanilla
pinch of cinnamon
pinch of nutmeg

In a medium mixinb bowl, mix glaze ingredients until texture is smooth.  Adjust consistency as desired.  With a spoon, drizzle over completly cooled cookies.  Allow glaze to set.


SOURCE: Slightly adapted from Two Peas and Their Pod

Friday, February 24, 2012

Brown Butter Chocolate Chip Cookies


It seems like there is a continuous search for the perfect chocolate chip cookie. I've gone through different recipes over the years and I've seen many, many different recipes come and go through the blogging world. In the end, I think it's a little bit of personal preference and a really good recipe that fits your bill.

With that, I have to say that this recipe, for me, almost reaches perfection! First of all, I love brown butter anything. Second, these cookies are nice and chewy with just the slightest bit of crunch. If there's one thing I don't like about chocolate chip cookies it's when they are too crunchy. But then again, that's just me.

Give these babies a try--trust me you will ADORE them as I do. When I first stumbled upon the recipe, I made them two days in a row! You just cannot go wrong here.

Brown Butter Chocolate Chip Cookies
1/2 cup butter
1/2 cup granulated sugar
1/2 cup packed brown sugar
1 egg
1 teaspoon vanilla extract
1 1/3 cups all purpose flour
1/4 tsp. baking powder
1/8 tsp. baking soda
1/2 tsp. salt
2 oz. semi-sweet chocolate chips (about 1/3 cup)

Preheat oven to 350 degrees.

Place butter into small pot over medium heat. After butter has melted, start swirling pot gently until it starts to brown and become fragrant. Once the butter is a golden amber color, take off the heat and allow to cool.

In a bowl, whisk together flour, baking powder, baking soda and salt. Set aside.

In a mixing bowl, fitted with a paddle attachment, beat together cooled butter, both sugars, egg and vanilla.

Gradually add flour mixture and beat until just moistened. Gently mix in chocolate chips with a rubber spatula or a few pulses of your mixer.

Using a small scoop, scoop dough onto baking sheet. Slightly flatten with the palm of your hand. Bake in preheated oven for about 7-10 minutes. Allow to cool on baking sheet. Remove cookies to a cooling rack.

Yield: about 18 cookies

SOURCE:Slightly adapted from Lauren's Latest

Monday, October 31, 2011

White Chocolate Macadamia Nut Cookies


White chocolate macadamia cookies were always my favorite growing up. Although nothing beats a homemade chocolate chip cookie straight out of the oven, there was just something about these cookies that beckoned me. They were like a special treat. I would choose them over any other cookie if they were offered at a party or gathering. Sometimes I would even snag one at Mrs. Fields or Subway when I was at the mall hanging out.

That having been said, I never ONCE made them all that time! People don't really make white chocolate macadamia cookies do they? I mean, I know you can get them in large quantities at your local Costco and such, but really, I don't think I've ever eaten a homemade one! Do you even see many recipes for this wonderful cookie in many cookbooks? I'm sure the recipes are actually there, even if they are few and far between.

I don't know what prompted me to make these the other night, but I'm so glad I did! Well, actually, I have this love affair with the bulk foods section at WinCo every time I go there and the last time I was there I grabbed a small bags worth of macadamia nuts. I had great intentions to use them but never did. So, I figured there's no time like the present. Sunday nights my girls and I are almost always in the kitchen together making treats; usually brownies or cookies. So, as I opened my cupboard and saw all the little bags of bulk food goodness, I spied that little bag of nuts and naturally my mind went to cookies...and the rest is history.

So, long intro, I know, but I have to say these cookies are superb (and I'm pretty picky about my cookies)! They are a little crunchy around the outside edges but nice and chewy in the middle and they have that nice contrast between slightly salty and sweet. Stick this recipe in your cookie file, you're going to want to make them. (You can probably find good deals on nuts and chocolate chips now or soon with the upcoming holiday baking season, so stock up!)

White Chocolate Macadamia Nut Cookies
Makes about 2 1/2 dozen cookies

2 cups all-purpose flour
1/2 tsp. baking soda
1/2 tsp. salt
3/4 cup unsalted butter, melted and cooled to room temperature
1 cup packed light brown sugar
1/2 cup white sugar
1 egg
1 egg yolk
1 tablespoon vanilla extract
1 cups chopped macadamia nuts
1 cup white chocolate chips

Preheat the oven to 325 degrees F.

In a medium bowl, whisk together the flour, baking soda and salt and set aside.

In a stand mixer with a paddle attachment, beat together the melted butter*, brown sugar, and white sugar. Beat in the egg, then beat in the egg yolk, then beat in the vanilla. (*Do NOT skip cooling the butter down to room temperature, you may encounter problems with your dough if it is too hot.)

Gradually add the flour mixture to the sugar mixture until just moistened. Gently mix in the macadamia nuts and white chocolate chips either by hand with a rubber spatula, or with a few pulses of your mixer.

Using a small scoop, drop dough onto baking sheets. Slightly press down on the cookies with the palm of your hand a bit to flatten. but not too much. Bake for 12-15 minutes or until the edges look golden brown and the middles don’t look quite set. Allow to finish cooling on the baking sheet. Remove cookies to a cooling rack and repeat with remaining dough, scooping dough out onto COOLED baking sheets (this will prevent them from spreading too quickly).


SOURCE:Slightly adapted from Brown Eyed Baker

Saturday, August 6, 2011

Vegan Breakfast Cookies


The first time I had theses cookies I could not get enough of them! My friend Rachel created the recipe and shared them at a class she was giving and I couldn't wait to get the recipe. I love her recipes because she puts a lot of thought into them and adds things that pack a nutritional punch. For example, coconut, I've talked a little about how good it is for our bodies in previous posts, raw sesame seeds are packed with calcium, flax seed is a great source for essential fatty acids and dietary fiber, and oats are also a good source of fiber as well as protein.

These little breakfast cookies are so delicious and the perfect way to start your day. The dough makes a relatively small batch because they are best eaten fresh, preferably the same day they are made. However, they will keep for several days.

Vegan Breakfast cookies
1 banana, mashed
2 Tbsp. coconut oil
1/4 cup agave
1/4 cup sesame seeds (preferably raw)
1/2 cup shredded coconut
1/2 cup raisins (you could also sub dried cherries or cranberries)
1/2 tsp. vanilla
pinch of salt
1/2 tsp. cinnamon
1 1/2 Tbsp ground flax seed
1 cup oatmeal
1/2 cup whole wheat flour
1/2 tsp. baking powder
1/2 tsp. baking soda

Preheat oven to 350 degrees F. Cream together the banana and the coconut oil. Add agave and mix well. Add the remaining ingredients and bake on parchment lined baking sheet for 10-12 minutes.

Makes about 12 -15 cookies.

Sunday, March 20, 2011

Favorite Sugar Cookies and Cherry Buttercream Frosting

I know there are a lot of sugar cookie recipes out there and everyone has their favorite but today I wanted to share with you MY favorite sugar cookie recipe. It's pretty basic but it uses almond extract in addition to vanilla extract and I LOVE it! I got this recipe from a dear friend and co-worker in college. She used to bring these sugar cookies into the office every holiday and there were never any leftover! As for the frosting, it was kind of an experiment and it worked out fabulously. I have a small collection of flavored oils for candy making and I happened upon a cherry-flavored oil that I thought would be great in a buttercream frosting. Pairing that cherry flavor with the almond in the cookies and, my friends, we have a winning combination! I told my husband that these cookies were so amazing and my favorite sugar cookies ever. He didn't believe me at the time, after all, a sugar cookie is a sugar cookie right? Well, he changed his mind after eating one; he agreed with me. You will too! 

Favorite Sugar Cookies
2 sticks butter 
1 1/2 cups sugar 
2 eggs 
1/2 tsp. vanilla extract 
1/2 tsp. almond extract 
1/4 cup milk 
1/2 tsp. baking soda 
1/2 tsp salt 
4 cups flour 

Cream together butter and sugar until light and fluffy. Add eggs, vanilla and almond extract and milk; mix. Add flour and baking soda and mix until combined. Chill dough for about 10-15 minutes. Roll out dough on lightly floured surface and cut with cookie cutters. Bake at 400 for 8-10 minutes. 

Cherry Buttercream Frosting 
1 stick butter, at room temperature 
2 1/2 - 3 cups powdered sugar 
1-2 tsp. cherry flavored candy and baking oil 2-4 Tbsp. milk Food coloring (if desired) 

In a stand mixer fitted with the whisk attachment, beat butter at medium-high speed until smooth, about 20 seconds. Add powdered sugar; beat at medium-low speed until most of the sugar is moistened, about 45 seconds. Scrape down the bowl and beat at medium speed until mixture is fully combined, about 15 seconds. Scrape bowl, add cherry oil and milk, and beat at medium speed until incorporated, about 10 seconds. Then increase the speed to medium-high and beat until light and fluffy, about 4 minutes, scraping down bowl once or twice. 


SOURCE:Cookies recipe from my friend Anita; Buttercream adapted from Annie's Eats. 

Linked to... Potluck Sunday @ Mommy's Kitchen Sweet Tooth Friday @ Ali-N-Son Mangia Mondays @ Delightfully Dowling

Wednesday, February 2, 2011

Raspberry Almond Cookie Bars


Before we bought our place we live in now, we rented this little farm house where we were completely spoiled. We had free reign over a nicely established raspberry patch in the back. It was huge. During raspberry picking season it would take me about an hour and a half to pick the whole patch, and that was picking about every 2-3 days. I was in heaven because I am a huge lover of raspberries.

I also love to make treats, especially on Sundays and, with my girls when possible. On Sundays we don't do much else other than go to church and maybe an occasional family dinner, so I like to do something special with my girls. My oldest said she would make cookies with me the other Sunday and when I asked her what kind she wanted to make, she said raspberry. I was at a little of a loss because I wasn't exactly sure how I was going to make them. I've seen raspberry flavored icings on cookies, raspberry chips and even raspberry jam, but I wanted that pure, unadulterated raspberry flavor that comes from using real berries.

Well, I altered a simple bar cookie recipe and this is what I came up with. They were amazing! I was kicking myself for only making a very small batch because they didn't last more than 4 or 5 hours. My husband said he liked them as much as I like brownies. Now that's saying something.

Raspberry Almond Cookie Bars
1/2 cup flour
1/2 cup oats
1 teaspoon baking powder
1/4 teaspoon salt
1/2 cup almonds (slivered, sliced or roughly chopped)
1/2 cup (1 stick) unsalted butter
1 cup packed brown sugar
1 egg
1 teaspoon almond extract
1/2 cup fresh raspberries (if using frozen, thaw and let drain)

Preheat oven to 350 degrees. Spray an 8-inch square baking pan with cooking spray, line with parchment paper. then spray again.

Combine flour, oats, baking powder, salt and almonds in a medium bowl. Cream together butter and sugar until light and fluffy; 2-3 minutes. Add egg and almond extract and mix to incorporate. Mix in the flour mixture until just incorporated.

Spread about 2/3 of the dough into the prepared baking pan. The dough is pretty sticky, you could use a spatula to help you spread it out or even just drop it by the spoonful very close together. When it cooks, it will all come together anyway.

Gently lay raspberries evenly over the first cookie layer, then drop the rest of the dough by spoon fulls over the raspberry layer.

Bake for 25-30 minutes. Let cool for about 10 minutes in pan, then gently pull them out with the parchemnt paper and let them completely cool on a rack.

Linked to...
Recipe Swap Thursday @ Prairie Story
Sweets For A Saturday @ Sweet As Sugar Cookies
It's A Keeper Thursday @ It's A Keeper

Friday, December 10, 2010

Peanut Butter Chocolate Chip Cookies

I grew up on the east coast. Now I live close to the west coast. Growing up I made a pretty mean chocolate chip cookie. I kind of got famous for them around my group of friends. When I came out west I tried making chocolate chip cookies for years and could never get them just right like I used too. I kind of gave up for a while. Then I had kids, got back into the cookie baking business and BINGO! Found a keeper.


Every time my daughter asks me if we can make cookies I search through my piles of recipes to try, then I look through my trusty old Toll House cookie book and it practically turns itself to the page with these cookies on it. I take one look and know immediately that these are the ones we'll make....again...and again. They are so good! When I make them they do not last long in our house. I love that they are perfectly chewy and not flat and crispy (not my kind of cookie), and I love the little hint of cinnamon you can taste too. These little cookies completely satisfy my every craving. Maybe they will yours too, so give them a try.

Chunky Chocolate Chip Peanut Butter Cookies
1 1/4 cups flour
1/2 tsp. baking soda
1/2 tsp. salt
1/2 tsp. cinnamon
3/4 cup (1 1/2 sticks) butter, softenend
1/2 cup granulated sugar
1/2 cup brown sugar
1/2 cup creamy peanut butter
1 egg
1 tsp. vanilla
2 cups (12-oz pkg.) semi-sweet chocolate chips
1/2 cup coarsely chopped peanuts (or use chunky peanut butter)

Preheat oven to 375° F.

Combine flour, baking soda, cinnamon and salt in small bowl. Beat butter, brown sugar, granulated sugar and peanut butter in large mixer bowl until creamy. Beat in egg and vanilla extract. Gradually beat in flour mixture. Stir in chocolate chips and peanuts.

Drop dough by rounded tablespoons onto ungreased baking sheets. Press down slightly to flatten into 2-inch circles.

Bake for 7 to 10 minutes or until edges are set but centers are still soft. Cool on baking sheets for 4 minutes; remove to wire racks to cool completely.

Makes about 3 dozen cookies.

SOURCE:Toll House Best-Loved Cookies

Tuesday, November 2, 2010

Butterfinger Bars


Looking back on the past several posts, I am now realizing why I have gained 5 pounds all of a sudden. I do eat real food, I even eat my veggies, but I think once fall hit the baking started and I just can't stop. There is so much good food around this time of year, I have a hard time holding back.

I have had this recipe almost 7 years and have never made it. I got it from my sister-in-law, Jaime. She made these for one of my bridal showers and has made them for family dinners here and there. If you are a chocolate and peanut butter fan, you will love them, but brace yourselves, they are a little gluttonous. You may want to wear an elastic waitband when eating these!

These make a whole cookie sheet full so you probably want to share them. I made them for my husband to take to work for a halloween treat.

Butterfinger Bars
For cookie layer:
1 cup granulated sugar
1 cup brown sugar
1 cup (2 sticks) butter, softened
2/3 cup peanut butter
2 eggs
2 tsp. vanilla
2 cups flour
2 cups oats
1 tsp. baking soda
1 tsp. salt

For topping:
about 1 cup peanut butter
chocolate frosting (I used the frosting recipe on the Toll House cocoa powder tub)
Butterfinger candy bar, crushed

Preheat oven to 350 degrees F.

In a stand mixer fitted with a paddle attachment, cream together butter and sugars until light and fluffy, about 2-3 minutes. Beat in peanut butter until incorporated, then add eggs and vanilla and mix until just incorporated. In a separate bowl, mix together the dry ingredients then add them to the butter and sugar mixture. Beat until well-combined.

Spread dough out into a cookie sheet. You may want to use waxed paper on your hand to help you spread it out because it is pretty sticky.

Bake for 15-18 minutes. Let cool completely. Spread a thin layer of peanut butter over the cookie layer. Put it in the freezer for a few minutes to stiffen a bit then spread the chocolate frosting over the peanut butter layer. Sprinkle with crushed Butterfinger candy bars (I think I used about 4-5 minis).

This post linked to Recipe Swap Thursday @ Prairie Story.

Monday, September 27, 2010

Chewy Lemon Sugar Cookies


Before I being raving about these cookies, I have to tell you about the comment my husband made the other day. I was walking outside to photograph something, well food, for a post. My husband just laughed and said I should change the title of my blog to Blue Plate Special because everything I photograph is on a blue plate. He's so clever; I loved it but still think I'll be sticking to this one. You're still going to see everything photographed on a blue plate because that's pretty much all we have that looks decent. Maybe one of these days I'll branch out.

Anyway, on to these cookies. Have I told you how much I love lemon anything? Lemon desserts are probably my number 1 (aside from chocolate, that is). I don't make a whole lot of cookies but these were different enough and tempting enough that I wanted to give them a try. They were the perfect balance of sweet and tart for me. They were nice and chewy but a little crisp on top from being rolled in sugar. I served them with some homemade lemon ice cream and made ice cream sandwich cookies. They were divine. Go ahead, treat yourself.

Chewy Lemon Sugar Cookies
3 cups all-purpose flour
1 teaspoon baking soda
1/2 teaspoon baking powder
1/2 teaspoon salt
1 cup butter, softened
1 1/2 cups white sugar
1 egg
1/2 teaspoon vanilla extract
Zest of one large lemon
4 tbsp fresh lemon juice (about 1 large or 2 small lemons)
1/3 cup sugar for rolling cookies

Preheat oven to 375°F. In a small bowl, sift together flour, baking soda, baking powder and salt. Set aside.

In the bowl of a stand mixer, using a paddle attachment, cream together the butter and sugar until smooth and very fluffy (3-5 minutes). Beat in egg, vanilla extract, lemon juice and lemon zest. Gradually mix in the dry ingredients.

Roll rounded teaspoonfuls of dough into balls, and roll the top side in sugar. Place on cookie sheets about 1 1/2 inches apart. Bake 8 to 10 minutes, or until lightly browned. Let stand on cookie sheet two minutes before removing to cool on wire racks.

Makes approximately 24-30 cookies.

SOURCE:Adapted from My Baking Addiction via Meet Me In The Kitchen

Thursday, July 1, 2010

Giant S'mores Cookies


Boy were these fun to make! I had my girls help me with them and I think they got a sugar high from stuffing as much chocolate and marshmallows into their mouths as they were putting on top of the cookies.

A lot of people around here like to go up the canyon for the 4th of July to do their barbecuing. I don't know about you, but for me, a campfire just cannot be put out without first making s'mores. Since we're not going to be in the canyon this year, I think these cookies make a good substitute. They were delicious.

2 sticks softened butter
1 cup light brown sugar, packed
3/4 cup granulated sugar
2 large eggs
1 Tbsp. vanilla
4 cups flour
1 tsp. salt
1 1/2 tsp. baking soda
1 1/2 cups semi-sweet chocolate chips
3 regular size Hershey’s Chocolate Bars, broken into pieces
3 full graham crackers, broken into pieces
5-6 large marshmallows, cut into fourths

Preheat oven to 350 degrees F. Place butter and sugars into a stand or electric mixer; beat until light and fluffy. Add eggs and vanilla until well combined. Add dry ingredients and mix until just combined.

Using a large scoop, or a 1/4 cup measuring cup, scoop dough out onto cookie sheet. Flatten out with the palm of your hand. Gently press the chocolate, graham cracker pieces and marshmallows into the dough.


Bake for 10-12 minutes or until lightly golden. Let cool for 5 minutes before removing from pan.

Makes 18 giant cookies

SOURCE:Picky Palate

Thursday, March 11, 2010

Peanut Butter Oatmeal Chocolate Chip Cookies


I made these the other night and hadn't planned on posting them. First of all because everyone has their own cookie recipes and second of all, their just cookies, right? Holy Hannah, not these, they were so good, I couldn't not post the recipe. This dough makes a firm yet tender cookie. Even better, they didn't dry out or harden overnight, they stayed tender. That's one of my biggest pet peeves about cookies is that they harden if you don't eat them right out of the oven. These were heavenly right out of the oven, but any way you eat them grab a glass of milk and you will enjoy them!


3/4 cup all-purpose flour
1/4 tsp. salt
1/2 tsp. baking soda
1/2 tsp. baking powder
1-2 tsp. cinnamon
1/2 cup unsalted butter, at room temperature
1/2 cup white sugar
3/4 cup dark brown sugar
1 large egg
1/2 cup crunchy peanut butter (creamy is fine too)
1 teaspoon vanilla
2 cups old fashioned oats
1 cup semi-sweet chocolate chips

Preheat the oven to 375 degrees F. In a small bowl, whisk together the flour, salt, baking soda, baking powder, and cinnamon. Set aside. In a mixing bowl, fitted with a paddle attachment, beat the butter and sugars together until creamy; about 2 minutes. Add the peanut butter and mix until incorporated. Add in the egg and vanilla. Mix until well combined.

On low speed, add in the dry ingredients. Mix just until the combined. Stir in the oats and chocolate chips until everything is combined.

With a small scoop, scoop the dough into balls and place on 2 baking sheets. Slightly flatten dough balls. Bake for 8-10 minutes, or until the cookies are lightly browned and puffed. They will set up after they cool, so don’t over bake.

Remove cookies from oven and let cool on the baking sheet for about 3 minutes. Transfer to a wire rack and cool completely.


Makes about 21 cookies.

SOURCE:Recipe adapted from Two Peas and Their Pod.

Tuesday, November 3, 2009

Pumpkin Oatmeal Scotchies

1/2 cup butter (1 stick)
3/4 cup brown sugar
3/4 cup granulated sugar
1/4 cup plain or vanilla fat free yogurt
2 eggs
1 tsp. vanilla
1 cup pumpkin
1 1/4 cup flour
1 tsp. baking soda
1 1/2 tsp. cinnamon
pinch ground ginger
pinch allspice
1/8-1/4 tsp. fresh ground nutmeg
1/2 tsp. salt
3 cups oats
1 bag (1 3/4 cups) butterscotch chips

Cream butter and sugars together until light and fluffy, scraping the sides down as needed. Add yogurt, eggs and vanilla and pumpkin and mix to incorporate. Add dry ingredients through salt and mix to combine. Add the oats and mix then fold in the butterscotch chips.

Bake 375 for 8-10 minutes.

NOTES:I kind of combined a few recipes together to get this one and made it mine. These are delish! They might be one of my new favorites. They are great for fall baking and the best warm right out of the oven. You can also substitute craisins for the butterscotch chips.

Saturday, September 12, 2009

Double Chocolate Cherry Cookies


Before I started blogging, or even knew about blogging, I loved to collect those little Pillsbury and Betty Crocker cookbooks that you get at the checkout stand. I have a ton of them. This recipe comes from a Betty Crocker one with lots of fall baking recipes. I love anything dark chocolate and it usually pairs well with almost any fruit.

We had lots of cherries this year from our tree and I ended up dehydrating a bunch of them so they wouldn't go to waste, but I didn't really know what I was going to do with them. This ended up being the perfect to use some of them up.

1 1/4 cups sugar
1 cup butter, softened
1/4 cup milk
1/2 tsp. almond extract
1 egg
1 3/4 cup flour
1/3 cup unsweetened baking cocoa
1/2 tsp. baking soda
1 tsp. salt
1 cup quick-cooking oats
1 cup dark chocolate chips
1 cup dried cherries

Heat oven to 350. In stand mixer, fitted with a beater attachment beat sugar and butter until light and fluffy. Add milk, almond extract and egg, mixing to incorporate. Add in flour, cocoa, soda and salt and mix well. Switch to a paddle attachment and add in oats, chocolate chips and cherries, mixing well. Drop dough by rounded tablespoonfuls about 2 inches apart onto ungreased cookie sheets.

Bake 10-12 minutes.

Linked to...
This Week's Cravings @ Mom's Crazy Cooking

Thursday, July 9, 2009

Chocolate Chocolate Chip cookies

2 1/4 cups flour
1 teaspoon salt
1 teaspoon baking soda
2 sticks butter, softened
1/2 cup granulated sugar
1 1/2 cup packed brown sugar
2 large eggs, beaten
1 tablespoon vanilla
1/2 cup unsweetened cocoa
2 cups chocolate chips (or 2 Hershey's chocolate bars, chopped)

Preheat oven to 350 degrees. In a bowl stir together flour, salt, and baking soda. In a mixer cream together butter and both sugars until light and fluffy. Add eggs, vanilla and cocoa; mix until incorporated. Gradually stir flour mixture into butter mixture and mix until combined. Stir chocolate chips and stir to distribute evenly.

For cookies: Drop dough by tablespoonfuls onto greased baking sheets and bake about 9minutes. Cool on a baking rack.

For bars: Pat dough into a greased 9 inch square baking pan and bake 20 to 25 minutes. Cut into squares when cooled.

NOTES:Recipe adapted from Food Network's Cathy Lowe. These cookies are sooo delicious. I'm a totaly chocoholic and these hit the spot.

Tuesday, September 23, 2008

Oatmeal Cookies

1/2 cup brown sugar, packed
1/2 cup sugar
1/4 cup shortening
1/4 butter, softened
1/4 tsp. vanilla
1 egg
1 cup flour
1/2 tsp. baking powder
1/2 tsp. baking soda
3/4 cup oats
1/4 cup chopped nuts (optional)

In mixing bowl, cream together sugars , butter and shortening until light and fluffy. Add vanilla and egg and mix. Add flour baking powder and soda and mix well. Stir in oats and nuts last. Form dough into 1-inch balls and dip tops in sugar. Place on ungreased cookie sheet. Bake at 375 for 10-12 minutes. Makes about 3 1/2 dozen.

Monday, September 22, 2008

Peanut Butter Cookies

1/2 cup butter-flavored shortening
1/2 cup butter, softened
1 cup peanut butter
1 cup sugar
1 cup brown sugar
2 eggs
2 1/2 cups flour
1 1/2 tsp. baking soda
1/2 baking powder
1/2 tsp. salt

Mix thoroughly shortening, peanut butter, sugars and egg. Blend in flour, soda, baking powder and salt. Cover and chill.
Heat oven to 375°F. Shape dough into 1-inch balls. P,lace 3 inches apart on baking sheet. With fork , flatten in criss-cross pattern to 2 inches. Bake 10-12 minutes or until set but not hard.

NOTES:I grew up on these cookies, they were one of my favorites. This makes a large batch, you can always half it.
Related Posts Plugin for WordPress, Blogger...