Showing posts with label Fall Baking. Show all posts

Monday, September 21, 2015

Pumpkin Chocolate Chip Buttermilk Waffles


Nevermind that I have salsa recipes from the summer to still post, let's move right along to fall with these waffles!!  I have been waiting to make these for a couple weeks.  I LOVE just about everything the fall brings, especially pumpkin chocolate chip.  One of my favorite combos.  These are pretty much my regular buttermilk waffles, with a little extra fall punch, so not a ton of work.  These are perfect for Sunday brunch with friends or family because they make a HUGE plateful.  But even if you don't have company, they keep really well.  I like to just throw them in the freezer and pull them out when we want them.  When you're ready to eat, just toss them in the toaster and they'll warm up nice and good.  I like to serve them with pumpkin maple syrup or cinnamon sugar sprinkled on top. Sometimes I even sprinkle the cinnamon sugar on top of the batter in the waffle iron.  (If you do this, make sure you spray it with cooking spray so it doesn't stick.)


Pumpkin Chocolate Chip Buttermilk Waffles
2 cups buttermilk
1 cup pumpkin puree
1 Tbsp. vanilla
4 eggs, separated
3 Tbsp. sugar
6 Tbsp.  unsalted butter, melted
1 1/4 cups all-purpose flour
1 1/4 cups whole wheat flour
2 tsp. baking powder
3/4 tsp. baking soda
3/4 tsp. salt
1 1/2 tsp. cinnamon
1/4 tsp. ground ginger
1/4 tsp. ground nutmeg
1/2-3/4 cup chocolate chips

Melt butter and set aside to cool slightly. Preheat waffle iron.

In a large mixing bowl, whisk together buttermilk, pumpkin, vanilla, sugar and egg yolks. Slowly whisk in melted butter. In a separate bowl, stir together the remaining dry ingredients then gently stir them in with the wet ingredients until just incorporated.

In a separate mixing bowl, beat egg whites until stiff peaks form. With a spatula, gently fold them into the batter until almost incorporated, add the chocolate chips then fold in a few more times.  NOTE: Egg whites do not have to be completely incorporated, just mostly.

Pour batter onto waffle iron and cook according to manufacturer's directions.  Serve with choice of toppings: pumpkin maple syrup, syrup, cinnamon sugar, or powdered sugar.


Pumpkin Maple Syrup:
4 Tbsp. pumpkin puree
6 Tbsp. pure maple syrup
splash of vanilla
pinch of cinnamon

Tuesday, November 5, 2013

Pumpkin Cinnamon Rolls with Apple Cider Glaze


Cinnamon rolls and soup. Yep, that's what I start craving when it starts getting cold and gloomy outside.  I think I've already made cinnamon rolls like four times in the past couple of months!!  Luckily I have great neighbors that are willing to take them off my hands so I don't eat them all!

You probably remember reading last month on my facebook page that I like to try new kinds of cinnamon rolls every October.  Pumpkin rolls definitely AREN'T a new concept but I can't believe I haven't made them until now and let me tell you I may just have to make them again. Soon.

I had some fresh apple cider in the fridge so decided to use that in the glaze but if you don't have any, feel free to use any of the options I listed at the end of the post.

Pumpkin Cinnamon Rolls
for the dough:
5 cups flour
1 1/2 Tbsp. yeast
1/2 cup sugar
2 tsp. salt
1 tsp. cinnamon
pinch of cloves
pinch of nutmeg
1/2 cup butter, softened
3 eggs
1 cup pumpkin puree
1/2-3/4 cup whole milk

for the filling:
1/3 cup butter, softened
1 cup brown sugar
1 tsp. cinnamon
pinch of nutmeg
pinch of cloves
1 cup chopped pecans, plus more for garnish

for the glaze:
1/2 cup butter, softened
1/2 cup apple cider (fresh is best)
2-4 Tbsp. whole milk
~ 4 cups powdered sugar
pinch of apple pie spice


To prepare the dough, place flour, yeast, sugar, salt and spices in a mixing bowl fitted with a dough hook.  Pulse to combine.  In a small mixing bowl, whisk together butter, eggs, pumpkin and milk and add to the mixing bowl with the dry ingredients.  Mix on medium speed for about a minute, then check to see if dough looks right (it should be a little sticky, more so than bread, but not incredibly and definitely NOT dry).  Mix for about 5 minutes.  Remove dough and place in an oiled bowl, cover and let rise until doubled in bulk.

Divide dough in half and roll out into a long rectangle.  Mix together filling ingredients, except pecans.  Spread half of the butter across the dough, leaving about an inch on the upper edge.  Sprinkle half of the filling over the dough and about half a cup of pecans.  Roll dough away from you, stopping at the edge to pull it over towards you and sealing it shut.  Slice into about 1-inch slices either with a knife or a clean piece of floss. Place rolls into prepared pans. Repeat with other half of dough and filling.

*Grease your pans.  Depending on what kind of pans you use and how thick you cut your rolls will determine how many pans you need.  I used 4 9-inch rounds and a lasagna-size tray this time. 

Cover rolls with a light tea towel and allow to rise until almost doubled.  Preheat oven to 375 degrees F and bake rolls for 13-15 minutes or until lightly golden.

Allow rolls to cool.  Prepare frosting.  Whisk together butter, cider, milk,  pie spice and enough powdered sugar to reach desired consistency; start with 4 cups.  Slather on cooled rolls and garnish with extra chopped pecans, if desired.


*For an alternate frosting, substitute the apple cider for milk, omit the apple pie spice and add either vanilla or maple extract. OR, you could also substitute cream cheese for the butter if you prefer cream cheese frosting.


Sunday, December 16, 2012

Soft Gingersnaps with Egg Nog Glaze


Are you in the holiday spirit yet?  For me, getting in the holiday spirit means fun with family and friends and, of course, lots of baking (mostly goodies).  Every year we have to make our favorites, but I also like to try a few new things as well.  These were one of those few new things. 
I love the warm spices of fall, so anything with ginger, cinnamon, nutmeg, and cloves will call my name.  Gingersnaps are one of my favorite holiday cookies, but I don't always love how crunchy they are. That's why these cookies are so perfect.  They have the warm, delicious flavor of gingersnaps but all in a soft, chewy cookie.

Soft Gingersnaps with Egg Nog Glaze
2 1/3 cup flour
1 tsp. baking powder
1/4 tsp. salt
1 tsp. ground cinnamon
1/2 tsp.ground cloves
1/8 tsp. ground nutmeg
3/4 cup butter, room temperature
1 cup sugar
1 egg
1 tsp. vanilla
1/4 cup molassas

Preheat oven to 375 degrees F.

In a mixing bowl, combine flour, baking powder, salt, cinnamon, cloves and nutmeg.  Set aside.

In the bowl of a stand mixer, beat the butter and sugar until light and fluffy, about 2-3 minutes.  Add egg and vanilla and mix to combine.  Add molassas and mix.

With a small scoop, drop dough onto cookie sheet.  Bake about 10-12 minutes (a minute or two less for non-stick pans).  Remove from oven and allow to cool on cookie sheet abouty 2 minutes, then remove them to a wire rack to cool completely.  Drizzle with egg nog glaze.


Egg Nog Glaze
1 Tbsp. unsalted butter, melted
1 cup powdered sugar
2-3 Tbsp. egg nog
1/2 tsp. vanilla
pinch of cinnamon
pinch of nutmeg

In a medium mixinb bowl, mix glaze ingredients until texture is smooth.  Adjust consistency as desired.  With a spoon, drizzle over completly cooled cookies.  Allow glaze to set.


SOURCE: Slightly adapted from Two Peas and Their Pod

Wednesday, December 12, 2012

Cranberry-Turkey Enchiladas


I've probably said it before, but I love holiday leftovers!!!  That's one good thing about making a huge meal, you can eat off it for days!! Many times we just eat them as is, but once in a while I get a hankering to make the leftovers into something else, hence this meal. 

I was so excited to come home from my parent's house at Thanksgiving with a big bag of turkey.  Even though it was just 5 adults and my 3 girls, who don't eat much, my dad insisted on getting a 20 pound turkey!  I'm glad he did.  I had been eyeing these enchiladas even before Thanksgiving, so I was glad to whip them up a few days later.

You will love this rendition of  the traditional Chicken Enchiladas.  With the orangey-tangy-ness from cranberry sauce, a little spice from the chipotle tabasco  and, of course the turkey.  Next time you cook up a turkey, save some leftovers for these!


Cranberry-Turkey Enchiladas
2-2 1/2 cups shredded turkey or chicken
2 cups Fresh OrangeCranberry Sauce (or 1 16-oz can)
1 (15-ounce) can black beans, drained and rinsed
1 1/2 cups salsa
1 1/2 cups shredded Monterey Jack cheese (or pepper jack for more kick)
1/2 cup sour cream
3-4 green onions, chopped
1/4 cup lightly-packed chopped cilantro
1 tsp. ground cumin
1/2 tsp. kosher salt
1/2 tsp. freshly cracked black pepper
10-12 (6-inch) fresh corn tortillas
1-2 tsp. bottled chipotle hot sauce (tabasco)

Preheat the oven to 350 degrees F and lightly spray a 9x13 inch baking dish with cooking spray.

In a large bowl, combine the turkey, 1 cup of the cranberry sauce, the beans, sour cream, 3/4 cup cheese, 1/2 cup of the salsa, green onions, cilantro, cumin, salt, and pepper.

Wrap 6 tortillas at a time in a light kitchen towel and microwave abotu 60 seconds. Pulling one tortilla out at a time, keeping the remaining warm tortillas wrapped up, spoon about 1/4 cup filling into each tortilla, and roll tightly. Place seam-side down in the baking dish. Repeat with remaining tortillas and filling.

In a medium bowl, combine the remaining cranberry sauce, 1 cup of salsa, and the hot sauce. Stir to combine and Pour over the enchiladas. Cover the dish with foild, and bake 45 minutes. Remove foil, and sprinkle with remaining 3/4 cup cheese. Continue to bake, uncovered, an additional 10 minutes, or until cheese is melted and bubbly. Sprinkle with additional cilantro and scallions, and serve.
 
 
SOURCE: Pink Parsley

Tuesday, November 13, 2012

Caramel Apple Upside Down Cake


Apples are one of my favorite things about fall. Almost every year for the past 5 or 6 years we find a local apple orchard and take our kids to pick apples. It's the whole experience of being together, picking delicious home grown fruit, then taking it home to eat and make into wonderful things!

This year must have been a bad year for apples because several of the orchards we tried to go to said they hardly had any and there were none left to pick-bummer! So, instead, I ordered a box of LOVELY honey crisps from our local CSA and have been thrilled to have them even though we didn't pick them.

Honey crisps are my absolute favorite apple. They are sweet and mild and nice and crisp and keep a long time under the right circumstances. They are the perfect apple for this dessert. They compliment the dense sweetness of the cake and the slight saltiness of the caramel sauce. I made this cake within hours of finding the recipe and it was gone in less than 24! And I've been craving it ever since! It's mouth-watering and delicious. It would be a beautiful addition to any family gathering or holiday party this season.


Caramel Apple Upside Down Cake

For the caramel sauce:
1 cup brown sugar, packed
1 cup heavy cream
2 Tbsp. thawed apple juice concentrate
4 Tbsp. butter
pinch salt
1/4 tsp. cinnamon
1 Tbsp. vanilla extract

Mix the brown sugar, heavy cream, apple juice concentrate, butter, salt and cinnamon in a saucepan over medium-low heat. Cook while whisking gently for 5 to 7 minutes, until it gets thicker. Add the vanilla and cook another minute to thicken further. Turn off the heat, cool slightly.

 
For the cake:
2 medium cooking apples (I used Honey Crisp)
3/4 cup oil (I used coconut oil, melted)
1 cup brown sugar, firmly packed
2 Tbsp. thawed apple juice concentrate
2 large eggs
1 1/2 tsp. ground cinnamon
1/4 tsp. ground ginger
1/8 tsp. ground cloves
1/2 tsp. salt
1 tsp. baking soda
1 1/2 cups flour
1 large apple, peeled and shredded (I used Honey Crisp)
3/4 cup chopped pecans or walnuts, optional
 
Preheat oven to 350 degrees F.  Lightly grease a 9-inch round cake pan at least 2-inches deep.  Line the bottom with parchment, and grease the parchment.  Make sure you measure your pan.  If it's pretty close to 2 inches deep, make sure you put the pan on a cookie sheet in case of any spills.
Peel and slice the 2 medium apples into 1/4-inch thick wedges.  Overlap the apple wedges in a ring around the bottom of the pan.  Pour about 1/3-1/2 cup of the caramel sauce over the apples and set it aside.
 
To make the cake, beat the oil, brown sugar, apple juice concentrate, eggs, spices and salt together for 2 minutes on medium speed.  Add the flour and baking soda and mix to combine.  Fold in the shredded apple and nuts, if desired, until just incorporated.
 
Drop batter by scoops on top of the apples in the pan, gently spreading to even out and cover the bottom. Bake for 50-55 minutes, or until cake tester inserted near center comes out clean.
 
Let cake cool in pan for 5 minutes.  Run a spatula around the edge to loosen it, then turn cake out onto a serving plate, bottom side up.  Pour reserved caramel sauce over the top of the cake and serve warm or room temperature.

SOURCE: Cake from King Arthur Flour and sauce adapted from Pioneer Woman

Friday, October 19, 2012

Caramel Apple Cheesecake Bars

'Tis the season to make anything apple. I'm always looking for a reason to make a yummy dessert and Sunday night family dinner is no better time. In the fall I crave anything with apple, from pancakes, to oatmeal.

This is a simple dessert with a taste that will blow the socks off of anyone! It may seem like a lot of steps but it really comes together quickly. I used the leftover caramel sauce from these pancakes but feel free to use store bought if you prefer.

Caramel Apple Cheesecake Bars
For the crust:
2 cups all-purpose flour
1/2 cup firmly packed brown sugar
1 cup (2 sticks) butter, softened

For the cheesecake filling:
3 (8-ounce) packages cream cheese, softened
3/4 cup sugar
3 large eggs
1 1/2 tsp. vanilla extract

For the apple topping:
3 Granny Smith apples, peeled, cored and finely chopped 
2 Tbsp. sugar
1 tsp. cinnamon
1/2 tsp. nutmeg 
 
For the streusel topping:
1 cup firmly packed brown sugar
1 cup all-purpose flour 
1 tsp. cinnamon 
1/2 tsp. nutmeg
1/2 cup quick cooking oats
1/2 cup (1 stick) butter, softened

1/2 cup caramel sauce

Preheat oven to 350 degrees F. 
 
In a medium bowl, combine flour and brown sugar. Cut in butter with a pastry blender (or 2 knives) until mixture is crumbly. Press evenly into a 9x13 baking pan sprayed with cooking spray.  Bake 15 minutes or until lightly browned. 
 
In a large bowl, beat cream cheese and sugar in an electric mixer at medium speed until smooth. Then add eggs, 1 at a time, and vanilla. Beat to combine. Pour over warm crust. 
 
In a small bowl, stir together chopped apples, sugar, cinnamon, and nutmeg. Spoon evenly over cream cheese mixture.

For the streusel topping,  combine all ingredients in a small mixing bowl. Cut butter until mixture is crumbly and resembles a coarse meal.

Sprinkle streusel topping over apples. Bake 40-45 minutes, or until filling is set. Filling should look a little wiggly in the center but firm everywhere else.  Cheesecake will finish setting once cooled.
 
Once cooled but still warm, cut into squares, drizzle with caramel sauce and whipped topping, if desired.

SOURCE: Adapted from The Girl Who Ate Everything

Monday, November 21, 2011

Cranberry Sour Cream Crumble


Not all the recipes that I share have a story or history behind them, but I love that this one does. My mom has had this recipe in her file box since probably before I was born; let's just say a LONG time. Back then my parents were young, finishing college, with three young children, and didn't have much extra money to splurge on things like REAL butter and sour cream. My mom, she has a good eye. She knows a good thing when she sees one. She tucked this recipe away until later in life when things were a little more established.

Now my mom has been making this for years and I've always enjoyed it but I have never actually made it myself until now. This crumble is perfect for serving at a breakfast or brunch, and especially perfect now that the holiday season is upon us.


Cranberry Sour Cream Crumble
1/4 cup chopped almonds

For the topping:
1/2 cup flour
1/3 cup sugar
1/4 cup chopped almonds
1/4 cup butter, melted
1/4 tsp. vanilla extract


For the cake:
1 cup sugar
1/2 cup butter, softened
1 tsp. vanilla
2 eggs
2 cups flour
1 1/4 tsp. baking powder
1/2 tsp. baking soda
1/4 tsp. salt
1 cup sour cream
1 cup whole cranberry sauce

Heat oven to 350° F. Sprinkle 1/4 cup of almonds on the bottom of a greased 9-inch spring-form pan or 10-inch tube pan. Set aside.

In a medium bowl, stir together all the topping ingredients until crumbly and set aside. In a separate bowl, combine the flour, baking powder, soda and salt.

In large mixer bowl, fitted with a paddle attachment, beat butter and sugar until light and fluffy; about 2 minutes. Beat in eggs, one at a time, until incorporated, then vanilla. Add in dry ingredients alternately with the sour cream, beginning and ending with flour mixture. Beat until incorporated.

Spoon half of batter into prepared pan, spreading to cover the bottom. Next, spoon cranberry sauce over the batter, spreading to the edges. Spoon remaining batter over cranberry sauce, spreading to cover. Sprinkle topping over batter.

Bake for 70-85 minutes or until toothpick inserted in center comes out clean. Cool 10 minutes on wire rack. Remove sides of spring-form pan and cool completely.


SOURCE:Land O' Lakes

Thursday, October 27, 2011

Pepita Granola and Pumpkin Butter


If you like granola, you're in for a treat for today's post! I daresay that this has become my favorite granola...ever...I think. I first discovered it last fall, when I fell in love with it. Then I waited all the way until this fall to make it again, don't ask my why. Maybe because it seems strange to eat pumpkin other than during pumpkin season.

I usually eat my granola on top of some plain yogurt, but I couldn't resist mixing it together with some pumpkin butter to take it over the top. If you've never heard of or had pumpkin butter, it's pretty similar to apple butter in that you let it cook down with some sugar and spices. It's very easy to make and very tasty, but you only need a dollop because it packs a spice-packed punch.

If you have a hard time finding the nuts and dried fruit that you want, try shopping where they have a bulk foods section. I usually buy all my ingredients to make any kind of granola from the bulk section at my local WinCo. They are also less expensive there as well and you can just buy the quantity that you want.

You can also experiment with dried fruit by drying your own, especially if you have a dehydrator. I like to buy boxes of fruit, in season, to can and dry to use throughout the rest of the year. This year I got about 40 lbs. of delicious pears; you wouldn't believe how yummy they are dried! I'll hopefully be doing apples soon as well.

Pepita Granola
3 cups old-fashioned rolled oats
1 cup crisp rice cereal
1/4 cup ground flax seed (optional)
1 cup sweetened flaked coconut
1 1/2 cups nuts and seeds (I used about 1/2 cup each of sliced almonds, chopped walnuts, and green (hulled) pumpkin seeds-not roasted)
2-3 cups mixed dried fruit (I used pears and cranberries; you could also use apricots, cherries, raisins, apples, figs, or whatever else you want.)
1/4 cup coconut oil (or other oil)
1/4 cup mild honey
1/3 cup packed brown sugar
1/4 - 1/2 cup unsweetened applesauce
1/2 - 1 tsp. cinnamon
Pinch salt
splash of vanilla

Preheat oven to 325 degrees F.

In a large mixing bowl, stir together the oats, cereal, flax meal, coconut and nuts. In a microwave safe bowl, gently melt the oil and honey; add the sugar, applesauce, cinnamon, salt and vanilla and stir until incorporated. Pour over the dry mixture and stir until it's evenly coated.

Spread granola over two cookie sheets and bake about 15-25 minutes, until lightly golden, stirring every 5 minutes. Stir in dried fruit. Let granola cool completely and store in an airtight container in the fridge or freezer.


Pumpkin Butter
1 (29 ounce) can pumpkin, or about 3 1/2 cups fresh pumpkin puree
3/4 cup apple juice
2 teaspoons ground ginger
1/2 teaspoon ground cloves
1 1/3 cups brown sugar
1 tablespoon ground cinnamon
1/2 teaspoon ground nutmeg

Juice of half a lemon

Combine pumpkin, apple juice, spices, and sugar in a large saucepan; stir well. Bring mixture to a boil. Reduce heat, and simmer for 30 minutes or until thickened. Stir frequently. Adjust spices to taste. Stir in lemon juice, or more to taste.

Once cool, pumpkin butter can be kept in an airtight container in the fridge


SOURCE: Adapted from Smitten Kitchen

Sunday, February 13, 2011

Butternut Squash Gratin


I got a surprising thumbs up from my husband for this dish! While I really enjoy butternut squash, I have a hard time making it any way that my family would like it. I almost never make gratins because of all the dairy but I thought I would try coconut milk in place of the typical cream. Although the coconut milk imparted a slight sweetness to the dish, it paired really well with the butternut squash and the saltiness of the Gruyère balanced out the flavors. I really liked using Gruyère because it melts really nicely and since it's an aged cheese doesn't have any lactose.

Butternut Squash Gratin
1 small (about 1.5 pounds) butternut squash, peeled, seeded and cut into 1/3-inch-thick slices
1 shallot, finely chopped
1 cup shredded Gruyère cheese (about 3.5 ounces)
1 cup canned coconut milk (or heavy cream)
1/2 teaspoon fine sea salt
1/2 teaspoon freshly ground black pepper
1/4 cup whole wheat bread crumbs

To make the bread crumbs, toast well one slice of whole wheat bread, then either cut into very small pieces or crumble between your fingers into a small bowl.

Preheat oven to 375°F. Butter a 2 quart casserole dish and arrange half of the squash slices in the bottom. Sprinkle with shallots and half of the cheese. Cover with remaining squash and sprinkle with remaining cheese. In a small bowl, whisk together coconut milk (or cream), salt and pepper; pour mixture over squash. Sprinkle with bread crumbs and bake until browned on top and bubbling, about 45 minutes. Cool 15 minutes before serving.

Serves 5-6

SOURCE: Whole Foods Market

Linked to...
Seasonal Sunday @ Real Sustenance
Recipe Swap Thursday @ Prairie Story

Tuesday, November 16, 2010

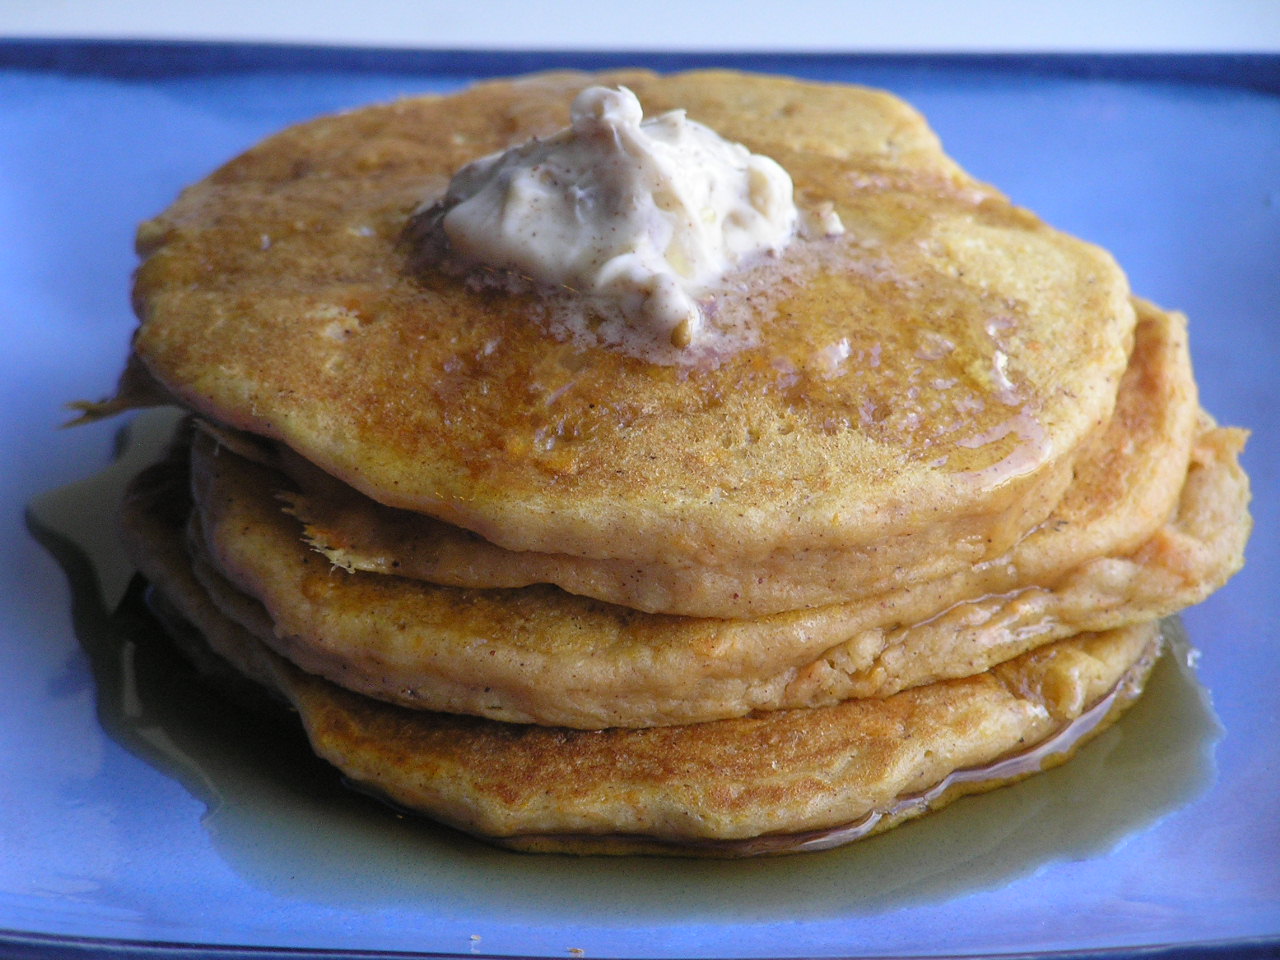
Sweet Potato Pancakes w/ Pecan Butter

Ok, so I'm a little obsessed with pancakes. Because my daughter recently kept asking for pancakes all the time, I can't get them off my mind and I'm still collecting new recipes to try and thinking up others to create. How does orange buckwheat pancakes sound or strawberry sunrise pancakes? Or even peanut butter or egg nog pancakes. Seriously, the possibilities with pancakes is endless.

I usually try to make pancakes as healthy as I can by using all whole wheat flour, only adding a little bit of oil and sugar and making my own syrups or jams or using fresh fruit. I've been pretty lucky in that my girls have eaten every kind of pancake that I've thrown at them. Now, if I could only be so lucky at dinner time.

Well, on to these sweet potato pancakes. They are perfect for this time of year and highlight some of the wonderful flavors of fall. If you have any leftover sweet potatoes from your Thanksgiving feast, these would be a great way to use them up. The pecan butter really adds to the depth of flavor and takes them up a notch. If you're into fall fare, you've gotta try these!


Sweet Potato Pancakes w/ Pecan Butter
1 1/2 cups whole wheat flour
1 Tbsp. sugar
1 1/2 tsp. baking powder
1 tsp. cinnamon
1/2 tsp. salt
2 eggs
1 cup plain yogurt (or sour cream)
1 1/4 cup mashed sweet potatoes
1/2 cup milk
2 Tbsp. butter, melted

Pecan Butter (recipe below)
Maple Syrup

In a large bowl, combine all ingredients. Mix together and whisk until smooth. Cook in batches on an electric griddle or in a buttered skillet on medium high temperature until bubbles form on the surface; then turn over and cook until golden brown. Serve with pecan butter and maple syrup.


Pecan Butter
1/4 cup finely chopped pecans toasted and cooled
1/2 pound butter (8 Tbsp.), softened
1/2 teaspoon cinnamon
1 teaspoon vanilla
1 tablespoon brown sugar
1 tablespoon honey

Mix all ingredients together. Roll in parchment paper and freeze. Cut into slices and top sweet potato pancakes.


SOURCE:Pecan Butter from Food Network

Linked to...
Recipe Swap Thursday @ Prairie Story
Mom's Crazy Cooking

Thursday, November 11, 2010

Mashed Sweet Potatoes with Orange Essence and Walnuts


Sweet potatoes, in some form or another, make it on to just about any Thanksgiving menu. Growing up we always had the Betty Crocker candied "yams" with marshmallows and brown sugar and they were, and still are, so good! That used to be the only time of year or pretty much the only meal that we would eat sweet potatoes at our house. Now, I use them a lot through the fall and winter months. They are delicious and wonderful and very versatile.

If you're looking for a great sweet potato side dish for your Thanksgiving dinner, then look no further. These sweet potatoes are packed with healthy goodness and bursting with flavor. They are not too sweet and the orange is just subtle enough to not be over powering.

Mashed Sweet Potatoes with Orange Essence
4 medium sweet potatoes, peeled and cut into a large dice
1/4 cup buttermilk (I used almond milk to make it dairy-free)
zest and juice of 1 orange
1/2 tsp salt
1/3 tsp nutmeg
1 TBS butter

Garnish:
chopped walnuts
brown sugar

Boil or steam potatoes in a large covered pan until they are tender (about 8 minutes). In a large bowl mash potatoes with the buttermilk, orange juice and butter. Stir in zest, salt and nutmeg. Serve the potatoes topped with a little brown sugar and chipped walnuts.

SOURCE:Perkins Recipes

Looking for more sweet potato recipes?
Whipped Sweet Potatoes
Chipotle Mashed Sweet Potatoes
Ginger Sweet Potato Muffins
Sweet Potato Pancakes with Pecan Butter

Linked up to...
Recipe Swap Thursday @ Prairie Story

Tuesday, November 9, 2010

Cherry Almond Granola


I love a small bowl of homemade granola in the morning with a dollop of homemade yogurt. It tastes so clean and refreshing. What a healthy way to start your day. Granola is so versatile. You can change the grains, spices, binders & nuts and still turn out a wonderful and different granola each time.

This is a pretty simple granola with not too many ingredients. I just couldn't resist the combination of cherries and almonds. I love them together. The only thing that could make it better would be some dark chocolate, although I think I would have to reserve the chocolate addition for a special occasion or maybe as a snack.

Cherry Almond Granola
5 cups old-fashioned rolled oats
1/2-1 cup flaked coconut
2 cups sliced almonds
1 1/2 cups dried cherries, chopped
1/3 cup coconut oil, melted (or other oil)
1/3 cup honey
2 tsp. cinnamon

Preheat the oven to 325 degrees F.

Toss the oats, coconut, almonds, and cherries together in a large bowl. Pour the coconut oil and honey over the oat mixture. Add the cinnamon, and stir with a wooden spoon until all the oats and nuts are coated with the liquids. Pour onto a sheet pan. Bake, stirring about every 5 minutes with a spatula, until the mixture turns a nice, even golden brown, about 15 to 20 minutes.

Remove the granola from the oven and allow to cool, stirring occasionally. Store the cooled granola in an airtight container.


SOURCE:Adapted from Ina Garten.

Linked to...
Potluck Sunday @ Mommy's Kitchen
This Week's Cravings @ Mom's Crazy Cooking
Seasonal Sunday @ Real Sustenance

Saturday, November 6, 2010

Oatmeal Raspberry Pancakes with Berry Coulis


I know, oatmeal raspberry pancakes with berry coulis (koo-lee) sounds so fancy huh? It's really just raspberry syrup, but it's homemade and it's yummy and it's better than anything you could buy at the store.

Pancake fanatic that I am, I still try new pancakes often. Lucky for me my oldest daughter asked for pancakes every morning the past two weeks and I gave in. What can I say? I made some of my old faves (check them out at the bottom of this post), and tried some new ones as well. Now, I didn't end up making fresh pancakes EVERY morning, that just would be crazy. Some days we pulled the leftovers out of the fridge but I think we pretty much ate pancakes one way or another just about every day for those two weeks. And I still have pancake recipes I haven't yet tried. I am always up for trying a new pancake recipe.


Oatmeal Raspberry Pancakes
1 cup rolled oats
2 cups buttermilk, divided
1 cup all-purpose flour
1/4 cup sugar
1 tsp. baking soda
1 tsp. baking powder
1/2 tsp. salt
2 large eggs
1 tsp. vanilla
1-2 cups fresh raspberries, rinsed (you can use thawed, drained frozen as well)


In a bowl, mix oats and 1 cup of the buttermilk; let stand at least 15 minutes or up to 30 minutes.

Meanwhile, in a small bowl, mix flour, sugar, baking soda, baking powder, and salt.

In a large bowl, beat eggs, remaining buttermilk, and vanilla to blend. Stir in flour and oat mixtures just until evenly moistened, then gently stir in raspberries.

Preheat your griddle or frying pan. If using a frying pan you may need to grease it. Pour batter in 1/4-cup portions onto griddle and cook until pancakes are browned on the bottom and edges begin to look dry, about 2 minutes; turn with a wide spatula and brown other sides, 1 1/2 to 2 minutes longer.

Serve the pancakes warm with berry coulis.


Berry Coulis
*2 cups rinsed fresh or thawed frozen blueberries
2 cups rinsed fresh or thawed frozen raspberries
1 1/2 cups sugar
1/4 cup lemon juice

In a 3- to 4-quart pan, combine blueberries, raspberries, sugar, and lemon juice. Bring to a boil over medium-high heat, then reduce heat and simmer, stirring occasionally, until berries begin to disintegrate and mixture starts to thicken, about 15 minutes. Press through a fine strainer into a bowl, extracting as much liquid as possible with the back of a spoon or a spatula; discard seeds and skins. Serve coulis warm; if mixture cools before you're ready to serve, reheat in a microwave oven. If it's too thick, stir in a little warm water.

*I only used raspberries this time because that's all I had but I think it would be fabulous with the blueberries too. Next time I will definitely make it with the blueberries.

SOURCE:Adapted from Sunset Magazine on myrecipes.com.

Linked to...
Recipe Swap Thursday @ Prairie Story

Thursday, November 4, 2010

Pumpkin Seed Pesto


See, I can make healthy things! I swore after I made that pan of brownies the other night that that would be it until Thanksgiving. NO TREATS! I do have an ice cream post waiting to go up but I made it a few weeks ago so it doesn't count. So, if you see anything other than that between now and then, you'll know I'M CHEATING!

Anyway, on to this pesto. So yummy. I had been going through the Whole Foods Market blog and this was one of the first things I bookmarked. I liked the whole pumpkin seed thing because, you know, it's fall and pumpkin is in the air, not that it tastes anything remotely like pumpkin, but that's beside the point. I also liked it because it's dairy-free (and nut-free) and that's a plus because my hubby is lactose-intolerant.

This is a very versatile pesto. You can toss it with some pasta or steamed veggies. It's little thicker than a traditional basil pesto so it would also be good as a sandwich spread, or on some crackers or crostini. We just put it on some fettuccine but it makes quite a bit so I plan on using the leftovers with some gnocchi.

Pumpkin Seed Pesto
2 cups unsalted hulled (green) pumpkin seeds
6 tablespoons extra-virgin olive oil, divided
Salt and pepper to taste
1/4 cup water
2 tablespoons fresh lemon juice, or to taste
3 garlic cloves
1 - 1 1/2 bunches fresh cilantro, roughly chopped

Preheat oven to 375°F. Toss pumpkin seeds with 2 tablespoons of the oil and salt then spread out in a single layer on a large baking sheet. Roast until seeds are puffed and fragrant, 10 to 15 minutes, then set aside to let cool.

Combine seeds in a food processor with water, lemon juice, garlic, cilantro and remaining 4 tablespoons oil. If you're not a huge cilantro fan, start with less then add until it's to your liking. Pulse until mixture forms a coarse paste then season with salt and pepper. Cover and chill until ready to use.

SOURCE:Whole Foods Market Blog

This recipe Linked to Potluck Sunday @ Mommy's Kitchen.

Friday, October 29, 2010

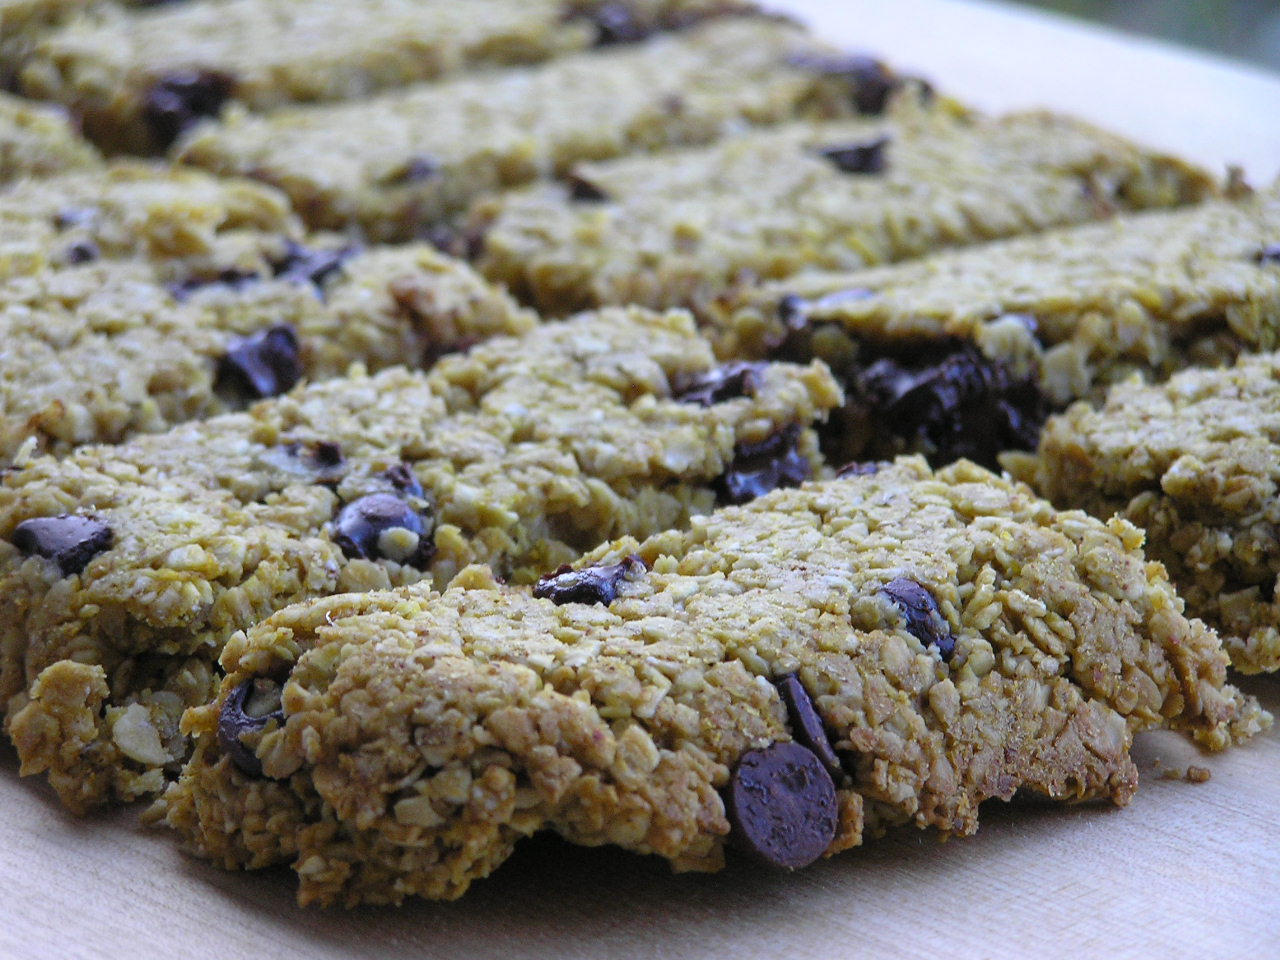
Pumpkin Chocolate Chip Granola Bars


I made these twice in 2 days. I made them the first time for a play group I was hosting and I was expecting to have some leftover. Alas, after everyone was gone, all that was left were a few crumbs. So, I set out to make them again the very next afternoon because they were really good and my kids devoured them. Kids can be finicky, especially when it comes to food, so when I find something that they will eat that's healthy, I stick to it. This is a great snack food that I feel good about giving my family.

I used pumpkin as a binder in this granola because I love the flavor and it's perfect for fall. If you don't like the flavor of pumpkin, you can substitute applesauce or another fruit puree.

Pumpkin Chocolate Chip Granola Bars
3 1/4 cups old fashioned oats
1/2 tsp. pumpkin pie spice
1/2 tsp. cinnamon
1/4 tsp. nutmeg
1/2 tsp. salt
1/4 cup + 2 Tbsp. brown sugar
3/4 cup pumpkin puree
1/4 cup honey
*2-3 Tbsp. coconut oil, melted (or other oil or butter)
1 tsp. vanilla extract
1/2 cup chocolate chips

Preheat oven to 350°F. Spray an 8x8-inch square baking pan or an 8x11-inch bar pan with cooking spray or line with parchment paper.

In a large bowl, combine oats, spices and salt. In a separate bowl, whisk together brown sugar, pumpkin, honey, coconut oil and vanilla until smooth. Pour over oats and stir well, until all of the oats are coated and moist. Stir in chocolate chips.

Evenly press granola into prepared pan. Bake for 30-35 minutes or until golden brown. Remove from the oven and let cool about 10 minutes. Carefully flip pan over onto a cutting board, or lift parchment paper out of the pan. Cut into bars and separate them a little bit so they can cool completely.

You can easily double this recipe, especially since they don't last long! Just bake it in a 9x13 pan.

*The first time I made the granola bars, I didn't use any oil but I thought I would add it the second time to see if it would make the bars a little more moist and plyable. There was not much difference between the two. The second batch was more moist but the oil didn't make them more pliable. Either way they were great.

SOURCE:Adapted from Two Peas and Their Pod

This recipe linked to Putluck Sunday @ Mommy's Kitchen and This Week's Cravings @ Mom's Crazy Cooking.

Thursday, October 21, 2010

Caramel Apple Cinnamon Rolls


Holy Hannah! I don't think I have ever heard my husband mmmm and ahhh over food like he did when he ate these. He absolutely loved them and also thought the caramel frosting was the best frosting ever. I have to say that I thought they were great too and that it was a fun way to change up regular old cinnamon rolls. I really loved how the dough turned out once it was cooked. It was very light and airy, not heavy and dense, and had a great flavor.

Seriously, you should add these to your fall menu sometime soon. Even if you have to give some away, like I did, so you don't eat them all yourself. I like to bake my rolls in round cake or pie pans and drizzle on the frosting while they are still a little warm so it seeps down into every crack and crevice. You could also bake these in 1 or 2 large baking pans as well.

Caramel Apple Cinnamon Rolls
Yield: About 18-20 rolls

For the cinnamon rolls:
3 1/2 cups bread flour
2 tsp. instant (rapid rise) yeast
6 tbsp. sugar
1 tsp. salt
1 tsp. ground cinnamon
Pinch ground nutmeg
5 1/2 Tbsp. unsalted butter, at room temperature
1 large egg, slightly beaten
1 cup plus 2-4 tbsp. whole milk or buttermilk, at room temperature

For the filling:
1-2 Tbsp. unsalted butter
3 Granny Smith apples, peeled, cored and cut into 1/2-inch pieces
1/4 cup sugar
1/2 tsp. cornstarch
1 tsp. ground cinnamon
Pinch ground nutmeg
Pinch salt
1 tsp. vanilla extract

brown sugar
cinnamon

For the frosting:
8 oz. cream cheese
2 Tbsp. unsalted butter
1/3 cup caramel sauce
2 tbsp. milk
1 tsp. vanilla extract
2 cups powdered sugar

In the bowl of a stand mixer, fitted with a dough hook, add the dry ingredients: flour, sugar, yeast, salt, cinnamon and nutmeg. Pulse a few seconds to incorporate. Add the butter, egg and warm buttermilk. Mix on low speed for about 5 minutes; the dough should be silky and supple but not sticky.

Lightly oil a large bowl and transfer the dough to the bowl, turning once to coat. Cover with plastic wrap and let rise at room temperature until doubled in size.

Meanwhile, make the filling. To make the caramelized apples, melt the butter in a skillet over medium-high heat. Add the apple slices, sugar, cornstarch, cinnamon, nutmeg and salt. Mix until the apples are evenly coated. Cook about 10-15 minutes, stirring occasionally. Remove from the heat and stir in the vanilla. Set aside to cool.

Mist a work surface with spray oil. Divide dough in half and set one half aside. Roll the other half out into a rectangle with a rolling pin; if the rolling pin gets sticky, spray with cooking spray, do not dust with flour.

Sprinkle the brown sugar and cinnamon over the surface of the dough, smoothing it out with your hand. Quantities here will vary as I like more than just a dusting of cinnamon and sugar but others like it a little more sparse. Evenly distribute the caramelized apples over the top of the dough.

Starting with the wide edge, roll up the dough into a log. Pinch the seam shut. With the seam side down, slice about 1 to 1-1/2 inch pieces off with a piece of dental floss and transfer them to either a round baking dish, cake pan or baking sheet, sprayed with cooking spray. Place the rolls about 1/2-1 inch apart. Repeat with remaining ball of dough. (I filled 2 round cake pans and 1 pie tin). (For a step by step visual aid, see my orange roll recipe.)

Cover loosely with plastic wrap and let rise at room temperature, until the rolls have grown into each other and have nearly doubled in size.

Preheat the oven to 350˚ F. Bake for 20-30 minutes, or until golden brown. Let cool in the baking about 10 minutes, then transfer to a wire rack.

To make the glaze, combine the cream cheese and butter in a small heatproof bowl and microwave in 15-20 second intervals until it is warm enough to whisk together. Whisk in the caramel sauce, milk and vanilla extract until smooth. Whisk in the confectioners’ sugar until smooth. Swirl the glaze over the top of the cinnamon rolls. Let cool before serving.

SOURCE:Adapted from Annie's Eats


This post is linked to Recipe Swap Thursday @ Prarie Story.

Saturday, October 16, 2010

Whole Wheat Pumpkin Apple Butter Muffins


Yummy, healthy, pumpkin; what more could a girl ask for? The first time I made these muffins my girls devoured them within days. I've been itching to make these again for a while but I turned a few too many zucchini into muffins at the end of the summer and I had to deplete my supply in the freezer before I could make more.

I'm not sure how many of these will get into the freezer, but I'm sure glad I got to make them again. I got this recipe from my friend Jamie. The original recipe was a whole wheat pumpkin muffin but I changed it a bit to add the apple butter. I used my own apple butter, it's pretty simple to make. If you don't have apple butter, you could use applesauce or all pumpkin and no applesauce.

These muffins are great warm out of the oven or probably any other way you could imagine. Spread it with some more apple butter or even this pumpkin butter that I'm dying to try but haven't yet.

Whole Wheat Pumpkin Apple Butter Muffins
1 1/2 cups sugar
1/4 cup oil
1/4 cup yogurt (I used homemade that I strained to make Greek-style yogurt, but any vanilla or plain yogurt will work fine.)
1 1/2 cups water
1 cup pumpkin
1 cup apple butter
3 eggs
3 cups whole wheat flour
1 1/2 tsp. baking powder
1 tsp. baking soda
1 tsp. salt
1 tsp. nutmeg
1/2 tsp. cloves
1 tsp. cinnamon

Mix the wet ingredients together in a mixing bowl. In a separate bowl, combine the dry ingredients. Add the dry ingredients to the wet and mix only until just combined. Let batter sit for 1 hour.

Preheat oven to 400° F. Line 2 muffin pans with liners or spray with cooking spray. Divide batter evenly among the muffin cavities. Bake for about 15-17 minutes or until toothpick inserted in center comes out clean.

This recipe linked to Recipe Swap Thursday @ Prarie Story and Make Ahead Meals For Busy Moms.

Saturday, October 9, 2010

Squash Ravioli


I'm just going to cut to the chase and say that these were good; really good. First of all, I love winter squash, even if nobody else in my family does, and I love using rosemary when I cook savory dishes. The parmesan cheese on top was perfect. I tried a bite without it and it wasn't as complete for me. The saltiness of the cheese just makes it great and balances out the flavors. Oh, and lets not forget the rosemary brown butter; ya just need a tiny bit, but oh so good.

By itself, this ravioli would be a great vegetarian main dish. You can substitute the cream in the puree with veggie broth or coconut milk and omitt the parmesan. It would also be great along side some grilled chicken.

I also have to put a plug in for these four cheese ravioli. I found the recipe earlier this year and we just love them.

Squash Ravioli
1 1-lb. butternut squash; about 2 cups puree (or other winter squash or a combination)
Salt and pepper
5 Tbsp. butter
1/2 small onion, finely diced
1 tsp finely chopped rosemary, plus 1 Tbsp.
2-4 Tbsp. milk or cream
1/4 cup plus Parmesan more for garnish
Pinch of nutmeg
48 wonton wrappers

Preheat oven to 450°F. Halve squash and remove seeds. Season with salt and pepper and place, flesh side down, on a baking sheet. Bake until tender and a knife comes out easily, about 40 minutes. Use a spoon to scoop out flesh; puree in a food processor or blender until smooth.

Melt 1 tablespoon of butter in a skillet. Add onion and cook until tender, about 3 minutes. Add chopped rosemary, squash puree, cream and 1/4 cup Parmesan. Season with salt, pepper and nutmeg, and cook for 1 minute. Remove from heat and allow to cool completely.

Place one wonton wrapper on work surface, keeping the rest covered with a damp cloth. Place about 1-2 teaspoons of filling in the middle of each won ton wrapper, leaving a clear edge around the perimeter. Dip a finger in water and lightly brush around the edges. Fold opposite edges together, making sure to press out any excess air and sealing the edges compeltely. Repeat with the remaining wrappers. Let dry on a lightly floured surface for about 1-2 hours. (If they are not sufficiently dry, they will open up when you boil them.)

Bring a large pot of salted water to a boil. Melt remaining butter in skillet over very low heat, then add 1 Tbsp. rosemary. Cook butter and rosemary until butter turns light golden brown, about 5 minutes; remove from heat. While butter is browning, add ravioli to boiling water, stirring gently so they don't stick together. Cook 3-4 minutes, then carefully drain.

Place 3 ravioli on each plate, top each with 1 Tbsp. browned butter and garnish with 1/2 Tbsp. Parmesan. Serve hot.

Any ravioli left uncooked can go right in the freezer, just separate the layers with some wax paper. They will not keep well in the fridge because the filling is so moist; the wrappers will get sticky. There is no need to thaw the frozen ravioli when you're ready to cook them, just boil for about 6-8 minutes.

SOURCE: Adapted from All You on myrecipes.com.


Linked to...
Recipe Swap Thursday @ Prarie Story.
Seasonal Sunday @ Real Sustenance

Saturday, October 2, 2010

Bittersweet Chocolate Pear Cake and Buttermilk Ice Cream


I have had the recipe for this cake for probably a year or so. I have been waiting for the right occasion to make it. Since pears are in season and I picked up about a bushel of them a few weeks ago I knew now was the time. I couldn't wait to try it.

I found the recipe from Smitten Kitchen when I was looking for a cake to make for my baby's first birthday. The recipe is from a popular little Italian restaurant in New York, Al Di la, is typically served with buttermilk ice cream.

The cake was yummy, browned butter kind of yummy. The process was different that I was used to, because you beat the eggs for so long, and it didn't seem like very much batter, but I guess all that beating makes it light and fluffy. The batter ended up really thick and browned buttery tasting; finger-licking good. I think bittersweet is the perfect chocolate for this cake, it compliments it well.

Al Di La’s Torta di Pere
Courtesy of Al Di La Restaurant in Park Slope, Brooklyn

1 cup all-purpose flour
1 tablespoon baking powder
1/4 teaspoon salt
3 eggs, at room-temperature
4 ounces (1 stick) unsalted butter
3/4 cup sugar
3 pears, peeled, in a small dice
3/4 cup bittersweet chocolate chunks

Preheat the oven to 350°F. Butter a 9-inch springform pan and dust with flour; set aside. (I only had a 10-inch so it was a little flatter, but worked just as well).

Sift the flour, baking powder and salt together, set aside.

Using a mixer fitted with the whisk attachment, whip the eggs on high speed until pale and very thick. (In a professional Kitchen Aid, it takes at least five minutes; on a home machine, it will take nine minutes to get sufficient volume)

While the eggs are whipping, brown the butter. Melt the butter in a medium saucepan (because it will foam a lot) and cook it until the butter browns and smells nutty (about 6 to 8 minutes). It helps to frequently scrape the solids off the bottom of the pan in the last couple minutes to ensure even browning. Remove from the flame but keep in a warm spot.

Add the sugar to the eggs and whip a few minutes more.

Just as the egg-sugar mixture is starting to loose volume, turn the mixture down to stir, and add the flour mixture and brown butter. Add one third of the flour mixture, then half of the butter, a third of the flour, the remaining butter, and the rest of flour. Whisk until just barely combined — no more than a minute from when the flour is first added — and then use a spatula to gently fold the batter until the ingredients are combined. It is very important not to over-whisk or fold the batter or it will lose volume.

Pour into prepared pan. Sprinkle the pear and chocolate chunks over the top, and bake until the cake is golden brown and springs back to the touch, about 40 to 50 minutes or a tester comes out clean.


As for the ice cream, dee-lish as well! I'm not a fan of vanilla ice cream. I never make it and I never buy it. It just doesn't do anything for me and I wouldn't want to waste my calories on it; but that's just me. This buttermilk ice cream was a little sweet with a little tang and lots of creamy. I'd be willing to eat this solo, but it goes great along side this torte or any other, for that matter.

Buttermilk Ice Cream

2 cups heavy cream
1 1/4 cup sugar
6 large egg yolks
2 cups buttermilk
2 teaspoons vanilla
Pinch of salt

In a large, heavy saucepan, combine the heavy cream, buttermilk and one cup of sugar and bring to a simmer over medium heat.

In a large bowl, whisk egg yolks and remaining 1/4 cup of sugar.

Remove the cream mixture from the heat and drizzle a small amount into the yolks, slowly, and whisking constantly to keep the eggs from curdling. Do this a few more times to warm up the yolks before pouring the yolk mixture back into the cream, whisking constantly.

Cook over low heat until the mixture is thick enough to coat the back of a spoon. Whisk in the vanilla, and salt. Cool completely and freeze according manufacturer’s directions.


SOURCE:Smitten Kitchen

Wednesday, September 22, 2010

Mini Orange Chocolate Chunk Cakes


I have actually had this recipe for a while and made these little cakes last year. However, I tucked the recipe away and completely forgot about it until last weekend. My friends and I were having a girls night and I invited them over for dessert afterwards. As I was trying to decide what to make for everyone, this recipe popped into my head and I was glad to make it again.

I absolutely love the chocolate and orange combination, especially when it's dark chocolate, and knew with that I would immediately love these cakes; I was right. These cakes are very moist and I think have the perfect balance of orange and chocolate flavor. While I have made these into mini cakes, you could certainly bake them in any cake pan.


For the cakes:
8 tbsp. unsalted butter, at room temperature
1 cup sugar
2 eggs
2 Tbsp. grated orange zest (2 oranges)
1 1/2 cups all-purpose flour
1/4 tsp. baking powder
1/4 tsp. baking soda
1/4 tsp. salt
1/4 cup freshly squeezed orange juice (1 orange)
3 oz. buttermilk, at room temperature
1 tsp. vanilla extract
1 cup dark chocolate, coarsely chopped

For the syrup:
1/4 cup sugar
1/4 cup freshly squeezed orange juice (1 orange)

For the ganache:
4 oz. dark chocolate, coarsely chopped
1/4 cup heavy cream
1 Tbsp. butter


Preheat the oven to 350 degrees F. Grease and flour a 12 cavity mini bundt pan.

In the bowl of an electric mixer fitted with the paddle attachment, cream the butter and sugar until light and fluffy; 2-3 minutes. Add the eggs one at a time, scraping down the bowl between additions. Mix in the orange zest.

In a small mixing bowl, sift together the flour, baking powder, baking soda, and salt. In another bowl or large liquid measuring cup, combine the orange juice, buttermilk and vanilla. Add half of the flour mixture to the bowl of the mixer and mix on low speed until just incorporated. Add the liquid ingredients, mixing until blended. Add the remaining dry ingredients, mixing on low speed until just combined. Fold in the chocolate chunks with a rubber spatula.

Divide the batter evenly between the prepared pans. Bake for 18-22 minutes (you will have to watch carefully as ovens and altitudes are different) or until a toothpick inserted in one of the cakes comes out clean. Allow the cakes to cool in the molds for 10 minutes.

In the meantime, prepare the syrup. In a small saucepan over medium-low heat, cook the sugar with the orange juice just until the sugar dissolves. Remove the cakes from the pans, place them on a wire rack over a tray, and spoon the orange syrup over the tops of the cakes. Allow to cool completely.

To make the ganache, melt the chocolate, heavy cream and butter in the top of a double boiler over simmering water until smooth and warm, stirring occasionally. Dip the tops of the cooled cakes in the ganache and allow to set.


SOURCE:Adapted from Annie's Eats, originally from Ina Garten.
Related Posts Plugin for WordPress, Blogger...