I'm not really a pie person. But, there are a few times a year where it's practically required to make and/or eat pie. I grew up eating, and actually loving, lemon meringue pie. I like a good pumpkin pie as well. Come to think of it, maybe it's just the crust I can't get on board with. Yes, crusts are beautiful and buttery and flaky, but to me, it's just plain, boring and almost tasteless. I often just eat the filling right out of the shell.
Anyway, over the years, I've embraced pie more and more and have found my favorites that I can make over and over and genuinely enjoy. Take this blackberry pie for example. So good! And this egg nog pie, just in time for the holidays.
This pie today takes the cake! It's everything you want in a dessert...chocolate, peanut butter, smooth and crunchy, salty and sweet. The whole shebang!
Chocolate Peanut Butter Pie with Pretzel Crust
for the crust:
2 cups finely crushed pretzels (4 cups whole pretzels)
13 Tbsp. butter, melted
1/4 cup brown sugar
1 9-inch deep dish pie pan
for the chocolate filling:
8 oz. good quality dark chocolate (use a bar, not chips)
16-20 large marshmallows
1/2 cup milk
1 cup heavy cream
1 tsp. vanilla
for the peanut butter whipped topping:
1 cup heavy cream
1/4 cup smooth peanut butter
2 Tbsp. powdered sugar
1/2 tsp. vanilla
Preheat oven to 350 degrees F.
Combine all ingredients for crust. Press firmly into pie pan and bake at 350 degrees F for 10 minutes. Cool completely.
In a double boiler over medium low heat, melt chocolate, milk and marshmallows. Whisk until smooth. Remove from heat and cool. Whip 1 cup of heavy cream until stiff and fold into cooled chocolate mixture. Fold in vanilla. Pour into cooled crust and chill.
In a mixing bowl, whip remaining cup of heavy cream until stiff. In a separate bowl, whisk about 1/3 of the whipped cream into the peanut butter, powdered sugar and vanilla. Gently fold in the rest of the whipped cream. Spread the whipped topping on top of the pie and chill until ready to serve.
Garnish with chocolate curls and crushed pretzels, if desired.
Showing posts with label Chocolate. Show all posts
Wednesday, November 22, 2017
Monday, September 21, 2015
Pumpkin Chocolate Chip Buttermilk Waffles
Nevermind that I have salsa recipes from the summer to still post, let's move right along to fall with these waffles!! I have been waiting to make these for a couple weeks. I LOVE just about everything the fall brings, especially pumpkin chocolate chip. One of my favorite combos. These are pretty much my regular buttermilk waffles, with a little extra fall punch, so not a ton of work. These are perfect for Sunday brunch with friends or family because they make a HUGE plateful. But even if you don't have company, they keep really well. I like to just throw them in the freezer and pull them out when we want them. When you're ready to eat, just toss them in the toaster and they'll warm up nice and good. I like to serve them with pumpkin maple syrup or cinnamon sugar sprinkled on top. Sometimes I even sprinkle the cinnamon sugar on top of the batter in the waffle iron. (If you do this, make sure you spray it with cooking spray so it doesn't stick.)
Pumpkin Chocolate Chip Buttermilk Waffles
2 cups buttermilk
1 cup pumpkin puree
1 Tbsp. vanilla
4 eggs, separated
3 Tbsp. sugar
6 Tbsp. unsalted butter, melted
1 1/4 cups all-purpose flour
1 1/4 cups whole wheat flour
2 tsp. baking powder
3/4 tsp. baking soda
3/4 tsp. salt
1 1/2 tsp. cinnamon
1/4 tsp. ground ginger
1/4 tsp. ground nutmeg
1/2-3/4 cup chocolate chips
Melt butter and set aside to cool slightly. Preheat waffle iron.
In a large mixing bowl, whisk together buttermilk, pumpkin, vanilla, sugar and egg yolks. Slowly whisk in melted butter. In a separate bowl, stir together the remaining dry ingredients then gently stir them in with the wet ingredients until just incorporated.
In a separate mixing bowl, beat egg whites until stiff peaks form. With a spatula, gently fold them into the batter until almost incorporated, add the chocolate chips then fold in a few more times. NOTE: Egg whites do not have to be completely incorporated, just mostly.
Pour batter onto waffle iron and cook according to manufacturer's directions. Serve with choice of toppings: pumpkin maple syrup, syrup, cinnamon sugar, or powdered sugar.
Pumpkin Maple Syrup:
4 Tbsp. pumpkin puree
6 Tbsp. pure maple syrup
splash of vanilla
pinch of cinnamon
Labels:
Breakfast,
Chocolate,
Fall Baking,
Pumpkin
Sunday, June 21, 2015
S'mores Layer Cake
Right before my birthday this year I posted on facebook a couple of times that I was getting ready to choose my birthday cake. Usually it takes about a month (the time frame between my husband's birthday and mine) to decide but this year seemed busier than usual and my birthday was getting closer and I still didn't have a cake picked out. SO, a week or two before my birthday hubby and I were out to a play and waiting for it to start so I whip out my phone and we scroll through alllllllll the cakes I have pinned (seriously there's a ton!). When I saw this one, at the very end mind you, I knew it was the one. I LOVE anything s'mores and this cake looked just absolutely delicious. Plus, it's from Smitten Kitchen, so I knew I couldn't go wrong.
I was so, so happy with this cake! Luckily I was able to share with a bunch of people, otherwise I would have been in BIG trouble. I love how the cake tastes exactly like graham crackers and the ganache practically melts in your mouth, like it had been melted by the campfire. I go for a classic s'more and to me that's only with milk chocolate, which it weird because otherwise I pretty much only like dark. I really like the taste of Hershey's milk chocolate, that's what I always use when making s'mores. Feel free to use something different but whichever chocolate you choose, make sure it's good quality. Since the ganache is basically only cream and chocolate the flavor really counts.
S'mores Layer Cake
for the cake:
2 sticks unsalted butter, room temperature
2/3 cup granulated sugar
1 cup dark brown sugar
4 large eggs, room temperature
2 cups all-purpose flour
2 cups honey graham cracker crumbs (about 1 1/2 sleeves of crackers processed until it's a powder)
2 tsp. baking powder
3/4 tsp. baking soda
3/4 tsp. salt
1/2 tsp. cinnamon
2 cups buttermilk, well shaken and at room temperature
for the milk chocolate ganache:
16 oz good quality milk chocolate
1 1/3 cup heavy cream
pinch of salt
for the meringue frosting:
4 egg whites
1 cup granulated sugar
1/4 tsp. cream of tartar
1 tsp. vanilla extract
mini marshmallows, for extra garnish, if desired
Preheat oven to 350 degrees F. Grease 2 9-inch round cake pans, line with parchment paper, then grease the top of the parchment. Set aside.
In a mixing bowl, whisk together flour, graham cracker crumbs, baking soda and powder, salt and cinnamon. In the bowl of a stand mixer, beat together butter and sugars until they are light and fluffy; about 2-3 minutes. Add eggs, one at a time, beating after each addition. Add the flour mixture alternating with the buttermilk, in three additions. Scrape down the sides and mix until just combined.
Divide the batter between the two cake pans and bake about 30-35 minutes, or until a toothpick inserted in center comes out clean. Cool in pans about 10 minutes then remove from pans and cool completely on a wire rack. Wrap each cake in plastic wrap and chill in refrigerator at least 30 minutes (I typically refrigerate overnight.) *NOTE: This cake is very soft and tender, especially when it's still a little warm. When lifting and wrapping the cake be very careful so it doesn't break.
To make the ganache place the heavy cream and salt in a sauce pan and barely bring to a simmer over medium heat. Add the chocolate chips, cover and remove from heat. Let sit 5 minutes. After 5 minutes, remove lid and whisk until chocolate is completely incorporated and mixture is smooth and sheen. Transfer to a bowl and refrigerate until firm enough to spread on the cake.
To make the meringue frosting, place the egg whites, cream of tartar and sugar in a heat proof bowl. Place over a simmering pot of water and whisk constantly for about 3 minutes, until sugar is dissolved and it's warm to the touch. Transfer to the bowl of a stand mixer with a whisk attachment, or use electric beaters. Beat until stiff glossy peaks form, 4-7 minutes then add vanilla and mix in.
To assemble the cake, remove from the fridge and unwrap. Using a long serrated knife carefully slice each cake in half. Place the bottom half of one cake on cake plate. Spread with about 1/3 of the ganache. Place top half on top of the ganache and then spread another 1/3 of the ganache over that. Place the top half of the second cake top down over the second layer of ganache. Spread with remaining ganache and place the bottom half of the second cake, bottom up, on the very top. Quickly do a crumb coat with the meringue and place in the fridge about 10-15 minutes to let it set a bit. Bring it back out and generously frost the cake, with extra marshmallows for garnish, as desired. Brown with a kitchen torch. Keep leftovers covered and refrigerated.
SOURCE: Smitten Kitchen Cookbook
Some of my other favorite birthday cakes:
Cherry Chocolate Cake (#1 FAVE made this so many times!)
Chocolate Raspberry Truffle Cake
Neapolitan Layer Cake
Snickerdoodle Cake
Sweet and Salty Cake
Friday, June 5, 2015
Nutella Stuffed Croissant French Toast
It is a rare occasion that I make something like this for breakfast. I almost can't stand to serve my kids something that's over the top sweet that early in the morning. However, I think I can get away with this french toast because croissants aren't really sweet at all, and neither is the whipped cream (unless you buy it premade at the store), and I just serve it with fresh berries. So I'm totally good right!!
I almost never buy croissants because they're kind of expensive. But I love to shop the reduced bakery rack at a couple of my favorite grocery stores. Occasionally there will be a package or two of these babies, so I just grab them and throw them in the freezer for when I'm ready to use them. Day old bread is perfect for french toast since it's a little dry it'll soak up the egg mixture a little better.
This french toast is easier than it looks and SOOOO worth it!! It just takes a few minutes to pull everything together and you'll be on a roll flipping these babies on the griddle in no time.
Nutella Stuffed Croissant French Toast
1 package of croissants (either 5-6 large ones or about 12 small ones)
Nutella
2 large eggs
2-3 Tbsp. whole milk, heavy cream or half and half
1 tsp. vanilla
1/2 tsp. cinnamon
1 Tbsp. sugar
garnish:
whipped cream (homemade or store bought)
fresh berries
Preheat pancake griddle to about 300 degrees F. Alternately you can cook these in a large frying pan, heated to medium-low. Add a little butter to the pan when you're ready to cook the croissants.
In a small shallow dish whisk together the eggs, milk, vanilla, cinnamon and sugar. Set aside.
Slice each of the croissants in half and spread on nutella as desired. Place the croissants in the egg mixture and let them hang out to soak it up. Flip them to soak on the other side.
Place croissants on the griddle and let cook about 3-4 minutes, or until golden brown. Flip and cook another 3-4 minutes.
Serve warm with whipped cream and fresh berries.
Labels:
Breakfast,
Chocolate,
Kid-Friendly,
Quick n' Easy
Tuesday, February 10, 2015
Cranberry Pistachio and Dark Chocolate Granola
I used to be a granola making machine! I got a few in my recipe box that I loved and used all the time, then I sort of took a break. You know how things go...life happens. After our last stash of Almond Joy Granola (my fave!) was gone I decided to try a new recipe. Actually the base is pretty similar to most of the granola I make, but the add-ins are what make it unique and delicious. I've never put pistachios in granola before but I was pleasantly surprised. I love them by themselves and their delicious taste and saltiness gives a great contrast in flavors to the sweet cranberries and dark chocolate. This will definitely be up there in my top faves!
Cranberry Pistachio and Dark Chocolate Granola
4 cups rolled oats
1 cup crispy rice cereal
1- 1 1/2 cups sweetened flaked coconut
1/4 cup coconut oil
1/4 cup water
3 Tbsp. brown sugar
3 Tbsp. honey
1 Tbsp. vanilla
1 Tbsp. cinnamon
1/2 tsp. ground ginger
1 cup salted pistachios
1 cup dried cranberries
1 cup dark chocolate chips
Preheat oven to 325 degrees F.
In a large mixing bowl, combine oats, cereal and coconut. In a smaller microwave-safe mixing bowl, add coconut oil, water, brown sugar, vanilla, cinnamon and ginger. Microwave about 30 seconds to melt coconut oil and whisk together until combined. Pour over oat mixture and stir until oats are well-coated.
Spread granola out on 1 or 2 cookie sheets. Bake for 20-25 minutes, stirring every 5-10 minutes. If you use only one cookie sheet, use the longer cook time but if using two sheets the granola will brown quicker so stir more frequently and use the shorter cook time.
Allow granola to slightly cool then add pistachios, cranberries and dark chocolate chips. Mix in and let it sit a few minutes so chocolate melts a little. Stir just a few times so the chocolate spreads just a little but doesn't coat everything. This will give you clusters perfect for popping in your mouth.
Tuesday, January 27, 2015
The Best Brown Butter Chocolate Chip Cookies
Who doesn't love a warm chocolate chip cookie right out of the oven? Mmm, there's almost nothing better (except maybe the cookie dough). Just when I think I've got all the chocolate chip cookie recipes I'll ever need, I try a new one that goes in the recipe box.
I was craving chocolate chip cookies like MAD the other day and for some reason wanted to try a new recipe. Although I absolutely love my current go-to Brown Butter Chocolate Chip Cookies and these Peanut Butter Oatmeal Chocolate Chip Cookies (my hubby's favorite), there was just something about this recipe that drew me to it. I had to try it! The method is similar to the brown butter CCCs and hey, the recipe is from Joy the Baker, so I knew I couldn't go wrong there.
I've learned a few things over the years from baking many, many, MANY batches of cookies. So if you find a recipe with similar methods, you're sure to have a winner.
1-Whip it, whip it real good!!! When you cream the sugar and butter, don't just beat until it's combined, beat it for a good 3-4 minutes until it's light and fluffy. It spreads out the sugar granules and incorporates air into the dough resulting in a more tender cookie.
2-Use a combination of both white and brown sugars. I learned this a long time ago from Alton Brown on "Good Eats." All white sugar will make a crispy cookie that spreads more, while adding brown sugar helps add a little moisture as well as chewiness.
3-Chill! You don't have to chill the dough very long (20 minutes) but chilling the dough will help the cookies from spreading too quickly.
4-Low and slow. Don't be tempted to turn up the heat! Use a gentle heat (350 degrees) and slightly underbake and you'll have a soft, moist and chewy cookie.
5-Use a chocolate bar instead of chocolate chips. Chocolate chips have stabilizers that keep them from melting as easily as a chocolate bar. Plus by chopping up a bar of chocolate, you not only get chunks of chocolate but little shards throughout the whole cookie, thus chocolate in every bite.
The Best Brown Butter Chocolate Chip Cookies
1 cup butter (2 sticks), room temperature
1 cup brown sugar, packed
2 tsp. vanilla
1 tsp. molasses
1/2 cup granulated sugar
1 egg
1 egg yolk
2 1/4 cup all-purpose flour
1 tsp. baking soda
1 tsp. salt
1 cup semi-sweet or dark chocolate, chopped
1 cup pecans, roughly chopped
1/2 cup sweetened, flaked coconut, toasted
Place 1 of the sticks of butter in a small saucepan. Melt the butter over medium heat, swirling the pan occasionally. Once it's melted, it'll start foaming then it'll start popping. Keep a close eye on it, continuing to swirl. Once the butter starts smelling nutty and the brown bits on the bottom turn amber in color, remove it from the heat. Allow to cool completely.
In the mean time spread the coconut out on a cookie sheet and place under the broiler until just starting to brown. Don't take your eye off it. It can go from toasted to completely burned in a matter of seconds! Remove from oven and set aside to cool.
In a stand mixer, fitted with a paddle attachment, cream the remaining stick of butter with the brown sugar about 3-4 minutes, stopping to scrape the sides as necessary. Mix in the vanilla and molasses.
Add the cooled browned butter and the granulated sugar and cream another 2 minutes until light and fluffy. Add egg and egg yolk one at a time and mix. Add in flour, baking soda and salt and mix until mixture it uniform. Gently fold in chopped chocolate, toasted coconut and pecans.
Scrape the dough out onto plastic wrap and flatten into a disc. Refrigerate about 20-30 minutes. Alternately, you can scoop out all the dough into balls ahead of time, then refrigerate the balls.
Preheat oven to 350 degrees F.
Once dough is chilled, scoop dough out onto cookie sheets, either using a small cookie scoop or making about 2-inch balls. Place 9 balls per cookie sheet. Bake 12-15 minutes, until tops just start to get golden. Remove from oven, cool a minute or two on the cookie sheet the cool completely on a wire rack.
SOURCE: Joy The Baker
Tuesday, July 22, 2014
Cherry Chocolate Pancakes
I know, call me crazy, I have managed to get not one, but two posts up this
Not only do we love summer fruit when it comes on, we also LOVE pancakes!! Hence the 29 different recipes on the blog. Funny thing was I hadn't even planned on making these, let alone blog blog about them, until I had actually made them. It's been more than a year since my last pancake concoction, so I knew it was time for another one.
Cherries and chocolate are one of my favorite flavor combinations. I used to make this cake all the time, especially on my birthday and it's still a favorite to this day. These pancakes highlighted the fresh cherries perfectly and were wonderfully complimented by the dark chocolate (chocolate-duh!). The effort level for this recipe is still minimal; the only extra step is chopping the cherries and chocolate. So, you can still flip these out in a short amount of time and still enjoy your morning.
Cherry Chocolate Pancakes
1/2 cup all-purpose flour
1/2 cup whole wheat flour
1 tsp. baking powder
1/2 tsp. salt
1/2 tsp. baking soda
1 Tbsp. sugar
1 cup buttermilk
1 egg
2 Tbsp. oil or melted butter
1/4 tsp. almond extract
1/2 cup fresh cherries, pitted and roughly chopped, plus extra for garnish
1/4 cup dark chocolate bar, roughly chopped, plus extra for garnish
In a mixing bowl, whisk together sugar, buttermilk, egg, oil and almond extract. Add flours, baking powder, soda and salt. Whisk until just combined. Gently fold in cherries and chocolate. Let batter sit while griddle heats up.
Pour batter by 1/4 cup onto griddle. Cook on one side until bubbles start to form and sides begin to look dry; about 2-3 minutes. Flip pancakes and cook another minute or two on the other side. Repeat with remaining batter.
Serve warm with butter, syrup and additional fresh cherries and chocolate, if desired.
more cherry chocolate love...
Double Cherry Chocolate Cookies
Cherry Chocolate Scones
Cherry Chocolate Ice Cream
Sunday, May 25, 2014
S'mores Trifle
When life gives you lemons you make lemonade right? Well I say, when life gives you ugly chocolate cupcake you make trifle. I have conquered a lot (relatively speaking) as a home cook/baker, but for some reason chocolate cupcakes, not chocolate cake, but specifically CUPCAKES just seem to evade me.
This is not even the first time this is happened to me. In fact, I think all the chocolate trifles I have made are a result of a failed chocolate cupcake attempt, except maybe this trifle (be still my heart). I should learn better.
This year for my birthday I was really trying to be good, dessert-wise. I have been limiting my sugar and only eating sweets once a week so I thought cupcakes would the perfect little heavenly bite, just enough but not overdoing it. Then if I had too many leftover I could just give some away.
Oh but no, those sunken chocolate cupcakes stuck all over the pan had to rear their ugly faces. Really, I should learn. However, it actually turned out good; making the cupcakes into a trifle. I kept with the s'mores theme that I wanted (hello is it summer yet!!!) and I ended up taking them to a church barbecue, and brought home NO leftovers. Score!
You can thank me now for this, 'cause you'll have something to take to every gathering you attend throughout the summer.
S'mores Trifle
1 13x9 pan of your favorite chocolate cake (from scratch or a box), baked and cooled
3 cups graham cracker crumbs
1 12-oz bag milk chocolate chips (good quality)
1/2 cup heavy cream
1 bag mini marshmallows
For the milk chocolate ganache, pour chocolate chips out into a small mixing bowl. In a small saucepan, heat heavy cream to just a boil then pour it over the chocolate chips. Cover and let sit for 5 minutes. Remove cover and whisk until smooth.
To assemble trifle, layer about half of the cake in the bottom of a trifle bowl. Top with 1-1 1/2 cups of the graham cracker crumbs and drizzle 1/2-3/4 cup of the ganache. Add about 1/3 of the bag of mini marshmallows. (You can toast the marshmallows if you want, I happened to use my kitchen torch but it isn't necessary.) Repeat layers with remaining cake, graham cracker crumbs, ganache and marshmallows. (Note: you may not want all of the graham cracker crumbs or ganache, you can use personal judgement there. I also reserved a tiny bit of crumbs and ganache to for garnish.)
To toast the top layer of marshmallows there are a few ways it can be done. The easiest way would be to use a kitchen torch. You could also put the whole bowl under the broiler (after you add the marshmallows) in the oven for about 3-4 minutes watching very closely; and you may have to take out the top rack as trifle bowls tend to be on the tall side. The last way you could toast the marshmallows would be to lay them out on a large baking sheet, put them under the broiler for 3-4 minutes then remove them from the oven, allow them to cool then transfer them to the trifle and garnish as desired.
Enjoy!
Thursday, February 27, 2014
Chocolate Coconut Bread Pudding
Here in Utah we have a local favorite place to eat called Kneaders. It's kind of a bakery/cafe type that's real homemade. A few years ago I stopped in to one of the locations and decided to try their German Chocolate Bread Pudding, because I have a hard time resisting things with chocolate and coconut, and I was in heaven!! It was one of the most delicious things I have ever tasted. I have only been back once to have it again and I have sorely missed it.
When we moved to our current house I decided to give it a try at the one closer to us, but it was not the same. Needless to say, I was disappointed but I set out, bound and determined, to make my own that was equally delicious. I searched for a while but was never satisfied with what I found, until one day I was back in to Kneaders for lunch. I got the girl behind the counter chatting about the bread pudding and she gave away some of the secrets about each of their flavors. When she mentioned that the chocolate coconut one was made with croissants it was like a light went off in my head. That was what I needed to finish my recipe that I had started.
So, without further delay, I give you this delicious dessert you are sure to crave as much as I have.
Chocolate Coconut Bread Pudding
4-5 large croissants, day old (*I always look for them first on the day-old bakery rack, you'll get them cheaper too!)
1/2 cup full-fat coconut milk, plus more for drizzling
3/4 cup half and half or heavy cream
4 eggs
1/3 cup sugar
1 tsp. vanilla (can add a drop or two of coconut extract if you want more coconut flavor)
1/2 cup semi-sweet or dark chocolate chips, plus more for sprinkling
1/2 cup shredded, sweetened coconut
shaved coconut for garnish, if desired
Spray a 9-inch or similar baking dish with cooking spray (I happened to use an 8.5x11-inch baking dish). Cut croissants into chunks and place in prepared baking pan. Sprinkle 1/2 cup chocolate chips and 1/2 cup shredded coconut over the croissants. Shake the pan a little so they can distribute a little.
In a mixing bowl, whisk together milk, cream, eggs, sugar and vanilla. Pour over the top of croissants, pushing them down into the milk mixture a little bit to get them soaking it up. Let it stand about 10-30 minutes. Preheat oven to 350 degrees F.
Bake in preheated oven about 25-30 minutes. *Optional: While bread pudding is baking, put a handful of shaved coconut in a skillet and toast until lightly golden. Set aside.
When bread pudding is done cooking, remove from oven and sprinkle a small handful of chocolate chips over the top as well as the toasted coconut. Allow to cool. Serve warm with an extra drizzle of coconut milk, if desired.
Friday, February 7, 2014
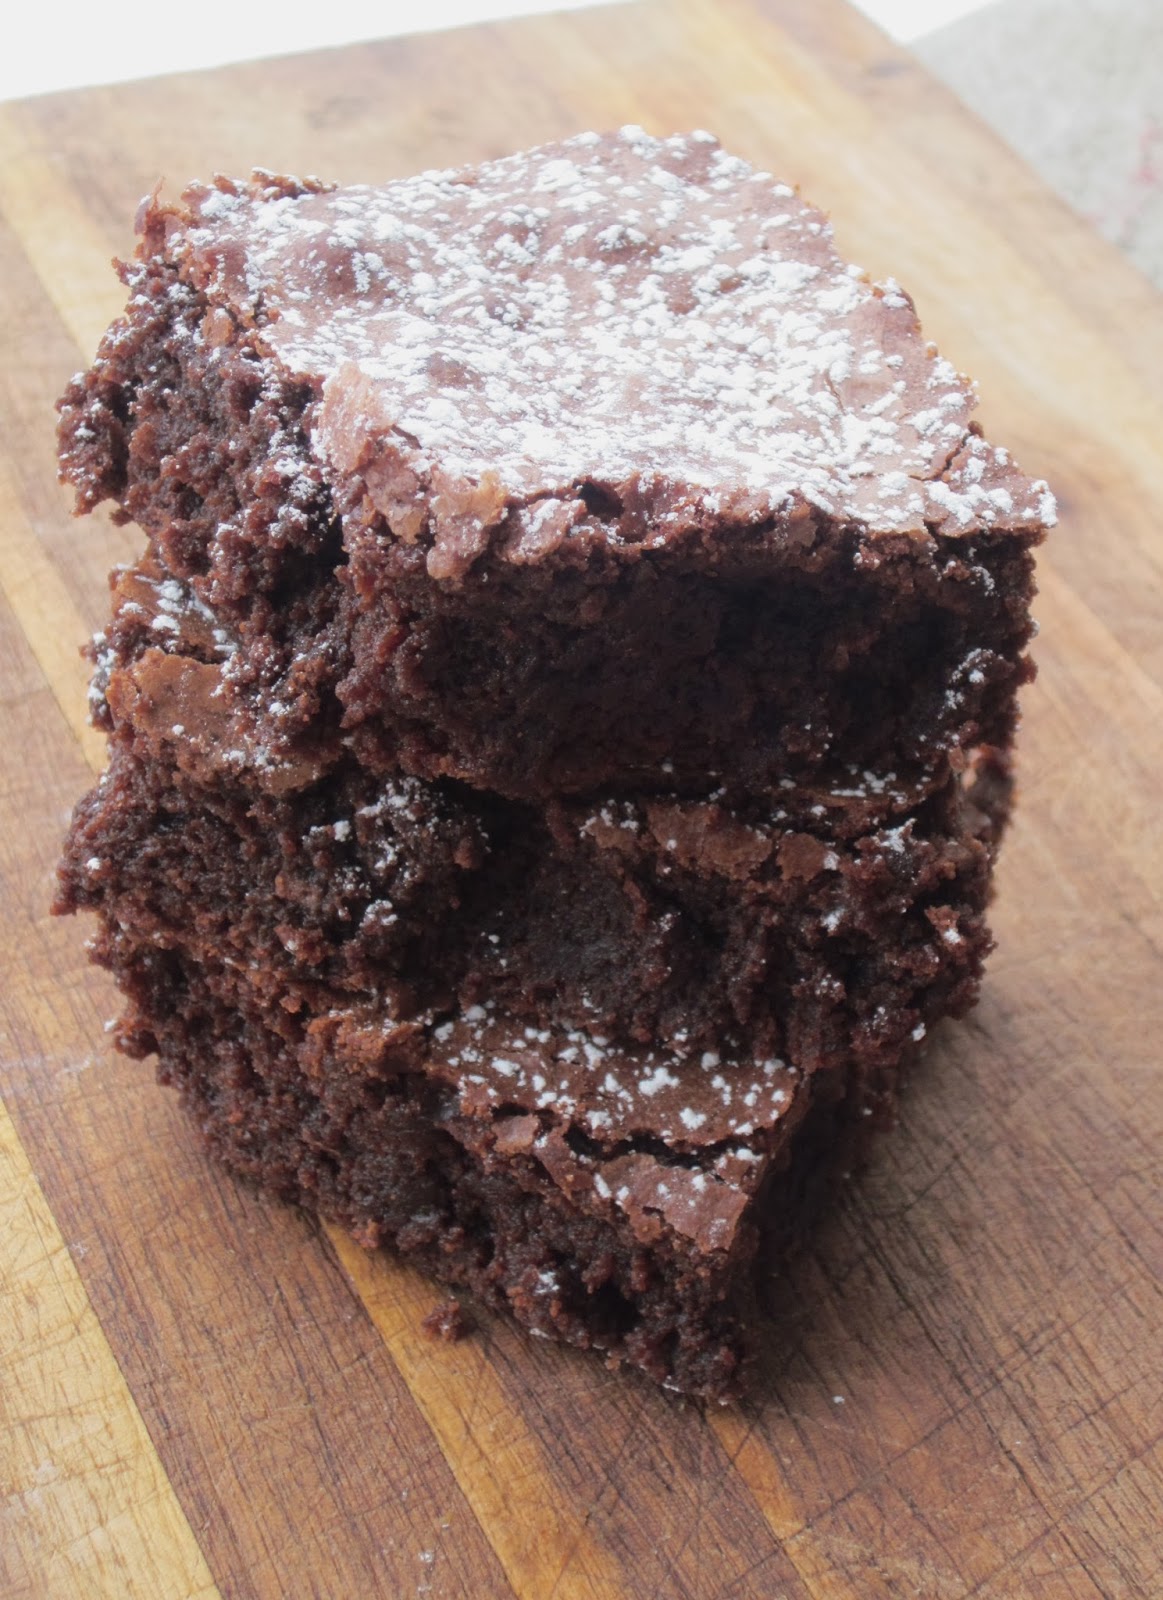
One Bowl Brownies (AKA: The Baked Brownie)
For years, my go-to treat, when I needed a chocolate fix or even just a sweet fix, was brownies, and not the scratch kind. I used brownie box mixes forever, mostly because of convenience, but also, I was hard-pressed to find a homemade recipe that was as thick and fudgey and ooey-gooey as the box mix kind. By the way, if you're more of a cake-like brownie lover, this may not be the brownie for you.
I was SOOOO excited when I found this recipe a few years. Not only did they fit my high expectations for a homemade brownie, they were so easy and I only had to dirty ONE bowl. SCORE! If you've never checked out the Baked Cookbook you should. It has some amazing dessert recipes that are a little off the cuff. Amazing.
So, if you're in the mood for a quick treat this weekend, whip these up in your favorite mixing bowl and just try and wait until they are cool enough to dig in...I dare ya.
The Baked Brownie
3/4 cup flour
1/2 tsp. salt
5.5 oz dark chocolate, chopped (I like to use Trader Joe's Pound Plus bars)
1/2 cup butter, cut into chunks
3/4 cup granulated sugar
1/4 cup brown sugar
1 Tbsp. cocoa powder
1 tsp. vanilla
*3 eggs
Preheat oven to 350 degrees F. Grease an 8 or 9 inch baking pan and set aside.
In a microwave-safe bowl, place butter and chopped dark chocolate. Microwave on 50% power, 30 seconds at a time, stirring after each interval, until smooth.
Add sugars, cocoa powder and vanilla and whisk to combine. Make sure mixture isn't too hot, then add eggs and whisk to combine again.
Sift in flour and salt. Stir until just combined. Pour batter into prepared baking pan and bake 28-30 minutes, rotating pan half way through baking time. Brownies are done when toothpick inserted in center comes out just the tiniest bit sticky.
Place brownies on a wire rack until completely cooled.
*If doubling recipe for a 9x13-inch pan, only use 5 eggs.
SOURCE: Slightly adapted from Baked: New Frontiers in Baking, by Matt Lewis & Renato Poliafito
Friday, September 20, 2013
Almond Joy Granola
I love making my own granola. It's so versatile and it's great for breakfast, brunch or even snacking. Usually before I make a batch, I scour my cupboards and pull out all the little bags of dried fruit and nuts then toss together what looks good.
So, right before I made this I had the contents of two cupboards all over my counter. At the last minute I decided to scratch everything and just throw together some almonds, shaved coconut and chocolate. Totally uncomplicated and easy. Totally delicious!
I LOVE anything coconut and I about died when I found these Roasted Coconut Chips at Trader Joe's. Then I found them at Sprouts and saved them because I knew I'd eventually use them for my granola. Let me tell you, they're fabulous in this granola. My other favorite part...the chunks of chocolate...duh!! The trick here is to add the chocolate after the granola has baked and cooled about 10 minutes. Then only slightly stir them in so they kinda melt. When they harden, you have these delicious little bites of almond joy!
Almond Joy Granola
3 cups rolled oats
2 cups shaved coconut
1 cup chopped almonds
2 Tbsp. coconut butter
2 Tbsp. coconut oil
2 Tbsp. honey
1 1/2 Tbsp. brown sugar
1 cup mini semi-sweet chocolate chips
Preheat oven to 325 degrees F.
In a large mixing bowl, toss together oats, coconut and almonds. Set aside.
In a smaller bowl, add coconut butter, coconut oil, honey and brown sugar. Gently heat until coconut oil is melted. Whisk until smooth. Pour over oat mixture and fold in until completely coated.
Spread mixture out evenly in a large cookie sheet. Bake for 10 minutes. Remove from oven, stir and spread out again. Return pan to oven and cook another 10 minutes. Remove and stir again. If it's not golden enough to your liking bake UP TO 5 minutes more.
Cool granola in cookie sheet set over a wire rack about 10 minutes. While granola is still slightly warm, sprinkle chocolate chips over the top and stir just a little bit, so there's chunks of chocolate rather then melting the chocolate completely and having it cover all the granola. Cool granola completely. Break up any large chunks and place in an airtight container.
Friday, August 16, 2013
S'mores Fudge Bars
I obviously didn't get enough s'more goodness on National S'more day last week. I just had to tempt fate and make these dang things. Then I went and figured out how many calories were in each one...yeah, don't do that!
These are seriously one of those things are are just soooo good, but you really should just stop at one. They are sweet and rich and perfect!
Each layer has it's own deliciousness about it. The graham layer is buttery and slightly salty and, of course, crumbly and crunchy. The chocolate fudge layer is smooth and milk chocolaty. I highly suggest you get Hershey's brand milk chocolate so it has that quintessential s'more taste. The marshmallow layer is homemade goodness that far surpasses the store bought stuff.
The hardest part about making these s'mores bars is waiting until they are completely set! If you try to pull them out of the pan too early, the chocolate will start to seep out. I put mine on the counter first, then got impatient and put them in the fridge, then finally couldn't hardly stand it any longer and threw them in the freezer!!
S'mores Fudge Bars
for the graham layer:
2 cups graham cracker crumbs
1/2 cup butter, melted
1/4 cup sugar
1/2 tsp. salt
for the chocolate layer:
2 cups Hershey's milk chocolate chips
1 14-oz can sweetened condensed milk
for the marshmallow layer:
3/4 cup sugar
1/2 cups light corn syrup
1/4 cup water
1/4 tsp. salt
2 egg whites
1/4 tsp. cream of tartar
1 1/2 tsp. vanilla extract
Preheat oven to 350 degrees F. Line a 9-inch square baking pan with foil and spray with cooking spray.
Combine all the ingredients for the graham layer and press it into the baking pan. Bake for 10 minutes.
While graham layer is baking, combine milk chocolate chips and sweetened condensed milk in a medium saucepan. Heat, over medium-high heat, stirring frequently, until completely melted and smooth. Immediately pour over graham layer.
In a mixing bowl, fitted with a whisk attachment, whisk egg whites and cream of tartar until soft peaks form.
In a small saucepan, combine the sugar, corn syrup, water and salt. Boil until candy thermometer reads 240 degrees F.
Turn mixer on low and slowly drizzle syrup into the bowl. Once it's all added, scrape down sides and turn mixer to medium and beat another 5-7 minutes or so, until mixture is thick and glossy. Add vanilla in very last.
Spread fluff on top of chocolate layer and smooth with off-set spatula.
Turn broiler on and place pan first on bottom rack of oven for 2-3 minutes, or until puffy and getting light brown-don't take your eyes off the oven!!! Move the pan up to the top rack and let it finish browning another 30-60 seconds or so.
Cool COMPLETELY!! This may take several hours depending on your method of cooling. Using the foil, pull bars out of pan and cut into about 1 1/2 in squares.
Bars will keep in an airtight container on the counter for 2 days or 5 days in the fridge. Store any leftover fluff in the fridge for up to 2 weeks.
SOURCE: Cookies & Cups
These are seriously one of those things are are just soooo good, but you really should just stop at one. They are sweet and rich and perfect!
Each layer has it's own deliciousness about it. The graham layer is buttery and slightly salty and, of course, crumbly and crunchy. The chocolate fudge layer is smooth and milk chocolaty. I highly suggest you get Hershey's brand milk chocolate so it has that quintessential s'more taste. The marshmallow layer is homemade goodness that far surpasses the store bought stuff.
The hardest part about making these s'mores bars is waiting until they are completely set! If you try to pull them out of the pan too early, the chocolate will start to seep out. I put mine on the counter first, then got impatient and put them in the fridge, then finally couldn't hardly stand it any longer and threw them in the freezer!!
S'mores Fudge Bars
for the graham layer:
2 cups graham cracker crumbs
1/2 cup butter, melted
1/4 cup sugar
1/2 tsp. salt
for the chocolate layer:
2 cups Hershey's milk chocolate chips
1 14-oz can sweetened condensed milk
for the marshmallow layer:
3/4 cup sugar
1/2 cups light corn syrup
1/4 cup water
1/4 tsp. salt
2 egg whites
1/4 tsp. cream of tartar
1 1/2 tsp. vanilla extract
Preheat oven to 350 degrees F. Line a 9-inch square baking pan with foil and spray with cooking spray.
Combine all the ingredients for the graham layer and press it into the baking pan. Bake for 10 minutes.
While graham layer is baking, combine milk chocolate chips and sweetened condensed milk in a medium saucepan. Heat, over medium-high heat, stirring frequently, until completely melted and smooth. Immediately pour over graham layer.
In a mixing bowl, fitted with a whisk attachment, whisk egg whites and cream of tartar until soft peaks form.
In a small saucepan, combine the sugar, corn syrup, water and salt. Boil until candy thermometer reads 240 degrees F.
Turn mixer on low and slowly drizzle syrup into the bowl. Once it's all added, scrape down sides and turn mixer to medium and beat another 5-7 minutes or so, until mixture is thick and glossy. Add vanilla in very last.
Spread fluff on top of chocolate layer and smooth with off-set spatula.
Turn broiler on and place pan first on bottom rack of oven for 2-3 minutes, or until puffy and getting light brown-don't take your eyes off the oven!!! Move the pan up to the top rack and let it finish browning another 30-60 seconds or so.
Cool COMPLETELY!! This may take several hours depending on your method of cooling. Using the foil, pull bars out of pan and cut into about 1 1/2 in squares.
Bars will keep in an airtight container on the counter for 2 days or 5 days in the fridge. Store any leftover fluff in the fridge for up to 2 weeks.
SOURCE: Cookies & Cups
Monday, June 17, 2013
Fresh Raspberry Scones
One thing I love about summer is the abundance of fresh produce, especially fresh berries. Occasionally berries will go a on a super sale and I can't help but stock my freezer full, namely for smoothies. However, I ALWAYS have to keep some out fresh to enjoy their goodness. I have to restrain my girls or they would eat the lot within minutes, but I do give them their fair share before I have a go at them. I usually limit my use to just one baked goodie and eat the rest fresh as well.
Fresh raspberries are so delicious in simply baked treats and I knew they would shine in these scones. Pair that with some dark chocolate and buttermilk and you have yourself a little piece of heaven!
Fresh Raspberry Scones
1 1/2 cups whole wheat flour
1/2 cup rolled oats
1 Tbsp. baking powder
1/4 cup sugar
1/2 tsp. salt
5 Tbsp. unsalted butter, chilled and cut into pieces
1 cup buttermilk
1/2 tsp. almond extract
1/3 cup dark chocolate chips
1 cup fresh raspberries
Preheat oven to 425 degrees F.
In large work bowl of a food processor fitted with steel blade, add flour, oats, baking powder, sugar and salt. Pulse a few times to combine. Add butter and whiz until mixture resembles a coarse meal.
Put mixture into a mixing bowl. Add raspberries, chocolate and toss. Add buttermilk. Stir with a spoon until a dough forms. Use your hands to bring it together. Turn onto a lightly floured surface and knead gently, only about 3 or 4 times, adding a bit more flour, if needed. Do not over-work or dough will be chewy.
Form scones by patting the dough into a circle and cut into wedges.
Place scones on un-greased baking sheet and bake until lightly brown, 12 to 15 minutes. Cool on wire rack for at least 10 minutes. Serve warm or at room temperature.
Fresh raspberries are so delicious in simply baked treats and I knew they would shine in these scones. Pair that with some dark chocolate and buttermilk and you have yourself a little piece of heaven!
Fresh Raspberry Scones
1 1/2 cups whole wheat flour
1/2 cup rolled oats
1 Tbsp. baking powder
1/4 cup sugar
1/2 tsp. salt
5 Tbsp. unsalted butter, chilled and cut into pieces
1 cup buttermilk
1/2 tsp. almond extract
1/3 cup dark chocolate chips
1 cup fresh raspberries
Preheat oven to 425 degrees F.
In large work bowl of a food processor fitted with steel blade, add flour, oats, baking powder, sugar and salt. Pulse a few times to combine. Add butter and whiz until mixture resembles a coarse meal.
Put mixture into a mixing bowl. Add raspberries, chocolate and toss. Add buttermilk. Stir with a spoon until a dough forms. Use your hands to bring it together. Turn onto a lightly floured surface and knead gently, only about 3 or 4 times, adding a bit more flour, if needed. Do not over-work or dough will be chewy.
Form scones by patting the dough into a circle and cut into wedges.
Place scones on un-greased baking sheet and bake until lightly brown, 12 to 15 minutes. Cool on wire rack for at least 10 minutes. Serve warm or at room temperature.
Tuesday, May 21, 2013
Chocolate Raspberry Truffle Cake
This was my birthday cake this year and I'd say I spoiled myself! I haven't indulged this much in a long time! But birthdays for me are that time of year where you can break all the rules, eat whatever you want make it all about YOU. It's ok for one day a year....tomorrow I can go back to everything being about mostly everyone else (just fine by me), and eating more green things than brown (aka chocolate). In my defense I did drink a green smoothie today AND ate a green salad as my dinner...so it all balances out right?
So, I think I actually wanted to make this cake for my birthday two years ago but it didn't happen, and last year either, so this was the year. I do have to admit that while I love the cake as a whole, the chocolate cake recipe I used is not my favorite, a bit dense and crumbly for this type of cake. So, the chocolate cake recipe below is one I've made for a previous cake, and is lighter with a more tender crumb.
Chocolate Raspberry Truffle Cake
for the cake:
1 3/4 cup plus all-purpose flour
12 Tbsp. dark cocoa powder
2 tsp. baking soda
1 tsp. baking powder
1 tsp. salt
2 cups sugar
1/2 cup oil
2 large eggs
2 cups buttermilk
1 Tbsp. vanilla extract
for the ganache filling:
4 oz. heavy cream (1/2 cup)
4 oz. dark chocolate, chopped
for the raspberry filling:
1 1/2 cups frozen raspberries
1/4 cup sugar
1 Tbsp. water
for the raspberry buttercream:
1 cup butter (2 sticks)
4 cups powdered sugar
3 Tbsp. strained raspberry puree (need about 1/4 cup frozen raspberries)
for the chocolate glaze:
2 oz. dark chocolate
2 oz. heavy cream (1/4 cup)
2 Tbsp. light corn syrup
1 tsp. vanilla extract
for garnish:
a small handful of fresh raspberries (about 3 oz.)
Preheat the oven to 350˚ F. Grease and flour the edges of 2, 9-inch, round cake pans, shaking out the excess flour. Line the bottom with a round of parchment. In a small bowl, combine the flour, cocoa powder, baking soda, baking powder and salt; whisk to blend and set aside. In the bowl of an electric mixer, combine the sugar, oil and eggs. Beat on medium speed until smooth, about 1-2 minutes. With the mixer on low speed, blend in half of the dry ingredients, beating just until incorporated. Blend in the buttermilk and vanilla just until smooth. Beat in the remaining dry ingredients, mixing just until incorporated.
Pour the batter into the prepared pan and bake, rotating halfway through, until a toothpick inserted in the center comes out clean, about 35 minutes. Transfer to a wire rack and let cool in the pan for 20 minutes. Run a knife around the edges, then turn the cake out onto the rack and let cool completely. Wrap in plastic wrap and chill at least an hour, up to overnight. (note: I usually bake the cake part the night before and once it's cooled, wrap it in plastic wrap and put it in the fridge so it's nice and firm to work with the next day.)
Next, prepare the raspberry and ganache fillings. In a small saucepan boil raspberries, sugar and water. Boil about 5 minutes, until mixture thickens slightly. Set aside to cool. For the ganache, chop chocolate and place in a bowl. Bring cream just to a boil then remove from heat and pour over chocolate. Cover with a clean plate and let sit about 4-5 minutes. Stir chocolate and cream together until smooth and allow to cool a bit.
While ganache is cooling, carefully cut each cake round in half vertically, making two layers. (note: you may have to level your cake off a bit first.) Place bottom layer of one cake round on a cake plate or other flat serving dish. Pour half of the raspberry filling on the layer and spread out just about to the edges. Replace the top layer of first cake round, making sure edges are even and flush with each other. Next, pour the ganache over the layer you just placed down and spread it evenly out all the way to the edges. Refrigerate until firm, about 10-15 minutes.
Remove cake from fridge. Next take the TOP layer of the remaining cake round and invert it over the ganache layer. Spread the other half of the raspberry filling on top, then place the last layer of cake on top of the raspberry filling BOTTOM UP!
Next prepare raspberry buttercream. Puree about 1/4 cup raspberries and strain through either cheesecloth or a fine mesh sieve. (note:you can also boil them a minute or two to get more juice out of them.) Set aside to cool. In a mixing bowl fitted with a whisk attachment, place butter and whisk about 2 minutes. Add strained raspberry puree and powdered sugar and whisk again another 2-3 minutes, until light an fluffy.
Crumb coat the cake. Take a very thin layer of frosting and coat top and sides of cake. Chill about 10 minutes. Remove cake and frost the top and sides of the cake with the rest of the frosting.
To make the glaze prepare chocolate and cream as for the ganache. Stir chocolate and cream until smooth and combined. Add in corn syrup and vanilla extract. Allow to cool a bit; enough so that you can pour it and it will make it's way slowly over the edge, but not so thin that it all goes over quickly. Pour glaze; allow to drip over edges. Garnish with fresh raspberries and chill about 10 minutes before serving.
(yes, that is finger swipe in the frosting; my daughter's to be exact!)
SOURCE: Inspired by Annie's Eats
Tuesday, April 2, 2013
Chocolate Chip Coconut Scones
I've been on kind of a scone kick lately. I simply adore scones and my girls love them too. They are so wonderful to have fresh and warm in the morning and they aren't too sweet either. Since finding a fabulous cream scone base recipe, I adapt all other scones I make to that one. Each flavor combination turns out better than the last, it seems like, and they are always so soft and flaky.
I'm nuts for anything coconut, but throw chocolate in with it and don't plan on holding me back! Amazing combination.
I don't usually glaze my scones, but I thought once in a while it would be ok. These would be perfect for Sunday brunch when you've got some extra time on a quiet day.
Chocolate Chip Coconut Scones
for the scones:
2 cups flour
1 Tbsp. baking powder
3 Tbsp. sugar
1/2 tsp. salt
5 Tbsp. chilled, unsalted butter, cut into 1/4-inch cubes
1/2 cup chocolate chips (regular or mini)
1/2 cup sweetened, flaked coconut
2 tsp. vanilla
1 cup canned coconut milk
for the glaze:
1 cup powdered sugar
2-3 Tbsp. coconut milk
1/4 cup toasted coconut
Preheat oven to 425°F.
In a large bowl, whisk together flour, baking powder and salt and sugar. Using a pastry blender, cut the cold butter into the dry ingredients until it is the size of small peas and evenly incorporated. Work quickly so the butter does not soften too much.
Stir in coconut milk and vanilla with a rubber spatula or fork until dough begins to form, about 30 seconds.
Transfer dough to countertop, there will be some crumbly bits, and knead dough by hand just until it comes together into a rough, sticky ball, 5 to 10 seconds.
Press the dough into an 8-inch disc and cut into 8 wedges. Place wedges on ungreased baking sheet and bake until tops are light brown, 12 to 15 minutes. Cool on wire rack for at least 10 minutes.
While scones are baking, make glaze and toast coconut.
For the glaze, mix powdered sugar and coconut milk and whisk until smooth. Add more milk until it reaches desired consistency.
To toast the coconut, place in a medium frying pan over medium-high heat. Monitor closely and stir frequently, until coconut starts to brown. Immediately remove from heat and set aside.
Once scones are cooled, spoon glaze over tops, a few at a time, then sprinkle the toasted coconut on top. Allow to finish cooling and glaze to set.
SOURCE: Adapted from Smitten Kitchen and My Baking Addiction
Labels:
Breakfast,
Chocolate,
Coconut,
Quick n' Easy,
Scones
Saturday, March 2, 2013
Chocolate Dipped Orange Shortbread Cookies
It's Saturday and you know what weekends are good for? Saturdays are good for sleeping in. They're good for eating a stack of nice fluffy warm pancakes with chocolate chips, of course, and a healthy drizzle of syrup (cause if it's during the week, we eat the whole wheat variety with very little syrup, haha). Saturdays are also good for long walks, cartoons, playing at the park and taking on a new baking project!
I love to spend my weekends in the kitchen trying new things; things I wouldn't normally attempt during the week with schedules and early mornings and such. It just so happens that these cookies were one of those baking projects I got to play with a few weeks ago. And it was so fun!
Did you know you could make your own candied citrus? It is actually pretty easy and most of the effort that is involved is waiting. Orange is probably my second favorite citrus, with lemon being first. But orange and dark chocolate is a combination I cannot resist!!
These little shortbread cookies are simply to die for and worth every bit of effort that go into them! Although not difficult to make, mostly what you need in making these is TIME! So clear out your Saturday and make some room for this delicious treat.
Chocolate Dipped Orange Shortbread Cookies
1 cup (2 sticks) unsalted butter (room temperature)
1/2 cup powdered sugar
2 cups all-purpose flour
1/2 tsp. salt
1 cup candied orange peel (chopped), recipe below
zest of 1 orange
1 Tbsp. orange juice
1/2 Tbsp. vanilla extract
8 ounces dark chocolate (chopped)
In a mixing bowl fitted with a whisk attachment, cream the butter and the sugar. Add vanilla, orange zest and juice and mix to combine. Remove whisk attachment and replace with paddle attachment. Add flour and salt and mix until it starts forming larger clumps. Fold in candied orange peel.
Form the dough into a log, wrap it in plastic and let
it chill in the fridge for at least an hour.
Cut the log into 1/4 inch thick slices and place on a parchment lines baking pan with one inch of space between them. Bake in a preheated 325F oven until they just start to turn lightly golden brown on top, about 15-20 minutes. Cool completely (or they will be too fragile to dip!!).
Melt the chocolate in a double boiler or in a microwave-safe bowl in 30 second increments on half power. Stirring after each increment.
Dip the cookies into the chocolate and place on a sheet of parchment
paper and let cool until the chocolate sets.
Candied Orange Peel
3 oranges
2 cup water
2 cups sugar, divided
Cut the top and bottom from the orange, then cut the peel each orange into 4 vertical pieces and remove from orange in one piece. Cut the peel into thin strips.
Bring a pot of water to boil, reduce the heat to medium and cook the peels in boiling water for 15 minutes, drain and rinse.
Bring 2 cups water and 1 cup of the sugar to a boil over medium heat in a sauce pan. Add the peel, reduce the heat to medium-low and simmer until the peels are tender, about 45 minutes.
Drain and toss the peels in the remaining 1 cup of sugar. Note: You want to drain the orange peels well. If you just throw them straight from the syrup into the sugar, the sugar will clump up.
Place the peels on a cooling rack and let them sit until the coating is dry, anywhere from 24-48 hours.
SOURCE: Closet Cooking
Monday, February 18, 2013
Almond Joy Cookies
Chocolate and coconut are two of my favorite flavors, especially when paired together. When they came together in this cookie, it was pretty much cookie nirvana for me. Now I have my other two favorites. THIS CCC was my first love, then along came THIS one, which I could not get enough of for like ever!! But, I think these Almond Joy Cookies have earned their place in my top three...and I don't think they are going anywhere.
These cookies are both chewy and a little crunchy, the best of both worlds! I used coconut oil as part of the fat which not only gives it that little crunch on the outside but lends more nutrition than butter (not that I'm trying to make a "healthy" cookie here though).
If you like chocolate and coconut, this is the combo for you!!
Almond Joy Cookies
1/2 cup butter, softened
1/2 cup virgin coconut oil (it will have a slight coconut scent and flavor)
1 1/2 cups sugar
2 eggs
1/4 tsp. almond extract
2 1/4 cups flour
1 tsp baking soda
1 tsp salt
2 cups sweetened shredded coconut
1 cup dark chocolate chips
1 cup slivered or sliced almonds
Preheat oven to 350 degrees F.
In a mixing bowl fitted with a paddle attachment, cream together butter and coconut oil until light and fluffy. Add sugar and continue beating another minute or so. Add eggs, one at a time, until incorporated, then almond extract. Sift together flour, soda and salt and add it to the rest of the ingredients. Mix until just incorporated. Add in coconut, chocolate chips and almonds last and gently stir in the dough, until evenly distributed.
Using a small scoop, drop dough onto cookie sheet, 8 or 9 to a pan. Bake for about 10 minutes.
Allow to cool a few minutes on the cookie sheet, then remove to a wire rack to cool completely.
SOURCE: Adapted from Heather Christo Cooks
Monday, September 24, 2012
Mug Brownie (Vegan)
You're either going to love me or hate me for this post. Love me because it's soooooo delicious, so good and so quick. Hate me because it's addicting, and not very high up there on the healthy factor. But hey, you can't be 100% all the time. A girl's gotta have her chocolate once in a while!
Brownie in a mug is the perfect treat for one (or 2) when you've got an intense craving to satisfy, or you don't want to make very much. I've tried a few "mug" recipes and I really absolutely love this one. The brownie comes out nice and moist and has a deep chocolate flavor. NO cake-like brownies here!
This is vegan only because there is no dairy or eggs, but don't let that fool you, it has one of the best flavors in a brownie that I have tasted!
Mug Brownie
2 Tbsp. coconut oil
4 Tbsp. brown sugar
pinch salt
splash of vanilla
2 Tbsp. almond milk
2 Tbsp. unsweetened cocoa powder
4 Tbsp. flour
(Optional: tiny splash rum extract OR tiny pinch cayenne pepper and cinnamon)
Melt coconut oil in mug of choice. You only need to microwave it for about 10 seconds or so, it melts pretty easily. Add sugar, salt and vanilla and stir well. Add milk; stir. (You don't want to add the milk with the coconut oil because it will harden back up since, so add it after the sugar is mixed in.) Add cocoa powder and flour and stir well. Microwave for about 45-70 seconds, or until cooked. Time will depend on your microwave and your mug. I used 2 different mugs; one was done at 45 seconds, the other, closer to 75. Check as you go, starting at about 45 seconds. Enjoy!
SOURCE: Adapted from Industrious Justice
Labels:
Brownies,
Chocolate,
Desserts,
Quick n' Easy
Friday, July 13, 2012
Cherry Chocolate Ice Cream
One of the things I love most about summer is keeping my freezer well stocked with homemade ice cream. At the end of a long, hot day, I love nothing more than to sit down to a delicious chocolaty refreshing treat and this totally hits the spot.
I love the base for this ice cream. It's one of the smoothest, most chocolaty I've ever made. I think using the bittersweet chocolate is amazing here, although if you prefer a lighter, sweeter chocolate flavor, I would go with a dark or semi-sweet chocolate.
Cherries are in season right now and are on sale everywhere. I couldn't resist pairing them with the chocolate ice cream. The rum extract adds a little dimension and nicely compliments the other flavors. If you have rum on hand, feel free to swap out the water when cooking the cherries and omit the rum extract.
Cherry Chocolate Ice Cream
1 1/3 cups halved pitted cherries (about 13 ounces whole cherries)
1/2 cup plus 2 Tbsp. sugar
1/2 cup water
1/4 tsp. rum extract (or to taste)
1 1/2 cups whole milk
4 large egg yolks
4 ounces bittersweet chocolate, chopped
1 Tbsp. unsalted butter
3/4 cup heavy cream
1 1/2 tsp. vanilla
Put the cherries, 2 tablespoons sugar and the water in a medium saucepan and cook over medium-high heat until syrupy, about 20 minutes. Remove from the heat, add rum extract and let cool, then refrigerate until cold, at least 2 hours.
Meanwhile, heat the milk and the remaining 1/2 cup sugar in a saucepan over medium-low heat, whisking to dissolve the sugar. Whisk the egg yolks in a small bowl. Gradually whisk about 1/2 of the warm milk mixture into the eggs, then whisk the egg mixture back into the saucepan. Cook, stirring constantly, until the mixture coats a spoon and registers 168 degrees F on a candy thermometer, about 15 minutes. Remove from the heat; add the bittersweet chocolate and the butter and set aside until the chocolate melts, about 5 minutes.
Transfer the chocolate mixture to a blender and puree until smooth. Pour into a large bowl and stir in the heavy cream and vanilla. Refrigerate until chilled, at least 2 hours or overnight.
Churn the chilled chocolate mixture in an ice cream maker. Strain the cherry mixture, reserving the syrup. When the ice cream is very thick, add the cherries and continue churning until incorporated. Transfer to a freezer-safe container. Drizzle in the reserved cherry syrup and swirl with a spoon. Cover and freeze until firm, at least 4 hours.
SOURCE: Food Network
I love the base for this ice cream. It's one of the smoothest, most chocolaty I've ever made. I think using the bittersweet chocolate is amazing here, although if you prefer a lighter, sweeter chocolate flavor, I would go with a dark or semi-sweet chocolate.
Cherries are in season right now and are on sale everywhere. I couldn't resist pairing them with the chocolate ice cream. The rum extract adds a little dimension and nicely compliments the other flavors. If you have rum on hand, feel free to swap out the water when cooking the cherries and omit the rum extract.
Cherry Chocolate Ice Cream
1 1/3 cups halved pitted cherries (about 13 ounces whole cherries)
1/2 cup plus 2 Tbsp. sugar
1/2 cup water
1/4 tsp. rum extract (or to taste)
1 1/2 cups whole milk
4 large egg yolks
4 ounces bittersweet chocolate, chopped
1 Tbsp. unsalted butter
3/4 cup heavy cream
1 1/2 tsp. vanilla
Put the cherries, 2 tablespoons sugar and the water in a medium saucepan and cook over medium-high heat until syrupy, about 20 minutes. Remove from the heat, add rum extract and let cool, then refrigerate until cold, at least 2 hours.
Meanwhile, heat the milk and the remaining 1/2 cup sugar in a saucepan over medium-low heat, whisking to dissolve the sugar. Whisk the egg yolks in a small bowl. Gradually whisk about 1/2 of the warm milk mixture into the eggs, then whisk the egg mixture back into the saucepan. Cook, stirring constantly, until the mixture coats a spoon and registers 168 degrees F on a candy thermometer, about 15 minutes. Remove from the heat; add the bittersweet chocolate and the butter and set aside until the chocolate melts, about 5 minutes.
Transfer the chocolate mixture to a blender and puree until smooth. Pour into a large bowl and stir in the heavy cream and vanilla. Refrigerate until chilled, at least 2 hours or overnight.
Churn the chilled chocolate mixture in an ice cream maker. Strain the cherry mixture, reserving the syrup. When the ice cream is very thick, add the cherries and continue churning until incorporated. Transfer to a freezer-safe container. Drizzle in the reserved cherry syrup and swirl with a spoon. Cover and freeze until firm, at least 4 hours.
SOURCE: Food Network
Friday, June 1, 2012
S'mores Brownies (Take Two)
Man, we haven't even hit the first day of summer and I'm already craving s'mores. S'mores are one of my most favorite summer treats and I love eating them all summer long. I love that you can throw them in the microwave if you want to do it quick, put them over the grill when you don't have a camp fire around or even use a kitchen torch (which I have done more often than I care to admit!).
Last summer I made s'mores all sorts of ways to curb that craving: s'mores pancakes, s'mores cake in a jar, s'mores pops, and s'mores ice cream. Even before that I made these delectable s'mores bars, as well as s'mores cookies and a different s'mores brownie. Oh, and the s'mores addiction doesn't end there. Thanks to pinterest, I have yet to try the s'mores truffles, turnovers, rice crispie treats, pudding, cupcakes... and oh my gosh, does it ever end? I don't think I'll ever get tired of those things.
The other day I was going to make s'mores with my girls and it ended up not happening, but I still wanted them! I opened my pantry to find a box of brownies, some mini marshmallows, some milk chocolate chips and graham crackers and the wheels in my head started turning. Luckily, thanks to google, I didn't have to reinvent the wheel and found a recipe rather quickly that embodied what I had envisioned.
These brownies were exactly what I had in mind and they were absolutely perfect. I love the crumbly buttery graham cracker crust on the bottom, and the milk chocolate on top of the brownies. When it comes to me and chocolate, it's usually the darker the better. But, when it comes to s'mores, you HAVE to use milk chocolate to get the right taste. You just have to ok?
S'mores Brownies
For the crust:
7 Tablespoons unsalted butter, melted
1 1/2 cups graham cracker crumbs (8 or 9 whole graham crackers)
2 Tbsp. granulated sugar
pinch of salt
For the brownies:
Your favorite recipe or box mix to fit an 8x8 or 9x9-inch pan
For the topping:
1 cup milk chocolate chips
2 cups mini marshmallows
about 1/4 cup of graham cracker crumbs (1 whole cracker, crumbled)
Preheat oven to 350 degrees F. Line 8x8-inch pan with foil so it hangs over the edges a bit. Spray with nonstick spray.
Prepare crust: In a medium bowl, mix butter with crumbs, sugar and salt. Press crumb mixture into the bottom of the pan. Bake until golden; about 10 minutes.
Prepare and bake brownies according to directions.
Remove pan from oven. Turn up heat on the oven to broil. Sprinkle the chocolate chips over the brownie, then top with the marshmallows. Sprinkle graham cracker crumbs on top.
Place pan back into the oven. Toast under the broiler until golden- KEEP AN EYE ON IT- it can go from golden to burned in a matter of seconds. 1 to 2 minutes under the broiler should be plenty.
Cool for a few minutes, then use foil to remove brownies from the pan and set on a cutting board. Carefully pull the sides of the foil away from the marshmallows and brownies. Cut brownies into squares. Helpful tip: Use a large, WET & SHARP KNIFE to cut the brownies. Slice through the brownie, then clean the knife and slice through again with a clean, wet knife. Keep cleaning off the knife after each cut for the cleanest cuts.
SOURCE: Slightly adapted from RecipeGirl
Last summer I made s'mores all sorts of ways to curb that craving: s'mores pancakes, s'mores cake in a jar, s'mores pops, and s'mores ice cream. Even before that I made these delectable s'mores bars, as well as s'mores cookies and a different s'mores brownie. Oh, and the s'mores addiction doesn't end there. Thanks to pinterest, I have yet to try the s'mores truffles, turnovers, rice crispie treats, pudding, cupcakes... and oh my gosh, does it ever end? I don't think I'll ever get tired of those things.
The other day I was going to make s'mores with my girls and it ended up not happening, but I still wanted them! I opened my pantry to find a box of brownies, some mini marshmallows, some milk chocolate chips and graham crackers and the wheels in my head started turning. Luckily, thanks to google, I didn't have to reinvent the wheel and found a recipe rather quickly that embodied what I had envisioned.
These brownies were exactly what I had in mind and they were absolutely perfect. I love the crumbly buttery graham cracker crust on the bottom, and the milk chocolate on top of the brownies. When it comes to me and chocolate, it's usually the darker the better. But, when it comes to s'mores, you HAVE to use milk chocolate to get the right taste. You just have to ok?
S'mores Brownies
For the crust:
7 Tablespoons unsalted butter, melted
1 1/2 cups graham cracker crumbs (8 or 9 whole graham crackers)
2 Tbsp. granulated sugar
pinch of salt
For the brownies:
Your favorite recipe or box mix to fit an 8x8 or 9x9-inch pan
For the topping:
1 cup milk chocolate chips
2 cups mini marshmallows
about 1/4 cup of graham cracker crumbs (1 whole cracker, crumbled)
Preheat oven to 350 degrees F. Line 8x8-inch pan with foil so it hangs over the edges a bit. Spray with nonstick spray.
Prepare crust: In a medium bowl, mix butter with crumbs, sugar and salt. Press crumb mixture into the bottom of the pan. Bake until golden; about 10 minutes.
Prepare and bake brownies according to directions.
Remove pan from oven. Turn up heat on the oven to broil. Sprinkle the chocolate chips over the brownie, then top with the marshmallows. Sprinkle graham cracker crumbs on top.
Place pan back into the oven. Toast under the broiler until golden- KEEP AN EYE ON IT- it can go from golden to burned in a matter of seconds. 1 to 2 minutes under the broiler should be plenty.
Cool for a few minutes, then use foil to remove brownies from the pan and set on a cutting board. Carefully pull the sides of the foil away from the marshmallows and brownies. Cut brownies into squares. Helpful tip: Use a large, WET & SHARP KNIFE to cut the brownies. Slice through the brownie, then clean the knife and slice through again with a clean, wet knife. Keep cleaning off the knife after each cut for the cleanest cuts.
SOURCE: Slightly adapted from RecipeGirl
Subscribe to:
Posts (Atom)