Monday, January 31, 2011

Asian Wraps with Creamy Peanut Sauce


This is another delicious recipe I snagged from the Smart Cooking the Costco Way Cookbook. It's easily the tastiest dinner dish I've made in a long time. We've eaten it twice recently, so that should say something, especially considering the long list of things I always have waiting to try.

I like Asian slaws to begin with, but I think the thing that really made this meal was the creamy peanuty dipping sauce. I absolutely loved it and I secretly stuck my finger in the bowl a time or two just to lick it off! You just can't have this meal without it. Another thing I liked about this meal was that I could easily make it meatless with very little effort. The second time I made them, I ate mine with avocado slices in place of the chicken and it was every bit as delicious. This just might be your next favorite too, so go on and give it a try.

For the filling:
1 lb. grilled chicken, cut into strips (or sliced avocado for a meatless wrap)
2 cups shredded green cabbage (green, Nappa, Brussels sprouts, etc.)
2 cups packed baby spinach
1/2 cup grated carrot
3 medium radishes, thinly sliced
2 Tbsp. rice vinegar
1 Tbsp. soy sauce
1 Tbsp. canola oil
6 10-inch flour tortillas

For the sauce:
2 Tbsp. canola oil
1/2 small onion, finely chopped
2 garlic cloves, minced
1 Tbsp. fresh ginger, peeled and minced
3/4 cup smooth peanut butter
1 cup unsweetened coconut milk
2 Tbsp. soy sauce
2-3 tsp. hot chili sauce


Mix cabbage, spinach, carrots and radishes in a medium bowl. In a small bowl, stir together rice vinegar, soy sauce and oil. Pour over the cabbage mixture and let stand for 5 minutes.

To prepare the peanut sauce, heat oil in a small saucepan over medium heat. Add onion and cook until tender; about 3-4 minutes. Add garlic and ginger and cook another minute. Set aside. In another bowl, combine peanut butter, coconut milk, soy sauce and hot chili sauce. Add the onion mixture and stir to combine. Thin with water, if necessary.

To assemble the wrap, lay the tortillas on a flat surface. Divide the cabbage mixture evenly over the wraps. Top with chicken. Drizzle peanut sauce over the chicken, then fold in the edges, wrap and serve.

**For a meatless version, swap the chicken out for strips of avocado.

SOURCE: Adapted form Smart Cooking The Costco Way

Linked to...
Recipe Swap Thursday @ Prairie Story
Seasonal Sunday @ Real Sustenance

Thursday, January 27, 2011

Coconut Brownies with Creamy Coconut Frosting


I really like brownies, in fact, I used to joke all the time that they were my favorite food group. Years ago, when brownies were one of the few desserts I used to make, I would experiment a lot. I'd throw in chocolate chips, add chocolate frosting, add some orange extract, you get the picture.

I have always liked coconut too, but it wasn't until last year that I started eating it with any frequency. I found this fabulous Thai Coconut Rice and Bean Curry, which both use coconut milk. I also throw shredded coconut in all of my homemade granola that I make usually once or twice a month. Amazingly enough, I've learned recently how good coconut is for you. You can read more about it here if you want.

Coconut and chocolate are an amazing combination, which I absolutely love. I did a little experimenting with this recipe and I really liked the outcome. I did use a box mix, please don't judge, I've had a hard time finding one from scratch that I love enough to give up the box. I used coconut milk to replace most of the oil in the batter and used coconut oil (which is solid at room temp) in place of butter in the frosting. The end result was a moist brownie, although not as dense, with a frosting that was different and delicious and I'd say out-of-this-world, but that's me, and I like coconut.


Coconut Brownies with Creamy Coconut Frosting
For the brownies:
1 box brownie mix
1/2 cup coconut milk
1/4 cup oil
2 eggs

For the frosting:
1/2 cup coconut oil (room temp, not melted)
3-4 cups powdered sugar
1 tsp. vanilla
2-3 Tbsp. coconut milk
1/4 cup shredded coconut
toasted coconut for garnish

Preheat oven to 350 degrees F. Mix all brownie ingredients together and pour batter into a greased 8 or 9-inch baking pan (I used a brownie pan). Bake 30-35 minutes, or until just barely done. (Sometimes I slightly under bake my brownies because I like them really chewy and soft.) Cool completely.

To make frosting, cream coconut oil (you can substitute butter) until creamy. Add powdered sugar and vanilla and 2 Tbsp. of coconut milk. Add more milk/sugar to desired consistency. Add shredded coconut last. Spread on cooled brownies.

To toast shredded coconut, put them in a frying pan on medium heat and toss them gently until they start to brown. Sprinkle over frosted brownies.


Linked to...
Recipe Swap Thursday @ Prairie Story
Sweets For A Saturday @ Sweet As Sugar Cookies
Feed Me, Tweet Me, Follow Me Home @ 21st Century Housewife's Kitchen
Potluck Sunday @ Mommy's Kitchen

Tuesday, January 25, 2011

Portabello and Black Bean Enchiladas with Roasted Poblano Sauce


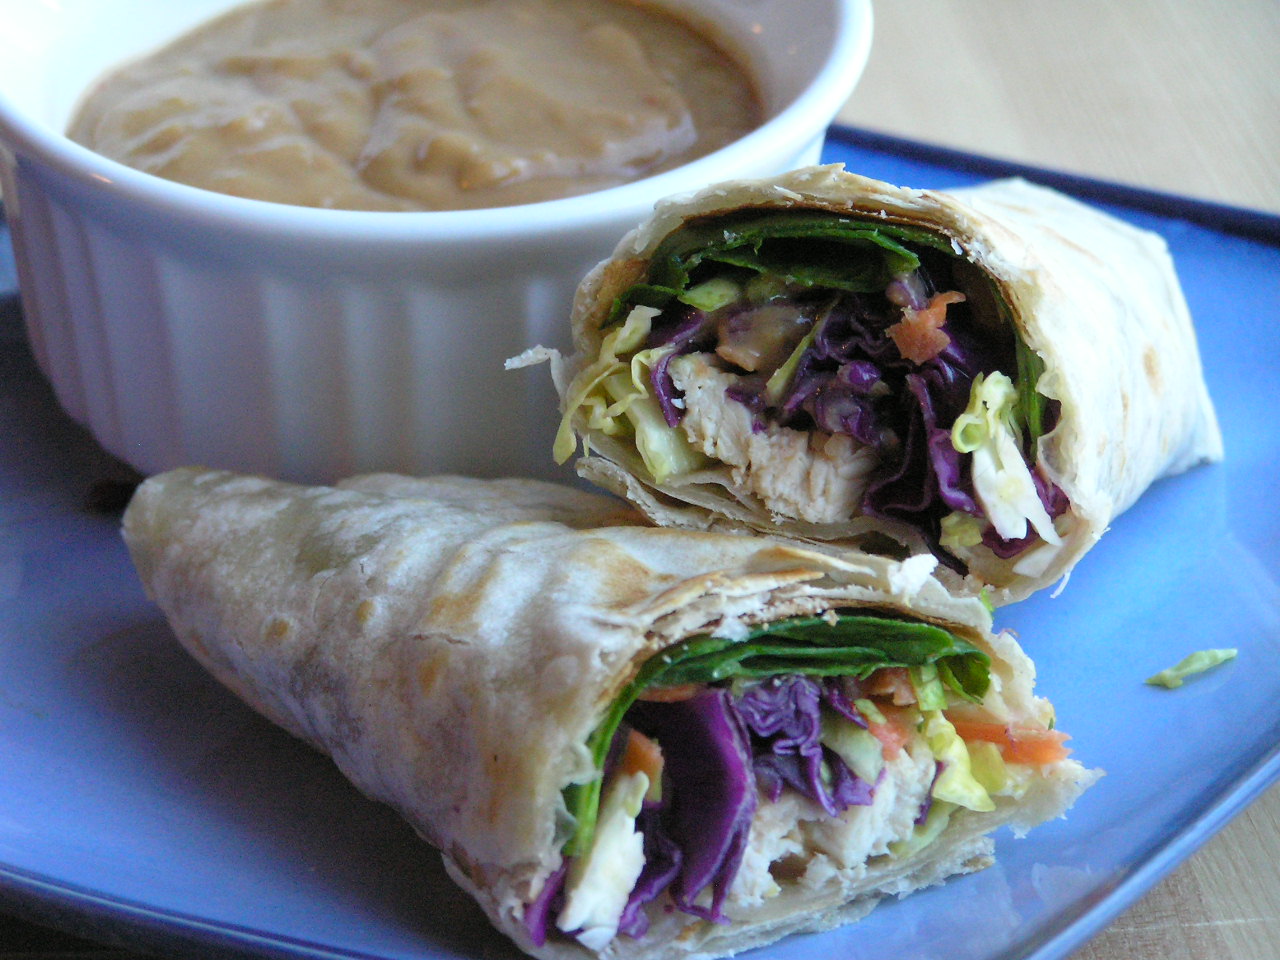
I am increasingly enjoying many more meatless dishes and, to my surprise, I'm finding it pretty easy to find meatless main dishes that are really flavorful. When I saw these I couldn't wait to make them. Black beans are almost always my bean of choice and I love the flavor of roasted red peppers. Pair that with some mushrooms and this makes a tasty and "meaty" filling for these enchiladas. My husband wasn't so thrilled about the dish when I told him there wasn't any "meat" meat in it, so I put it off for about a week or so. However, he was pleasantly surprised when he actually tasted them and gave me the thumbs up.

I love the smokey, spicy flavor of roasted poblanos. It made really nice sauce to accompany the enchiladas. One tip though, the less time it's roasted, the more heat it will retain, so if you don't like too much heat, cook it a little longer, or use less of it. You could always add more tomatoes or tomato sauce too to tone it down.

These enchiladas do require a little more effort and time spent in the kitchen. Natalie, from Perry's Plate, suggests that you can make both the sauce and filling ahead of time so you won't spend too much time in the kitchen right before dinner. Or make them on the weekend when you have a little extra time, like I did.


Portabello and Black Bean Enchiladas
with Roasted Poblano Sauce

for the sauce:
1 poblano pepper
2 tsp. extra virgin olive oil
1 medium yellow onion, chopped
1/2 tsp. salt
1/2 tsp. ground cumin
1/2 tsp. chili powder
1/4 tsp. paprika
1/8 tsp. ground chipotle pepper (optional)
2 cups (1 can) tomatoes, crushed or chopped, undrained
1/4 cup water
1/2 cup fresh cilantro, chopped + extra for garnish

for the filling:
2 roasted red peppers, diced (jarred or fresh)
*12 oz. portobellos (about 4-5 large), stemmed, gills scraped out, and diced
1/2 red onion, diced
extra virgin olive oil
salt and freshly ground black pepper
1 can black beans, drained and rinsed

12 corn or whole wheat flour tortillas
4 oz. queso fresco (or sub feta)
cheddar cheese
fresh tomatoes or pico de gallo, for serving

Preheat oven to 425 F.

Roast the poblano pepper (and red peppers if using fresh) directly over the flame of a gas burner, turning frequently with tongs, until evenly charred. (Alternatively, char under the broiler, turning once or twice, for 5 to 7 minutes total.) Transfer to a deep bowl, cover with plastic wrap, and set aside to steam for 10 minutes.

Meanwhile, heat 2 tsp. olive oil in a medium saucepan over medium heat. Add the onion, garlic, salt, cumin, chili powder, paprika and ground chipotle (optional) and cook, stirring, until the vegetables have softened, about 5 minutes. Remove from the heat.

Peel the pepper, discard the stem and seeds, and chop. Add to the saucepan along with the tomatoes, water, and chopped cilantro. Return to medium heat and cook, uncovered, at a steady simmer, until the liquid has reduced slightly, about 10 minutes. Puree using an immersion or stick blender (or very carefully transfer to a blender or food processor) until smooth.

While the sauce simmers, place the mushrooms and red onion in a single layer on a rimmed baking sheet. Drizzle with olive oil and sprinkle with salt and pepper. Roast, stirring halfway through, until the vegetables are tender and browned in spots, about 15 minutes total. Alternately you can saute them in a large frying pan with olive oil, until tender. Do not salt and pepper until mushrooms are finished cooking. Transfer to a large bowl and stir in beans and roasted red peppers (if you are using jarred peppers make sure to remove the excess moisture).

Reduce oven temperature to 375 F.

To assemble the enchiladas: Spread 1/2 cup of the sauce in the bottom of a 9x13 baking dish. Place a skillet over medium heat. Coat both sides of a tortilla with cooking spray. Heat in skillet for 5 to 10 seconds per side, adjusting the heat if the pan gets too hot. (You can also warm the tortillas in the microwave, wrapped in a tea towel, but make sure you spray them with a little water first so they are pliable without breaking.) Spread about 1/3 cup of the filling and 1 Tbsp. of the sauce down the middle of the tortilla and roll it up to enclose the filling. Place seam-side down in the baking dish. Repeat with the remaining tortillas, filling and sauce. Spread the remaining sauce over the enchiladas. Top with crumbled queso fresco and cheddar cheese.

Bake, in preheated oven, uncovered (I covered mine the first half), until hot, about 15-20 minutes. Serve with fresh tomato or pico de gallo and garnish with cilantro.

Serves 4-6.

*Portabellos can be pretty expensive, but you can substitute crimini mushrooms here, especially since they get chopped up. Criminis are mini portabellos and a little more cost-effective to buy.

SOURCE: Perry's Plate


Linked to...
Recipe Swap Thursday @ Prairie Story
Potluck Sunday @ Mommy's Kitchen
Seasonal Sunday @ Real Sustenance

Sunday, January 23, 2011

Risotto with Roasted Chicken and Caramelized Onion


I love risotto. For me, it's an easy, usually one pot, dish to throw together that has some really nice flavor combinations going on. For others though, it may seem a little labor intensive, with all the stirring and adding liquid and stirring again every few minutes. When I first started making this butternut squash risotto a few years ago, I would pull up a chair right next to the stove and have a book handy to read in between all the stirring. Trying to make dinner with kids running around screaming and pulling on my leg the whole time, well now that's a different story.

I had not made risotto in quite a long time and when I saw this recipe, I really, really started craving it. Roasted chicken and caramelized onions, it all sounded like a wonderful flavorful combination to me. Another wonderful thing about this recipe is there's a little less hands-on time. Most of the stirring is in the beginning and the end, so during the major cooking time in the middle you are free to do other things.

I like that risotto typically calls for a few splashes of white wine/cooking wine, I think it develops the flavor really nicely. This recipe called for a little more than I've usually seen but I went with it and I think it turned out great. Feel free to substitute additional chicken broth in place of the wine if you don't use it.

Herbed Risotto with Roasted Chicken and Caramelized Onion
Olive oil
1 yellow onion, thinly sliced
Pinch of sugar
4 cups low-sodium chicken broth
2 cups water
1-2 cups roasted chicken, shredded (I used this leftover chicken)
2 cloves garlic, minced or pressed
2 cups Arborio (short grain) rice
1 cup white wine/cooking wine
1 cup grated Parmesan cheese
2 Tbsp. butter
2 tbsp. minced fresh parsley (about 1 Tbsp. dry)
2 tbsp. minced fresh chives (about 1 Tbsp. dry)
Ground black pepper
Salt

Add a small drizzle of olive oil to a large skillet over medium heat. Add the sliced onion and sugar, stirring to coat. Allow the onion to cook, stirring occasionally, until deep golden brown and caramelized, about 10-15 minutes. Remove the onions to a plate and set aside.

In a medium saucepan over medium heat, combine the chicken broth and water and bring to a simmer. Keep warm.

Drizzle a couple of tablespoons of olive oil into a Dutch oven set over medium heat. Add the garlic and cook just until fragrant, about 30 seconds. Add the rice to the pan, stirring to coat. Cook, stirring frequently, until the grains are translucent around the edges, about 3 minutes.

Add the wine and cook, stirring constantly, until fully absorbed, about 2-3 minutes. Stir 5 cups of hot broth mixture into the rice. Reduce the heat to medium-low, cover and simmer until almost all liquid has been absorbed and the rice is just al dente, 16-19 minutes, stirring twice during cooking.

Add 3/4 cup of the hot broth mixture to the risotto and stir gently and constantly until the risotto becomes creamy, about 3 minutes. Remove the pot from the heat and stir in the Parmesan.

Stir the shredded chicken and caramelized onions into the risotto with the butter, parsley and chives. Season with salt and pepper to taste. Serve immediately.

Source:Adapted from Annie's Eats

Linked to...
Potluck Sunday @ Mommy's Kitchen

Thursday, January 20, 2011

Garlic-Rosemary Roasted Chicken


The last two times I have roasted a chicken, I could not get a good picture to save my life! Darn chickens, they are so unphotogenic. Well, despite that mishap, this was a really tasty bird. Garlic and rosemary are two of my favorite flavors when it comes to cooking and poultry. This is really simple and relatively quick to throw together, barring you don't get squeamish from touching raw chicken because you do have to get fresh with it when you stuff the herbs under the skin (just don't rip the skin like I did). However, you should give it a go anyway for your next Sunday dinner.

Garlic-Rosemary Roasted Chicken
1 (5 to 6-pound) roasting chicken
1 Tbsp. chopped fresh rosemary
8 garlic cloves, crushed
2 medium red onions, quartered
2 whole garlic heads
2 tsp. olive oil

Preheat oven to 450°.

Remove and discard giblets and neck from chicken. Rinse chicken under cold water; pat dry. Trim excess fat.

Starting at neck cavity, loosen skin from breast and drumsticks by inserting fingers and gently pushing fingers between the skin and meat. Place rosemary and crushed garlic beneath skin of breast and drumsticks. Lift wing tips up and over back; tuck under chicken. Place chicken, breast side up, on a broiler pan.

Cut a thin slice from end of each onion. Remove white papery skins from garlic heads (do not peel or separate cloves). Cut tops off garlic heads, leaving root end intact.

Insert meat thermometer into meaty part of thigh, making sure not to touch bone. Bake at 450° for 30 minutes. Brush onions and garlic heads with olive oil. Arrange onions and garlic heads around chicken. Reduce oven temperature to 350°; bake an additional 1 hour and 15 minutes or until meat thermometer registers 180°. Cover chicken loosely with foil; let stand 10 minutes. Discard skin from chicken.

NOTE: Squeeze roasted heads of garlic to extract pulp; serve as a spread on French bread, if desired.

SOURCE:Cooking Light

Monday, January 17, 2011

Banana Bars


These banana bars totally take me back to my college days. Along with chocolate chip cookies and brownies, these were my standard goodies. When I made these the other day, a whole 9x13 pan for our small family, they did not even last 24 hours. Ok, I did give a few away to our neighbor, but still!

Bananas and chocolate are a great combination and for me the darker the chocolate, the browner the banana the better! You don't want to miss these delicious treats.

Banana Bars
2 cups flour
2 tsp. baking powder
1/2 tsp. salt
1/2 cup butter, softened
2/3 cup sugar
2/3 cup brown sugar, packed
1 tsp. vanilla extract
1 cup (about 2) mashed ripe banana
1 egg
1 pkg. (2 cups) semi-sweet chocolate chips

Preheat oven to 350 degrees F.

Combine flour, baking powder and salt in medium bowl. Beat butter, sugars and vanilla in a large mixer bowl until creamy. Beat in bananas and egg. Gradually beat in flour mixture. Stir in chocolate chips. Spread into greased 9x13 baking pan or 15x10 jelly roll pan.

Bake for 20-30 minutes or until toothpick inserted in center comes out clean. Cool completely in pan on wire rack. Cut into bars.


SOURCE:Toll House Best-Loved Cookies Cookbook

Linked to...
Recipe Swap Thursday @ Prairie Story
Sweets for a Saturday @ Sweet As Sugar Cookies
Full Plate Thursday @ Miz Helen's Country Cottage
Potluck Sunday @ Mommy's Kitchen
Seasonal Sunday @ Real Sustenance
It's A Keeper Thursday @ It's A Keeper

Saturday, January 15, 2011

Apple Cinnamon Baked Oatmeal


Last year sometime my sister introduced me to baked oatmeal. I had never really heard of it but when I tried it I loved it. We're hot cereal eaters in this house, especially my girls, and they love it when I make oatmeal. So, it was no surprise that they loved this baked oatmeal when I first made it.

Sometimes I forget about the really delicious recipes that I have made because I have so many others that I'm waiting to try out. When I saw this recipe though, I knew it would be a keeper because it reminded me immediately of when I had made it before. After my daughter's first bite, she declared it yummy. The apple and cinnamon is really a perfect combination here and is nicely balanced. I like that it's not overly sweet and that I could still sprinkle a little brown sugar over each individual bowl. My younger daughter wasn't too fond of the bigger chunks of apple, so I think next time I will shred the apple.

Apple Cinnamon Baked Oatmeal
2 cups old fashioned oats
1/4 cup light brown sugar
1 1/2 teaspoons cinnamon
1 tsp. baking powder
1/4 tsp. salt
1/2 cup milk (I used almond milk)
1/2 cup applesauce
1 egg
1 tsp.vanilla
1 large Granny Smith apple, peeled, cored, and diced

Optional Toppings:
Brown Sugar
Raisins
Dried Cranberries
Chopped almonds

Preheat oven to 350 degrees F. Coat an 8 by 8 baking dish with cooking spray and set aside.

In a large bowl, combine oats, brown sugar, cinnamon, baking powder, and salt.

In a medium bowl, whisk together milk, applesauce, egg and vanilla. Pour wet ingredients over dry ingredients and stir until combined. Gently stir in diced apples. Pour oatmeal mixture into prepared pan.

Bake for 20-25 minutes or until oatmeal is golden brown and set. Remove from oven and serve warm with milk and toppings, if desired.

Serves 4-6

Source: Adapted from Two Peas and Their Pod

Linked to...
Potluck Sunday @ Mommy's Kitchen
Seasonal Sunday @ Real Sustenance

Wednesday, January 12, 2011

Stuffed Portobellos with Mashed Potatoes


If any of you have a Costco membership, this may look familiar. I guess recently they handed out a Costco cookbook and this was one of the recipes in it. I don't have a membership but my parents do and I happened to be at their house right after they got the cookbook. After thumbing through it and finding so many yummy recipes to try, my mom let me take it home. I'm so glad she did because I've already made several recipes in it and I love it.

I wanted to try this recipe because I love mushrooms, especially portabellos, and we also had a big bag of potatoes from our produce co-op basket that we needed to use up. Well, when I say big bag, I guess it's relative because I think it was only a 5lb. bag. But, we don't eat potatoes very often so, for me, that's big.

Anyway, I thought these stuffed mushrooms were wonderful. The potato mixture was great on it's own, and I really loved the flavor the feta cheese brought to it. And, who can complain about bacon? Really. The combination of the potatoes and mushrooms was great, one I'd be willing to use my potatoes for any time. I served this as a main dish but it could also be served as a side.

Stuffed Portobellos with Mashed Potatoes
6 fresh portobello mushrooms
4 garlic cloves, chopped
4 Tbsp. butter, divided
1 Tbsp. olive oil
2 cups mashed potatoes
pinch of black pepper
pinch of salt
1/2 tsp. dried thyme
1/2 cup chopped fresh chives (I used about 1 Tbsp. dried)
1/2 cup feta cheese
1/4 + 2 Tbsp. grated parmesan cheese
8 slices bacon, crisp, cooked & crumbled
2 cups dry bread crumbs
1/4 cup chopped fresh parsley

Preheat oven to 400 F. Remove stems from mushrooms and set caps aside. Finely chop stems.

In a skillet, saute mushroom stems and garlic in 1 tablespoon of butter over medium-high heat until tender.

Rub mushroom caps with oil and set in a greased baking pan.

In a bowl, combine mashed potatoes, pepper, salt, thyme, chives, feta cheese, 2 tablespoons of parmesan cheese, bacon and sauteed mushroom stems. Mix until well blended. Stuff firmly into the mushroom caps.

In a separate bowl, combine the remaining melted butter, bread crumbs, Parmesan and parsley. Sprinkle over the mushroom caps.

Bake, uncovered, for 25 minutes, or until heated through. Serve warm.

Makes 3-6 servings.

SOURCE:Adapted from the Costco cookbook

Linked to...
This Week's Cravings @ Mom's Crazy Cooking

Sunday, January 9, 2011

Maple Cornbread


When I think of cornbread, I think of a nice salty pot of beans with a little bacon or ham. We usually eat the two together and it's yummy. Simple, but yummy. When I was making up the January menu I told my husband that we're going to be eating a lot of rice and beans for a while. After indulging in sweets and heavy foods, our bellies (and our wallets) needed to get back to simple. I say that to my husband as a joke, but he always smiles because he loves rice and beans and so do my girls.

This is a simple and tasty cornbread. After doing a little reading on the subject, I found out this is more of a Yankee cornbread because it's sweetened. I guess southerners don't like sweetened cornbread, but I'll take it any day. This is perfect right out of the oven with a little honey butter or crumble it over a scoop of freshly made beans. YUM!

Maple Cornbread
1 cup flour
1 cup yellow cornmeal
1 Tbsp. baking powder
1/2 tsp. salt
1 cup buttermilk
1/4 cup maple syrup
1/4 cup melted butter, cooled
2 large eggs

Preheat your oven to 425°F. Lightly grease or oil an 8 x 8-inch square or 9-inch round baking pan.

In a medium-sized mixing bowl, whisk together the flour, cornmeal, baking powder and salt until thoroughly combined. In a small bowl, or in a large measuring cup, whisk together the milk, maple syrup, melted butter and eggs. Add the liquid mixture to the dry ingredients and stir just until moistened.

Pour the batter into the prepared pan, and bake the cornbread for about 20 to 25 minutes, until it's lightly browned and a cake tester inserted into the center comes out clean.


SOURCE: adapted from King Arthur Flour

Wednesday, January 5, 2011

Apple Sausage Cheddar Quiche


We had some guests Christmas morning and I wanted to make something a little special. We make pancakes all the time so I wanted to stray from our norm, and my husband suggested a breakfast casserole. I went straight to my Southern Living cookbook. It didn't take long for me to make up my mind about what to make, this quiche jumped right out at me. I knew it would be perfect. I also thought it would balance out the cinnamon rolls we were also having.

This is slightly different than your typical quiche and it's not quite as heavy and rich. I used my own chicken sausage and think using the homemade sausage really makes a difference here. It adds to the great flavor without all the grease, salt, MSG and who knows what else in other sausages.

Apple Sausage Cheddar Quiche
1 9-inch pie crust (store bought or homemade)
1/2-1 lb. chicken sausage
1 1/2 cups (6-oz)shredded Cheddar cheese
1 cup peeled, chopped cooking apple (I used Granny Smith)
1/4 cup chopped onion
1/4 cup chopped green pepper
1/2 tsp. dried basil
1/8 tsp. garlic powder
4 large eggs, beaten
1 cup milk
Paprika

With your pie crust fitted in a pie plate, prick bottoms and sides of pie crust with a fork. Bake at 400 degrees F for 8 minutes.

Brown sausage in a large skilled, stirring until it crumbles. Drain and cool.

Combine sausage, cheese and next 5 ingredients; spoon into prepared crust. Beat eggs and milk until blended and pour over sausage mixture. Sprinkle lightly with paprika.

Bake at 325 for 50-60 minutes OR until set. Don't take it out too early.

SOURCE: Adapted from The Ultimate Southern Living Cookbook

Linked to...
Potluck Sunday @ Mommy's Kitchen

Monday, January 3, 2011

January Menu

I totally caved this whole holiday season. I pretty much just threw in the towel with exercising after my 5k in October. And as for indulging in holiday sweets, I didn't even TRY to restrain myself. Ok, maybe there was that one time...oh, who am I kidding? It's like a complete food fest from Thanksgiving to New Years, and it doesn't help that both my daughters' birthdays are in December and early January. I guess it's good that it's only one time of year and we can get it all done and over with and move on. As much as I love fudge and caramel and egg nog, I think I've had enough. I'm sure I'll be craving it come next holiday season though.

Well, my waist is not getting any smaller, so onto some lighter fare this month with lots of veggies, salads and soups. You know the drill, what's highlighted is linked back to previous recipes, the others I will post as I go. Got any suggestions for me, just leave them in the comments.

HAPPY NEW YEAR! HERE'S TO GOOD EATING-BON APPETIT!

Breakfast
Banana Pancakes w/Peanut Butter and Maple Syrup
Lemon Poppy Seed Pancakes
Peppery Bacon Cheddar Scones
Peanut Butter Granola
Banana Chocolate Chip Granola

Dinner
Chicken Parm Meatball Subs & Tuscan Panzanella
Roast Acorn Squash w/ Maple Cornbread Stuffing, Spinach & White Bean Salad with Maple-Mustard Dressing
Bean Curry w/ Thai Coconut Rice
Garlic Rosemary Roast Chicken w/ peas and Caesar Potato Salad

Chinese Chicken Salad
Broccoli & Cheddar Rolls w/ Oven Fries & Salad
Portabello & Black Bean Enchiladas w/ Roasted Poblano Sauce & Corn
Posole
Ham Beans & Homemade Bread

Pasta w/ Kale Pesto & Salad
Chipotle Bean Tostadas & corn
Butternut Squash Gnocchi w/ Roasted Veggies
Grandma's Chili & Mexican Cornbread
Italian Wedding Soup w/ Romano-Black Pepper Biscotti

Fettuccine w/ Cashew Cream & Peas
Black Bean Burgers & Mango Chicken Salad
Cauliflower Soup
Chicken Wraps w/ Creamy Asian Peanut Sauce & Asian Slaw w/ Ginger Lime Dressing
Spicy Thai Shrimp Soup

Goodies
Strawberry Cupcakes
Cake Batter Ice Cream

Saturday, January 1, 2011

2010 Faves, Part 3

Happy New Year! I hope you all had a happy and safe holiday.

Ok, here's the last of my favorites from 2010.

Berry Cheesecake Ice Cream-This ice cream is amazing and wonderful and delicious. I love the layers of flavor and texture here; tastes just like real cheesecake.


Pumpkin Pancakes with Pumpkin Maple Syrup-I know this is the third pancake recipe in the "faves" but my life is not complete without pancakes and I love pumpkin. Need I say more?


Peanut Butter White Chocolate Popcorn-A simple, easy treat that tastes divine! This is great in goodie bags or for a game night.

Peanut Butter Chocolate Chip Cookies-My absolute favorite cookie recipe and my go-to recipe whenever I get a hankering.


Pesto Panini-I absolutely love the flavor of fresh basil, so naturally basil pesto is a big hit in my book. This sandwich is really easy to throw together and has lots of great flavor.


Ham and Swiss Sliders-I can't believe how tasty these little sandwiches are. They are perfect for entertaining a crowd or just your belly.


What recipes have you tried from the Sweet Luvin' blog? What are some you hope to try?

I hope you've enjoyed a little reminiscing of the past year's cooking adventures. I'm excited to see what 2011 brings to the Sweet Luvin' blog.
Related Posts Plugin for WordPress, Blogger...