Wednesday, July 31, 2013

Homemade Refried Beans


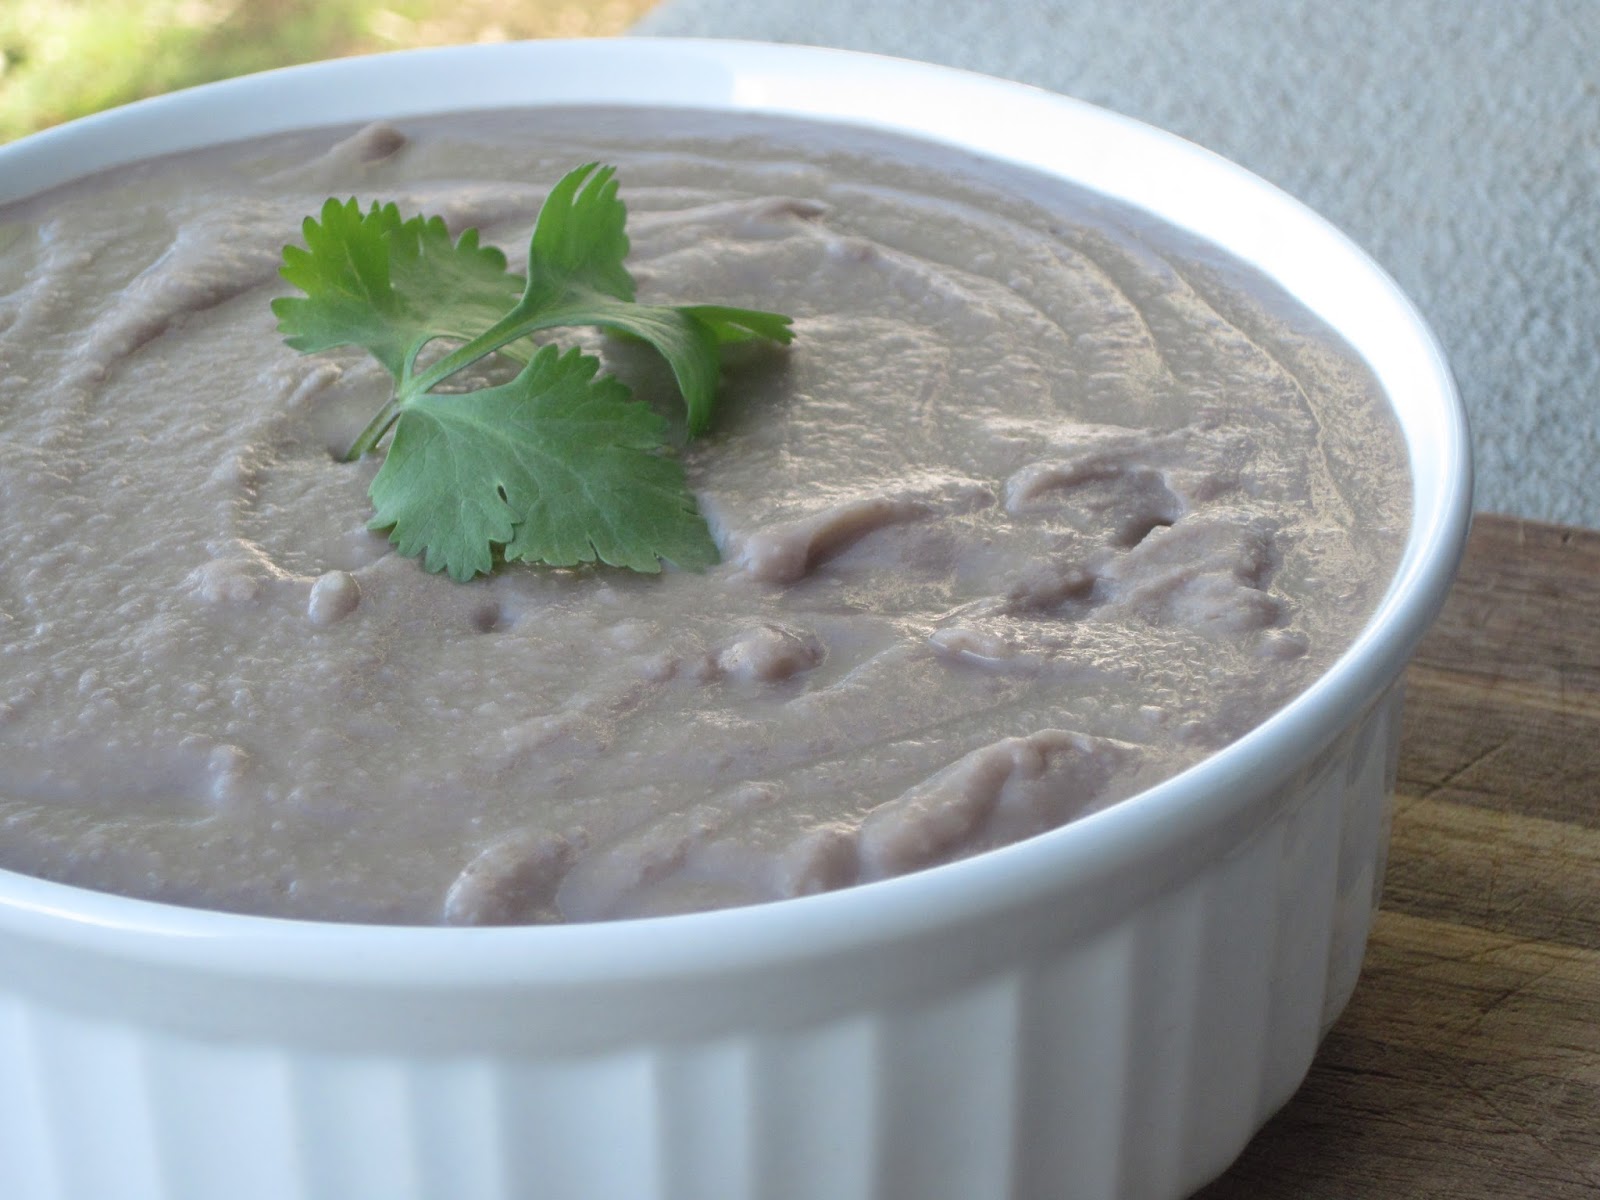
These beans are simple goodness, to put it plainly. They are part of my ever-growing list of pantry items that I now make homemade.  Let me tell you they are well worth the small effort it takes, as they basically make themselves.  I love these beans because they just taste fresh and free from extra sodium, sugar and others stuff often found in the canned ones.

Beans are a wonderful food!  They are cheap and healthy, loaded with lots of fiber, iron and potassium, as well as protein.


Homemade Refried Beans
1 lb. dry pinto beans
8-10 cups water
1 Tbsp. granulated garlic
1/2 medium onion, cut in large chunks
1 1/2 Tbsp.  chicken bouillon granules (or sub part of the water for broth)

2 Tbsp. butter
salt, to taste

Rinse the beans thoroughly and put them in a large pot.   Add water, granulated garlic, onion and bouillon.  Bring to a boil, then reduce heat to medium or medium-low.  Off-set a lid on top of the pot and cook until beans are tender.  Depending on the freshness of the beans it could take as little as 1 1/2 hours, up to 3 hours. 

When beans are finished cooking, pour off about half, or more, of the liquid, reserving about a cup, if desired.  Using an immersion blender, puree the beans and onions until smooth.  You'll want to keep them a little runny because they will set up as they cool.  If they are too dry, add some of the reserved liquid to thin them out.  Add butter and salt, to taste. 


*Michele's notes: 
-I like to make a large pot at once because then I can freeze the rest into 1-2 cup portions for later use.  I often add a little more liquid to the ones I'm going to freeze, because as they are reheated, they will lose some liquid.  This keeps them from getting to dry.

-I also like to buy my beans in the bulk section of my grocery store.  They tend to be much more fresh and cook up on the lower end of the cooking time.  The 1-lb bags at the grocery store are much older and often take a long time to cook; although they still should taste fine.

Thursday, July 25, 2013

Penne Pasta with Roasted Beet Sauce


I don't think there's a whole lot I have to say to make you intrigued about this dish.  It's neon pink!!  The night I made this for dinner, my daughter saw me grating the parmesan and asked if we were having spaghetti.  I replied, "no, I'm making pink noodles," to which she then said, "pink noodles, that just doesn't make any sense!"  I had to laugh, she's kind of right, it does seem a little out there.  However, if you're a beet-lover, this will be right up your alley.

This pasta actually has a similar flavor profile of an ice cream I made last summer with beet puree, mascarpone, poppy seeds and orange.  I was thinking about it the whole time I was making this pasta.  Mmmmmm!  I ended up not having an orange though, which I actually wanted to use, so I used lemon instead at the last second and it worked out perfectly.  The citrus cuts the earthy dirt-like flavor of the beets and really balances and brightens up the sauce.

This dish is super quick to throw together.  If you roast your beets ahead of time, the sauce can be done in the time it takes the pasta to cook.  Yay for quick and easy.  Serve it with a large salad, and you're good to go.


Penne Pasta with Roasted Beet Sauce
3 medium-sized beets, cleaned and quartered
2 Tbsp.  olive oil
pinch of dry thyme (or a sprig or two 0f fresh)
2-3 cloves garlic
1 Tbsp. balsamic vinegar
2 Tbsp. white cooking wine (or a little extra pasta water or stock)
1/2 cup freshly grated parmesan cheese
1/2 cup chicken or vegetable stock
1/4 cup heavy cream (can sub full-fat coconut milk)
1 tsp. sugar
1 tsp. lemon zest
juice of half a lemon
3/4 pound penne pasta
salt and freshly ground pepper

Garnishes:
poppy seeds
mint leaves, chopped
extra parmesan


Preheat oven to 400 degrees F.

On a rimmed baking sheet, toss the diced beets with 1 tablespoon of the olive oil, thyme and a pinch of salt and pepper. Roast for 30-40 minutes.  (You could also roast the garlic with the beets-yum!)

Bring a large pot of water to a boil.  Drop pasta and cook according to package directions.

Transfer beets to a food processor. Add the garlic, balsamic vinegar, cooking wine, half of the parmesan and the remaining tablespoon of oil. Pulse until smooth.

Transfer beet mixture to a small saucepan. Add the stock and cream and bring to a light simmer. Add the sugar and the remaining cheese. Simmer on medium-low about 5-7 minutes. Take it off the heat. (If you have an immersion blender now would be a good time to give it one last whiz so it's nice and smooth.  Or you can put it back in the food processor or a blender.)  Just before adding it to the cooked pasta, add the lemon zest and juice; stir to combine. Taste for seasoning.

Drain cooked pasta and return to skillet. Pour the sauce over the pasta and toss to combine. Check for seasoning one more time and adjust as necessary. Allow pasta to sit a few minutes to soak up the sauce.

Serve pasta warm, with garnishes of your choice.

Michele's notes:
-if you don't have a lemon, you could use an orange in it's place for both the zest and juice, probably even a lime in a pinch; just add a little at a time so it's not overpowering.
-If you don't have fresh mint leaves or can't find them, try using cilantro or even fresh basil.


Source: Adapted from Bev Cooks 

Monday, July 22, 2013

Menu Plan Monday Week 30 (2013)

I know I'm getting the menu up for this week a little later than I usually do but I think I'm still feeling "car-lag" (if there is such a thing) from our week-long vacation we just got home from.  We went to Seattle and had an absolute blast!!  We were treated to some delicious seafood from the famous Etta's, seriously good pizza from Serious Pie and the most amazing ice cream from Mora I have ever eaten.  I can't wait to recreate that one at home...hopefully soon.

I got a bountiful basket on Saturday because I knew my fridge would be EMPTY after we got home and I wanted at least something in there we could eat off of for  a few days until I could get a little more grocery shopping done.  I came home with a boat load of blueberries (yum! for smoothies), a ton of kale and not 1 but 2 heads of cabbage.  As if 1 head didn't make a mountain by itself.  Soooo, I hope I can use all the cabbage before it goes bad.  Luckily it keeps well for a while.


Dinner Menu 
Monday
Ham and Gruyere Stuffed Potatoes
Sweet Kale Salad
Steamed broccoli (from the garden yay!!)

Tuesday
Crispy Lemon-Basil and Parmesan Crusted Chicken
peas
leftover salad

Wednesday
Asian Slaw with Roasted Peanuts and Ginger Lime Salad Dressing
Easy Sesame Peanut Noodles

Thursday
Penne Pasta in Roasted Beet Sauce
Italian Salad

Friday
Cashew Chicken & Rice
fresh veggies

Saturday
Pizza/leftovers

Sunday
Family dinner at my parents

Thursday, July 18, 2013

Stuffed Red Peppers with Wild Rice, Spinach and Goat Cheese


A few weeks ago red peppers were on sale pretty cheap so I had my husband bring me home a huge bag of them.  We go through a lot of red peppers around here.  I love them in my salads, with hummus or in stir-fries and they're a veggie my kids will actually eat and enjoy! But even with as often as we eat them, I still had some leftover that would take more than a salad to finish.

Stuffed peppers have been on my list to make forever!  I've even had the wild rice sitting in my pantry just waiting to be used.  Actually, the night I made these I was planning on making lasagna rolls with a similar flavor profile but a light bulb went off at the last minute.

I'm glad I followed my gut on this one and went with the stuffed pepper idea.  They were so delicious!!  My favorite part...the goat cheese. 

Stuffed Red Peppers with Wild Rice, Spinach and Goat Cheese
1 cup wild rice
3 cups reduced sodium chicken stock
3 large red peppers (or 4 medium for smaller portions)
1/2 large onion, diced
1 clove garlic
1/2 cup sun-dried tomatoes
1 10-oz bag baby spinach
1 Tbsp. balsamic vinegar
1 tsp. dried oregano
pinch of red pepper flakes
salt and pepper, to taste
4 oz. goat cheese
1/2 cup chopped pecans

Prepare rice ahead of time; about an hour.   Bring to boil 3 cups reduced sodium chicken stock.  Add rice, reduce heat and cover.  Cook for 45-50 minutes. Uncover and fluff with fork.

Preheat oven to 350 degrees F.  Halve bell peppers and lay them on a baking sheet.  Sprinkle with a pinch os sea salt and bake for about 10 minutes.

Meanwhile, heat a large skillet over medium heat.  Add a drizzle of olive oil and onions. Sauté about 10 minutes or until tender and slightly golden. Add garlic during last 30 seconds, being careful not to burn it.  Remove from heat and add tomatoes and spinach.  Stir to combine and just wilt the spinach.  Add in the remaining ingredients and stir until incorporated.  Taste for seasoning and add salt and pepper  as necessary.

Spoon mixture into peppers halves and sprinkle with pecans. Bake uncovered about 20-25 minutes, until peppers are tender.

Serve warm.


Monday, July 15, 2013

Fresh Peach Buttermilk Scones

 
Fresh summer peaches are just about my favorite thing in the world!! Every bite dripping down your chin, slurping up the juices and going back for more.  Mmm, doesn't get much better than that. Local peaches are just about to start popping up in grocery stores and farmer's markets all over town and I cannot wait!!   Until they arrive locally, we're still getting pretty good peaches from outside the state and other than gobbling them up as fast as they are ripe, I had to save a couple to make delicious fresh scones!  Of course. I'm a breakfast freak...and a scone freak.

I lightened up these scones a bit by using buttermilk and half whole wheat flour and added a little crunch with some raw sugar sprinkled on top.  These scones are absolutely delightful and a must for those summer peaches!

Fresh Peach Buttermilk Scones
1 cup all-purpose flour
1 cup whole wheat flour
1 Tbsp. baking powder
1/4 cup sugar
1/2 tsp. salt
1 tsp. cinnamon
1/2 tsp. ground ginger
1/4 tsp. nutmeg
pinch of cloves
5 Tbsp. unsalted butter, chilled and cut into cubes
1 cup buttermilk
1 cup fresh peaches, peeled and small-diced
coarse sugar, for sprinkling

Preheat oven to 425 degrees F.

In large work bowl of a food processor fitted with steel blade, add flours, baking powder, sugar, salt and spices.  Pulse a few times to combine.  Add butter and whiz until mixture resembles a coarse meal.

Put mixture into a mixing bowl. Add peaches and toss.  Add buttermilk. Stir with a spoon until a dough forms. Use your hands to bring it together. Turn onto a lightly floured surface and knead gently, only about 3 or 4 times, adding a bit more flour, if needed. Do not over-work or dough will be chewy.

Form scones by patting the dough into a circle and cut into wedges.

Place scones on un-greased baking sheet.  Brush with a little more buttermilk and sprinkle each with coarse sugar. Bake until lightly brown, 12 to 15 minutes. Cool on wire rack for at least 10 minutes. Serve warm or at room temperature.

Thursday, July 11, 2013

Grilled Greek Chicken


Wow, wow, wow!!! I will never look at Greek Chicken the same again.   When I see this picture I want to call it Chicken Bruschetta, but in Greek.  However, I don't speak Greek and wouldn't trust an online translation, so I'm calling it Greek Chicken...I know, original right? Believe me though, it's a party in your mouth!

The chicken is actually pretty simple and no-fuss, but what makes it amazing is the tomato salsa that tops it.  Now I've made plenty of tomato, cucumber and feta-type salads to go with our occasional Greek meal, but this one blows them away.  The key ingredient??? MINT! Oh, how lovely. 

Grilled Greek Chicken
for the chicken:
2 chicken breasts, butterflied
1 Tbsp. olive oil
2 Tbsp. red wine vinegar
juice of a lemon
3-4 cloves garlic, minced
1 tsp. Dijon mustard
1 Tbsp. dried oregano
a pinch of salt and pepper

for the salad:
1 pint cherry tomatoes, halved
1/3-1/2 cup crumbled feta cheese
1/2 cup olives, halved (kalamata if you choose, I don't care for them)
1/2 cup mint leaves, chopped
1 Tbsp. olive oil
salt and pepper, to taste

For the marinade, whisk together olive oil, vinegar, lemon juice, garlic, mustard, oregano, salt and pepper.  Place chicken in a shallow dish and pour marinade over the top, turning to coat. Marinate on the counter up to 30 minutes if cooking the chicken right away.  Cover and marinate 3 hours, up to overnight otherwise.

For the salad, combine tomatoes, feta, olives and mint in a small salad bowl. Drizzle with olive oil, sprinkle with salt and pepper.  Toss to coat.  Set aside.

Preheat outdoor grill and cook chicken until no longer pink inside; about 4-5 minutes per side.  Place chicken on a serving platter and let it rest about 5 minutes.  Spoon salad mixture over the top. Serve warm.

SOURCE: Laa Loosh

Monday, July 8, 2013

Homemade Flour Tortillas


Oh, what a treasure these are!!!  I put off making my own tortillas for the longest time.  I'm not sure I can pinpoint the exact reason for it but I'm sure it had to do with the fact that I just didn't want to spend the time on it.  Well, come to find out, these don't take that much time at all to make and the flavor is FAR superior than anything you can buy at the store.

I try to make as much of our food from scratch as I can.  I know it takes a lot of time and effort but I think it's worth it.  I want to know EXACTLY what I am feeding my family.  If you're on that path and are feeling overwhelmed, I suggest you take one thing at a time, get good at it, then add another.  For me it was bread. I started making our bread about 5 years ago.  That was pretty much the only pantry staple I made for a long time.  Gradually I started making more and more and stopped buying boxed and pre-made items at the grocery store.  Now that I make our tortillas I can't imagine going back.  These are made with just white flour but whole wheat works great too, or even half and half.


Homemade Flour Tortillas
3 cups flour (unbleached, whole wheat or a combination)
1 1/2 tsp. salt
1/4 cup coconut oil (measure solid)
1 cup hot water

Add everything into the bowl of a stand mixer fitted with a dough hook.  Mix on low for about 5 minutes.  Although the dough does not need to rise, it's good to let it sit for a bit to let it rest so that it is easier to roll out. 

Divide the dough into 12 equal pieces.  Roll each into a ball and cover with a damp towel or plastic wrap.  Let rest at least 20 minutes, up to 2 hours.

Preheat griddle on hottest setting.  On a lightly floured surface, roll out dough, one ball at a time, to about 1/8-inch thickness, or as thin as you can get it. Place on hot griddle and cook for about 30-45 seconds, or until lightly golden.  Flip and cook another 30-45 seconds.  Place cooked tortillas on a large plate and continue until all the dough is rolled and cooked. Cover with a clean dish towel or tin foil to keep them warm. 

*Alternately you can cook them in a large skillet.  Preheat the skillet to medium high.  Cook your first tortilla and adjust time and temperature as necessary according to doneness.

Keep leftovers in an airtight container or sealed bag on the counter for up to a week, or in the freezer 3 to 4 months.

Monday, July 1, 2013

The Perfect Hamburger


What is summer without the perfect burger?  I've been making these burgers forever.  They are so simple but really the best homemade burger I have ever made.  My oldest daughter asks for hamburgers about once a week at least so I'm glad I have this simple recipe to throw together.  They are so quick, you'll be finished making them before the grill heats up!

I like to serve my burgers on whole wheat buns, I use this recipe and substitute whole wheat flour, with just lettuce, tomato, mayo and ketchup.  I know, pretty plain, but there are some things that just don't need to be complicated.


The Perfect Hamburger
1 lb. ground sirloin
2 Tbsp. finely chopped yellow onion (I use dehydrated since it's just a small amount)
1 clove garlic, minced
1 tsp. salt
1/2 tsp. freshly ground black pepper
1-2 dashes Worcestershire sauce

Place everything in a mixing, bowl. Mix together with your hands until well incorporated.  Form into patties; I do about 5-6 per pound.

Preheat outdoor grill over medium-high heat.  Oil the grates of the grill.  Place the patties on the heated grill and cook 4-5 minutes.  Flip and cook another 3-4 minutes.

Serve warm with toasted buns and toppings of your choice.


SOURCE: Williams Sonoma
Related Posts Plugin for WordPress, Blogger...