So, um, prepare to have your socks knocked off, mm-kay! What an unlikely combination, this pizza is; strawberries, cilantro, bacon, balsamic vinegar and a few other things. I was completely intrigued by this pizza and I happened to have every single ingredient the day I stumbled upon this recipe. So, as any good food blogger would do, I made it-like immediately, that very day!
Unfortunately, the power went out the first time I made this pizza (right as I was putting it in the oven), and although it tasted wonderful, the crust didn’t turn out quite right because it was only being cooked with the residual heat left in the oven. Well, I had no problem making it again, in fact I could hardly wait.
Now is still a great time to get strawberries in season, so I suggest you make this pizza rapido!! Your family and your belly will thank you.
So, without further ado, here are the cast of characters.....
Doesn't it look pretty all put together? I love all the colors! Colorful food is yummy food in my book.
Strawberry Balsamic Bacon Pizza
For the sauce:
¼ cup balsamic vinegar
½ cup good quality strawberry jam or preserves
1 Tbsp. sriracha sweet chili sauce
To assemble:
1 ball pizza dough
olive oil, for brushing
1 cup shredded or diced cooked chicken
4 slices bacon, diced and cooked until crisp
1/4 cup thinly sliced red onion
4 oz. shredded mozzarella cheese
2 oz. freshly grated Parmesan cheese
2-3 Tbsp. minced fresh cilantro
Scant 1/2 cup hulled strawberries, small-diced
Add the balsamic vinegar to a small saucepan over medium-high heat. Bring to a boil, reduce to a simmer, and let cook 4-5 minutes or until reduced by about half with a thick, syrupy texture. In a small bowl, combine the balsamic reduction with the strawberry jam and sriracha chili sauce. Set aside.
To make the pizza, heat the oven to 500˚ F and preheat a pizza stone. Roll out the pizza dough into a 12-14 inch round. Lightly brush the perimeter of the dough with olive oil. Spread the balsamic-strawberry mixture in a thin layer over the crust. Layer with the chicken, bacon, onion, cheeses, cilantro, and strawberries.
Transfer the pizza to the preheated pizza stone and bake until the cheese is melted and bubbling and the crust is lightly browned, about 8-10 minutes. Remove from the oven and let cool slightly before slicing and serving.
SOURCE:Slightly adapted from Annie's Eats, originally from The Cafe Sucre Farine
Tuesday, May 29, 2012
Thursday, May 24, 2012
Spicy Basil Chicken with Sweet Peppers and Snow Peas
I cook a lot of Asian and Thai-style dishes, partly because they don't use dairy, but mostly because they are so delicious! I have really grown to love this style of food.
As you know from my last post, I was looking for anything and everything that I could make using fresh basil. The stuff just speaks to me. I walk by it in the grocery store and I JUST CANNOT RESIST! So, when I came upon this recipe recently, I knew I would have to make it soon.
Let me tell you, this is not your mamma's chicken and rice dinner!
If you have never used fish sauce, don't be intimidated! I was for a while. And then even after I bought a bottle and opened it up I wondered if it really would taste good, because, honestly it doesn't smell that good by itself. There's something about it though when you add it in Asian dishes. It magically transforms them, deepening the flavor and giving it that salty bite. Be warned though, don't be heavy handed...a little goes a long way.
The dish is balanced out with a little sweet and spicy from the sweet chili sauce and, of course that pop from the fresh basil added in at the very end.
Spicy Basil Chicken with Sweet Peppers and Snow peas
olive oil
1/4 cup onion, finely diced
2 red bell peppers
1/2 lb snow peas, trimmed and cut in half, if desired
3 garlic cloves, minced
6 skinless, boneless chicken thighs, cut into 1-inch pieces
2 Tbsp. fish sauce
4 tsp. low-sodium soy sauce
2 Tbsp. sweet chili sauce
2 tsp. water
1 teaspoon cornstarch
1/2 cup sliced basil leaves
Thai Coconut Rice (omit cilantro for this recipe)
Heat a large nonstick skillet over medium-high heat. Drizzle olive oil and swirl to coat. Add onion and saute until soft and translucent, about 3-4 minutes, then add peppers and peas and saute another 3-4 minutes, until they are crisp-tender. Add garlic to pan during the last 30 seconds or so of cooking. Remove veggies to a plate and set aside.
Add another drizzle of olive oil to the pan and let it heat up. Add the chicken pieces and cook until chicken is no longer pink. While chicken is cooking, combine fish sauce and the next 4 ingredients in a small bowl Stir with a whisk to combine.
Return veggies to the pan with the chicken and add fish sauce mixture. Cook for 1 minute or until mixture thickens, stirring to coat chicken and veggies. Remove from heat. Stir in basil. Serve warm with Thai Coconut Rice.
SOURCE: Adapted from Cooking Light on myrecipes.com
As you know from my last post, I was looking for anything and everything that I could make using fresh basil. The stuff just speaks to me. I walk by it in the grocery store and I JUST CANNOT RESIST! So, when I came upon this recipe recently, I knew I would have to make it soon.
Let me tell you, this is not your mamma's chicken and rice dinner!
If you have never used fish sauce, don't be intimidated! I was for a while. And then even after I bought a bottle and opened it up I wondered if it really would taste good, because, honestly it doesn't smell that good by itself. There's something about it though when you add it in Asian dishes. It magically transforms them, deepening the flavor and giving it that salty bite. Be warned though, don't be heavy handed...a little goes a long way.
The dish is balanced out with a little sweet and spicy from the sweet chili sauce and, of course that pop from the fresh basil added in at the very end.
Spicy Basil Chicken with Sweet Peppers and Snow peas
olive oil
1/4 cup onion, finely diced
2 red bell peppers
1/2 lb snow peas, trimmed and cut in half, if desired
3 garlic cloves, minced
6 skinless, boneless chicken thighs, cut into 1-inch pieces
2 Tbsp. fish sauce
4 tsp. low-sodium soy sauce
2 Tbsp. sweet chili sauce
2 tsp. water
1 teaspoon cornstarch
1/2 cup sliced basil leaves
Thai Coconut Rice (omit cilantro for this recipe)
Heat a large nonstick skillet over medium-high heat. Drizzle olive oil and swirl to coat. Add onion and saute until soft and translucent, about 3-4 minutes, then add peppers and peas and saute another 3-4 minutes, until they are crisp-tender. Add garlic to pan during the last 30 seconds or so of cooking. Remove veggies to a plate and set aside.
Add another drizzle of olive oil to the pan and let it heat up. Add the chicken pieces and cook until chicken is no longer pink. While chicken is cooking, combine fish sauce and the next 4 ingredients in a small bowl Stir with a whisk to combine.
Return veggies to the pan with the chicken and add fish sauce mixture. Cook for 1 minute or until mixture thickens, stirring to coat chicken and veggies. Remove from heat. Stir in basil. Serve warm with Thai Coconut Rice.
SOURCE: Adapted from Cooking Light on myrecipes.com
Labels:
Asian,
Chicken,
main dishes,
Quick n' Easy,
Rice
Monday, May 21, 2012
Italian Salad with Basil Vinaigrette
So, I recently had a birthday. For once, it took me a while to decide what kind of cake I wanted to make, but I had no problem deciding what I wanted to make for dinner. It was easy, anything and everything with fresh basil! I swear that stuff is completely intoxicating to me. I love the smell, I love the bright taste and how it perfectly accents so many dishes.
Salads are one of my most favorite things to eat for lunch or dinner and I especially love making my own dressings to go with them. So as part of my meal, I decided to make this Italian salad with a basil vinaigrette. The salad itself, although wonderful, is pretty traditional, but the vinaigrette is brilliant! What better way to get that basil-y goodness jam-packed into every bite than to whiz it up in the dressing? I loved it, slurped it and doused my salad in it. De-lish!
Italian Salad with Basil Vinaigrette
For the salad:
1 head romaine lettuce
1 red bell pepper, julienned
1 yellow bell pepper, julienned
2 tomatoes on the vine, (sliced, diced or chopped)
1/2 small red onion, very thinly sliced
olives (black or kalamata)
croutons (optional)
grated Parmesan cheese
For the vinaigrette:
Handful of basil leaves (about 1/3 cup)
1/4 cup olive oil
2 Tbsp. balsamic vinegar
2 Tbsp. red wine vinegar
1 clove of garlic
1 tsp sugar, to taste
Sea salt and freshly cracked pepper, to taste
Prepare the salad ingredients and place in a large salad bowl, topping with croutons and grated Parmesan cheese.
To prepare the vinaigrette, you can do it one of two ways. Most of the time, I like to just put all my ingredients in a small mason jar, put the lid on and shake it up. However, I wanted the basil to be chopped up more than a rough chop so it would be more evenly distributed throughout the dressing, so I put it in my little Cuisinart and blended it up real well.
Serve over salad. Enjoy!
SOURCE: For the Love of COoking
Salads are one of my most favorite things to eat for lunch or dinner and I especially love making my own dressings to go with them. So as part of my meal, I decided to make this Italian salad with a basil vinaigrette. The salad itself, although wonderful, is pretty traditional, but the vinaigrette is brilliant! What better way to get that basil-y goodness jam-packed into every bite than to whiz it up in the dressing? I loved it, slurped it and doused my salad in it. De-lish!
Italian Salad with Basil Vinaigrette
For the salad:
1 head romaine lettuce
1 red bell pepper, julienned
1 yellow bell pepper, julienned
2 tomatoes on the vine, (sliced, diced or chopped)
1/2 small red onion, very thinly sliced
olives (black or kalamata)
croutons (optional)
grated Parmesan cheese
For the vinaigrette:
Handful of basil leaves (about 1/3 cup)
1/4 cup olive oil
2 Tbsp. balsamic vinegar
2 Tbsp. red wine vinegar
1 clove of garlic
1 tsp sugar, to taste
Sea salt and freshly cracked pepper, to taste
Prepare the salad ingredients and place in a large salad bowl, topping with croutons and grated Parmesan cheese.
To prepare the vinaigrette, you can do it one of two ways. Most of the time, I like to just put all my ingredients in a small mason jar, put the lid on and shake it up. However, I wanted the basil to be chopped up more than a rough chop so it would be more evenly distributed throughout the dressing, so I put it in my little Cuisinart and blended it up real well.
Serve over salad. Enjoy!
SOURCE: For the Love of COoking
Labels:
Condiments,
Salads
Wednesday, May 16, 2012
Whole Wheat Spaghetti with Spicy Broccoli
This right here is my kind of meal. It's healthy, quick and easy, and with just a few ingredients. It's also something my kids would eat and that I would enjoy as well. Broccoli is one of my girls' most favorite veggies and what kid doesn't like noodles? It was a thumbs up all around!
Because of it's simplicity, this dish is pretty adaptable. You can add some cooked meat (grilled chicken, bacon, Italian sausage or ham). You can also pump up the veggie factor by adding in sauteed mushrooms and onions, grape tomatoes or really whatever you'd like. I can't wait to try this again.
Whole Wheat Spaghetti with Spicy Broccoli
2 large crown of broccoli
3 tablespoons extra-virgin olive oil
3 garlic cloves, minced
1/2 teaspoon dried hot red pepper flakes
Salt
1/2 pound (8 ounces) whole wheat, whole grain or regular spaghetti
1/2 cup Parmesan, shredded, or to taste
Bring a large stock pot full of water to a boil.
Cut the he stalks off the broccoli and cut the florets into bite-size pieces. Set aside.
Warm the oil in a large skillet over medium heat. Add garlic and red pepper flakes, and sauté about 1 minute. Turn off the heat, and stir in 1/2 teaspoon salt.
When the water comes to a boil, drop the pasta and cook until the almost al dente, about 5 minutes, then add the broccoli.
Continue cooking until the pasta is al dente and the broccoli is tender, about 2 minutes. Drain, reserving 1/4 cup of the cooking liquid.
Add the spaghetti and broccoli to the skillet and toss over high heat. Add the reserved cooking liquid to moisten the dish. Divide into bowls, top with cheese, and serve immediately.
SOURCE: Ezra Pound Cake
Because of it's simplicity, this dish is pretty adaptable. You can add some cooked meat (grilled chicken, bacon, Italian sausage or ham). You can also pump up the veggie factor by adding in sauteed mushrooms and onions, grape tomatoes or really whatever you'd like. I can't wait to try this again.
Whole Wheat Spaghetti with Spicy Broccoli
2 large crown of broccoli
3 tablespoons extra-virgin olive oil
3 garlic cloves, minced
1/2 teaspoon dried hot red pepper flakes
Salt
1/2 pound (8 ounces) whole wheat, whole grain or regular spaghetti
1/2 cup Parmesan, shredded, or to taste
Bring a large stock pot full of water to a boil.
Cut the he stalks off the broccoli and cut the florets into bite-size pieces. Set aside.
Warm the oil in a large skillet over medium heat. Add garlic and red pepper flakes, and sauté about 1 minute. Turn off the heat, and stir in 1/2 teaspoon salt.
When the water comes to a boil, drop the pasta and cook until the almost al dente, about 5 minutes, then add the broccoli.
Continue cooking until the pasta is al dente and the broccoli is tender, about 2 minutes. Drain, reserving 1/4 cup of the cooking liquid.
Add the spaghetti and broccoli to the skillet and toss over high heat. Add the reserved cooking liquid to moisten the dish. Divide into bowls, top with cheese, and serve immediately.
SOURCE: Ezra Pound Cake
Labels:
Figure Friendly,
Kid-Friendly,
main dishes,
Meatless,
Pasta,
Vegetables
Thursday, May 10, 2012
Baked Chicken and Roasted Red Pepper Taquitos
I guess I still have Cinco de Mayo on the brain from last week because I keep thinking of Mexican-style meals to make. It's a good thing though, because we love Mexican food here and I don't make it enough!
I am always looking for quick and healthy meals that a) don't involve a lot of dairy and b) don't involve a lot of meat. I saw a version a of these taquitos a while ago and knew with some tweaking they would be a new family favorite. I love the combination of beans, corn and chicken with Mexican flavors. The roasted red pepper was a great addition that lends a unique flavor and the spinach and cilantro not only pump up the health factor, they add great color and eye appeal! If you don't have roasted red pepper, you can roast your own (tip below) or just use fresh and saute it with the onion.
You'll want to add these to your dinner rotation soon! Tasty and quick to prepare, they make a perfect weeknight meal.
Baked Chicken and Roasted Red Pepper Taquitos
olive oil
1/2 small onion, finely diced
1 clove garlic, minced
2 tsp. cumin
pinch cayenne pepper (optional, especially if you have little mouths to feed)
salt and pepper, to taste
1 cup chicken, cooked and chopped into bite-sized pieces
1 can black beans, drained and rinsed
1 cup frozen corn, un-thawed
*1 roasted red pepper, small-diced
1/2 cup chicken broth
2 cups fresh spinach, washed and chopped
1/4 cilantro, chopped
1 cup shredded cheese (Monterrey or Pepper Jack, Mexican blend, etc.)
12 8-inch whole wheat tortillas
In a large skillet, heat a good drizzle of olive oil (about a tablespoon). Add onion and saute over medium heat until soft and translucent. Add garlic, cumin, cayenne, salt and pepper and saute about 30 seconds. Add the rest of the ingredients, except the cheese, and stir to coat evenly with the spices. Cook until the chicken broth has just about evaporated completely. Turn off the heat, but keep pan on burner and stir in the spinach and cheese. The residual head from the burner with wilt the spinach and melt the cheese. Add cilantro just before filling taquitos.
Preheat oven to 425 degrees F. Wrap tortillas in a clean kitchen towel and warm them in the microwave for about 30-60 seconds. Spray a large baking sheet, such as a cookie sheet, with cooking spray. Lay one tortilla at a time on a large plate. Scoop about 1/4-1/3 cup filling across the bottom third of the tortilla. Roll it up, leaving the ends open. Place on cookie sheet, seam side down. Repeat with remaining filling and tortillas.
Once all the taquitos have been assembled, brush the tops with olive oil and bake for about 10-15 minutes or until golden brown. (This would also work as a great freezer meal. You could stop before brushing the tops with olive oil, cover the cooking sheet with plastic wrap and freeze. Once frozen, remove taquitos from cookie sheet and place in a zip-top freezer bag. When you're ready to bake, remove desired amount of taquitos, brush with olive oil and bake about 5 minutes longer.)
Serve warm with desired garnished: fresh lime, sour cream, guacamole, salsa
*To make your own roasted red peppers, cut fresh red peppers in half removing stem and seeds, and place them on a cookie sheet. Place under the broiler until they are mostly black and charred. Remove from oven and immediately place in a bowl with a lid or a paper bag. Once they are cooled, remove as much of the skin as you can (sometimes it's tricky and it doesn't all come off, but it's not a big deal). Use immediately, refrigerate for 3-5 days or freeze. If you plan to freeze them, I suggest you portion them into 1-2 peppers pr baggie. I usually place each pepper in a little sandwich bag, then place all the sandwich bags into a larger zip-top freezer bag so they are all together.
SOURCE: Adapted from Savour the Senses
I am always looking for quick and healthy meals that a) don't involve a lot of dairy and b) don't involve a lot of meat. I saw a version a of these taquitos a while ago and knew with some tweaking they would be a new family favorite. I love the combination of beans, corn and chicken with Mexican flavors. The roasted red pepper was a great addition that lends a unique flavor and the spinach and cilantro not only pump up the health factor, they add great color and eye appeal! If you don't have roasted red pepper, you can roast your own (tip below) or just use fresh and saute it with the onion.
You'll want to add these to your dinner rotation soon! Tasty and quick to prepare, they make a perfect weeknight meal.
Baked Chicken and Roasted Red Pepper Taquitos
olive oil
1/2 small onion, finely diced
1 clove garlic, minced
2 tsp. cumin
pinch cayenne pepper (optional, especially if you have little mouths to feed)
salt and pepper, to taste
1 cup chicken, cooked and chopped into bite-sized pieces
1 can black beans, drained and rinsed
1 cup frozen corn, un-thawed
*1 roasted red pepper, small-diced
1/2 cup chicken broth
2 cups fresh spinach, washed and chopped
1/4 cilantro, chopped
1 cup shredded cheese (Monterrey or Pepper Jack, Mexican blend, etc.)
12 8-inch whole wheat tortillas
In a large skillet, heat a good drizzle of olive oil (about a tablespoon). Add onion and saute over medium heat until soft and translucent. Add garlic, cumin, cayenne, salt and pepper and saute about 30 seconds. Add the rest of the ingredients, except the cheese, and stir to coat evenly with the spices. Cook until the chicken broth has just about evaporated completely. Turn off the heat, but keep pan on burner and stir in the spinach and cheese. The residual head from the burner with wilt the spinach and melt the cheese. Add cilantro just before filling taquitos.
Preheat oven to 425 degrees F. Wrap tortillas in a clean kitchen towel and warm them in the microwave for about 30-60 seconds. Spray a large baking sheet, such as a cookie sheet, with cooking spray. Lay one tortilla at a time on a large plate. Scoop about 1/4-1/3 cup filling across the bottom third of the tortilla. Roll it up, leaving the ends open. Place on cookie sheet, seam side down. Repeat with remaining filling and tortillas.
Once all the taquitos have been assembled, brush the tops with olive oil and bake for about 10-15 minutes or until golden brown. (This would also work as a great freezer meal. You could stop before brushing the tops with olive oil, cover the cooking sheet with plastic wrap and freeze. Once frozen, remove taquitos from cookie sheet and place in a zip-top freezer bag. When you're ready to bake, remove desired amount of taquitos, brush with olive oil and bake about 5 minutes longer.)
Serve warm with desired garnished: fresh lime, sour cream, guacamole, salsa
*To make your own roasted red peppers, cut fresh red peppers in half removing stem and seeds, and place them on a cookie sheet. Place under the broiler until they are mostly black and charred. Remove from oven and immediately place in a bowl with a lid or a paper bag. Once they are cooled, remove as much of the skin as you can (sometimes it's tricky and it doesn't all come off, but it's not a big deal). Use immediately, refrigerate for 3-5 days or freeze. If you plan to freeze them, I suggest you portion them into 1-2 peppers pr baggie. I usually place each pepper in a little sandwich bag, then place all the sandwich bags into a larger zip-top freezer bag so they are all together.
SOURCE: Adapted from Savour the Senses
Labels:
Beans n' Legumes,
Chicken,
Figure Friendly,
Mexican,
Quick n' Easy,
Tomatoes
Friday, May 4, 2012
Cinco de Mayo Round-Up
If you still need some last minute ideas to celebrate Cinco de Mayo, or if you just like Mexican food, I've rounded up some of my favorites for you! (Beware though, some of these posts are OLD!)
Dinner
Baked Chimichangas
Chicken Enchiladas
Chicken Tacos with Mango Salsa
Chiles Rellenos with Mexican Tomato Sauce
Chipotle Bean Tostadas
Tortilla Soup with Southwest Cabbage Slaw
Chipotle Lime Shrimp
Crockpot Tamales
Cafe Rio Style Sweet and Spicy Shredded Pork
Cilantro Lime Rice
Spanish Rice
Posole
Dessert
Arroz con Leche
Dulce de Leche Banana Trifle
Pina Colada Ice Cream
Cinnamon-Honey Ice Cream
Tres Leches Cake
Chocolate Chipotle Cupcakes with Chili Chocolate Ganache
Pastel Frio
Dressings and Sauces
Dulce de Leche
Tomatillo Salsa
Tomatillo Dressing
Dinner
Baked Chimichangas
Chicken Enchiladas
Chicken Tacos with Mango Salsa
Chiles Rellenos with Mexican Tomato Sauce
Chipotle Bean Tostadas
Tortilla Soup with Southwest Cabbage Slaw
Chipotle Lime Shrimp
Crockpot Tamales
Cafe Rio Style Sweet and Spicy Shredded Pork
Cilantro Lime Rice
Spanish Rice
Posole
Dessert
Arroz con Leche
Dulce de Leche Banana Trifle
Pina Colada Ice Cream
Cinnamon-Honey Ice Cream
Tres Leches Cake
Chocolate Chipotle Cupcakes with Chili Chocolate Ganache
Pastel Frio
Dressings and Sauces
Dulce de Leche
Tomatillo Salsa
Tomatillo Dressing
Thursday, May 3, 2012
Baked Chimichangas
Chimichangas are one of my most absolute favorite Mexican foods. My mom has been making these as long as I can remember and they have been the star of many a family gathering. So a little while back I got the hankering for some chimichangas and actually thought I could find a better recipe. So I looked and looked and found a recipe I thought would be good. Well, it got rave reviews and it was good, but it wasn't THIS good. It didn't really compare to my mom's recipe. So, I will never search for another chimichanga recipe again! This is my go-to; perfectly seasoned, wonderful taste!
If you're looking for a main dish to celebrate Cinco de Mayo look no further! These will be the star of your feast. They are easy to throw together, can be made a day in advance and they still get that flaky, crispy outer layer, resembling it's fried form, but healthier since it's baked.
Baked Chimichangas
for the Mexican Meat Mix:
2 lb. beef roast
1-2 cups beef broth
olive oil
1 small onion, finely diced
1 4-oz. can chopped green chiles
1 7-oz. can tomatillo salsa (salsa verde)
2 garlic cloves
1/2 tsp. cumin
3 Tbsp. flour
juices from roast
salt & pepper
for the chimichangas
12 8-inch flour tortillas
sour cream
roma tomatoes, diced
salsa
lettuce, shredded
guacamole
Set out a crock pot large enough to fit your roast. Turn on low.
Heat a small drizzle of olive oil in a large skillet on medium-high. Generously season both sides of roast with salt and pepper and place in skillet. Brown on all sides. Place browned roast into warm crock pot and add beef broth until it reaches about half way up the roast; between 1-2 cups. Cook on low for about 6-8 hours. Alternately you could put the roast in a roasting pan in the oven at about 275 degrees F for about 2-3 hours.
Once roast is cooked, remove meat to a large platter, reserving juices. Shred meat and set aside. In a large skillet, over medium heat, add a drizzle of olive oil. Add onions and saute until translucent. Add garlic and saute about 30 seconds, then sprinkle with flour and saute another minute or so. Add green chiles, tomatillo salsa and cumin, then reserved meat and juices (should be around 1 1/2 cups-feel free to add more broth if you don't have many drippings). Cook about 5 minutes, until it has thickened. Cool slightly.
*Preparing the Mexican Meat Mix can be done a day in advance to minimize time spent in the kitchen during dinner prep.
To assemble the chimichangas: Preheat oven to 350 degrees F. Spray a large baking sheet with cooking spray. Warm tortillas in the microwave about 20-30 seconds so they are pliable when rolling. Spread about 1/4 - 1/3 cup Mexican Meat Mix on lower third of tortilla. Fold bottom edge up over filling, then fold sides toward center and roll up the rest of the way. Place on greased baking sheet and continue with remaining meat mix and tortillas. Brush the tops of each chimichanga with olive oil and bake about 20-30 minutes or until lightly golden.
Serve on top of a bed of shredded lettuce. Top with your choice of garnishes: sour cream, chopped fresh tomatoes, salsa, guacamole, cheese, olives, etc.
*These freeze very well. Once you are done rolling them all up, stop there and place them in a zip-top freezer bag. When you're ready to bake, continue with the rest of the instructions, baking slightly longer to account for them being frozen.
If you're looking for a main dish to celebrate Cinco de Mayo look no further! These will be the star of your feast. They are easy to throw together, can be made a day in advance and they still get that flaky, crispy outer layer, resembling it's fried form, but healthier since it's baked.
Baked Chimichangas
for the Mexican Meat Mix:
2 lb. beef roast
1-2 cups beef broth
olive oil
1 small onion, finely diced
1 4-oz. can chopped green chiles
1 7-oz. can tomatillo salsa (salsa verde)
2 garlic cloves
1/2 tsp. cumin
3 Tbsp. flour
juices from roast
salt & pepper
for the chimichangas
12 8-inch flour tortillas
sour cream
roma tomatoes, diced
salsa
lettuce, shredded
guacamole
Set out a crock pot large enough to fit your roast. Turn on low.
Heat a small drizzle of olive oil in a large skillet on medium-high. Generously season both sides of roast with salt and pepper and place in skillet. Brown on all sides. Place browned roast into warm crock pot and add beef broth until it reaches about half way up the roast; between 1-2 cups. Cook on low for about 6-8 hours. Alternately you could put the roast in a roasting pan in the oven at about 275 degrees F for about 2-3 hours.
Once roast is cooked, remove meat to a large platter, reserving juices. Shred meat and set aside. In a large skillet, over medium heat, add a drizzle of olive oil. Add onions and saute until translucent. Add garlic and saute about 30 seconds, then sprinkle with flour and saute another minute or so. Add green chiles, tomatillo salsa and cumin, then reserved meat and juices (should be around 1 1/2 cups-feel free to add more broth if you don't have many drippings). Cook about 5 minutes, until it has thickened. Cool slightly.
*Preparing the Mexican Meat Mix can be done a day in advance to minimize time spent in the kitchen during dinner prep.
To assemble the chimichangas: Preheat oven to 350 degrees F. Spray a large baking sheet with cooking spray. Warm tortillas in the microwave about 20-30 seconds so they are pliable when rolling. Spread about 1/4 - 1/3 cup Mexican Meat Mix on lower third of tortilla. Fold bottom edge up over filling, then fold sides toward center and roll up the rest of the way. Place on greased baking sheet and continue with remaining meat mix and tortillas. Brush the tops of each chimichanga with olive oil and bake about 20-30 minutes or until lightly golden.
Serve on top of a bed of shredded lettuce. Top with your choice of garnishes: sour cream, chopped fresh tomatoes, salsa, guacamole, cheese, olives, etc.
*These freeze very well. Once you are done rolling them all up, stop there and place them in a zip-top freezer bag. When you're ready to bake, continue with the rest of the instructions, baking slightly longer to account for them being frozen.
Labels:
Beef,
main dishes,
Mexican
Wednesday, May 2, 2012
Arroz con Leche
Have you ever heard that children's song that goes, "Arroz con leche, me quiero casar, con una senorita de san Nicolas. Que sepa coser, que sepa bordar, que sepa abrir la puerta para ir a jugar." Well, probably not if you don't speak Spanish. That song goes through my head every once in a while and it makes me want to make rice pudding, or as it directly translates, rice with milk. This is a treat that I often enjoyed while living in South America many years ago. We ate it plain and simple, no special ingredients, just rice, milk, sugar and a little cinnamon. Sometimes we'd put a little dollop of dulce de leche on top and boy, was that ever delicious!
Even though I am not Mexican, have never been to Mexico and have no distant relatives there I still love the food; simple yet delicious. And I love celebrating Cinco de Mayo. To get you in the mood for Cinco de Mayo this weekend, I've given in to the little song in my head and made this treat so I could share it with you. Hope you enjoy!
Arroz con Leche
8 cups whole milk (2% is ok)
1/2 tsp. salt
1 cinnamon stick
1 cup rice (medium or short grain is nice if you have it)
1/2 cup sugar
Dulce de Leche (optional)
In a sauce pan, slowly heat the milk, salt and cinnamon stick. Bring to a low simmer. Add the rice and sugar and stir. Continue cooking the rice for about 1 hour to 1 hour 15 minutes, stirring about every 5 minutes to prevent sticking and burning on the bottom.
Remove from heat and ladle into individual custard cups. Top with dulce de leche and sprinkle with additional cinnamon.
SOURCE: Cannelle et Vanille
Monday, April 30, 2012
Homemade Dulce de Leche
I love, love, love Mexican food and am so excited about Cinco de Mayo this weekend that I've planned my whole dinner menu this week with almost all Mexican food. I've also got a bunch of Mexican recipes to throw your way to get you in the mood too and give you some ideas if you're like me and love to celebrate.
The first is this dulce de leche. I'm sure most of you have heard of it. It's a dessert sauce, almost like caramel, sweet and creamy. I'm not sure if it's typical in Mexico, but I know they eat it all over South America and I ate it by the kilo when I lived there, so I'm going with it.
This is one dessert sauce you will never want to live without, especially when you find out how easy it is to make. There is one, and only one ingredient: sweetened condensed milk. Now, I know you can do this in your crock pot without ever taking it out of the can, but man, I just can't wait that long. This'll take you just over an hour from start to finish, and you 'll be enjoying this over cake, ice cream, or just by the spoonful (my favorite way)!
Homemade Dulce de Leche
1 14 oz. can sweetened condensed milk
Preheat oven to 425 degrees F. Open the can of milk and pour into a shallow baking dish, like a pie plate. Cover tightly with foil. Make a water bath by placing the shallow dish in a larger dish; a roasting pan works great. Fill the roasting pan with water until it reaches about half way up the smaller dish. Bake for about an hour, then lift the foil to check the color. If it's not a caramely brown color, let it bake another 15-20 minutes.
Remove pans from oven and transfer dulce de leche into a jar with a tight fitting lid-I used a canning jar. You can let it cool some before doing this but don't wait too long or it will start to set and get too sticky and messy to scrape out of the pan.
Enjoy warm or chilled.
Labels:
Condiments,
Desserts
Friday, April 27, 2012
Blueberry Banana Granola
I've been making my own granola for quite a while now and I think I can say with fair certainty that this granola is my favorite one yet! In terms of crunchiness and flavor, this is a real winner. To kick up the crunch a little, I added just a bit of brown sugar to my wet ingredients and while I usually use applesauce as a binder, I decided to use pureed banana. It not only added a touch of natural sweetness but flavor too. Blueberries and bananas go so well together.
If you have never made granola before, don't hesitate, it couldn't be easier. The few minutes it takes to throw together is well worth the end result, and in our house it lasts a couple of weeks. By making your own granola, you get to control what goes in it; that means no preservatives and the amount of sugar you like. If you're not sure where to pick up the nuts, seeds and dried fruit, typical in granolas, check out your local grocery or health food stores that have a bulk foods section. There you can purchase what you want and in the quantities you want as well.
Blueberry Banana Granola
6 cups rolled oats
3/4 cup walnuts, roughly chopped
3/4 cup almonds, roughly chopped
1/3 cup sunflower seeds
1/3 cup pepitas (green pumpkin seeds)
1 cup shredded coconut
1/4 cup honey or maple syrup
1/4 cup coconut oil
1/3 cup pureed banana (about 1 medium banana)
3 Tbsp. brown sugar
1/2 tsp. ground cinnamon
1/2 tsp. ground cardamom (if you don't have cardamom, just use more cinnamon)
1/2 tsp. salt
1 1/2 cups dried blueberries
In a large mixing bowl, add the oats, nuts, seeds and shredded coconut and toss. In a smaller, microwave-safe bowl, add the honey, coconut oil and brown sugar. Microwave it on about half power until coconut oil is melted. Add banana puree, cinnamon, cardamom (or another 1/2 tsp. or cinnamon) and salt and stir until combined. Pour honey mixture over oat mixture and toss until evenly coated. Spread over 2 cookie sheets and bake at 325 for 20-30 minutes, stirring every 5-10 minutes. Cool and toss in blueberries. Store in an airtight container (in the fridge if you want it to keep longer).
SOURCE: adapted from Bob Vivant
Labels:
Breakfast,
Coconut,
Figure Friendly,
Fruit,
Granola,
Kid-Friendly,
Quick n' Easy
Thursday, April 26, 2012
Salad Demos
For those of you who came to my class night at the church, here are the salads I demoed. Thanks to all who attended, I had so much fun!
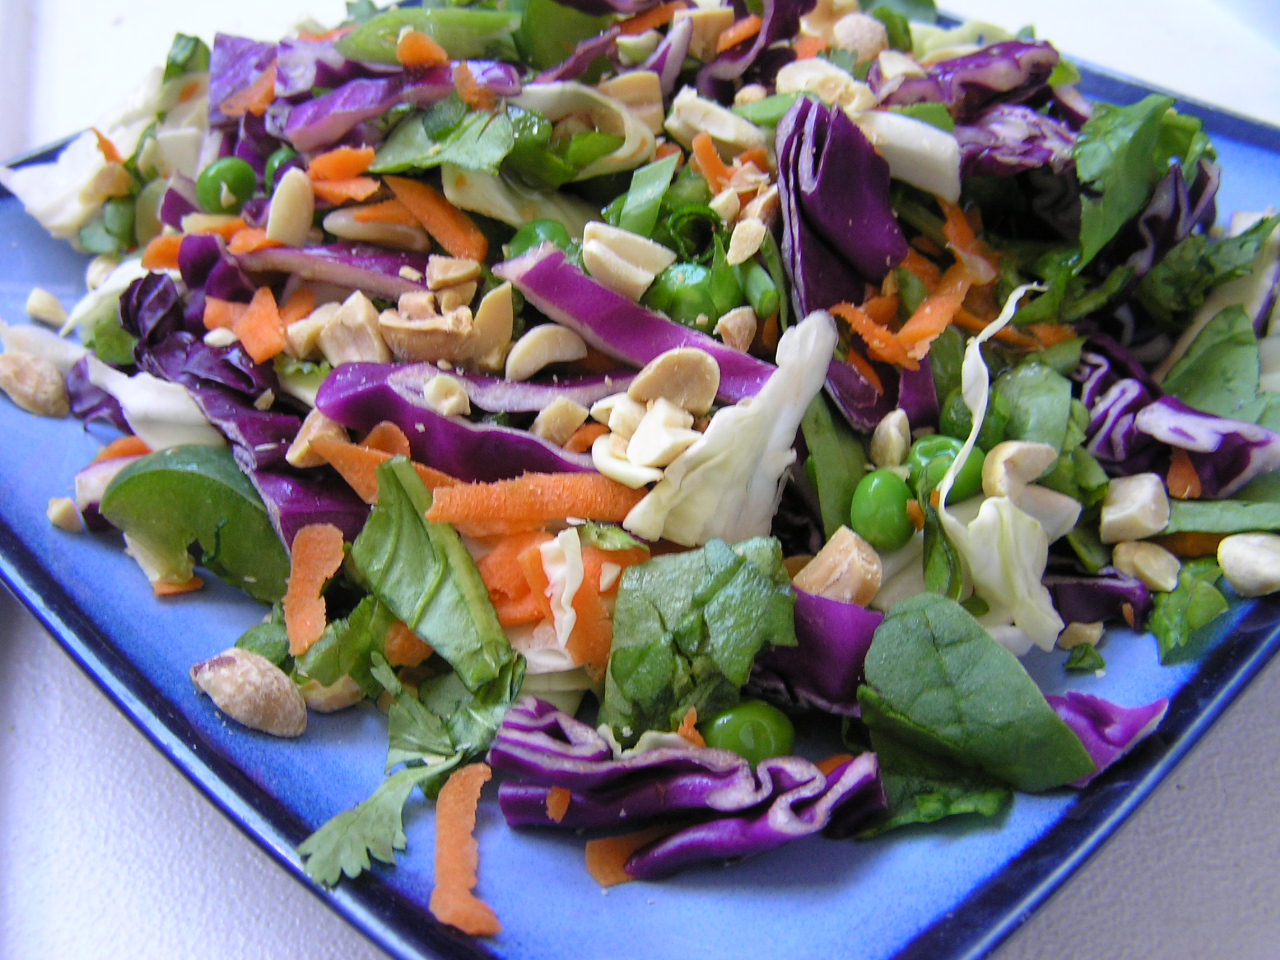
Asian Slaw with Roasted Peanuts and Ginger Lime Dressing
Mango Chicken Salad (Since mangoes were not ripe when I went to the store, I substituted mandarin oranges, and to keep it more budget friendly, I omitted the chicken.)
I realized that I actually demoed the Greek Pasta Salad (swapping lettuce for the pasta) rather than the Greek Panzanella I originally posted. However, I love them both and they do use the same dressing, which is one of my favorites. So, make either or both. Enjoy!
Asian Slaw with Roasted Peanuts and Ginger Lime Dressing
Mango Chicken Salad (Since mangoes were not ripe when I went to the store, I substituted mandarin oranges, and to keep it more budget friendly, I omitted the chicken.)
I realized that I actually demoed the Greek Pasta Salad (swapping lettuce for the pasta) rather than the Greek Panzanella I originally posted. However, I love them both and they do use the same dressing, which is one of my favorites. So, make either or both. Enjoy!
Sunday, April 22, 2012
Lemon Basil Penne with Grilled Chicken
One of the things I love to cook with most of all is fresh basil. Is that weird? I love the bright, fresh flavor that just makes a dish pop! I've tried growing it on my window sill, but we don't get very much direct sunlight here and we don't have a yard (because believe me I would be growing mounds of it if we did). I have a couple of local grocery stores near me that sell fresh basil for a reasonable price, so I splurge every once in a while.
Fresh basil is one of those hallmark flavors of spring and summer fare and pairs perfectly with fresh lemon. I grabbed my basil at the store the other day, not knowing before hand I was going to with it (even though I just had to have it). When I got home and found three lemons in my fridge that needed to be used, I immediately knew I wanted to make this pasta dish. It is so quick and easy and delivers up tons of flavor! I love how just a few fresh and simple ingredients can make some of the best food. This pasta can be served with or without the chicken.
Lemon Basil Penne with Grilled Chicken
for the marinade:
4 chicken breasts, pounded to an even thickness
good drizzle of olive oil
juice of 3-4 lemons
a good squirt of Dijon mustard (about 1 Tbsp.)
dash of salt
for the pasta:
1 pound penne Pasta
4 Tbsp. butter
3 whole lemons, juiced
1 cup heavy cream
1 1/2 cup grated Parmesan cheese
salt and freshly ground black pepper, to taste
20 basil leaves, chopped into ribbons
1 pint cherry tomatoes, halved
Pour all the marinade ingredients into a gallon zip-top bag and add chicken, tossing to coat. Marinate several hours, up to overnight.
Cook pasta according to package directions, reserving 1 cup of hot pasta water when you drain. Set pasta aside in a colander.
While pasta is cooking, grill chicken either on an outdoor grill or indoor grill pan. Cook until no longer pink. Let cool at least 5 minutes, then slice into strips.
In the same pot used to cook the pasta, melt butter over medium heat. Squeeze in the juice of 3 lemons. Whisk together. Pour in cream and whisk until hot. Add cheese and whisk until melted. Add salt and pepper, to taste. Check consistency, adding some of the hot pasta water to loosen the sauce if needed.
Pour pasta back into the pot, along with the basil and tomatoes, stirring to coat. Pour into a large serving dish. Top with sliced chicken breasts. Serve immediately.
SOURCE: Lightly adapted from Pioneer Woman
Labels:
Chicken,
Fruit,
grilled,
Kid-Friendly,
main dishes,
Pasta
Friday, April 20, 2012
Chocolate Crepes with Nutella and Whipped Cream Cheese Filling
Crepes are one of my husband's my favorite foods. We even got a crepe pan a couple of years ago to celebrate something or other and it sat unused in my cupboard, behind all the other pots and pans. Why it stayed there, I do not know. I mean, who doesn't love a good crepe?? They are so easy to make (you don't even really need a crepe pan, a frying pan will do just fine) and the fillings are endless; both sweet and savory. So, when another little celebration came rolling along, my husband asked for crepes and I heartily agreed, deciding it was time to dust off that pan! I'm so glad we did and I'm happy to report we've made crepes several times since then, not even having time for dust to gather.
I decided that these chocolate crepes would be the first we'd make. I knew nutella, strawberries and whipped cream were a must but I also decided to do a flavored whipped cream cheese. The combination was heavenly! I'm dreaming about them right now as I write this!! Hope you enjoy these as much as we did.
Chocolate Crepes with Nutella and Whipped Cream Cheese Filling
For the crepe batter:
1 cup milk
4 eggs
3/4 cup flour
1/4 cup Hershey’s Dark Cocoa Powder
2 tablespoons sugar
1/4 teaspoon salt
For the fillings and toppings:
Sliced fruit-we love strawberries and bananas
Cool Whip or Whipping Cream
Whipped Cream Cheese (recipe below)
Nutella (chocolate hazelnut spread)
Chocolate syrup (optional)
Powdered sugar (optional)
To make the crepes, put all the batter ingredients in a blender and blend until well-incorporated.
Heat a non-stick crepe or frying pan on medium heat. Pour about 1/3 cup of the batter in the pan, swirling the batter out around the edges. Crepe should be very thin, so you may need more or less batter depending on your pan size. Cook crepe about 30-60 seconds until slightly browned on bottom and top is just about cooked. Carefully flip and cook another 15-30 seconds on the second side. Remove to a plate and continue with the rest of the batter.
There are a couple methods to assembling crepes. Probably the most popular is the burrito way, where you spread out the crepe, lay your fillings down the middle, roll it up then top with whipped cream and drizzle with chocolate sauce. I like to do it another way. Spread out the crepe. On one half, spread the nutella then whipped cream cheese on top of it. Fold the top over, in half, then fold it over again, in fourth. Top with sliced strawberries, cool whip and a drizzle of chocolate sauce and powdered sugar.
Whipped Cream Cheese:
8-oz block of cream cheese
2-4 Tbsp. powdered sugar
a couple drops of coconut extract (although almond, orange or vanilla would also be delicious)
Soften cream cheese to room temperature. Place in a mixing bowl and whip until light and fluffy. Gently add the powdered sugar until incorporated and to taste, then add the extract last. Refrigerate leftovers.
SOURCE:Crepe batter from The Clever Culinarian
Labels:
Chocolate,
Desserts,
Quick n' Easy
Monday, April 16, 2012
Balsamic Chicken Tortellini Salad
This little salad has easily become one of my new favorite quick and easy dinners. It's kind of funny because it's also the salad that got my two older girls to eat sweet peppers. I had brought home a big bag of mini sweet peppers one day, primarily for this salad, and they thought they were the cutest thing and just ate them whole! Now they love them.
You can tackle this salad in the time it takes the tortellini and chicken to cook, making it ideal for a soccer night or any weeknight for that matter. I use fresh baby spinach as well as a little fresh basil, which makes the flavor just pop! Fresh basil can be pricey if you don't know what to look for. Sometimes grocery stores will carry small, unpackaged bunches that are near the fresh herbs like parsley and cilantro. That seems to be the least expensive that I have found, but I have also found a living basil plant that comes with roots, which you can keep for a while at home. Of course, the easiest and most definitely least expensive would be to grow your own in your garden or even on your window sill.
Balsamic Chicken Tortellini Salad
For the salad:
1 7-10 oz. package cheese tortellini (or multiple smaller packages)
2 boneless, skinless chicken breasts (pounded thin if they are thick)
1 pint cherry tomatoes, halved
2 sweet bell peppers, seeded and diced
fresh baby spinach, chopped (about half a 10-oz bag)
1/2 cup fresh basil leaves, cut into ribbons
1/2 cup freshly grated parmesan cheese
For the balsamic vinaigrette:
1/2 cup olive oil
1/2 cup balsamic vinegar
1 Tbsp. brown sugar
salt and pepper to taste
To prepare the vinaigrette, put all ingredients in a small jar with a tight fitting lid and shake to combine. Add about 1/3 of the vinaigrette to a zip-top bag. Add the chicken and marinate for 1-2 hours. When it's time to cook the chicken, remove it from the zip-top bag and discard the marinade. Cook either on indoor grill pan or outdoor grill. Once cooled, chop into bite-sized pieces.
Bring a large pot of water to boiling and cook tortellini according to package directions. Drain and cool.
While the chicken and tortellini are cooking, chop the veggies and greens and add them to a large salad bowl. Add cooled chicken and tortellini. Toss with remaining dressing and parmesan cheese.
Labels:
Chicken,
Condiments,
Kid-Friendly,
main dishes,
Pasta,
Quick n' Easy,
Tomatoes
Monday, April 2, 2012
Snickerdoodle Cake
I'm so lucky, I get to make desserts and goodies most often for our family parties, usually once or twice a month. It's almost my favorite thing to do, next to sleeping (not that I get any) and eating chocolate. I happened upon this cake on pinterest, no surprise there. I remembered the ONE time I made my girls snickerdoodle cookies instead of chocolate chip and they couldn't stop eating them! They were the new favorite around here. Then I remembered these snickerdoodle muffins that my sister makes, which are heavenly and I decided that this cake was probably worth a shot.
I'm so glad I tried it, it totally was worth the shot. The cake baked up beautifully and was dense and moist. The frosting is absolutely heavenly; incredibly creamy and totally unique. The brown sugar in it gives you little bursts of flavor and texture with every bite.
I liked this cake more than I thought I would and can't wait to make it again. It is on the sweeter side, so when you dish up, make sure you have a tall glass of milk!
Snickerdoodle Cake
1 1/2 cups all-purpose flour
1 1/2 cups cake flour
1 Tbsp. baking powder
1/2 teaspoon salt
1 Tbsp. cinnamon
2 sticks butter, room temperature
1 3/4 cups sugar
4 large eggs, room temperature
2 tsp. vanilla
1 1/4 cups milk, room temperature
Preheat oven to 350°F. Butter and flour two 8 or 9-inch round cake pans.
In a mixing bowl, sift together the flours, baking powder, salt and cinnamon. Set aside. Cream together butter and sugar until fluffy and pale in color. Beat the eggs in one at a time, then add the vanilla.
Alternate adding the dry ingredients and the milk in three 3 batches, starting and ending with the dry. Scrape down bowl as necessary.
Divide the batter evenly between the two pans and bake, rotating midway through, for about 35 minutes or until the cake tests done.
Let the cakes cool in the pan on a rack for 5 minutes before turning out onto the racks to finish cooling. Wrap in plastic wrap and refrigerate (preferable overnight).
Brown Sugar Buttercream
3 sticks butter, softened
2/3 cup brown sugar
1 tsp. cinnamon
6 cups powdered sugar
6 Tbsp. heavy cream
Mix butter, brown sugar and cinnamon. Alternating, add powdered sugar and heavy cream. Beat 1-2 minutes longer until light and fluffy.
To assemble the cake:Slice each of the chilled cake layers in half horizontally. Place one of the bottom layers on a cake board or platter. Top with a layer of frosting, spreading evenly as you go. Repeat with remaining layers. Crumb coat the top and sides (very thin layer-you will still be able to see the cake in some spots), then refrigerate for about 30 minutes. With the remaining buttercream, frost the top and sides again, smoothing it out evenly as you go. Refrigerate for about an hour or so before serving.
SOURCE:Slightly adapted from Always with Butter
Monday, March 26, 2012
Brown Butter Risotto with Lobster
We don't often buy lobster, in fact we may only have it once or twice a year. But, my husband loves lobster and I thought this would be the perfect addition to some risotto for a special date night at home. Using lobster tail, which I bought on sale, allowed us to feel a little indulgent without breaking the bank.
This turned out to be a beautiful dish and tasted amazing! It was also easier than you might think to put together. Instead of using chicken or fish stock to cook the rice, I decided to use the water I boiled the lobster in, with a dash of Old Bay to spice it up. Pair that with delicious brown butter, and I couldn't have been happier with the results.
Brown Butter Risotto with Lobster
1 pound (about 2 medium) frozen lobster tails, thawed
4 1/2 cups lobster stock
dash Old Bay seasoning (or more to taste)
4 tablespoon butter
1/2 cup finely chopped onion
1 1/2 cups Arborio rice
1/2 cup white cooking wine
1/2 cup grated Parmesan
salt and freshly ground black pepper
chives, for garnish, if desired
Bring a stockpot of salted water to a boil over medium-high heat. Add the lobster tails and boil for 8 to 10 minutes until the shells curl and the lobster meat turns white. Remove tails, reserving 4 1/2 cups of the stock, drain and transfer to a cutting board; cool for 15 minutes. Using kitchen shears or a sharp knife, cut through the top shell lengthwise. Remove the meat and cut into 1/2-inch pieces. Set aside.
In a medium saucepan, keep the stock hot over low heat. Add Old Bay and stir to incorporate.
In a large saucepan, melt 3 tablespoons of butter over medium heat. Cook until the butter begins to foam and then turns brown, about 1 to 1 1/2 minutes. Add the onion and cook, about 3 minutes. Add the rice and stir to coat with the butter. Add the white wine and simmer until the liquid has almost evaporated, about 3 minutes. Add 1/2 cup of stock and stir until almost completely absorbed, about 2 minutes.
Continue adding the stock, 1/2 cup at a time, stirring constantly and allowing each addition of stock to absorb before adding the next. Cook until the rice is tender but still firm to the bite, about 20 minutes. Remove from the heat. Stir in the Parmesan cheese and the remaining butter. Season with salt and pepper, to taste.
Transfer the risotto to a large serving bowl. Arrange the lobster meat on top of the risotto and garnish with the remaining chives, if desired.
SOURCE: Giada De Laurentiis
Labels:
Italian,
main dishes,
Rice,
Seafood
Friday, March 23, 2012
Spicy Thai Coconut Shrimp Soup
I had to hurry and sneak this soup in while the weather is still in limbo. It's been unseasonably warm this winter and now that spring is on the verge, we've got snow in the forecast. Silly weather.
Anyway, whether the weather cooperates or not, you'll be happy you tried this soup. It is amazingly delicious! My husband and I couldn't stop eating it. It's also super fast to throw together. Make the soup while the rice is cooking and it will all be ready at the same time.
This soup gets it's kick from serrano peppers and it's slight sweetness from the coconut milk. The flavors balance out with the addition of fresh lime, ginger and basil leaves. Don't have shrimp around? Go ahead and switch it out for a couple of cut up chicken breasts.
Spicy Thai Coconut Shrimp Soup
2 Tbsp. olive oil
2 serrano peppers, seeds removed and finely diced
6 cloves garlic, minced
1 Tbsp. ginger, peeled and minced (or grate it on a microplane, if you have one, no peeling necessary)
5 cups low sodium chicken broth
2 cans (13.5-oz) coconut milk, light or regular
3 Tbsp. fish sauce
2 tsp. black pepper
1 tsp. salt
8 whole basil leaves, chopped into ribbons
zest and juice of 1 lime
1/2 lb. large shrimp, raw, peeled and deveined, tails Off (can Substitute 1 Cup, Chopped Raw Chicken)
Hot cooked Thai Coconut Rice (omit toasted coconut and cilantro)
Heat the olive oil in a large pot over medium-high heat. Add the chili and cook until soft, about 3 minutes. Add the garlic and the ginger. Stir frequently until you can smell the garlic, about 30 seconds. Add the chicken broth and coconut milk and allow to simmer for 10 minutes.
Add the remaining ingredients and cook until the shrimp is cooked through, about 5 minutes. Taste and adjust seasoning to your personal preference.
Serve with a large spoonful of hot cooked coconut rice.
SOURCE: Adapted from Domestic Fits
Labels:
Asian,
Coconut,
main dishes,
Quick n' Easy,
Rice,
Seafood,
Soups
Wednesday, March 21, 2012
Tropical Smoothie
It is not very often that I try a new combination in my green smoothies that I immediately like and continue to make. So, I was really surprised when I made this the other day and absolutely loved it! I made it like three days in a row (until my cilantro and mangoes were gone). I was a little hesitant about the cilantro but was so glad I tried it. It is so refreshing in this smoothie.
If you don't have a high powered blender, you may have to blend this for a longer time to make sure there aren't pieces of orange floating around. Your other option would be to just juice the orange and use that.
Tropical Smoothie
1 mango, peeled and seed removed
1 cup fresh pineapple
1 whole orange, peeled
2 cups baby spinach
small handful of cilantro
1 cup water (add more to your liking)
handful of ice
Place everything in a blender and blend until liquid and smooth. Add more water as desired.
Labels:
Breakfast,
Figure Friendly,
Fruit,
Quick n' Easy,
Raw,
Smoothies,
Snacks
Monday, March 19, 2012
Chicken Enchiladas
I am so glad I finally got to post these. I didn't think I would ever find (or make) an enchilada that looked or tasted so good. You see me and enchiladas, we don't get along-uhh we didn't until now. Years ago, when I first got married, I searched and searched for a good enchilada recipe and tried a few different ones out. They never ended up any good. I usually didn't like the sauce and they always fell apart on me! After much searching, I came upon these Chicken Enchiladas that had a green sauce and used flour tortillas. I actually really liked them and made them quite a bit for a while. However, there was still something in the back of my head that wanted to find that perfect traditional enchilada recipe.
Well folks, I think I have found it! When I saw this recipe on Annie's Eats a while ago, I bookmarked it because I knew it would be good. Her recipes are always spot on! When I got around to trying it the first time I was blown away by how good they were, especially the sauce. They tasted even better than a traditional enchilada and looked pretty good too. My only complaint the first few times I made these was that the tortillas always broke when I tried to roll them up. Very frustrating; no fault of Annie's though, I just needed to learn how to do it.
I was almost ready to bag the whole roll-it-up way and make it lasagna-style like my other enchiladas when I happened to randomly pick up some freshly made tortillas from a Mexican bakery. Score!
Let me tell you! It made such a difference using the fresh tortillas. They were much more pliable with rolling and filling them up and they didn't break all over the place.
Now, I'm sure I won't be able to get fresh tortillas ALL the time, so I may have to learn a trick or two when using regular store-bough tortillas so they won't break. Or I might just stack instead of roll. Either way this is a keeper! You will want to try these.
Chicken Enchiladas
for the sauce:
1 medium onion, chopped fine
2 jalapenos, seeded and chopped fine
1 tsp. canola oil
3 cloves garlic, minced
3 Tbsp. chili powder
2 tsp. cumin
1 Tbsp. sugar
1 (15 oz.) can tomato sauce
1 cup water
1 tomato, seeded and chopped
Salt and pepper
3-4 cups cooked and shredded chicken
1 cup shredded sharp white cheddar cheese, divided (Feel free to substitute mozzarella cheese here, farmers cheese or a soft Mexican cheese such as cojita.)
1 cup shredded monterey jack cheese, divided
1/2 cup minced fresh cilantro
12 (6-inch) soft corn tortillas
Cooking spray
Combine the onion, jalapeno and oil in a large saucepan over medium heat. Cook, stirring often, until the onions and peppers have softened, 8-10 minutes. Stir in the garlic, chili powder, cumin and sugar, and cook just until fragrant, less than 30 seconds. Mix in the tomato sauce, water, and chopped tomato. Bring the sauce to a simmer, lower the heat and cook until slightly thickened, about 5 minutes.
Strain the sauce through a large mesh strainer into a medium bowl, pressing down on the onions and tomatoes to extract as much liquid as possible. Transfer the reserved solids to a large bowl and set aside. Season the sauce with additional salt and pepper to taste. Add shredded chicken to onion mixture, as well as 1/4 cup of the enchilada sauce, 1/2 cup of each of the shredded cheese and the cilantro. Stir to combine.
Preheat the oven to 425˚ F. Oil a 9 x 13″ baking dish with cooking spray. Stack half of the tortillas on a plate, cover with plastic wrap, and microwave for 40-60 seconds, until warm and pliable. Spoon 1/3 cup of the chicken mixture evenly down the center of a tortilla. Roll up the tortilla around the filling tightly, and place in the prepared baking dish, seam-side down. Repeat with the remaining filling and tortillas.
Lightly spray the tops of the enchiladas with cooking spray. Place in the oven, uncovered, for 7 minutes or until the tortillas start to brown slightly.
Reduce the oven temperature to 400˚ F. Remove the enchiladas from the oven and pour the sauce oven the top. Sprinkle with the remaining shredded cheese. Cover the dish with foil and bake for 20 minutes.
Remove the foil and bake for 5 more minutes, until the cheese is browned. Remove from the oven and let stand 10 minutes before serving.
SOURCE:Lightly adapted from Annie's Eats, originally from America's Test Kitchen
Labels:
Casseroles,
Chicken,
Mexican,
Tomatoes
Saturday, March 17, 2012
Cinnamon Baked French Toast
I know I'm a breakfast person, but I almost never make french toast. I don't know why. I like it. I eat it. I just don't really think about it much.
We had some day old french bread and cream in the fridge that I didn't have plans for and needed a home. My brain went right to french toast. And not just regular french toast. Baked french toast. I wanted yummy deliciousness but didn't want to have to stand around dippin' and flippin' all morning. I figured Ree-Pioneer Woman-would have something worth writing home about. And she did. I went right for it.
This stuff does not disappoint man! I cheated on the whole soaking over night part, 'cause, you know I only had patience to wait like 10 minutes before putting it in the oven. It still turned out heavenly. If you have the foresight to put this together the night before, more power to you. All you would have to do in the morning would be toss it in the oven. This would be great for company, or a lazy weekend.
Beware of those ooey-gooey little pieces though, they are dangerous! You'll want to snitch one because it's poking out making the row uneven. Then you'll keep snitching and snitching and before you know it, you've eaten a whole other row. By yourself. Don't say I didn't warn you!
Cinnamon Baked French Toast
For the toast:
1 loaf day old french bread
8 eggs
2 cups heavy cream
3/4 cups Sugar
2 Tbsp. vanilla extract
For the topping:
1/2 cup flour
1/2 cup firmly packed brown sugar
1 tsp. cinnamon
1/4 tsp. salt
1 stick cold butter, cut into pieces
Spray a 9 x 13-inch baking pan with cooking spray. Tear bread into chunks (or cut into bite-sized cubes) and evenly distribute in the pan.
Mix together eggs, cream, sugar, and vanilla. Pour evenly over bread. Cover tightly and store in the fridge several hours or overnight. (Or if you're like me, you can just wait 10 minutes or so, while the oven heats up.)
In a separate bowl, mix flour, brown sugar, cinnamon, and salt. Add nutmeg if desired. Add butter pieces and cut into the dry mixture until mixture resembles fine pebbles. Store in and airtight bag or container the fridge if you're not baking the french toast right away.
When you're ready to bake the french toast, preheat oven to 350 degrees. Remove pan from fridge and sprinkle crumb mixture over the top. Bake for 45 minutes for a softer, more bread pudding texture. Bake 1 hour or more for a firmer, less liquid texture.
Scoop out individual portions. Top with butter and drizzle with maple syrup.
SOURCE: Pioneer Woman
Labels:
Bread,
Breakfast,
Quick n' Easy
Thursday, March 15, 2012
Dulce de Leche Banana Trifle
I have a love-hate relationship with trifles. First of all, I love them because they are totally a fool-proof dessert, you can't mess them up if you tried and they have lots of layers of deliciousness. Buuuuuuuuuuuuuut, I hate, hate, hate trying to photograph them! I am by no means a great, or even good, photographer, so I have no skills in trying to take a nice picture of these tricky things.
Lately trifle has been my go-to dessert when I need something for a crowd and there is NEVER ANY LEFT! I guess that's a good thing, or I'd be scooping that stuff right out of the bowl and into my mouth. This trifle is no different. I stumbled upon it a while ago but finally found the right occasion to make it a few weeks ago. I was teaching an Italian-themed cooking class at my home for some girls in my church and this just fit.
Seriously, I couldn't believe my mouth when I had the first bite of this stuff-SO delicious! And rich. Don't think you can get away with eating just one bite of it either. And you may just have to add a few more miles on the treadmill for it as well.
I've actually made this a couple of times and I have to admit the first time I made it I accidentally bought sweetened condensed milk instead of dulce de leche. I used it anyway because really, it's the same stuff, just not cooked down as long, and even though it has a different flavor it was still really delicious. So, you know, just use which ever one you want.
Dulce de Leche Banana Trifle
1 box white cake mix
8 ounces mascarpone cheese,
2 cups heavy cream
1/2 tsp. pure vanilla
1/4 cup granulated sugar
1 can dulce de leche
3 ripe bananas
1 package toffee bits
Make cake mix according to package instructions in a 9x13 baking pan. Cool completely and cut into 1-inch cubes.
In a mixer, fitted with a whisk attachment, whisk the mascarpone cheese. Slowly add the heavy cream and whisk on high making sure the cream is incorporated into the cheese. Scrape down the sides of the bowl periodically. Whisk until the mixture is thick and forms soft peaks. Add the vanilla and sugar, mix.
In a trifle bowl, layer 1/3 of cake cubes, 1/3 of the dulce de leche, 1/3 of the bananas, 1/3 of the mascarpone cream, and 1/3 of the toffee bits. Repeat two more times. Cover and chill, at least 1 hour, or until ready to serve.
SOURCE: Adapted from Stonewall Kitchen
Monday, March 12, 2012
Basil Chicken in Coconut Curry Sauce
Goodness we have been eating some fabulous food around here lately. I'm not sure if it's the food that's a little extra special or if it's just we haven't had real food in so long anything and everything sounds soooo delicious!
I was looking at my long line-up of posts waiting to debut and deciding which was the next most delicious thing I could post. It was a hard decision (ok, it really only took me about 3 seconds to decide), but this coconut curry totally won.
This seriously is one of the most tasty meals I have had in a while. (Do I say that a lot, because it sounds a little deja vous.) Even better, it's so easy and quick to prepare...AND my kids gobbled it up! You really can't get better than that.
I love coconut curries. This one has a milder taste, but you could certainly intensify the flavor a bit by adding more curry paste and jalapenos, or better yet, try the smaller Thai chilies if you really want a kick. All the flavors go together so perfectly and completely balance each other out. I like to serve this curry with Jasmine rice, but feel free to use whichever rice you prefer.
Basil Chicken in Coconut Curry Sauce
1-2 tsp. red curry paste
1/2 tsp. cracked black pepper
1 tsp. salt
1/4 tsp. chili powder
4 skinless, boneless chicken breast halves, cut into 1-inch pieces
1 Tbsp. olive oil
1/2 large red onion, cut into thin wedges (1 cup)
2 fresh jalapeno chile peppers, seeded and finely chopped
5 cloves garlic, minced
1 13 1/2 - 14 ounce can unsweetened coconut milk
3 Tbsp. snipped fresh basil
1 tsp. grated fresh ginger
3 cups hot cooked Jasmine rice
In a medium bowl combine curry paste, black pepper, 1/2 teaspoon of the salt, and the chili powder. Add chicken pieces and toss to coat. Cover and let marinate for 1 to 2 hours.
In a large frying pan or wok, heat oil over medium-high heat. Add onion, jalapeno peppers, and garlic to wok; cook and stir about 8 minutes or until crisp-tender. Remove onion mixture from wok. Add chicken to the wok. Cook and stir for 4 to 6 minutes or until no longer pink. Return onions, jalapenos and garlic mixture to wok.
Pour the can of coconut milk into the wok and sprinkle the remaining 1/2 teaspoon of salt. Stir and allow to simmer a few minutes, until heated through. Stir in basil and ginger. Cook another minute or two. Serve over hot rice.
SOURCE: Adapted from Better Homes and Gardens
Labels:
Asian,
Chicken,
Coconut,
Kid-Friendly,
main dishes,
Quick n' Easy,
Rice
Monday, March 5, 2012
Orange Cranberry Granola
I'm always looking for new and tasty combinations for my granola. I don't know why I never thought to add orange to my granola, it's so light and refreshing and pairs wonderfully with cranberries.
Granola is one of my breakfast staples. We eat it a lot. I love making my own because it's much cheaper than buying it at the store, I can control the amount of sugar and I know exactly what goes into it. Plus, sometimes, I like to give it an extra healthy boost by adding some ground flax, sesame seeds or wheat germ. I love that my girls enjoy eating granola too. It gives me great satisfaction that they enjoy eating something healthy.
Whether you eat this for breakfast or for an afternoon snack, this deliciously crunchy, slightly sweet granola is sure to be a winner for any member of your family!
Orange Cranberry Granola
4 cups rolled oats
1 cup shredded sweetened coconut
1 cup almonds (whole, chopped, slivered or sliced)
1/4 cup coconut oil
1/4 cup Honey
3 Tbsp. brown sugar
1/2 Tbsp. vanilla extract
pinch salt
1 Tbsp. orange zest
1 1/2 tsp. ground cinnamon
1 1/2 cups dried cranberries
1/2 cup white chocolate chips, chopped (optional)
Preheat oven to 325 degrees F.
In a large bowl, combine the rolled oats, coconut and almonds. In a small microwave safe bowl, add the coconut oil, honey and brown sugar. Heat in microwave about 20-30 seconds until coconut oil is melted. Stir to combine, then add the vanilla extract, salt, orange zest and cinnamon. Stir again until completely combined then pour over the oat mixture. Stir with a long wooden spoon until oat mixture is evenly coated. Spread onto a baking sheet and bake for 20-30 minutes, and stirring about every 5 minutes. Remove from oven and allow to cool on the baking sheet. Stir in cranberries and white chocolate. Store in an airtight container.
Tuesday, February 28, 2012
Coconut Macaroon Pancakes
Happy national pancake day! It is no secret that we are big fans of pancakes around here, so this is a fabulous holiday for us to celebrate. Coconut is another love of mine, so, naturally, when I saw these pancakes I knew they would hold a dear place in my heart. If you don't like coconut, this may not be the pancake recipe for you, but stick around and check out the pancake link over there on the side. There's lots of other tasty ones to choose from.
Ok, back to the coconut macaroon pancakes. Ohh, were they lovely. For the most part, my favorite way to eat a pancake is HOT off the griddle. Any leftover pancakes (which are not many, so I just leave them on the counter) get eaten by my children, and sometimes me, a few hours later as a snack. Rarely do pancakes make it to the fridge for consumption the next day. But these did only because I was the only one eating them. Yes, I sometimes make pancakes JUST for myself. I know, I'm weird.
The first time I snitched a bite of these, COLD from the fridge they were a different kind of delicious. OH, so good. Then my mind went straight to CHOCOLATE! What is a macaroon without chocolate right? I drizzled some hot fudge over them and just like that they became a dessert pancake. Completely perfect.
So, what I'm trying to say is you can eat these hot with a little drizzle of syrup, just out of your hand at room temperature, or cold for dessert drizzled with chocolate. You cannot go wrong any way you eat them.
Coconut Macaroon Pancakes
1 14-ounce can of coconut milk
3 eggs
1/4 cup brown sugar
1 /4 cups flour
3 cups sweetened shredded coconut
1/4 tsp. salt
2 tsp. baking powder
In a large bowl combine the coconut milk, eggs and sugar. Whisk until incorporated. In a separate bowl, mix together flour, coconut, salt and baking powder. Add the dry ingredients to the wet and stir to combine.
Heat a non-stick (or well-seasoned) skillet, or griddle to medium-hot. Brush with a bit of coconut oil (or butter), if necessary. Drop batter, using a 1/4 cup measuring cup, onto the griddle and cook until edges begin to look dry (about 2 minutes). Flip pancakes and cook another 2 minutes or so, until bottom is deep golden in color.
Makes about 10-12 pancakes.
SOURCE: Perry's Plate
Friday, February 24, 2012
Brown Butter Chocolate Chip Cookies
It seems like there is a continuous search for the perfect chocolate chip cookie. I've gone through different recipes over the years and I've seen many, many different recipes come and go through the blogging world. In the end, I think it's a little bit of personal preference and a really good recipe that fits your bill.
With that, I have to say that this recipe, for me, almost reaches perfection! First of all, I love brown butter anything. Second, these cookies are nice and chewy with just the slightest bit of crunch. If there's one thing I don't like about chocolate chip cookies it's when they are too crunchy. But then again, that's just me.
Give these babies a try--trust me you will ADORE them as I do. When I first stumbled upon the recipe, I made them two days in a row! You just cannot go wrong here.
Brown Butter Chocolate Chip Cookies
1/2 cup butter
1/2 cup granulated sugar
1/2 cup packed brown sugar
1 egg
1 teaspoon vanilla extract
1 1/3 cups all purpose flour
1/4 tsp. baking powder
1/8 tsp. baking soda
1/2 tsp. salt
2 oz. semi-sweet chocolate chips (about 1/3 cup)
Preheat oven to 350 degrees.
Place butter into small pot over medium heat. After butter has melted, start swirling pot gently until it starts to brown and become fragrant. Once the butter is a golden amber color, take off the heat and allow to cool.
In a bowl, whisk together flour, baking powder, baking soda and salt. Set aside.
In a mixing bowl, fitted with a paddle attachment, beat together cooled butter, both sugars, egg and vanilla.
Gradually add flour mixture and beat until just moistened. Gently mix in chocolate chips with a rubber spatula or a few pulses of your mixer.
Using a small scoop, scoop dough onto baking sheet. Slightly flatten with the palm of your hand. Bake in preheated oven for about 7-10 minutes. Allow to cool on baking sheet. Remove cookies to a cooling rack.
Yield: about 18 cookies
SOURCE:Slightly adapted from Lauren's Latest
Saturday, February 18, 2012
Mini Lasagna Cups
Lasagna is comfort food at it's best! My mom made great lasagna growing up. I loved the thick layers of noodles, creamy cheese filling and the tasty meat sauce. I always had a hard time waiting for the pan of lasagna to cool down enough to dish up so that it wouldn't spread all over my plate!
Well, the only thing better than homemade lasagna is homemade MINI lasagnas! Food always tastes and looks better when in mini form, don't you agree? How cute are these? I had so much fun making them. This is some absolutely delicious lasagna and in perfect portions too.
Making mini lasagnas takes about the same amount of time as it does to make traditional lasagna. Although you don't have to precook noodles, you do have to scoop filling into each cup. But a small scoop, like ones you use for cookie dough, makes quick work of it and you'll be done before you know it.
This is a fun way to change up your typical lasagna. It's also great for large gatherings or small munchkin mouths.
Mini Lasagna Cups
1 lb. Italian sausage
1 1/2 - 2 cups marinara sauce
1 1/2 cups ricotta cheese
1 1/2 cups mozzarella cheese, divided
1 tsp. dried basil
1 tsp. dried oregano
salt and pepper
24 square wonton wrappers
1/4 cup chiffonade of fresh basil
Heat skillet over medium-high heat. Crumble sausage into pan and saute until cooked through. Drain fat from pan and add marinara sauce. Bring to a boil, then reduce heat and simmer for about 10 minutes.
Preheat oven to 375 degrees F.
In a medium bowl, combine ricotta cheese, dried oregano and dried basil, a pinch of salt and pepper, and just over 1 cup of the mozzarella cheese. Set aside.
Coat a 12-cup muffin pan with cooking spray. Line each cup with 1 wonton wrapper, pressing firmly in the bottom of the cup and up the sides. Using half of the cheese mixture, divide it evenly into each of the muffin cups. Do the same with the meat sauce. Gently press another wonton wrapper, in the opposite direction of the first wrapper. Repeat layers with remaining cheese mixture and meat sauce. Top with remaining mozzarella cheese.
Bake for 10-15 minutes or until cheese is melted and wonton wrappers are golden. Remove from oven and sprinkle fresh basil over the top of each one. Allow to cool in pan 5-10 minutes before serving.
SOURCE:Adapted from Kevin & Amanda and Sensible Shoppers
Labels:
Italian,
Kid-Friendly,
main dishes,
Pasta
Saturday, February 11, 2012
Valentine's Day Round-up
If you are still searching for some ideas for your Valentine's Day meal, I've rounded up some ideas for you. Hope your day is wonderful and full of love!!!
Breakfast in Bed
Banana Pancakes with Peanut Butter and Maple Syrup
Oatmeal Raspberry Pancakes with Berry Coulis
Oatmeal Cookie Pancakes
Lemon Poppy Seed Pancakes
Baked Oatmeal
Elegant Dinners
Chicken Milano
Chicken Parmesan
Lemon garlic Shrimp with Orzo
Risotto with Roasted Chicken and Caramelized Onion
Squash Ravioli
Four Cheese Ravioli
Decadent Desserts
Peanut Butter Pretzel Brownies
Lemon Poppy Seed Cakes with Raspberry Filling
Decadent Brownie Pie
Peanut Butter White Chocolate Popcorn
Peanut Butter Cup Trifle
Chocolate Chipotle Cupcakes with Chocolate Chili Ganache and Cinnamon Ice Cream
Chocolate Cupcakes with Peanut Butter Frosting
Cherry Chocolate Cake
Tres Leches Cake
Bittersweet Chocolate Pear Cake with Buttermilk Ice Cream
Mini Orange Chocolate Chunk Cakes
Breakfast in Bed
Banana Pancakes with Peanut Butter and Maple Syrup
Oatmeal Raspberry Pancakes with Berry Coulis
Oatmeal Cookie Pancakes
Lemon Poppy Seed Pancakes
Baked Oatmeal
Elegant Dinners
Chicken Milano
Chicken Parmesan
Lemon garlic Shrimp with Orzo
Risotto with Roasted Chicken and Caramelized Onion
Squash Ravioli
Four Cheese Ravioli
Decadent Desserts
Peanut Butter Pretzel Brownies
Lemon Poppy Seed Cakes with Raspberry Filling
Decadent Brownie Pie
Peanut Butter White Chocolate Popcorn
Peanut Butter Cup Trifle
Chocolate Chipotle Cupcakes with Chocolate Chili Ganache and Cinnamon Ice Cream
Chocolate Cupcakes with Peanut Butter Frosting
Cherry Chocolate Cake
Tres Leches Cake
Bittersweet Chocolate Pear Cake with Buttermilk Ice Cream
Mini Orange Chocolate Chunk Cakes
Thursday, February 9, 2012
Wheat-Oat Pancake Mix
My daughter asks for pancakes just about every other day, and since we just LOVE pancakes around here, this mix was a no-brainer. Especially since it's a whole grain mix. Now, I've made my fair share of pancakes over the years, so I can pretty much do it with my eyes closed in about 30 seconds flat! BUT, having a mix all ready to go, takes it down to about 15 seconds. Who can beat that? Now, I'm sure a bowl of cold cereal probably could, but how can you pass up a nice hot breakfast? Not I.
Even if you're not a morning person, throw together this mix ahead of time and you can still have a yummy, healthy hot breakfast in no time!
Wheat-Oat Pancake Mix
3 1/2 cups oats (rolled or quick is fine)
4 cups whole wheat flour
1 cup all-purpose flour
3 Tbsp sugar
3 Tbsp baking powder
1 Tbsp. salt
1 Tbsp. baking soda
3/4 cup oil*
To make the mix: Grind the oats in a food processor until they're chopped fine, but not a powder. Combine the oats, flours, sugar, baking powder, salt, and baking soda in a large bowl, preferably an electric mixer. Mix on low speed, and drizzle the oil into the bowl slowly while the mixer is running. When all the oil has been added, stop the mixer and squeeze a clump of the mix in your hand; if it holds together, it's just right. If it won't hold together, stir in 1 tablespoon of oil at a time, until it does. Store indefinitely in an airtight container in the freezer. *(I have also left the oil out of the mix and just added 2 tablespoons for each cup of mix at the time I make the batter up. Either way works well.)
To make the pancakes: Whisk together 1 cup mix, 1 cup buttermilk (or other milk) and 1 large egg. Don't worry if the batter seems thin at first; it'll thicken as it stands. Let the batter stand while the griddle heats up.
Heat your griddle or pan till a drop of water sputters when you drop it on the surface (on my griddle it's about medium-high or 250 degrees F). Lightly grease, if necessary, and pour pancake batter by the 1/4-cupful onto the griddle. A muffin scoop works well here. Cook the pancakes till they're golden brown on the bottom, flip them over, and cook till golden brown on the other side.
We love to change up the batter every once in a while and add different mix-ins for variety. Here are some of our favorites:
1 large, ripe banana, smashed
1 cup pumpkin puree and 1 tsp. pumpkin pie spice (and chocolate chips sometimes too)
1 cup applesauce (or shredded apple), with cinnamon and nutmeg
Each batch makes about 8-10 pancakes or about 12-14 when you mix in fruit.
SOURCE: King Arthur Flour
Labels:
Bread,
Breakfast,
Figure Friendly,
pancakes,
Quick n' Easy
Monday, February 6, 2012
Pretzel Rolls
Ok, a while back a friend and reader asked if I had a recipe for pretzel rolls. Well, not only did I NOT have a recipe but I had never heard of them! That totally intrigued me and sent me on a search for a great recipe. I bookmarked a couple recipes but wasn't able to get to them for quite a while.
Recently my two oldest girls have developed a small love affair with hamburgers and when putting them on our weekly menu a little while ago, I remembered the pretzel rolls my friend had asked me about and thought they would go perfect with homemade hamburgers. (Although I still totally love these buns I usually make.)
I have to admit, although the recipe is easy, the rolls totally flopped the first time I made them. I was SO disappointed that I made them again the very next day! I think my problem was that I made the dough too moist like the dough I make for our sandwich bread; this requires a much stiffer dough than I am used to.
Anyway, the second time I made them they were both delicious and beautiful. They just looked adorable! I loved how the cracks on the top made them look just like real pretzels.
So, try these the next time burgers are on your menu and change it up a bit from the norm! You'll love them too.
Pretzel Rolls
4 1/2 cups all-purpose flour
2 1/4 tsp. instant yeast
2 tsp. sugar
2 tsp. salt
4 Tbsp. unsalted butter, melted
1 1/2 cups warm water
1/4 cup baking soda
large saucepan of water
1 egg, lightly beaten
pretzel salt
In the bowl of a stand mixer fitted with a dough hook, combine the flour, yeast, sugar, salt and butter. Pulse just to combine. Add the water and mix 3-5 minutes; until thoroughly combined. Place dough in a greased bowl and cover with a light towel and let rise in a warm place until doubled in size. Punch down and turn out onto a lightly floured surface.
Line two sheet pans with parchment paper. Cut the dough into 18 pieces (2 ounces each-I use my kitchen scale but you can just eyeball it). For larger rolls, like for hamburger buns, I suggest you make the dough into about 3 1/2-4 ounce balls.) To shape, take a piece of dough and start forming a round, smooth ball by pulling the sides to the center and pinching to seal.
Place, pinched side down, on a counter and lightly cupping your hand around the dough ball, rotate your hand in small circles lightly rolling the ball around the palm of your hand. Place on baking sheet pinched seam side down at least 1” between each roll. Cover with a towel and let rise in a warm place for until doubled in size again.
Preheat oven to 425°F and place oven racks on the lowest and middle positions.
In a large saucepan, bring 2 quarts of water to a LOW boil. Add the baking soda (it will bubble a bit) and LOWER heat to a simmer. Put the rolls into the poaching liquid, 2-3 at a time and seam side down. Poach for 30 seconds then carefully turn the roll over and poach other side for 30 seconds. Remove with a slotted spoon to the same prepared sheet pans, seam side down. Repeat with the remaining rolls.
With a pastry brush, glaze each roll with the lightly beaten egg making sure to coat all sides completely. Top each roll with a sprinkle of pretzel salt.
Bake the rolls in a preheated oven for 15-20 minutes.
Source: Slightly adapted from The Misadventures of Myrtle Grace
Labels:
Bread
Thursday, February 2, 2012
Greek Pasta Salad
Ok, it's probably time I threw in something healthy again, you know with it being the new year and all. I don't know about you but my attempts to keep away from sweets are just not working!!! Maybe it's the whole having a baby thing and those extra 300 calories a day I need in order to feed baby. We do eat rather healthy at mealtimes, it's just those times in between that get me. A girl needs her chocolate you know!!
Anyway, I digress. On to this salad. I love salads. I love Greek food. Pasta is good. This is a great combo! My sister brought a similar pasta salad to one of our family dinners over the holidays and I had been thinking about it ever since. I knew it would be something that the whole family would eat and enjoy; not always an easy task with a toddler and preschooler to please. When I came upon this recipe and looked at the dressing ingredients, I realized it was pretty much the same dressing I use on my Greek Panzanella, which I love, so I knew the flavor would be spot on.
We ate this as is, meatless, for our whole dinner, although it would be fabulous with some roast chicken shredded on top (YUM!). I love that this only took about 10 minutes to prepare (almost a necessity these days). I made the dressing, then while the pasta cooked, I chopped veggies.
Greek Pasta Salad
For the salad:
1 pound gemelli or other short pasta
1 cucumber, peeled and diced (about half-inch pieces)
1 pint cherry or grape tomatoes, halved
1/4 large red onion, thinly sliced (or more if you like)
1 can black olives, drained (halved, if desired)
3 cups firmly packed baby spinach
feta cheese, crumbled
For the Greek Dressing:
2 cloves garlic, finely minced
1 tsp. dried oregano
1 tsp.Dijon mustard
1/4 cup red wine vinegar
1/2 tsp. salt
1/2 tsp. pepper
1/4 cup olive oil
To make the dressing, in a small bowl, whisk together garlic, oregano, mustard, vinegar, salt, pepper and olive oil until well combined. Set aside. (This can be made ahead of time)
Bring a large pot of salted water to a boil. Add pasta and cook until al dente, about 8 minutes, or as label directs. Drain, rinse under cold water and transfer to a bowl. Add remaining salad ingredients, all but the feta. Toss with dressing and crumble feta over the whole salad or each individual salad.
SOURCE: myrecipes.com
Labels:
Condiments,
Figure Friendly,
Greek,
Meatless,
Pasta,
Quick n' Easy,
Salads,
Vegetables
Subscribe to:
Posts (Atom)