Monday, October 28, 2013

Sweet Tomato Marinara

Raise your hand if you STILL have tomatoes from your garden you don't know what to do with?  Well, I don't...anymore.  I had to pick the last of them about 3 weeks ago and they were all green.  Then all of a sudden this last week they all ripened at the same time.

Lately we've gone a little over board on the Fresh Tomato Soup, although my girls devour it and would still probably eat it every day, so I wanted to see if I could make yet ANOTHER pasta sauce that I just couldn't live with out.  Score! 

All the sauces I make and have made I still like, but for different reasons.  This one is thick and rich, and slightly sweet with a hint of fennel.  I like LOTS of sauce on my pasta, but hate when it just puddles under the noodles as soon as it's poured on.  Not a problem here, this sauce ain't goin' nowhere!

Sweet Tomato Marinara
makes about 1 1/2 quarts

1 Tbsp. olive oil
1 small sweet onion
6 cloves garlic, minced
about 3 lbs fresh roma tomatoes, peeled and pureed (about 6 cups pureed)
2/3 cup red cooking wine, or cranberry or pomegranate juice
1 6-oz can tomato paste
1 1/2 Tbsp. balsamic vinegar
1 Tbsp. brown sugar
1 tsp. fennel seed (I ground mine in my mortar and pestle a bit)
salt and pepper

In a large saucepan or pot, heat olive oil over medium high heat.  Add onions and saute about 5 minutes until tender and translucent.  Add garlic and saute another minute.  Add tomato puree, cooking wine (or juice), tomato paste, vinegar, brown sugar and fennel.  Add a pinch of salt and pepper and bring to a boil.  Simmer for about 20-25 minutes until sauce is thickened to your liking, stirring occasionally.  Check for seasonings and add salt and pepper as necessary.  Serve warm with your favorite pasta.

Store in airtight container for about a week in the fridge and about 3 months in the freezer.

Thursday, October 24, 2013

Chicken Fajitas

Ohhhh!  I forgot how much I LOVE fajitas. I love ordering them in restaurants where they come sizzling to the table in their own personal skillets, warm tortillas on the side.  Then topping them with a healthy dose of guac and sour cream, maybe even some fresh pico de gallo.  MMM! My mouth is watering just thinking about it. 

Fajitas can be pretty versatile and generic, so getting the marinade right is key.  The marinade for these fajitas is delicious and bursting with flavor!  I got the recipe from my sister ages ago and our families just love them.


Chicken Fajitas
for the marinade:
juice of 1 lime
1/3 cup water
2 Tbsp. oil
2 cloves garlic, minced
1 1/2 tsp. salt
3 tsp. red wine vinegar
2 tsp. soy sauce
1/2 tsp. chili powder
1/2 tsp. cayenne pepper
1/2 tsp. liquid smoke
1/4 tsp. ground black pepper
pinch of onion powder

for the fajitas:
1 1/2 lbs chicken breasts (about 2-3), butterflied
1 small onion, julienned
3 colored peppers, julienned
8 oz. mushrooms, sliced
1 tsp. soy sauce
juice of half a lime
salt & pepper
6-8 8-inch flour tortillas

Garnishes:
sliced avocado
guacamole
sour cream
diced tomatoes

In a mixing bowl, whisk together marinade ingredients.  Pour into shallow baking dish, add chicken and cover with plastic wrap or place marinade and chicken in a zip top bag, pushing out the air as you seal it.  Refrigerate and let marinate for 2-3 hours.

When you're ready to prepare the fajitas, chop and gather veggies and preheat either indoor grill pan or outdoor grill.  Remove chicken from marinade and place on the grill*. Cook until no longer pink, about 3 minutes per side.  Remove from heat and let sit for about 5 minutes. Slice.

While chicken is cooking, heat a large saute pan with a tablespoon of olive oil.  Add onions and mushrooms and saute about 4-5 minutes, then add peppers and soy sauce and continue cooking until peppers are crisp tender.  Remove from heat, squeeze lime juice over the top and salt and pepper, to taste.

To serve, place chicken and veggies in a warm tortilla and top with garnishes of choice.

*Alternately you can slice the chicken before it's cooked and marinate it, then saute it in a frying pan before you cook the veggies.


Thursday, October 17, 2013

Thai Butternut Soup


If you haven't started making soup, it's time to get on that!!  We're having it at least once a week by now and I love it.  Soups are generally "soup-er" (haha) easy to make, take few ingredients and stretch a long way.  Plus, they can be pretty cheap as well.  This meal was literally pennies to make.  My mom gave me the squash, I used my own homemade stock and already had most of the rest of the ingredients already.   I only had to spend about $2.50 on the coconut milk and fresh lime. I also served the soup with some Artisan Bread, which is also pennies to make, which made for a delicious and very filling meal!

If you like curry even a bit, you're going to love this soup!  This is reminiscent of some of my most favorite curry dishes and so quick and easy!!


Thai Butternut Soup
2 Tbsp. coconut oil
1 small onion, sliced
4 cloves garlic, minced
1 tsp. grated fresh ginger
1-2 Tbsp. red curry paste
2-3 cups veggie stock
1 medium butternut squash, roasted
1 14-oz can full-fat coconut milk
juice of 1 lime
salt and pepper to taste

garnishes:
chopped cilantro
chopped peanuts or dollop of natural peanut butter
splash of fish sauce


*Do ahead.  Preheat oven to 400 degrees F.  Chop squash in quarters and rub with a little oil (I used coconut). Place on a silicone-lined baking sheet and bake until soft; about 25-30 minutes.  Cool, then scrape out the flesh and set aside.  Discard skins.

In a large pot over medium-high heat, melt coconut oil and add onion.  Saute until soft and starting to turn brown and caramelize, about 10 minutes.  Add garlic, ginger and curry paste, stir and cook another 5 minutes or so.  Add in squash and about 2 cups of the stock and increase the heat a bit.  Bring to a low bubble and simmer about 5-10 minutes. 

Use an immersion blender to puree soup, otherwise use an upright blender working in batches to puree a bit at a time.  Return puree to pot and add coconut milk, lime juice and salt and pepper to taste.  Stir until well-incorporated.  Check for seasoning and add more stock if necessary.

Serve warm.  Garnish as desired.


SOURCE:  slightly adapted from How Sweet It Is

Thursday, October 10, 2013

One Pot Pasta


I'm sure many of you have seen this one pot wonder flying around Pinterest.  I think it was originally posted on the Martha Stewart website, but regardless of where it started it's absolutely genius!  I think this is the first meal all of my kids have both liked and eaten.   Hubby and I loved it to.  It's absolutely full of flavor and fits in that category of comfort foods for me.  Nice and warm, slightly soupy and hey, there's fresh basil!!  Can't go wrong with that.  The only thing this was lacking was a nice crusty sourdough baguette.  I'm kicking myself for not making one.

Prep is a cinch, pretty much just chuck everything in the pot.  I used fresh tomatoes, so chopping them took a few extra minutes.  Canned tomatoes, however are a suitable substitute.  The pasta cooks in about 10 minutes so I'd call this dinner in 15!


One Pot Pasta
12-oz linguini
12-oz cherry or grape tomatoes, quartered
1 onion, thinly sliced
4 cloves garlic, thinly sliced
1/4 tsp. red pepper flakes (optional)
2 sprigs fresh basil, chopped
2 Tbsp. olive oil
salt and pepper
4 1/2 cups chicken stock

Combine pasta (break in half if necessary), tomatoes, onion, garlic, red-pepper flakes, basil, oil, pinch of salt and pepper, and stock in a large pot. Bring to a boil over high heat. Boil mixture, stirring and turning pasta frequently with tongs, until pasta is al dente and water has nearly evaporated, about 9 minutes.  Check for seasonings and adjust as necessary.

Divide pasta among serving bowls, garnish with parmesan cheese, if desired, and extra basil.  Serve warm.


SOURCE: Martha Stewart

Saturday, October 5, 2013

Mini Pumpkin Spice Scones with Chocolate Ganache Glaze

 It's not a lazy Saturday morning around here without scones.  They have pretty much been my go-to weekend breakfast indulgence and I love them!!  Now that it's fall my thoughts naturally gravitate towards pumpkin and spice...and everything nice, haha!  No really though, I keep thinking of things I can stick pumpkin into...pasta, pancakes, ice cream, muffins, soup....ya know, and pretty much everything.

These little scones scream fall and will remind you of your favorite pumpkin chocolate chip muffin.  Not too sweet and decadently drenched in dark chocolate these are sure to become your favorite weekend treat too.

Mini Pumpkin Spice Scones with Chocolate Ganache Glaze
1 cup whole wheat flour
1 cup all purpose flour
1/2 cup oat flour
3 Tbsp. sugar
1 Tbsp. baking powder
1/2 tsp. salt
3/4 tsp. cinnamon
1/2 tsp.  nutmeg
1/4 tsp. ground ginger
1/4 tsp. ground cloves
6 Tbsp. unsalted butter, chilled and cut into cubes
3/4 cup pumpkin puree
1 tsp. vanilla extract
1/2 cup heavy cream

for the ganache:
1 oz. good quality dark chocolate, chopped
1 oz. heavy cream 


Preheat oven to 425 degrees F.

In large work bowl of a food processor fitted with steel blade, add flours, baking powder, sugar, salt and spices.  Pulse a few times to combine.  Add butter and whiz until mixture resembles a coarse meal.  Alternately, you can use a mixing bowl and cut butter in using a pastry blender or 2 knives.

In a mixing bowl, whisk together the cream, pumpkin puree and vanilla extract.  Add flour mixture to pumpkin mixture. Stir with a spoon until a dough forms. Use your hands to bring it together. Turn onto a floured surface and knead gently, only about 3 or 4 times, adding a bit more flour, if needed. Do not over-work or dough will be chewy.

Divide dough in half.  Pat each half into about a 6-inch circle.  Cut each circle into 6 wedges. 

Place scones on un-greased baking sheet, or baking sheet lined with a silicone mat. Bake until lightly brown, 12 to 15 minutes. Cool on wire rack for at least 10 minutes.

While scones are cooling, make ganache.  Place chopped chocolate in a small bowl.  In a separate bowl, heat heavy cream about 20 seconds in the microwave.   Pour over chocolate, cover and let sit about 2-3 minutes.  Remove cover and stir until smooth.  Cool 2-3 minutes in the fridge then spoon over scones.  Allow ganache to set and enjoy!


Monday, September 23, 2013

Menu Plan Monday Week 39 (2013)

My husband informed me that yesterday was the official first day of FALL!!  Yay, I'm so excited.  I love fall probably more than anything, although spring is a close second.  Fall just brings feelings of comfort and peace.  There is so much beauty to behold as we watch the world change color right before our eyes.  I love drives and hikes up the canyon in the fall and the cool mornings, even early morning walks while there's still peace and quite on the streets.

Another great love of mine in the fall is fall cooking and baking...think pumpkin, squash, soup, warm and hearty.   I can't wait to get into all that.  The first weekend in October we also spend the better part of two days listening to a church wide broadcast (see here for more info).  During that weekend I always make huge batches of cinnamon rolls and I like to try a new kind every year.  One year I made these Caramel Apple Cinnamon Rolls, another year I made some Pumpkin and Pepita Cinnamon Rolls and, of course I've made loads of my regular cinnamon and Orange Rolls.  This year, I'm not sure which direction I'll go in but I'm sure it'll be delicious.

So, for this week's menu, I'm going to try and do a zero budget, meaning I'm going to try my hardest to use what we have without having to buy anything extra.  With that money I would have spent on groceries, instead I'm going to stock up on some ground beef and chicken that's on sale at Sprouts.  We may be scraping the bottom of the barrel on fresh stuff by the end of the week, but I think we can make it!


Dinner Menu Week 39 (2013) 
Monday
Thai Eggplant Stir-fry
Thai Coconut Rice 

Tuesday
Hamburgers
Steamed Green Beans
salad


Wednesday
Beet Gnocchi with Lemon Pesto
salad

Thursday
Black Bean Soup
Artisan Bread

Friday
Fish Tacos
Southwest Cabbage Slaw

Saturday
Sweet and Spicy Shredded Pork over Polenta
salad

Sunday
Tomato-Basil Pasta (One Pot Wonder!)
Artisan Bread

Friday, September 20, 2013

Almond Joy Granola


I love making my own granola.  It's so versatile and it's great for breakfast, brunch or even snacking.  Usually before I make a batch, I scour my cupboards and pull out all the little bags of dried fruit and nuts then toss together what looks good. 

So, right before I made this I had the contents of two cupboards all over my counter.  At the last minute I decided to scratch everything and just throw together some almonds, shaved coconut and chocolate.  Totally uncomplicated and easy.  Totally delicious!

I LOVE anything coconut and I about died when I found these Roasted Coconut Chips at Trader Joe's.  Then I found them at Sprouts and saved them because I knew I'd eventually use them for my granola.  Let me tell you, they're fabulous in this granola. My other favorite part...the chunks of chocolate...duh!!  The trick here is to add the chocolate after the granola has baked and cooled about 10 minutes.  Then only slightly stir them in so they kinda melt.  When they harden, you have these delicious little bites of almond joy!


Almond Joy Granola
3 cups rolled oats
2 cups shaved coconut
1 cup chopped almonds
2 Tbsp. coconut butter
2 Tbsp. coconut oil
2 Tbsp. honey
1 1/2 Tbsp. brown sugar
1 cup mini semi-sweet chocolate chips

Preheat oven to 325 degrees F.

In a large mixing bowl, toss together oats, coconut and almonds.  Set aside.

In a smaller bowl, add coconut butter, coconut oil, honey and brown sugar.  Gently heat until coconut oil is melted.  Whisk until smooth.  Pour over oat mixture and fold in until completely coated.

Spread mixture out evenly in a large cookie sheet.  Bake for 10 minutes.  Remove from oven, stir and spread out again.  Return pan to oven and cook another 10 minutes.  Remove and stir again.  If it's not golden enough to your liking bake UP TO 5 minutes more. 

Cool granola in cookie sheet set over a wire rack about 10 minutes.  While granola is still slightly warm, sprinkle chocolate chips over the top and stir just a little bit, so there's chunks of chocolate rather then melting the chocolate completely and having it cover all the granola.  Cool granola completely.  Break up any large chunks and place in an airtight container.

Monday, September 16, 2013

Grilled Ratatouille Polenta Stack


Most of what you see here is either from my garden or was given to me from a friend's garden.  Gotta love it!  I wish my garden were bigger, I wish I could grow everything I wanted and I wish I could have my own tomatoes the whole year long.  But alas, 'tis not so.  So, for now I'll take what I can get.

Last summer I played around with ratatouille a bit and really enjoyed the flavor profile.  I also started liking eggplant a little more.  When my friend brought me three eggplants a while back I immediately knew I wanted to do something ratatouille-like but wasn't sure what.  Then I got inspired and pulled this dish off.

This totally hit the spot and was a great meatless meal.  I was a little nervous at the lack of seasoning (other than salt) on the veggies but I forget just how delicious grilled or roasted veggies are by themselves.  They were anything but flavorless.  Then the marinated fresh tomatoes and herbs up the anti even more.  All that sat on top of a creamy polenta cake, giving the dish both flavor and substance.


Grilled Ratatouille Polenta Stack
for the ratatouille:
1 medium zucchini, sliced 1/4 inch thick
1 medium eggplant, sliced 1/4 inch thick
1 large yellow or orange bell pepper, sliced 1/2 inch thick
salt

for the polenta:
3/4 cup polenta/corn grits/cornmeal
3 cups chicken broth or water
3/4 cup freshly shredded parmesan cheese
1/3 cup heavy cream
salt and pepper, to taste

for the marinated tomatoes and herbs:
3-4 medium tomatoes, diced
2 Tbsp. fresh herbs, chopped (I used basil)
1 Tbsp. olive oil
1 Tbsp. balsamic vinegar
salt and pepper, to taste


Slice eggplant and zucchini.  Place on a wire rack fitted over a cookie sheet.  Alternately you can place them on a paper towel-lined cookie sheet as well.  Sprinkle with salt and let sit about 10 minutes to draw the water out.  Flip, salt again and let sit another 10 minutes.

Dice tomatoes and place in a bowl with vinegar and olive oil.  Add chopped herbs. Season with salt and pepper, to taste. Set aside until ready to plate and serve.

Bring chicken broth or water to a boil. Gently whisk in polenta.  Reduce heat and simmer 7-15 minutes.  Cook time will depend on coarseness of the grain.  If you are using a fine cornmeal, it may only take 4-5 minutes.

While polenta is cooking, preheat outdoor grill or indoor grill pan and grill zucchini, eggplant and peppers on both sides until tender.

When polenta is finished cooking, remove from heat and whisk in cheese and cream.  Pour into an 8x8-inch pan, buttered or sprayed with cooking spray.  Allow to set until firm.  You can briefly refrigerate it if necessary.  Cut into 6 squares. 

To assemble, place polenta cake on a plate.  Layer with about 2-3 slices each eggplant, zucchini and bell pepper.  Top with marinated tomatoes and herbs and some of the liquid.

Serve warm.


SOURCE: Slightly adapted from Project Domestication


Thursday, September 12, 2013

Biscuits and Peach Jam Ice Cream (Jeni's CopyCat)


If you haven't heard of Jeni's Splendid Ice Creams it's worth a look into!  My friend introduced me to her ice creams last summer and I almost immediately bought her book, Jeni's Splendid Ice Creams At Home.  The ice cream flavors are so unique and so delicious, and her method gives you thick and creamy, yet scoopable ice cream.  Love it!

So, this flavor you see above is a only available for a limited time in Jeni's scoop shops and online because, obviously, fresh summer peaches are only available for a limited time as well.  The flavor profile: buttermilk ice cream swirled with peach jam and crumbled biscuits. I knew I could hack it.

The verdict: Well, I don't know exactly how Jeni's tastes but I think I nailed it pretty good.  It's seriously fabulous.  The ice cream base has just a hint of buttermilk, making it slightly sweet and tangy.  The peach jam is incredibly easy, infused with bourbon vanilla, and the biscuits add yet another dimension of flavor and texture.


Biscuits and Peach Jam Ice Cream
for the ice cream:
1 1/2 cups whole milk
2 Tbsp cornstarch
2 oz. (4 Tbsp) cream cheese, softened
1/8 Tbsp. fine sea salt
1 1/4 cup heavy cream
2/3 cup sugar
2 Tablespoon light corn syrup
1/4 cup buttermilk

1/2 cup Vanilla Bourbon Peach Jam
1 cup biscuits, cut into small chunks

Mix 2 tablespoons of the milk with the cornstarch in a small bowl and make a slurry.  In a separate bowl, whisk the cream cheese and salt until smooth; it may help to microwave the cream cheese for 5-10 seconds first so you don't get any lumps.

Combine remaining milk, cream, sugar and corn syrup in a medium saucepan and bring to a boil over medium-high heat.  Boil for 4 minutes.  Remove from heat and gradually whisk in the cornstarch slurry.  Return pan to heat and bring to a boil.  Cook, stirring constantly, until slightly thickened; about 1 minute.  Remove from heat.

Gradually (AKA: very slowly!!) whisk the hot milk mixture into the cream cheese until smooth.  Add the buttermilk and blend well.  Pour into an airtight container and chill overnight or until completely cooled.

Pour ice cream base into freezer canister and freeze according to manufacturer's instructions.  Pack the ice cream into a freezer-safe storage container.  Stir in biscuits, then drop jam by the spoonful and gently swirl, trying not to fully incorporate the jam into the ice cream.  Place in freezer until firm.


SOURCE: Ice cream base from Jeni's Splendid Ice Creams at Home

Tuesday, September 10, 2013

Vanilla Bourbon Peach Jam {Low Sugar, No Pectin Recipe}


I've been  up to my elbows in peaches lately, but I'm not complaining. They are one of my most favorite things of summer.  I usually make freezer jam, but my freezer is full of ... peaches.  Go figure.  Although I do prefer freezer jam most of the time, peaches are one fruit that make good cooked jam.

I actually decided to make this jam to go with some ice cream I'd planned on making as well.  I chose to do it old-school with no pectin because every time I go to make jam it seems I'm always out!  I also wanted to control the amount of sugar, so this method worked out perfectly.

I love the addition of cinnamon and bourbon vanilla in this jam; it spices it up just a bit.  If you can't find real bourbon vanilla, you can substitute regular vanilla extract or even the real thing!

Vanilla Bourbon Peach Jam
makes about 3 half-pint jars

2 lbs peaches, peeled and pitted
juice of a small lemon
1 1/2 cups sugar
1 1/2 tsp. ground cinnamon
1 Tbsp. real bourbon vanilla extract (or you can use real bourbon)

Place peaches into a blender or food processor and puree until smooth.  If you like chunks in your jam, you can puree it a little less.

Add peaches to a heavy saucepan along with lemon juice and sugar.  Bring to a boil over medium high heat.  Continue boiling until candy thermometer reaches 220 degrees F, stirring frequently (this may take up to an hour or so).  Be careful when stirring and scraping off the bottom, mixture will bubble and pop.

When mixture reaches desired temperature, remove from heat and give it a good stir.  Add in the cinnamon and vanilla and stir to combine.  Taste and add more flavoring as desired.

Ladle into half pint canning jars and secure lids.  Cool on counter then keep either in fridge or freezer.  If you want to can the jars in a water bath canner, follow instructions for your particular canner.

Sunday, September 8, 2013

Menu Plan Monday Week 37 (2013)

Oops, it's been a few weeks since I last posted a menu plan.  I've gotten a local CSA basket a few times recently and I've been trying to work with that kind of on the fly...not so sure that's working out the best for me.  I think I work better when I plan for what I'm going to buy so I make sure I'll use it all up.  We got a TON of anaheim peppers last week and I'm still trying to figure out what to do with them, other than salsa, cause their kind of hot and I'm sure too hot for my kiddos.

Anyway, fall is definitely in the air!!  I'm totally loving it.  We've had rain and cooler temps the past couple of days and it makes me want all things soup and baked goodies and anything with pumpkin. I don't know about you but my fall food pinterest board is ever growing and I can't wait to start tackling it.

For this week though, I'm going to hold onto summer just a tad bit longer.  I still have a bunch of garden produce I need to use up and lots of salsa to make.  I am hoping to throw a couple more peach recipes at you this week as well. So, here's the quick and dirty....


Dinner Menu Week 37 (2013)
Monday
Ratatouille Polenta Stacks

Tuesday
Tacos
cabbage and radish slaw
fresh fruit

Wednesday
Crunchy Coconut Chicken Fingers with Peach Mustard Dipping Sauce
Greek Panzanella

Thursday
Brown Butter Tilapia with Basil Breadcrumbs
wild rice
steamed peas

Friday
Fideo (Cafe Rio Copy Cat)
fruit

Saturday
Beet and Basil Pesto Pizza 

Sunday

Cube Steaks Dijon
mashed potatoes
steamed green beans


Wednesday, September 4, 2013

Homemade Peach Pie with Vanilla Bean Crust


So, apparently August was National Peach Month.  Had no idea.  Peaches are just about my favorite thing to eat in the summertime.  I usually buy a bushel of local peaches every summer to can and freeze but this year they kept evading me!  Finally I got my hands on some and couldn't wait to bring them home.

So, after I took care of most of the peaches I asked my husband if he wanted me to make anything special with them. He immediately went to pie.  Surprised?  Not a bit.  He likes pie, I don't so much, hence the lack of pie posts on the blog.  However, it is my duty to be a good wife and actually bake him what he wants once in a while.  So, I happily obliged.

I get a bit obsessive when trying to find a recipe, because it has to be PERFECT!  This time was no exception, I think I combined about three recipes to get what I wanted.  The result: hubby loved it! The crust was nice and flaky with just a hint of vanilla bean and the filling was every bit as it should have been; soft, juicy peaches, nice warm spices and slightly sweetened.

Since I don't do pie, the crust kinda freaks me out.  Obviously I wanted it to look perfect but since I hardly ever make it, I have little experience.  Instead of lopping one whole crust on the top and pinching and pressing until it could get it to look right, I decided little circles would be perfect and a little unique to boot.


Peach Pie with Vanilla Bean Crust
for the crust:
2 cups flour
1 tsp. salt
3 Tbsp. sugar
1 cup unsalted butter, chilled and cut into cubes
1/2 cup ice water
1 Tbsp. vanilla bean paste (or 1 vanilla bean, scraped)

for the filling:
8 cups fresh peaches, peeled and sliced
1 1/2 Tbsp. fresh lemon juice (about 1 small lemon or 1/2 a large)
1/3 cup brown sugar
1/3 cup granulated sugar
1/4 tsp. cinnamon
1/8 tsp. ground nutmeg
pinch sea salt
3 Tbsp. flour


1 Tbsp. milk
Coarse sugar, for sprinkling


In a food processor fitted with a metal blade, combine the flour, salt, sugar and chilled butter.  Pulse until mixture resembles a coarse meal.  Transfer to a mixing bowl.  Add ice water and vanilla bean paste. Fold dough until it comes together and forms a ball.  Don't work it too much or it will turn out chewy.  It's ok if there's a few crumbs, just press it into the dough.  Divide the dough in half and form two discs. Wrap in plastic wrap and refrigerate for at least an hour.

When ready to bake, preheat oven to 425 degrees F.

In a large mixing bowl, add peaches, lemon juice, sugars and spices, salt and flour.  Stir to combine.

Roll out each disc of dough into about a 13-inch round.  Lay the first one into the pie pan, cutting off any extra and fluting the edges.  Pour the pie filling on top of the crust.  Using a cookie cutter or whatever you can find, cut small circles, about 1 1/2-2-inches, from the second round of dough and place them on top of the filling, in concentric circles.

Brush the top and edges of pie with milk and sprinkle with coarse sugar.  Place pie pan on a cookie sheet and put in the oven.  Bake for 20 minutes.  Reduce heat to 375 degrees F and continue baking another 40 minutes or until filling is bubbling and crust is slightly browned.

Remove from oven and cool on a wire rack at least 3 hours.


Source: Crust adapted from Hot Polka Dot, and filling adapted from Sift and Whisk.

Sunday, September 1, 2013

Whole Wheat Sandwich Bread


So, instead of continually updating my old bread recipe that I posted in 2010, I decided it was time for a complete rehaul.  Over the years as I have gained much experience and learned the art of bread making, I have tweaked the recipe to fit our tastes and needs.

This bread is delicious!  I have been making it (or a version of it) for my family for close to 4 years, I think.  We don't eat store bought anymore, usually unless it's an artisan loaf or something.  Bread making is a wonderful investment of your time because it brings such great reward!  Sure, it takes more time in the beginning to learn the art, but once you've got it down, you can practically do it with your eyes closed.

I love being able to make bread for my family and to know that it is fresh and healthy.  Eating a hot slice barely out of the oven never gets old either. 


Whole Wheat Sandwich Bread
makes 2 loaves
 
5 cups fresh ground whole wheat flour, or whole wheat bread flour
3/4 Tbsp. instant yeast
3 Tbsp.  vital wheat gluten
3/4 Tbsp. salt
½ cup potato flakes
3 Tbsp. olive oil
2 Tbsp. honey
2 cups warm tap water

In a mixing bowl, fitted with a dough hook, measure in the flour, yeast, gluten, salt, and potato flakes. Pulse to evenly distribute, for a second or two. Add oil, honey and water and mix for about 30 seconds. If the dough is too dry, add more water, about a tablespoon at a time, and if it is too wet, add more flour, a tablespoon at a time. The dough at this point should be wet enough to leave a little residue on the sides of the bowl. (It is better to err on the side of too wet than to dry.  A wet dough is still manageable, although messy, but a dry dough will give you a brick when cooked.) Mix for 10 minutes. Do not add any more water or flour at this point, it will not incorporate well.

When it's done mixing, the dough will look smooth and elastic. If it seems a little sticky, it will still be ok, most likely. If you have a Kitchen Aid-type bowl, remove dough hook and ball of dough. If you have a Bosch-type bowl, you’ll need a separate large mixing bowl. Spray the inside of either bowl and put the dough back in the dough to rise. Cover lightly with plastic wrap and let rise until doubled. (Time will vary greatly here, anywhere from 30 -60 minutes or so, so just watch over the dough.)

After the first rise, gently deflate the dough (spray your hands with cooking spray) and separate into 2 dough balls. For a perfect looking loaf, roll each dough ball out (on a counter coated with cooking spray not flour) the width of your loaf pan, and about 12 inches long, getting all the air bubbles out. Then, tightly roll the dough up, pinch each side closed and tuck them under a bit and lay it in a greased loaf pan. (Don't worry about the dough touching all the sides yet, as it raises, it will fill in.) Repeat with remaining dough ball. Cover bread pans with a light kitchen towel. Let dough raise again until about doubled; it should rise just above the top of the pan. Near the end of the second raise, preheat your oven to 350 F.

Bake for 25 minutes. Remove from oven and let loaves cool for 10 minutes, then take the bread out of the pans and completely cool on a wire rack. (Do not let the bread cool completely in the pans, it will become a sticky mess and ruin the bread.)


If you are new to bread-making, here are some tips from King Arthur Flour:
-If you're kneading bread by hand, it's tempting to keep adding flour till the dough is no longer sticky. Resist the temptation! The more flour you add while you're kneading, the heavier and drier your final loaf will be.

-The amount of liquid you use to make the "perfect" dough will vary with the seasons. Flour is like a sponge; it absorbs water during the humid days of summer, and dries out during the winter. Your goal should be making the dough as it's described (e.g., cohesive, soft but not sticky), rather than sticking religiously to the amount of liquid.

-When making yeast bread, let the dough rise to the point the recipe says it should, e.g., "Let the dough rise till it's doubled in bulk." Rising times are only a guide; there are so many variables in yeast baking (how you kneaded the dough; what kind of yeast you used) that it's impossible to say that bread dough will ALWAYS double in bulk in a specific amount of time.

Thursday, August 29, 2013

Lime Sublime Green Smoothie

Despite the pictures I post on facebook and instagram of some of the goodies I make, I do actually try to eat pretty healthy.  A mid-day green smoothie is almost a daily thing for me.  I started drinking  smoothies years ago as one of the first habits I picked up on my whole foods journey; a habit that I absolutely love.

By now I have a good repertoire of smoothies to choose from and change it up from day to day.  If you're a smoothie-drinker, I think you'll agree that being able to have a variety to choose from makes the habit a lot more enjoyable.

A few months ago I did a 30-day smoothie challenge and this smoothie was one of my favorites and probably the one I drink the most!  I love it because not only does it taste phenomenal but it's super low in calories as well and still packed with goodness.  This is always my go-to when I need a little detox as well.


Lime Sublime Green Smoothie
1 cup coconut water (or water or a combination)
1 cup frozen green grapes
1/2 cup fresh pineapple, frozen
2 handfuls of greens (spinach, kale, chard, etc.)
chunk of lime (make sure you wash it well) or use 1 tsp. zest and some juice if you don't have a high power blender
1 Tbsp. chia seeds
1 tsp. coconut oil (optional)
1 tsp. bee pollen (optional)
additional ice, if necessary

Place everything in a blender and blend until smooth.


SOURCE: adapted from Unconventional Kitchen

Tuesday, August 27, 2013

Stacked Chicken Enchiladas with Roatsted Tomatillo Salsa


The first time I made these, it was kind of a last minute deal, I just threw them together really and they turned out much better than I imagined.  I think I had originally planned on grilled chicken or something that night but forgot to defrost the chicken in time so had to do it in the microwave.  Well, I must have forgotten to decrease the power because before I knew it the chicken was poaching in it's own juices!!  Argh!

So, some quick thinking led me to my very last jar of bottled tomatillo salsa, some tortillas in the freezer and a few other fixings I found in the fridge.  I thought it would be edible at best but to my surprise my husband and I really enjoyed it and stacking the enchiladas this way made them fun to eat. 

This time around I was actually prepared for this meal and had a few extras I didn't have last time.  You're sure to love it!


Stacked Chicken Enchiladas with Roasted Tomatillo Salsa
serves about 8 (1 serving: half a stack)
 
for the salsa:
1 lb tomatillos, husked, rinsed and halved or quartered
3-4 garlic cloves, skins on
small onion, quartered
1 jalapeno pepper, halved and seeded
1-2 anaheim peppers, halved and seeded
olive oil
salt and pepper
half a bunch of cilantro
juice of a lime

for the chicken:
2 chicken breasts
1 cup chicken broth

for the filling:
1 can black beans, drained and rinsed (or about 2 cups cooked beans)
1 cup frozen corn
1 cup monterey jack cheese, shredded

remaining ingredients and garnishes:
12 corn tortillas
chopped cilantro
avocado, diced or sliced
caramelized onion
monterey jack cheese


Preheat oven to 500 degrees F. Line a cookie sheet with foil and.  Put tomatillos, garlic, onion and peppers on the sheet.  Drizzle with olive oil and sprinkle with salt and pepper.  Toss to coat.  Bake for about 15-20 minutes or until the tomatillos begin to char.  Remove from oven and cool slightly.  Slip garlic from the skins and add it, along with the rest of the roasted veggies, to a blender or food processor.  Add cilantro and lime juice.  Blend until desired consistency.  Taste for seasoning and adjust as necessary.  Set aside.

While veggies are cooking, cook chicken. In a Dutch oven or a pot with a lid, add chicken and chicken broth.  Bring to a boil.  Reduce heat to medium, cover with lid and cook about 30 minutes.  Remove and cool slightly then shred with a fork. Return chicken to broth and add about 1/2 cup of the tomatillo salsa.  Add beans and corn and let simmer on low for about 5 minutes, or until heated through.  Remove from heat, add 1 cup cheese and stir to combine.

*If you want caramelized onion, start it while the chicken and veggies cook.  Slice 1 large onion and place in a large saute pan. Drizzle with a little olive oil and cook over medium heat until onions are soft and brown; about 15-20 minutes.

Reduce oven temperature to 350 degrees F. 

To assemble enchiladas, line a cookie sheet with a slipat or spray with cooking spray.  Lay out 4 tortillas layer with about 1/3 cup chicken mixture and another tablespoon or so of the tomatillo salsa.  Lay another tortilla, more chicken mixture and salsa.  Top with a final tortilla, a spoonful of salsa and a little extra cheese.  Place in oven and cook about 20 minutes or until cheese on top is bubbly and slightly browning.

Remove from oven and top with caramelized onion, cilantro and avocado.  Serve warm.


Michele's Notes:
-I actually made the salsa the night before which made dinner much quicker to throw together.  You can also do the chicken the night before as well to save time.
-I only made two stacks since we have many wee mouths in this house.  I saved the remaining chicken mixture and little bit of salsa I had left for a double duty meal the next night!!  I cooked about 6 oz. homestyle noodles in 6 cups chicken broth, then added the chicken and salsa and made a delicious soup.  


 SOURCE:  Salsa adapted from Our Best Bites

Thursday, August 22, 2013

Black Beans and Coconut Rice with Mango Salsa


So, when my siblings and I were growing up, we would go through times here and there when my mom would say to us something to the effect of "we're going to be eating beans and rice for a while," meaning money is tight and we're eating cheap.  I, being my mother's daughter, have also used that phrase a time or two in our marriage, to which my husband would respond, "Great!  I love beans and rice!!"

This is, in fact, a cheap easy meal, but it's still packed with lots of nutrition and flavor!  I was actually drawn to making beans this time because I needed to increase my iron and potassium intake and turns out beans are great for that. 

I couldn't help but make this colorful salsa to top of the rice and beans.  Don't get me wrong, rice and beans are great by themselves but the fresh mango, avocado and tomato and the nice bite from the cilantro really brought it home for me.  Enjoy!


Black Beans and Coconut Rice with Mango Salsa
serves about 4

for the beans:
1 cup thinly sliced celery
2 cans black beans, drained and rinsed
1/2 small red onion, small diced
juice of 1 lime
1 tablespoon olive oil
1/4 tsp. cumin
pinch of smoked paprika

for the rice:
1 cup  jasmine rice
1 cup canned coconut milk (preferably full-fat)
1 cup water
pinch of salt
2 Tbsp. flaked coconut (optional)

for the salsa:
1 mango, diced
2 roma tomatoes, diced
1 avocado, diced
1 small anaheim pepper, finely diced (can substitute jalapeno for more heat)
2 green onions, chopped
1/2 cup cilantro, chopped
juice of 1 lime
salt and pepper


In a medium sauce pan, add rice, coconut milk, water, salt and flaked coconut (if desired).  Bring to a boil.  Reduce heat, cover and cook for 20 minutes.

Add the celery, black beans and onion to a salad bowl.  Squeeze lime, drizzle the olive oil and add the cumin and paprika.  Toss to coat.  Add a pinch of salt, if necessary.

In a smaller bowl, add the mango, tomato, avocado, pepper, onion and cilantro. Squeeze lime over it and add salt and pepper to taste.  Stir to coat. 

Once rice is finished cooking, allow to cool slightly.

Serve rice warm or at room temperature, topped with bean mixture and salsa.

Monday, August 19, 2013

Peanut Butter Banana-Oat Muffins

I've been gearing up for school to start for the past few weeks.  We're breakfast people, so not a whole lot of boxed cereal here, mostly home-cooked.  So, I decided to start doubling my recipes lately and throwing the rest in the freezer to stock up for those rushed early mornings.

Peanut butter and banana are one of my most favorite combinations when it comes to breakfast foods.  I thought about throwing chocolate chips in there, but I decided I shouldn't have chocolate with EVERY meal!!  Plus, we're trying to reduce the amount of sugar, especially refined, in our diets.  What's lovely about these muffins is the banana adds a natural sweetness so you can keep the amount of added sugar lower; remember the blacker the better when it comes to bananas for baking.

Another thing I love about these muffins is they are light and and have a very tender crumb.  No heavy whole wheat bricks here!!

Peanut Butter Banana-Oat Muffins
2 Tbsp. coconut oil
1 cup mashed banana, about 2 large
1/4 cup unrefined sugar (like sucanat)
1 egg
1 tsp. vanilla
1/4 cup natural peanut butter
1/4 cup Greek yogurt (preferably not low-fat)
1/2 milk (I use almond)
1 cup whole wheat flour
1/2 cup oat flour (put oats in blender or spice grinder to grind them up)
3/4 tsp. baking powder
1/2 tsp. baking soda
1/2 tsp. salt
1 tsp. cinnamon
1/4 tsp. nutmeg

Preheat oven to 400 degrees F.

In a mixing bowl, mash banana.  Add coconut oil and sugar and whisk until coconut oil is well incorporated.  Add egg, vanilla, peanut butter, yogurt and milk and whisk.  Add they dry ingredients and stir just to combine.  Do not over mix.

Line muffin tin with liners and divide batter evenly into wells.

Bake at 400 degrees F for about 12-14 minutes.  Cool on wire rack.  Store in an airtight container.

Sunday, August 18, 2013

Menu Plan Monday Week 34 (2013)

Wow!  School is starting in 2 days here and I can ALMOST wrap my head around it.  My oldest is going to first grade so it's the first year I'll have one gone all day.  Not sure how I feel about that.  I hope her sisters don't get lonely...I hope I don't get lonely.

So, being able to eat lunch at school has been a big deal!  My daughter and I sat down together and planned out the first 3 weeks of lunches that she was going to take to school.  She's super excited and to tell you the truth, so am I.  She's a pretty good eater when it comes down to it but can be picky and definitely drags her feet when something new is in front of her (even if she ends up liking it).  I want to sneak in some new things (like hummus and homemade beans) for her to try, hoping that in a less-stressful environment, (aka not the dinner table where mom is yelling at her to EAT) and with her friends she'll be more willing to just eat.  We'll see how that goes.

So, this week we're embracing some of the fruits of our harvest and have lots of corn, tomatoes, peaches and basil coming up.  Can't wait!!


Dinner Menu Week 34 (2013)
Monday
Spicy Bok Choy Rice Bowl

Tuesday
Cold Soba Noodles with Sesame Ginger Sauce
raw veggies

Wednesday
Corn and Basil Cakes
bacon
salad
fresh fruit

Thursday
Caramelized onion, Chipotle and Mushroom Burgers
salad
steak fries

Friday  
Smoky Heirloom Tomato and Grilled Peach Pasta Salad w/ Basil Vinaigrette

Saturday
Leftovers

Sunday
Summer Corn, Bacon and Potato Chowder

Friday, August 16, 2013

S'mores Fudge Bars

I obviously didn't get enough s'more goodness on National S'more day last week.  I just had to tempt fate and make these dang things. Then I went and figured out how many calories were in each one...yeah, don't do that!

These are seriously one of those things are are just soooo good, but you really should just stop at one.  They are sweet and rich and perfect!

Each layer has it's own deliciousness about it.  The graham layer is buttery and slightly salty and, of course, crumbly and crunchy.  The chocolate fudge layer is smooth and milk chocolaty.  I highly suggest you get Hershey's brand milk chocolate so it has that quintessential s'more taste.  The marshmallow layer is homemade goodness that far surpasses the store bought stuff.

The hardest part about making these s'mores bars is waiting until they are completely set!  If you try to pull them out of the pan too early, the chocolate will start to seep out.  I put mine on the counter first, then got impatient and put them in the fridge, then finally couldn't hardly stand it any longer and threw them in the freezer!!


S'mores Fudge Bars
for the graham layer:
2 cups graham cracker crumbs
1/2 cup butter, melted
1/4 cup sugar
1/2 tsp. salt

for the chocolate layer:
2 cups Hershey's milk chocolate chips
1 14-oz can sweetened condensed milk

for the marshmallow layer:
3/4 cup sugar
1/2 cups light corn syrup
1/4 cup water
1/4 tsp. salt
2 egg whites
1/4 tsp. cream of tartar
1 1/2 tsp. vanilla extract

Preheat oven to 350 degrees F.  Line a 9-inch square baking pan with foil and spray with cooking spray.

Combine all the ingredients for the graham layer and press it into the baking pan.  Bake for 10 minutes.

While graham layer is baking, combine milk chocolate chips and sweetened condensed milk in a medium saucepan.  Heat, over medium-high heat, stirring frequently, until completely melted and smooth.  Immediately pour over graham layer.

In a mixing bowl, fitted with a whisk attachment, whisk egg whites and cream of tartar until soft peaks form.

In a small saucepan, combine the sugar, corn syrup, water and salt. Boil until candy thermometer reads 240 degrees F.

Turn mixer on low and slowly drizzle syrup into the bowl.  Once it's all added, scrape down sides and turn mixer to medium and beat another 5-7 minutes or so, until mixture is thick and glossy.  Add vanilla in very last.

Spread fluff on top of chocolate layer and smooth with off-set spatula.

Turn broiler on and place pan first on bottom rack of oven for 2-3 minutes, or until puffy and getting light brown-don't take your eyes off the oven!!!  Move the pan up to the top rack and let it finish browning another 30-60 seconds or so.

Cool COMPLETELY!!  This may take several hours depending on your method of cooling.  Using the foil, pull bars out of pan and cut into about 1 1/2 in squares.

Bars will keep in an airtight container on the counter for 2 days or 5 days in the fridge.  Store any leftover fluff in the fridge for up to 2 weeks.


SOURCE: Cookies & Cups

Sunday, August 11, 2013

Menu Plan Monday Week 33 (2013)

Wow, I can't believe the summer is already coming to a close.  School starts here in just over a week.  I don't think I'm quite ready for that; although I think my kids are.  We haven't done half of the things we set out to do, but we still have had some good fun. Now it's back to routines, carpools and early bedtimes...that last one doesn't seem so bad though.

It doesn't really seem like the summer is almost over.  I mean, I have only eaten fresh corn like 3 times so far and I definitely have not eaten my fair share of peaches and fresh tomatoes yet.  I have a whole pinterest board dedicated to summer eats that I've barely touched so I'm going to have to do my best to cram in as much as I can before the weather turns...but why get ahead of myself, it's barely August.  We've got plenty of heat yet.

Once again, the menu this week is quick and easy.  Gotta keep it that way or it just doesn't happen.  You'll notice I have salad just about every night.  I love having salad with dinner.  I usually make it the larger portion of my meal, while the others keep is on the side.  When I make a salad I like to make enough for at least two days, sometimes three.  That way I can chop once and eat thrice. 


Dinner Menu
Monday
Spaghetti
green salad
Artisan Bread

Tuesday
Charred Corn Tacos
Southwest Cabbage Slaw
fresh fruit

Wednesday
Chicken Bacon Spinach Pasta w/ Tomatoes and Avocado
steamed broccoli
leftover salad

Thursday
Chipotle Caramelized Onion Burgers (Homemade Burger Buns)
steamed fresh green beans
steak fries

Friday
Stacked Green Enchiladas
leftover slaw and veggies

Saturday
Spicy Bok Choy Rice Bowl
peas

Sunday
leftovers/fend for yourself!!

Thursday, August 8, 2013

Pasta alla Norma


I think it's kind of hard to make cooked eggplant look good.  It's hard to improve on brown.  Thank goodness this dish has some colorful counterparts to help it live up to it's fantastic taste!

I don't usually buy eggplant but I found myself with not one but two a few weeks ago in my CSA basket.  My usual go-to dish for eggplant is this orzo, which is pretty phenomenal, but that only used up one of the eggplants.  So I went searching.  

I found a version of this pasta dish in a Cooking Light book of mine.  With a few tweaks, this turned out pretty amazing too.  Even if you don't think you like eggplant, when paired with it's flavorful friends, you might just change your mind. I even went out and bought another eggplant just to make it again!

Pasta alla Norma is a typical Sicilian dish and is served with ricotta salata, which is ricotta that has been aged, pressed, salted and dried.  Although it can be hard to come by, you can substitute a semi-firm, salty cheese, like feta or queso fresco.  In a pinch, you can also use fresh mozzarella as well, which is what I've done here.

 
Pasta alla Norma
3/4 lb. pasta (12 oz.)
olive oil
1 medium eggplant, peeled and diced (about 4 cups)
3-4 cloves garlic, minced
pinch of red pepper flakes
splash of white cooking wine
1 can diced tomatoes
large handful of fresh basil leaves, chiffonade
1/2-1 cup ricotta salata, grated or cubed 

Bring a large pot of water to a boil.  Drop pasta and cook until al dente.

While the pasta cooks, peel and chop eggplant.  In a large skillet, heat a couple drizzles of olive oil and add the eggplant.  Cook on medium heat until brown and tender.  Add garlic and red pepper flakes and cook about 30 seconds, then add the splash of cooking wine and cook until almost evaporated.  Add tomatoes and simmer until pasta is finished cooking.  Add most of basil at the last minute.

Drain pasta and pour into a large serving dish.  Pour eggplant sauce over pasta and toss to combine.  Top with cheese and the rest of the fresh basil.  Serve warm.


SOURCE: Adapted from Better Recipes

Monday, August 5, 2013

Banana Split Ice Cream


So, a few weeks ago, my husband and I took our three (young) daughters on a loooooong car ride to Seattle to visit my brother and his family.  It was our first time in that neck of the woods and we had an absolute blast.  My brother, being the wonderful host that he is, wanted to show us all the favorite "hot spots" around town; Pike Place Market, Etta's (oh my gosh best seafood ever!!), Seattle Science Center, Top Pot Doughnuts and Bainbridge Island to name a few.

One of my favorite eats was Mora Iced Creamery the day we took the ferry to Bainbridge.  According to my brother they are touted to have the best ice cream...ever?  Or in the U.S., something like that.  I have to say that, although I can't vouch for it being the best ice cream in the U.S., it's definitely the best ice cream I've ever eaten.  It was absolutely fabulous!  And the selection of flavors...they have 10 different kinds of chocolate!!  It's an ice cream lovers paradise.

I decided on the banana split and knew immediately I wanted to try to recreate it at home.  I loved every bite.  It was a sweet banana ice cream, speckled with dark chocolate and swirled with a thick dulce de leche.

Although it would be hard to duplicate exactly what I had at Mora in my own kitchen, I think this version is pretty darn good.  I had no idea I liked banana ice cream so much.  This is definitely a treat you are not going to want to pass up this summer.


Banana Split Ice Cream 
for the ice cream base:
6 large egg yolks
1 cup heavy cream
3 medium/large bananas (the riper the better)
1/8 tsp. sea salt
2 cups whole milk
1/2 cup granulated sugar
2 tsp. vanilla extract

for the chocolate stracciatella:
5 oz. dark or bittersweet chocolate, chopped
1 Tbsp. coconut oil

for the dulce de leche:
1 recipe Dulce de Leche 
 

Make dulce de leche ahead of time and refrigerate until ready to use.

Whisk together egg yolks in a small bowl and set aside.

In a food processor or blender, blend together bananas, salt and heavy cream until smooth.

In a medium saucepan, heat the milk and sugar over medium high heat until very warm, stirring frequently; do not boil.  Remove from heat.

Temper the eggs by VERY SLOWLY adding the milk mixture (about a tablespoon or two at a time) and whisking constantly.  Once you've added about half of the milk mixture, slowly whisk it all back into the saucepan.  Return saucepan to stove and heat over low heat.  With a rubber spatula, stir mixture, until it coats the back of a spoon. (If you heat it too fast, you will get scrambled eggs. BUT, you can still salvage it by running it through the blender.)

Slowly add the milk and egg mixture to the banana mixture in the blender.  Add vanilla and pulse or process until smooth.  Pour custard into an airtight container and refrigerate overnight or until completely cooled. 

Freeze in your ice cream maker according to manufacturer's instructions.  When ice cream is getting close to being done, prepare chocolate.

Place chocolate and coconut oil in a microwave-safe bowl and heat at 30 second increments at half power, stirring in between.  Once chocolate is thin and smooth, drizzle into ice cream at the last possible moment of churning.  Chocolate will harden immediately and shred into "chips."

Warm dulce de leche slightly, if necessary.  Layer ice cream and dulce de leche in a freezer-safe storage container, in as many layers as you wish.  I did only two layers of dulce but think it would be perfect with three.  Gently and briefly swirl with a knife, if desired.  Place in coldest part of your freezer and freeze until firm.

Wednesday, July 31, 2013

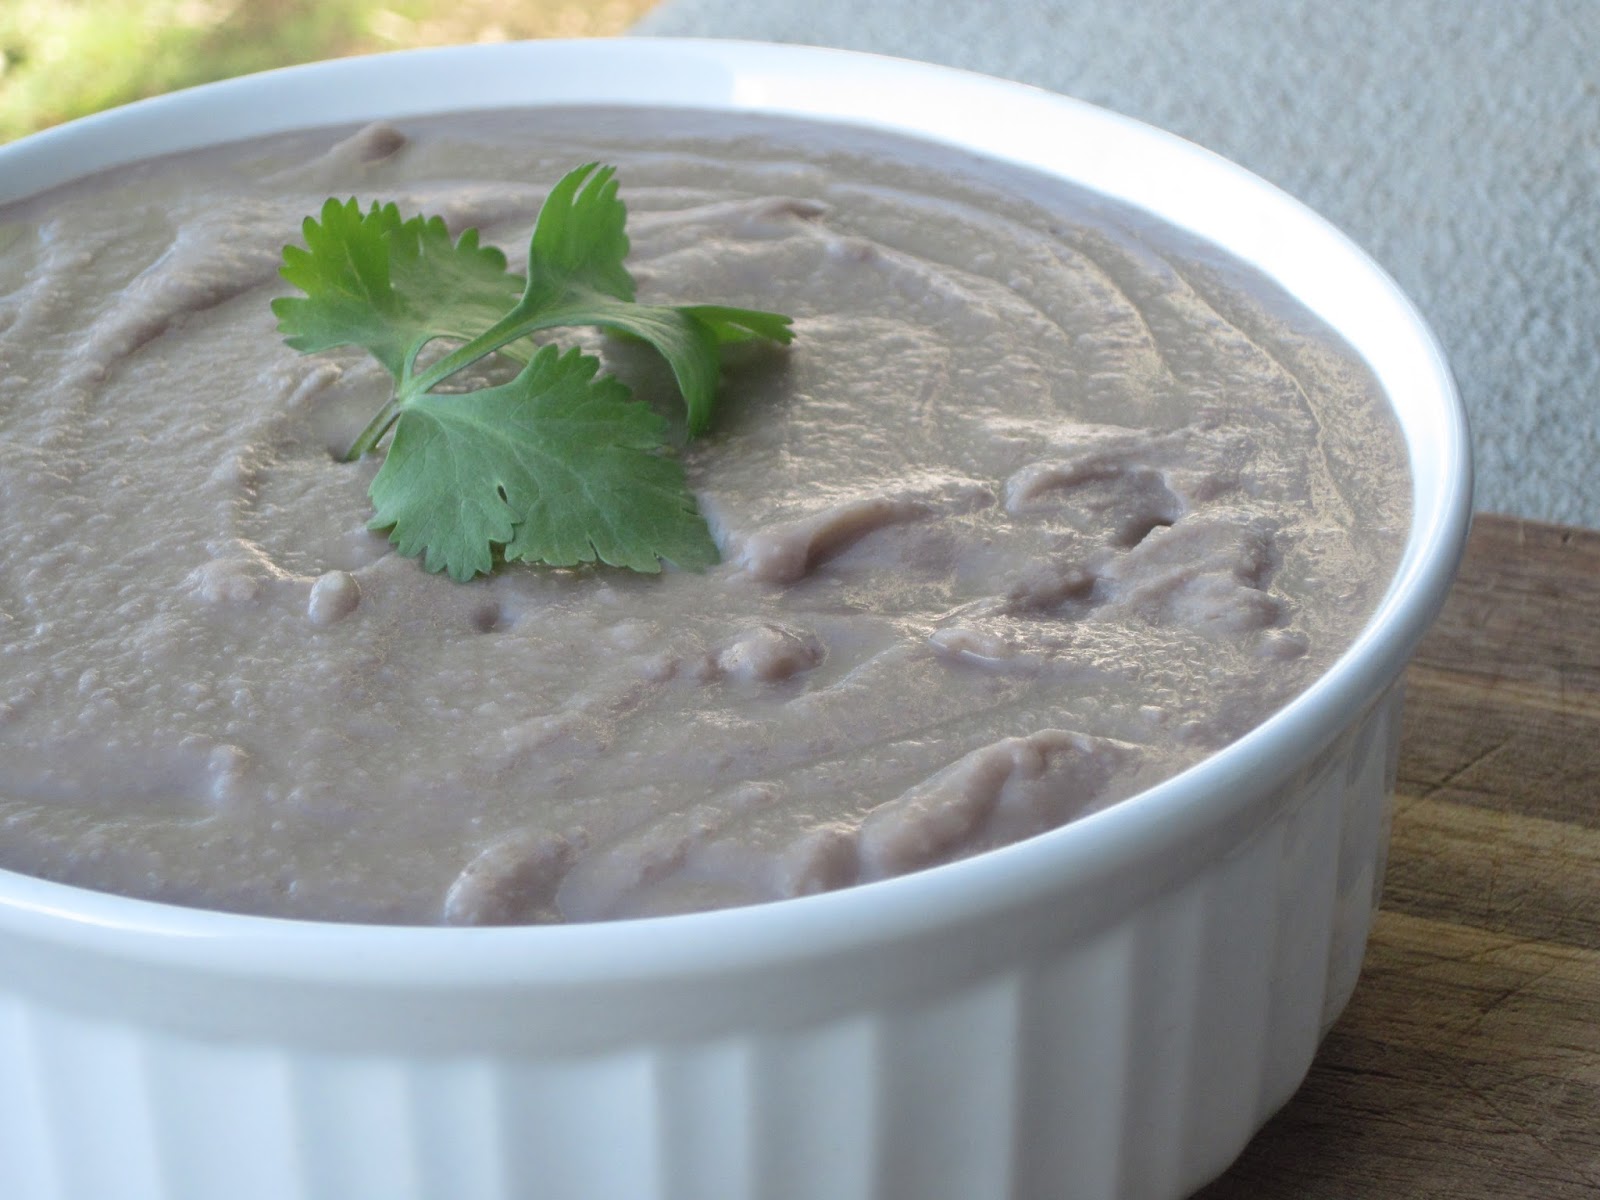
Homemade Refried Beans


These beans are simple goodness, to put it plainly. They are part of my ever-growing list of pantry items that I now make homemade.  Let me tell you they are well worth the small effort it takes, as they basically make themselves.  I love these beans because they just taste fresh and free from extra sodium, sugar and others stuff often found in the canned ones.

Beans are a wonderful food!  They are cheap and healthy, loaded with lots of fiber, iron and potassium, as well as protein.


Homemade Refried Beans
1 lb. dry pinto beans
8-10 cups water
1 Tbsp. granulated garlic
1/2 medium onion, cut in large chunks
1 1/2 Tbsp.  chicken bouillon granules (or sub part of the water for broth)

2 Tbsp. butter
salt, to taste

Rinse the beans thoroughly and put them in a large pot.   Add water, granulated garlic, onion and bouillon.  Bring to a boil, then reduce heat to medium or medium-low.  Off-set a lid on top of the pot and cook until beans are tender.  Depending on the freshness of the beans it could take as little as 1 1/2 hours, up to 3 hours. 

When beans are finished cooking, pour off about half, or more, of the liquid, reserving about a cup, if desired.  Using an immersion blender, puree the beans and onions until smooth.  You'll want to keep them a little runny because they will set up as they cool.  If they are too dry, add some of the reserved liquid to thin them out.  Add butter and salt, to taste. 


*Michele's notes: 
-I like to make a large pot at once because then I can freeze the rest into 1-2 cup portions for later use.  I often add a little more liquid to the ones I'm going to freeze, because as they are reheated, they will lose some liquid.  This keeps them from getting to dry.

-I also like to buy my beans in the bulk section of my grocery store.  They tend to be much more fresh and cook up on the lower end of the cooking time.  The 1-lb bags at the grocery store are much older and often take a long time to cook; although they still should taste fine.

Thursday, July 25, 2013

Penne Pasta with Roasted Beet Sauce


I don't think there's a whole lot I have to say to make you intrigued about this dish.  It's neon pink!!  The night I made this for dinner, my daughter saw me grating the parmesan and asked if we were having spaghetti.  I replied, "no, I'm making pink noodles," to which she then said, "pink noodles, that just doesn't make any sense!"  I had to laugh, she's kind of right, it does seem a little out there.  However, if you're a beet-lover, this will be right up your alley.
This pasta actually has a similar flavor profile of an ice cream I made last summer with beet puree, mascarpone, poppy seeds and orange.  I was thinking about it the whole time I was making this pasta.  Mmmmmm!  I ended up not having an orange though, which I actually wanted to use, so I used lemon instead at the last second and it worked out perfectly.  The citrus cuts the earthy dirt-like flavor of the beets and really balances and brightens up the sauce.

This dish is super quick to throw together.  If you roast your beets ahead of time, the sauce can be done in the time it takes the pasta to cook.  Yay for quick and easy.  Serve it with a large salad, and you're good to go.


Penne Pasta with Roasted Beet Sauce
3 medium-sized beets, cleaned and quartered
2 Tbsp.  olive oil
pinch of dry thyme (or a sprig or two 0f fresh)
2-3 cloves garlic
1 Tbsp. balsamic vinegar
2 Tbsp. white cooking wine (or a little extra pasta water or stock)
1/2 cup freshly grated parmesan cheese
1/2 cup chicken or vegetable stock
1/4 cup heavy cream (can sub full-fat coconut milk)
1 tsp. sugar
1 tsp. lemon zest
juice of half a lemon
3/4 pound penne pasta
salt and freshly ground pepper

Garnishes:
poppy seeds
mint leaves, chopped
extra parmesan


Preheat oven to 400 degrees F.

On a rimmed baking sheet, toss the diced beets with 1 tablespoon of the olive oil, thyme and a pinch of salt and pepper. Roast for 30-40 minutes.  (You could also roast the garlic with the beets-yum!)

Bring a large pot of water to a boil.  Drop pasta and cook according to package directions.

Transfer beets to a food processor. Add the garlic, balsamic vinegar, cooking wine, half of the parmesan and the remaining tablespoon of oil. Pulse until smooth.

Transfer beet mixture to a small saucepan. Add the stock and cream and bring to a light simmer. Add the sugar and the remaining cheese. Simmer on medium-low about 5-7 minutes. Take it off the heat. (If you have an immersion blender now would be a good time to give it one last whiz so it's nice and smooth.  Or you can put it back in the food processor or a blender.)  Just before adding it to the cooked pasta, add the lemon zest and juice; stir to combine. Taste for seasoning.

Drain cooked pasta and return to skillet. Pour the sauce over the pasta and toss to combine. Check for seasoning one more time and adjust as necessary. Allow pasta to sit a few minutes to soak up the sauce.

Serve pasta warm, with garnishes of your choice.

Michele's notes:
-if you don't have a lemon, you could use an orange in it's place for both the zest and juice, probably even a lime in a pinch; just add a little at a time so it's not overpowering.
-If you don't have fresh mint leaves or can't find them, try using cilantro or even fresh basil.


Source: Adapted from Bev Cooks 

Monday, July 22, 2013

Menu Plan Monday Week 30 (2013)

I know I'm getting the menu up for this week a little later than I usually do but I think I'm still feeling "car-lag" (if there is such a thing) from our week-long vacation we just got home from.  We went to Seattle and had an absolute blast!!  We were treated to some delicious seafood from the famous Etta's, seriously good pizza from Serious Pie and the most amazing ice cream from Mora I have ever eaten.  I can't wait to recreate that one at home...hopefully soon.

I got a bountiful basket on Saturday because I knew my fridge would be EMPTY after we got home and I wanted at least something in there we could eat off of for  a few days until I could get a little more grocery shopping done.  I came home with a boat load of blueberries (yum! for smoothies), a ton of kale and not 1 but 2 heads of cabbage.  As if 1 head didn't make a mountain by itself.  Soooo, I hope I can use all the cabbage before it goes bad.  Luckily it keeps well for a while.


Dinner Menu 
Monday
Ham and Gruyere Stuffed Potatoes
Sweet Kale Salad
Steamed broccoli (from the garden yay!!)

Tuesday
Crispy Lemon-Basil and Parmesan Crusted Chicken
peas
leftover salad

Wednesday
Asian Slaw with Roasted Peanuts and Ginger Lime Salad Dressing
Easy Sesame Peanut Noodles

Thursday
Penne Pasta in Roasted Beet Sauce
Italian Salad

Friday
Cashew Chicken & Rice
fresh veggies

Saturday
Pizza/leftovers

Sunday
Family dinner at my parents
Related Posts Plugin for WordPress, Blogger...