Thursday, July 18, 2013
Stuffed Red Peppers with Wild Rice, Spinach and Goat Cheese
A few weeks ago red peppers were on sale pretty cheap so I had my husband bring me home a huge bag of them. We go through a lot of red peppers around here. I love them in my salads, with hummus or in stir-fries and they're a veggie my kids will actually eat and enjoy! But even with as often as we eat them, I still had some leftover that would take more than a salad to finish.
Stuffed peppers have been on my list to make forever! I've even had the wild rice sitting in my pantry just waiting to be used. Actually, the night I made these I was planning on making lasagna rolls with a similar flavor profile but a light bulb went off at the last minute.
I'm glad I followed my gut on this one and went with the stuffed pepper idea. They were so delicious!! My favorite part...the goat cheese.
Stuffed Red Peppers with Wild Rice, Spinach and Goat Cheese
1 cup wild rice
3 cups reduced sodium chicken stock
3 large red peppers (or 4 medium for smaller portions)
1/2 large onion, diced
1 clove garlic
1/2 cup sun-dried tomatoes
1 10-oz bag baby spinach
1 Tbsp. balsamic vinegar
1 tsp. dried oregano
pinch of red pepper flakes
salt and pepper, to taste
4 oz. goat cheese
1/2 cup chopped pecans
Prepare rice ahead of time; about an hour. Bring to boil 3 cups reduced sodium chicken stock. Add rice, reduce heat and cover. Cook for 45-50 minutes. Uncover and fluff with fork.
Preheat oven to 350 degrees F. Halve bell peppers and lay them on a baking sheet. Sprinkle with a pinch os sea salt and bake for about 10 minutes.
Meanwhile, heat a large skillet over medium heat. Add a drizzle of olive oil and onions. Sauté about 10 minutes or until tender and slightly golden. Add garlic during last 30 seconds, being careful not to burn it. Remove from heat and add tomatoes and spinach. Stir to combine and just wilt the spinach. Add in the remaining ingredients and stir until incorporated. Taste for seasoning and add salt and pepper as necessary.
Spoon mixture into peppers halves and sprinkle with pecans. Bake uncovered about 20-25 minutes, until peppers are tender.
Serve warm.
Labels:
Meatless,
Rice,
Vegetables
Monday, July 15, 2013
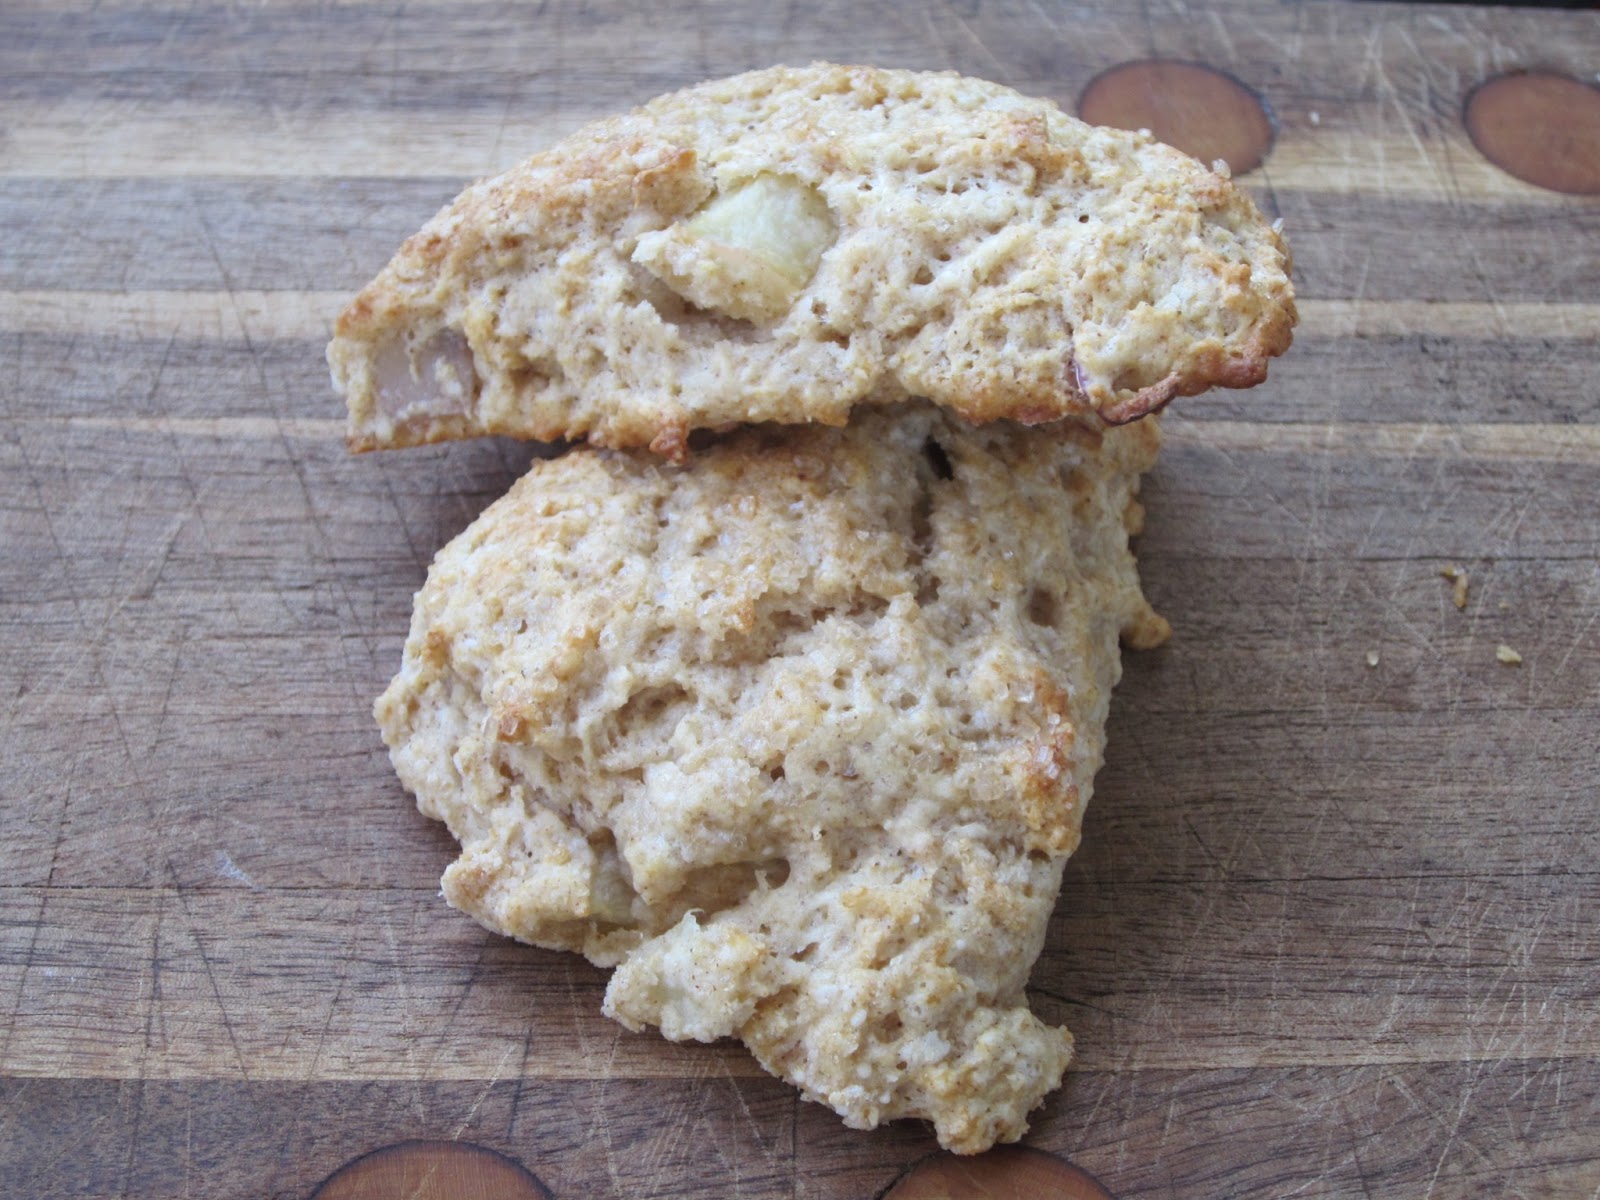
Fresh Peach Buttermilk Scones
I lightened up these scones a bit by using buttermilk and half whole wheat flour and added a little crunch with some raw sugar sprinkled on top. These scones are absolutely delightful and a must for those summer peaches!
Fresh Peach Buttermilk Scones
1 cup all-purpose flour
1 cup whole wheat flour
1 Tbsp. baking powder
1/4 cup sugar
1/2 tsp. salt
1 tsp. cinnamon
1/2 tsp. ground ginger
1/4 tsp. nutmeg
pinch of cloves
5 Tbsp. unsalted butter, chilled and cut into cubes
1 cup buttermilk
1 cup fresh peaches, peeled and small-diced
coarse sugar, for sprinkling
Preheat oven to 425 degrees F.
In large work bowl of a food processor fitted with steel blade, add flours, baking powder, sugar, salt and spices. Pulse a few times to combine. Add butter and whiz until mixture resembles a coarse meal.
Put mixture into a mixing bowl. Add peaches and toss. Add buttermilk. Stir with a spoon until a dough forms. Use your hands to bring it together. Turn onto a lightly floured surface and knead gently, only about 3 or 4 times, adding a bit more flour, if needed. Do not over-work or dough will be chewy.
Form scones by patting the dough into a circle and cut into wedges.
Place scones on un-greased baking sheet. Brush with a little more buttermilk and sprinkle each with coarse sugar. Bake until lightly brown, 12 to 15 minutes. Cool on wire rack for at least 10 minutes. Serve warm or at room temperature.
Thursday, July 11, 2013
Grilled Greek Chicken
Wow, wow, wow!!! I will never look at Greek Chicken the same again. When I see this picture I want to call it Chicken Bruschetta, but in Greek. However, I don't speak Greek and wouldn't trust an online translation, so I'm calling it Greek Chicken...I know, original right? Believe me though, it's a party in your mouth!
The chicken is actually pretty simple and no-fuss, but what makes it amazing is the tomato salsa that tops it. Now I've made plenty of tomato, cucumber and feta-type salads to go with our occasional Greek meal, but this one blows them away. The key ingredient??? MINT! Oh, how lovely.
Grilled Greek Chicken
for the chicken:
2 chicken breasts, butterflied
1 Tbsp. olive oil
2 Tbsp. red wine vinegar
juice of a lemon
3-4 cloves garlic, minced
1 tsp. Dijon mustard
1 Tbsp. dried oregano
a pinch of salt and pepper
for the salad:
1 pint cherry tomatoes, halved
1/3-1/2 cup crumbled feta cheese
1/2 cup olives, halved (kalamata if you choose, I don't care for them)
1/2 cup mint leaves, chopped
1 Tbsp. olive oil
salt and pepper, to taste
For the marinade, whisk together olive oil, vinegar, lemon juice, garlic, mustard, oregano, salt and pepper. Place chicken in a shallow dish and pour marinade over the top, turning to coat. Marinate on the counter up to 30 minutes if cooking the chicken right away. Cover and marinate 3 hours, up to overnight otherwise.
For the salad, combine tomatoes, feta, olives and mint in a small salad bowl. Drizzle with olive oil, sprinkle with salt and pepper. Toss to coat. Set aside.
Preheat outdoor grill and cook chicken until no longer pink inside; about 4-5 minutes per side. Place chicken on a serving platter and let it rest about 5 minutes. Spoon salad mixture over the top. Serve warm.
SOURCE: Laa Loosh
Monday, July 8, 2013
Homemade Flour Tortillas
Oh, what a treasure these are!!! I put off making my own tortillas for the longest time. I'm not sure I can pinpoint the exact reason for it but I'm sure it had to do with the fact that I just didn't want to spend the time on it. Well, come to find out, these don't take that much time at all to make and the flavor is FAR superior than anything you can buy at the store.
I try to make as much of our food from scratch as I can. I know it takes a lot of time and effort but I think it's worth it. I want to know EXACTLY what I am feeding my family. If you're on that path and are feeling overwhelmed, I suggest you take one thing at a time, get good at it, then add another. For me it was bread. I started making our bread about 5 years ago. That was pretty much the only pantry staple I made for a long time. Gradually I started making more and more and stopped buying boxed and pre-made items at the grocery store. Now that I make our tortillas I can't imagine going back. These are made with just white flour but whole wheat works great too, or even half and half.
Homemade Flour Tortillas
3 cups flour (unbleached, whole wheat or a combination)
1 1/2 tsp. salt
1/4 cup coconut oil (measure solid)
1 cup hot water
Add everything into the bowl of a stand mixer fitted with a dough hook. Mix on low for about 5 minutes. Although the dough does not need to rise, it's good to let it sit for a bit to let it rest so that it is easier to roll out.
Divide the dough into 12 equal pieces. Roll each into a ball and cover with a damp towel or plastic wrap. Let rest at least 20 minutes, up to 2 hours.
Preheat griddle on hottest setting. On a lightly floured surface, roll out dough, one ball at a time, to about 1/8-inch thickness, or as thin as you can get it. Place on hot griddle and cook for about 30-45 seconds, or until lightly golden. Flip and cook another 30-45 seconds. Place cooked tortillas on a large plate and continue until all the dough is rolled and cooked. Cover with a clean dish towel or tin foil to keep them warm.
*Alternately you can cook them in a large skillet. Preheat the skillet to medium high. Cook your first tortilla and adjust time and temperature as necessary according to doneness.
Keep leftovers in an airtight container or sealed bag on the counter for up to a week, or in the freezer 3 to 4 months.
Labels:
Bread
Monday, July 1, 2013
The Perfect Hamburger
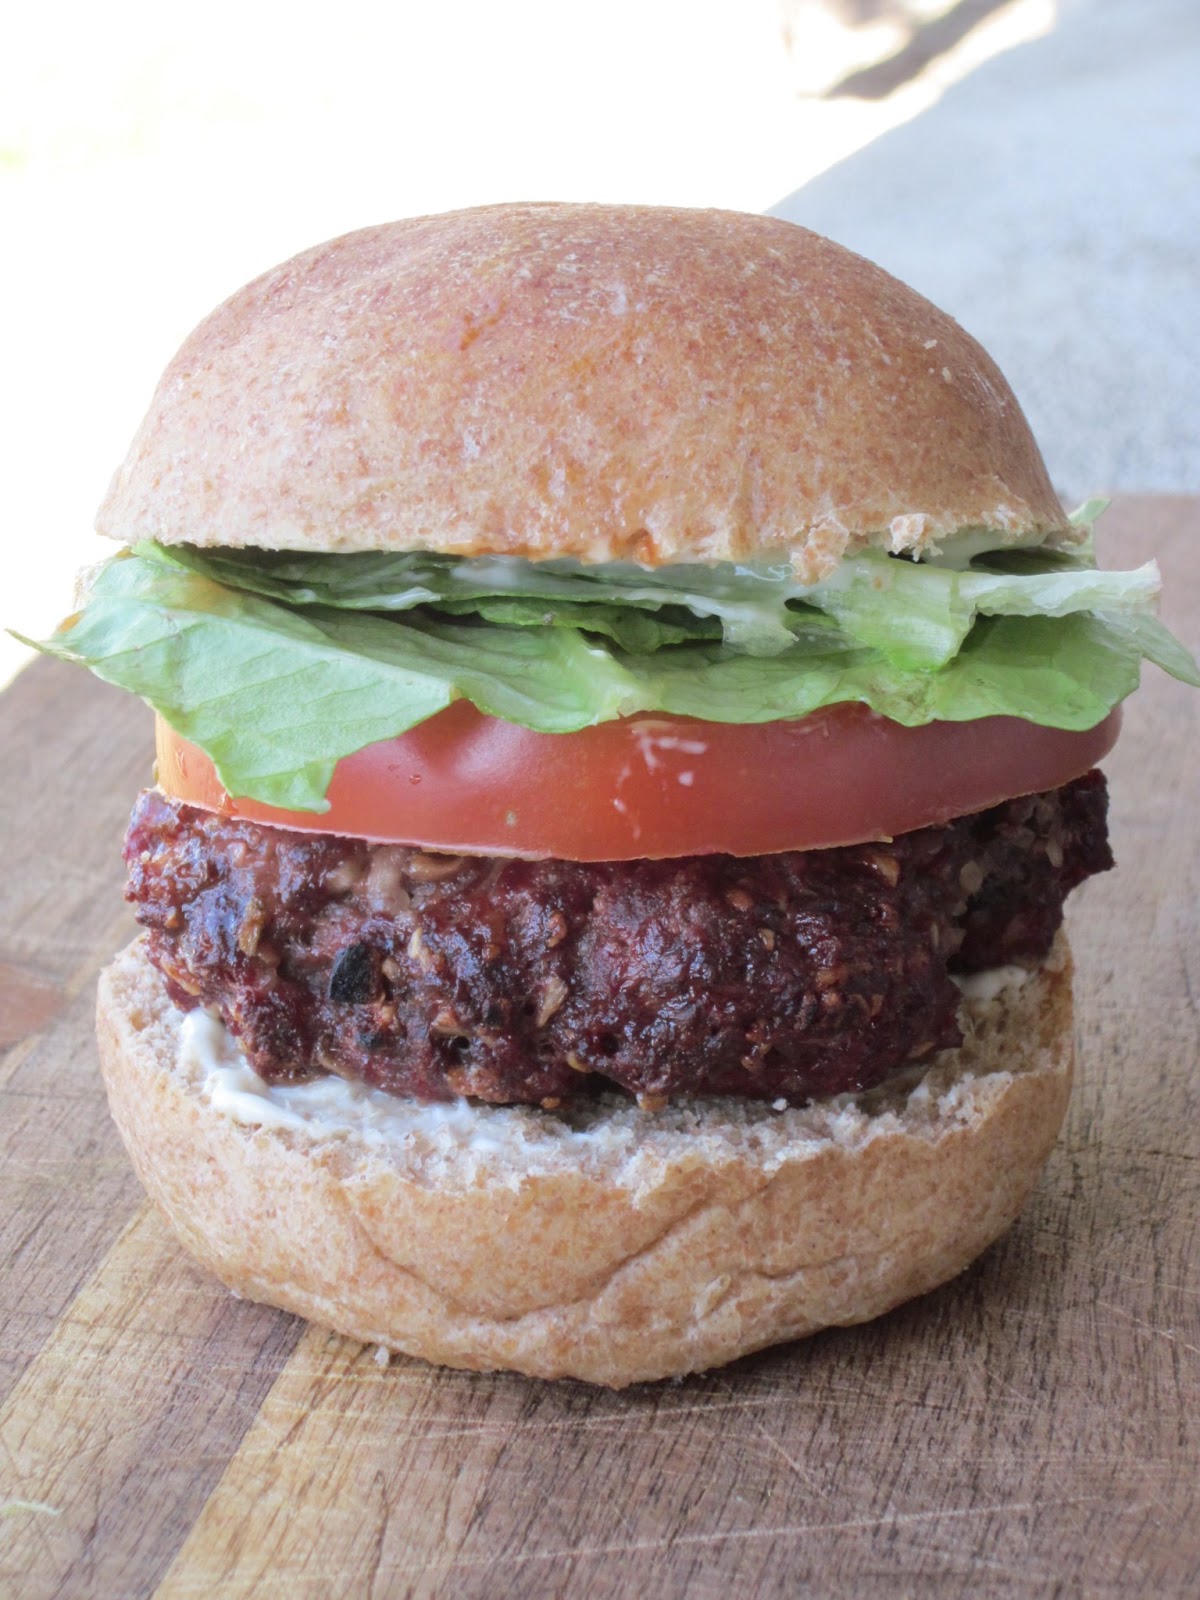
What is summer without the perfect burger? I've been making these burgers forever. They are so simple but really the best homemade burger I have ever made. My oldest daughter asks for hamburgers about once a week at least so I'm glad I have this simple recipe to throw together. They are so quick, you'll be finished making them before the grill heats up!
I like to serve my burgers on whole wheat buns, I use this recipe and substitute whole wheat flour, with just lettuce, tomato, mayo and ketchup. I know, pretty plain, but there are some things that just don't need to be complicated.
The Perfect Hamburger
1 lb. ground sirloin
2 Tbsp. finely chopped yellow onion (I use dehydrated since it's just a small amount)
1 clove garlic, minced
1 tsp. salt
1/2 tsp. freshly ground black pepper
1-2 dashes Worcestershire sauce
Place everything in a mixing, bowl. Mix together with your hands until well incorporated. Form into patties; I do about 5-6 per pound.
Preheat outdoor grill over medium-high heat. Oil the grates of the grill. Place the patties on the heated grill and cook 4-5 minutes. Flip and cook another 3-4 minutes.
Serve warm with toasted buns and toppings of your choice.
SOURCE: Williams Sonoma
Labels:
Beef,
grilled,
main dishes
Saturday, June 29, 2013
Hawaiian Dinner Rolls
In my quest to find just the right bun for my Pineapple BBQ Beef Sliders, it didn't take me long to realize that a recreation of those Hawaiian rolls from the store would be perfect. I googled a few recipes and realized they were pretty similar to the rolls I already make, just a little sweeter and a couple of surprise ingredients; pineapple juice and vanilla!
These rolls are absolutely delicious! Soft and chewy and make a perfect bun for the Pineapple Barbecue.
Hawaiian Dinner Rolls
3 cups flour
6 Tbsp. sugar
1 tsp. salt
1 1/2 tsp. yeast
1/4 cup melted butter
1/2 tsp. vanilla extract
1 egg
6 oz. can of pineapple juice (3/4 cup)
1/4 cup warm water (plus an additional 2-3 Tablespoons, if necessary)
In the bowl of a stand mixer fitted with a dough hook, add the flour, sugar, salt and yeast. Pulse a time or two to combine. Add the rest of the ingredients. Mix on medium speed for about a minute. If the dough looks too dry, add more water, a tablespoon at a time. Mix for 5 minutes. Dough will be tacky but not too sticky.
Place dough in an oiled bowl, cover and let rise until doubled, anywhere from 1-2 hours. Gently deflate dough and divide into 12 equal balls. Place in an oiled 9x13 pan. Cover lightly with a kitchen towel or plastic wrap sprayed with non-stick spray. Let raise until doubled.
Preheat over to 350 degrees F. Bake 20-25 minutes or until golden brown. Cool in pan for 10 minutes then remove to a wire rack and cool completely.
SOURCE: Adapted from Culinary Adventures in the Kitchen
Labels:
Bread
Thursday, June 27, 2013
Pineapple BBQ Beef Sliders with Sweet Hawaiian Slaw
So, a while back I ordered part of a cow! I never thought that would be something I would do, but as we are changing our eating habits and learning more about what actually happens to some of our food, it seemed like a natural step.
One of the cuts I was left with was a rump roast. Now I'm sure there's not a shortage of recipes for roast but I wanted to make it GOOD since we hardly ever eat it. I had initially planned an Italian-style meal with Pioneer Woman's Italian Pot Roast but changed my mind at the last minute. I was in the mood for some sliders and slaw!
I was really pleased with how this whole meal turned out. The meat was delicious and tender and I loved the pineapple and onion mixed in there. The slaw is light, crunchy and so fresh and adds great flavor and color to the sliders. The slider buns are a take on my favorite hamburger bun recipe, flavored with a unique ingredient; can't go wrong with those!
Pineapple BBQ Beef Sliders
1 (2-3 lb) beef rump roast
2 cups fresh pineapple, chopped
1 onion, diced
1/2 cup apple cider vinegar
1/3 cup brown sugar
1/2 cup ketchup
1 Tbsp. Dijon mustard
2 Tbsp. Worcestershire sauce
Place cold roast into a cold crock pot. Turn it on low.
Cut up pineapple, reserving juice if you can, and onion and spread over and around roast in crock pot.
In a small bowl, whisk together vinegar, brown sugar, ketchup, mustard and Worcestershire sauce and any juice leftover from cutting up the pineapple. Pour over roast and replace lid.
Cook roast for at least 6-8 hours on low, until meat easily shreds with a fork. Once cooked, remove roast to a large tray or cookie sheet and shred with two forks. Return meat to crock pot, letting it soak up the juices and mixing it with the pineapple and onion.
Serve on Hawaiian rolls with Sweet Hawaiian Slaw.
Sweet Hawaiian Slaw
1 small head of cabbage, thinly sliced (I used half purple and half green)
1 cup shredded carrots
3 green onions, sliced
1 1/2-2 cups fresh pineapple, small-diced
Anaheim pepper, finely diced
juice of a lime
2 Tbsp. coconut oil, melted
squirt of Dijon mustard
salt and pepper, to taste
Place cabbage, carrots, green onions, pineapple and pepper in a salad bowl and toss to combine. In a small bowl, whisk together lime juice, coconut oil, mustard and salt and pepper. Pour over slaw and toss once again to coat evenly. Serve either on top of or aside the Pineapple BBQ Beef Sliders.:
*Note: If you refrigerate the slaw with the dressing, the coconut oil in the dressing will firm up. To serve again, just leave the slaw on the counter and bring to room temperature.
SOURCE: Beef adapted from Six Sisters' Stuff
Labels:
Beef,
Salads,
Vegetables
Sunday, June 23, 2013
Menu Plan Monday Week 26 (2013)
This summer has been a blast!! We've been living it up and haven't had this much fun in a long time. Sure we've had lots of late nights but it's only officially been summer for like two days so we still have plenty of time to play.
I guess it's been just over a month that we put our garden in but it seems a lot longer than that. I'm still waiting for the day that I can pick my first ripe tomato and ear of corn of the season. Every time I go out to see my plants I look at them and just will them to grow. Produce stands and farmer's markets aren't really in full swing yet either and I'm just dying to get my hands on some fresh local produce. Patience, I guess.
Anyway, still trying to clean out the fridge, freezer and pantry so menu items this week are mostly stuff I already have and need to use up before I go shopping again. Enjoy.
Dinner Menu Week 26 (2013)
Monday
Peach-Glazed Salmon
Arugula Salad
Herb Roasted Potatoes
Tuesday
Cashew Chicken Stir Fry
Thai Coconut Rice
fresh fruit
Wednesday
Roasted Red Pepper Lasagna Roll-Ups
steamed broccoli
Thursday
Leftovers
Friday
Baked Chicken and Spinach Flautas
corn & salad
Saturday
Spaghetti
Mixed Greens with Honey Mustard Dressing
Artisan Bread
Sunday
Beans and Cornbread
I guess it's been just over a month that we put our garden in but it seems a lot longer than that. I'm still waiting for the day that I can pick my first ripe tomato and ear of corn of the season. Every time I go out to see my plants I look at them and just will them to grow. Produce stands and farmer's markets aren't really in full swing yet either and I'm just dying to get my hands on some fresh local produce. Patience, I guess.
Anyway, still trying to clean out the fridge, freezer and pantry so menu items this week are mostly stuff I already have and need to use up before I go shopping again. Enjoy.
Dinner Menu Week 26 (2013)
Monday
Peach-Glazed Salmon
Arugula Salad
Herb Roasted Potatoes
Tuesday
Cashew Chicken Stir Fry
Thai Coconut Rice
fresh fruit
Wednesday
Roasted Red Pepper Lasagna Roll-Ups
steamed broccoli
Thursday
Leftovers
Friday
Baked Chicken and Spinach Flautas
corn & salad
Saturday
Spaghetti
Mixed Greens with Honey Mustard Dressing
Artisan Bread
Sunday
Beans and Cornbread
Labels:
Menus
Thursday, June 20, 2013
Blueberry Cornmeal Pancakes
Hmmmm, pancakes!! They're pretty much a breakfast staple around here. I don't think a week goes by where we don't make at least a batch or two of them. Last week I found a fabulous deal on some fresh blueberries and I knew immediately I wanted to make a blueberry cornmeal pancake. My girls don't usually like fruit in pancakes, muffins and such, but when I made these Blueberry Cornmeal Muffins, they devoured them, blueberries and all, and have asked for them several times since. Needless to say, I figured I was safe making these and I was absolutely right!
Blueberry Cornmeal Pancakes
1 1/2 cups buttermilk
1 egg
3 Tbsp. oil or melted butter
1/4 cup sugar
1 cup flour (I use mostly whole wheat)
1/2 cup cornmeal
2 tsp. baking powder
3/4 tsp. baking soda
1/2 tsp. salt
1 cup fresh blueberries
In a mixing bowl, whisk together buttermilk, egg, oil and sugar. Next, add in the dry ingredients, al but the blueberries. Whisk until incorporated. Gently fold in the blueberries. Let batter sit while griddle heats up.
Pour batter by 1/4 cups onto griddle and cook until bubbles start to form and sides begin to look dry; about 3 minutes. Flip pancakes and cook another couple minutes on other side, until slightly golden.
Serve warm with maple syrup.
Wednesday, June 19, 2013
Grilled Chicken with Balsamic Bell Peppers over Creamy Polenta
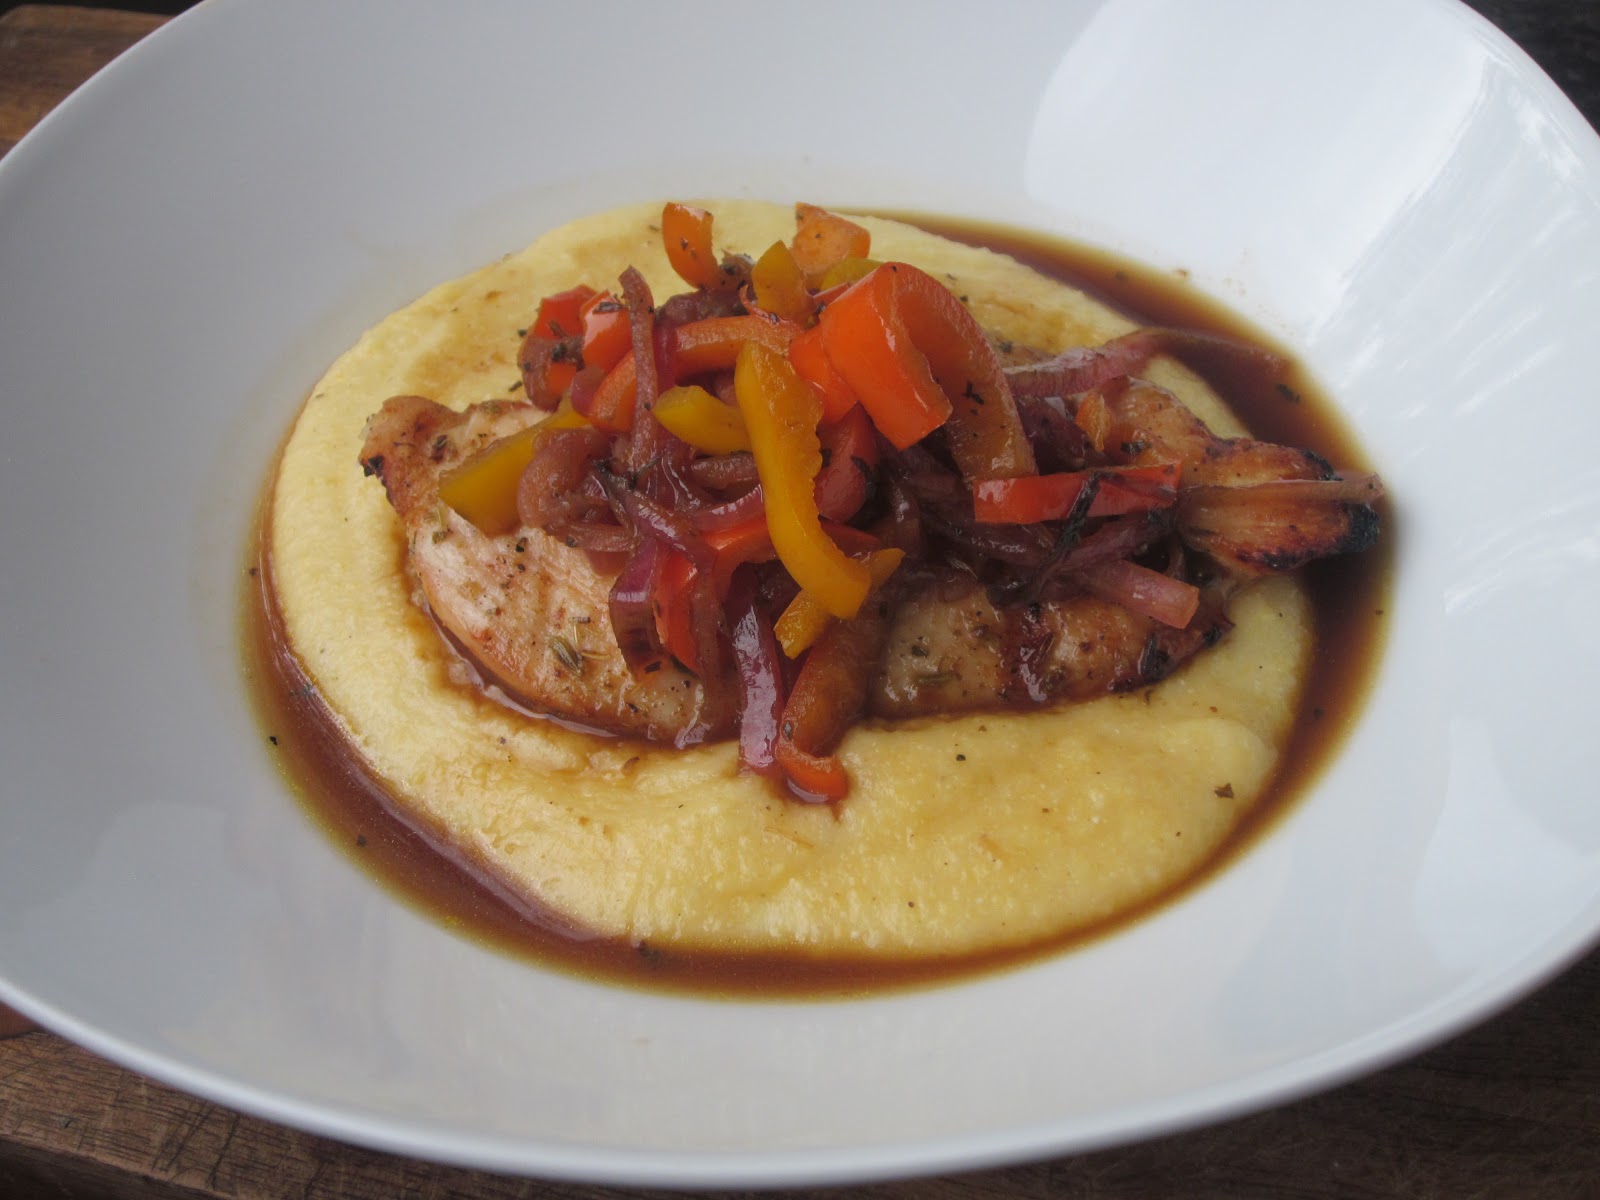
One of my favorite things about making dinner during the hot summer months is using the grill! It's quick, easy and doesn't heat up the house. The best thing about using the grill is how it makes whatever you're grilling taste absolutely fabulous. I cook whatever I can outside these days and I love it.
My kids are finally to the point where they actually like eating meat occasionally and I think they adored this chicken as much as I did. The chicken is great with the peppers, but combined with the creamy polenta and it was over the top!
Grilled Chicken with Balsamic Peppers
for the chicken:
1/2 tsp. salt
3/4 teaspoon fennel seeds, crushed
1/4 tsp. freshly ground black pepper
1/4 tsp. garlic powder
1/4 tsp. dried oregano
2 Tbsp. olive oil
2 large skinless, boneless chicken breasts, butterflied
for the peppers:
3 cups thinly sliced red and yellow peppers
1/2 cup thinly sliced red onion
1 tsp. dried basil
1/2 cup chicken broth
1 Tbsp. balsamic vinegar
for the polenta:
3/4 cup polenta (or coarse cornmeal; not instant)
3 cups water
1/3 cup heavy cream
1/2 cup freshly shredded parmesan cheese
Bring water to a boil in a medium saucepan. Add salt and whisk in polenta. Reduce heat to low and stir polenta as it thickens. Depending on the grain of the polenta, it will thicken in about 15-25 minutes.
In a shallow dish, combine salt, fennel, pepper, garlic powder, oregano and olive oil. Add chicken and toss to coat. Set aside while the peppers are prepped. Preheat outdoor grill and cook chicken until no longer pink; about 4-5 minutes per side.
Drizzle a tablespoon or so of olive oil into a frying pan. Add bell peppers, onion and basil. Saute about 3 minutes over medium-high heat. Stir in broth, scraping pan to loosen browned bits. Reduce heat and simmer about 5 minutes. Increase heat to medium-high. Stir in vinegar, a pinch of salt and pepper and cook another minute or two.
Once polenta is finished cooking, add in cream and cheese. Add salt as necessary.
Divide polenta between 4 serving dishes. On each place a piece of chicken, a spoonful of peppers and some of the liquid from the peppers.
SOURCE: Adapted from Cooking Light
Monday, June 17, 2013
Fresh Raspberry Scones
One thing I love about summer is the abundance of fresh produce, especially fresh berries. Occasionally berries will go a on a super sale and I can't help but stock my freezer full, namely for smoothies. However, I ALWAYS have to keep some out fresh to enjoy their goodness. I have to restrain my girls or they would eat the lot within minutes, but I do give them their fair share before I have a go at them. I usually limit my use to just one baked goodie and eat the rest fresh as well.
Fresh raspberries are so delicious in simply baked treats and I knew they would shine in these scones. Pair that with some dark chocolate and buttermilk and you have yourself a little piece of heaven!
Fresh Raspberry Scones
1 1/2 cups whole wheat flour
1/2 cup rolled oats
1 Tbsp. baking powder
1/4 cup sugar
1/2 tsp. salt
5 Tbsp. unsalted butter, chilled and cut into pieces
1 cup buttermilk
1/2 tsp. almond extract
1/3 cup dark chocolate chips
1 cup fresh raspberries
Preheat oven to 425 degrees F.
In large work bowl of a food processor fitted with steel blade, add flour, oats, baking powder, sugar and salt. Pulse a few times to combine. Add butter and whiz until mixture resembles a coarse meal.
Put mixture into a mixing bowl. Add raspberries, chocolate and toss. Add buttermilk. Stir with a spoon until a dough forms. Use your hands to bring it together. Turn onto a lightly floured surface and knead gently, only about 3 or 4 times, adding a bit more flour, if needed. Do not over-work or dough will be chewy.
Form scones by patting the dough into a circle and cut into wedges.
Place scones on un-greased baking sheet and bake until lightly brown, 12 to 15 minutes. Cool on wire rack for at least 10 minutes. Serve warm or at room temperature.
Fresh raspberries are so delicious in simply baked treats and I knew they would shine in these scones. Pair that with some dark chocolate and buttermilk and you have yourself a little piece of heaven!
Fresh Raspberry Scones
1 1/2 cups whole wheat flour
1/2 cup rolled oats
1 Tbsp. baking powder
1/4 cup sugar
1/2 tsp. salt
5 Tbsp. unsalted butter, chilled and cut into pieces
1 cup buttermilk
1/2 tsp. almond extract
1/3 cup dark chocolate chips
1 cup fresh raspberries
Preheat oven to 425 degrees F.
In large work bowl of a food processor fitted with steel blade, add flour, oats, baking powder, sugar and salt. Pulse a few times to combine. Add butter and whiz until mixture resembles a coarse meal.
Put mixture into a mixing bowl. Add raspberries, chocolate and toss. Add buttermilk. Stir with a spoon until a dough forms. Use your hands to bring it together. Turn onto a lightly floured surface and knead gently, only about 3 or 4 times, adding a bit more flour, if needed. Do not over-work or dough will be chewy.
Form scones by patting the dough into a circle and cut into wedges.
Place scones on un-greased baking sheet and bake until lightly brown, 12 to 15 minutes. Cool on wire rack for at least 10 minutes. Serve warm or at room temperature.
Friday, June 14, 2013
Tilapia with Coconut and Macadamia Breadcrumbs and Mango Salsa
Right after making this tilapia a while ago, I began concocting a new recipe in my head. I loved how the fish tasted cooked in coconut oil and thought a tropical twist would be just as delicious. And I was right! I loved adding the sweet coconut and salty, crunchy macadamia nuts to the bread crumbs. It made such a wonderful contrast in flavor as well as texture.
Fish is great to make for a weeknight meal since it cooks up so quickly and there is usually not much prep. I usually like to serve fish with rice and for this meal used my Thai Coconut Rice, which I think paired perfectly. Start the rice before you get to work on the rest and it'll all finish around the same time.
Tilapia with Coconut and Macadamia Breadcrumbs and Mango Salsa
for the fish:
4 fresh tilapia fillets
1 1/2 Tbsp. virgin coconut oil
salt/pepper
3 Tbsp. sweetened flaked coconut
3 Tbsp. cup panko bread crumbs
2 Tbsp. macadamia nuts, chopped
for the salsa:
1 mango, peeled and chopped
1/4 red onion, finely diced
1/2 jalapeño, finely diced
1/2 bunch of cilantro, chopped (or more, if desired)
the juice of 1 lime
1/4 teaspoon salt
1/4 teaspoon pepper
Combine all salsa ingredients in a small mixing bowl. Stir to combine and set aside while the rest is being prepared.
Add breadcrumbs and coconut to a small skillet over medium heat and toast until golden, about 3-4 minutes; add macadamia nuts the last 30 seconds or so. Remove from heat and set aside.
Heat a large skillet over medium-high heat. Add coconut oil and melt. Season tilapia with salt and pepper. Add tilapia to skillet and cook 2-3 minutes per side, or until slightly golden or opaque. Remove from heat sprinkle with breadcrumbs.
Serve warm with mango salsa and Thai Coconut Rice, if desired.
SOURCE: Salsa from How Sweet It Is
Labels:
Condiments,
Fish,
Seafood
Thursday, June 13, 2013
Quinoa with Strawberries & Watermelon with Lemon Shallot Dressing
3 cups cooked quinoa
1 1/2 cups watermelon, cubed
1 1/2 cups strawberries, hulled and chopped
feta cheese, crumbled
small handful fresh basil leaves, thinly sliced
sliced almonds
Lemon Shallot Dressing (below)
Cook and cool quinoa. You can place it in the fridge to help it cool faster.
In a salad bowl, toss quinoa, watermelon and strawberries with as much dressing as desired. Spread out on a platter and top with feta, almonds and fresh basil leaves. Add more dressing to individual servings as desired. Serve immediately.
Lemon Shallot Dressing
5 Tbsp. extra virgin olive oil
1/4 fresh lemon juice
2 tsp. minced shallot (I often used dried for that small an amount, unless I have one I need to use up in the fridge.)
1 1/2 tsp. honey
1/4 tsp. salt
1/4 tsp. freshly ground black pepper
Combine ingredients in a small mason jar with a lid. Shake vigorously until well-incorporated. Set aside until ready to use. Shake again before pouring.
SOURCE: Edible Perspective
Labels:
Figure Friendly,
Fruit,
Quick n' Easy,
Salads
Tuesday, June 11, 2013
Crispy Lemon-Basil and Parmesan Crusted Chicken
My kids have been such picky eaters lately, it's killing me! Thankfully they do eat chicken because this is the BEST CHICKEN EVER!! This right here in front of you. It comes together quickly, cooks quickly and tastes fabulous!
I decided to use whole wheat bread crumbs here and used my own homemade bread. I was a little leery that using my own bread to make the bread crumbs wouldn't get it crunchy enough, but I was wrong, thankfully, and it delivered.
The chicken is simply flavored with lemon and fresh basil, the perfect flavors for summer. I served it along side some herbed roasted potatoes and salad and everyone gobbled it down; you're sure to as well.
Crispy Lemon-Basil and Parmesan Crusted Chicken
2 chicken breasts, butterflied
2 cups whole wheat bread crumbs*
1/2 cup finely grated parmesan cheese
1 tsp. lemon zest
2 Tbsp. fresh basil, sliced
1 tsp. salt
1/2 tsp. fresh ground black pepper
flour, about 1/2 cup
1 egg, whisked
To make bread crumb mixture, combine bread crumbs, parmesan cheese, lemon zest, basil, salt and pepper. Set up breading station first with a shallow dish of flour, next the egg and third the bread crumb mixture. Line a cookie sheet with foil and place a wire rack on top. Preheat oven to 425 degrees F.
Dredge chicken, one piece at a time, in the flour shaking off any excess. Next dip each piece in the egg and then lastly the bread crumb mixture. Place the crusted chicken breasts on the wire rack.
Bake about 12-15 minutes depending on thickness of chicken. Let chicken rest for 5 minutes before serving.
*To make your own whole wheat bread crumbs, take 2-3 thick slices of bread (enough for 2 cups) and toast in toaster until well-toasted. Place in a small food processor and process until bread resembles breadcrumbs.
Sunday, June 9, 2013
Menu Plan Monday Week 24 (2013)
Ahh, I'm a blog-slacker!! Summer has set in and we are trying to live it up!! We've been having lots of fun playing with friends and cultivating our garden (well, mostly me on the garden), staying up too late and enjoying the sun and warm. After such a cool spring, I thought we might have a mild summer...NOT so. We're getting blasted with hot weather this week, but I guess that just means more days at the pool for us. FUN!
So, I ended last week with a full fridge. My challenge this week was to use what we had for meals and not have to shop for much, other than a few produce items. So, I'm going to throw it up there for ya, hope you enjoy!
Welcome to a few new followers. Some dishes are new this week, however if it's a repeat, it will link back to the recipe on the blog.
Dinner Menu Week 24 (2013)
Monday
Italian Pot Roast
Mashed Potatoes
Salad
Tuesday
Baked Chimichangas (with leftover roast)
Homemade Refried Beans
Salad
Fresh Fruit
Wednesday
Cran-Cherry Salad Wrap
roasted potatoes
Thursday
Easy Sesame Peanut Noodles
Southwest Cabbage Slaw
Fresh fruit and veggies
Friday
Basil Chicken Burgers
Greek Panzanella
Saturday
Creamy Spinach and Avocado Pasta
leftover salad
Sunday-Father's Day
Cajun Shrimp
Jasmine Rice
fresh fruit and veggies
Orange Rolls
On the side...
Homemade Burger Buns
Homemade tortillas
Artisan Bread
Peaches and Cream Steel Cut Oats
So, I ended last week with a full fridge. My challenge this week was to use what we had for meals and not have to shop for much, other than a few produce items. So, I'm going to throw it up there for ya, hope you enjoy!
Welcome to a few new followers. Some dishes are new this week, however if it's a repeat, it will link back to the recipe on the blog.
Dinner Menu Week 24 (2013)
Monday
Italian Pot Roast
Mashed Potatoes
Salad
Tuesday
Baked Chimichangas (with leftover roast)
Homemade Refried Beans
Salad
Fresh Fruit
Wednesday
Cran-Cherry Salad Wrap
roasted potatoes
Thursday
Easy Sesame Peanut Noodles
Southwest Cabbage Slaw
Fresh fruit and veggies
Friday
Basil Chicken Burgers
Greek Panzanella
Saturday
Creamy Spinach and Avocado Pasta
leftover salad
Sunday-Father's Day
Cajun Shrimp
Jasmine Rice
fresh fruit and veggies
Orange Rolls
On the side...
Homemade Burger Buns
Homemade tortillas
Artisan Bread
Peaches and Cream Steel Cut Oats
Monday, June 3, 2013
Pina Colada Pancakes
Happy Monday!! It's officially summer break for us here in Utah so I thought I'd start off the week with some Pina Colada Pancakes and get you in the mood for the beach or Bahamas or whatever floats your boat.
I've made a lot of different kinds of pancakes over the years, but it had been a while since I tried something new. When I spied a version of these a while ago on Tasty Kitchen I knew I wanted to try them...like immediately!! I absolutely LOVE just about anything coconut and pina colada is always a combo I have loved. If you're looking for something new and unique to try, and can't quite make it to the beach, hopefully these can suffice! You'll love them.
Pina Colada Pancakes
1 cup coconut milk (I used coconut milk beverage from a carton, if you use it from the can you can water it down a little bit.)
1 egg*
1 Tbsp. coconut oil, melted
1 ripe banana, smashed
1 Tbsp. sugar
1 cup whole wheat flour
1 tsp. baking powder
1/2 tsp. baking soda
1/2 tsp. salt
3/4 cup fresh pineapple, chopped
garnish:
sweetened, flaked coconut
macadamia nuts, chopped
In a mixing bowl combine the coconut milk, egg, coconut oil, banana and sugar. Whisk to combine. Add flour, baking powder and soda, and salt. Stir just to combine. Fold in fresh pineapple.
Preheat griddle while batter sits.
Melt coconut oil on griddle, if desired, before pouring batter. Pour batter by 1/4 cup onto griddle and cook until bubbles start to form and sides start to look dry. Flip and cook on the other side another minute or two. Continue with remaining batter.
Serve warm with chopped macadamia nuts and flaked coconut, even syrup, if desired.
*You can make these vegan by omitting the egg and replacing it with 1 tablespoon ground flax seed, mixed with about 2 tablespoons water.
Sunday, June 2, 2013
Menu Plan Monday Week 23 (2013)
Ahhh, school is finally out and summer has arrived!!! I must say it took it's sweet time. But our forecast for this upcoming week show's no lack of heat, so I guess we're on track.
I'm so excited for this summer, mostly because my girls are a little bit older and we can start doing a few more things with them. We have a week-long vacation coming up next month to Seattle that I'm SO excited about. I've never been up to that area and can't wait to visit. Plus we almost NEVER go anywhere so it'll be nice to get away. My oldest daughter and I also started our "bucket list" of things we wanted to do this summer. Things like camping, fishing, sleepover at grandma's, painting with water, hiking, splash pad, tye dye, marshmallow shooters....yeah, it's going to be fun. We're definitely not going to be bumps on a log this summer.
So, weekly menus may be on and off but I'll keep ya posted with delicious seasonal meals that are sure to knock your socks off! This week is easy and thankfully won't heat up my house much since I'll mostly be using either the crockpot or the grill and eating lots of salad! Enjoy.
Dinner Menu Week 23 (2013)
Monday
Ancho Braised Beef Tacos
Cabbage Slaw
Tuesday
Crunchy Thai Quinoa Salad with Ginger Dressing
Wednesday
Leftovers
Thursday
Grilled Chicken
Orange and Arugula Salad w/ Red Onion and Blue Cheese
Friday
Italian Pot Roast
Egg Noodles
leftover salad
Saturday
Linguine with Shrimp Scampi
Watermelon, Strawberry and Basil Salad
Sunday
leftovers/free day
Fresh Fruit
On the side:
Rye Artisan Bread
Caprese Chicken Wraps
I'm so excited for this summer, mostly because my girls are a little bit older and we can start doing a few more things with them. We have a week-long vacation coming up next month to Seattle that I'm SO excited about. I've never been up to that area and can't wait to visit. Plus we almost NEVER go anywhere so it'll be nice to get away. My oldest daughter and I also started our "bucket list" of things we wanted to do this summer. Things like camping, fishing, sleepover at grandma's, painting with water, hiking, splash pad, tye dye, marshmallow shooters....yeah, it's going to be fun. We're definitely not going to be bumps on a log this summer.
So, weekly menus may be on and off but I'll keep ya posted with delicious seasonal meals that are sure to knock your socks off! This week is easy and thankfully won't heat up my house much since I'll mostly be using either the crockpot or the grill and eating lots of salad! Enjoy.
Dinner Menu Week 23 (2013)
Monday
Ancho Braised Beef Tacos
Cabbage Slaw
Tuesday
Crunchy Thai Quinoa Salad with Ginger Dressing
Wednesday
Leftovers
Thursday
Grilled Chicken
Orange and Arugula Salad w/ Red Onion and Blue Cheese
Friday
Italian Pot Roast
Egg Noodles
leftover salad
Saturday
Linguine with Shrimp Scampi
Watermelon, Strawberry and Basil Salad
Sunday
leftovers/free day
Fresh Fruit
On the side:
Rye Artisan Bread
Caprese Chicken Wraps
Thursday, May 30, 2013
Minted Yogurt Dipping Sauce
If you can't tell I've been in a mediterranean mood lately, with the hummus, naan and now this yogurt dipping sauce. I acutally made and ate them together and had it for lunch for several days.
I can't remember how I came across this recipe, but I had some fresh mint leftover in my fridge that I needed to use up so I went searching. I wasn't sure what to think when I saw the list of ingredients but I had everything so I went ahead and made it. I made it right after I made my first batch of hummus and flat bread so I put it all together. Wow, what a great combination! The salty, chewy hummus and flat bread went perfectly with the fresh and tangy sauce. I bet it would even be great with some lamb or pork. The recipe only makes about a cup so if you're serving it to company I suggest at least doubling it!
Minted Yogurt Dipping Sauce
2 cups loosely packed fresh mint leaves (about 1 small bunch)
1 cup loosely packed cilantro (about half a bunch)
1/4 cup finely diced red onion
juice of 1 lime
1/4 cup pain Greek yogurt
1 tsp. raw honey
pinch of salt
pinch of red pepper flakes
drizzle of olive oil
Place everything in a food processor with a chopper blade and process until well blended. Store in the refrigerator.
Labels:
Condiments
Tuesday, May 28, 2013
Garlic Naan (flat bread)
I love a good flat bread. I confess, every time I go to the grocery store I scan the day old bakery rack for their reduced flat bread and I always snag what's there and throw it in my freezer. There must be others that think like me because I haven't seen it in a long time! Since I can't stand to pay full price for something that costs next to pennies (almost) to make I went on a quest to find a great recipe so that I can just make them at home.
Let me tell you, there are A LOT of naan recipes out there. I kinda wanted to stay true to a more authentic recipe so I have made one with Greek yogurt and LOTS of garlic. These are so delicious and never last long at our house. I love to eat them with hummus but you can wrap pretty much anything up in them and call it good, or serve them with your favorite Indian or Greek meal.
Garlic Naan (flat bread)
3 cups flour (I used whole wheat, you can use white, half/half or whatever combination you choose)
2 1/4 tsp. yeast
2 tsp. sugar
1 1/2 tsp. salt
1/4 cup plain whole-milk yogurt (I used Greek)
1 Tbsp. olive oil
2 garlic cloves, minced
1 cup warm water
Place everything but the water in a stand mixer fitted with a dough hook. Pulse to combine, then add the water. Mix on low for about 1 minute. If it looks too wet, add a little more flour 1 tablespoon at a time. For all whole wheat flour, mix for 10 minutes; for all white, about 5; for a mix, somewhere in between. When finished mixing, dough should be tacky but not too sticky.
Place dough in an oiled bowl, covered lightly with a towel or plastic wrap. Let rise until doubled.
Turn dough out onto a clean work surface. Cut dough into 8 equal portions and roll into balls. Let rest another 10 minutes.
Preheat a skillet or griddle to medium high. On a lightly floured work surface, roll out each ball, one at a time, either into a long oval or teardrop shape. If the dough keeps springing back, let it rest another few minutes.
Transfer rolled out dough to skillet or griddle and cook until bubbles start to form on top and underside is lightly golden; about 30-60 seconds. Flip and do the same on the other side. Remove to a plate and brush with melted butter or ghee. Repeat with remaining dough.
Serve warm alongside your favorite Indian or Greek meal, or cut into wedges and serve with hummus. Store in an airtight bag or container for a week on the counter.
SOURCE: Adapted from Arctic Garden Studio
Labels:
Bread
Saturday, May 25, 2013
Hummus
I'm so happy to finally have a hummus recipe that I love and is quick and easy to throw together. I know it's not rocket science and there's about a bajillion recipes out there for hummus but this one's a keeper for me.
I have recently had this obsession with Trader Joe's Organic Hummus, which is so good if you have never tried it. Every time my hubby goes into Salt Lake I plead with him to stop at Trader Joe's for me to pick up a few key items, hummus being one of them. Sadly though, we don't make it there far enough, haha, so I decided it was time to make my own, and spend a fraction of the cost!
Hummus
1 Tbsp. olive oil
1 15-oz canned chickpeas (garbanzo beans)-drained
1/2 cup sesame seeds, toasted
1/4 cup fresh lemon juice (about 1 lemon)
1 clove garlic, minced
pinch of salt
Heat a skillet over medium-high heat. Add sesame seeds and cook until lightly browned.
Put everything in the blender in order listed. You may need to pulse it a couple times to get it going. Let blender run until it reaches desired consistency. If you want to thin it out a little, add either water or olive oil about a tablespoon at a time. Check for seasoning and adjust if necessary.
Serve with pita chips or fresh veggies.
SOURCE: Blendtec
Labels:
Beans n' Legumes,
Condiments,
Quick n' Easy
Thursday, May 23, 2013
Jim Lahey's No-Knead Artisan Bread
Good artisan bread is absolutely divine! Crunchy, crispy exterior, soft open crumb inside. It kind of makes me drool. I've been making all sorts of bread for my family for years and never did I imagine that I would be able to make artisan bread in my own oven!
The glory of this bread is just about anyone can make it. The dough is a very wet dough so it's just stirred together a bit, hence the "no-knead" aspect. The magic happens during the long proofing time. With a mere 1/4 teaspoon of yeast, the dough will raise anywhere from about 12 hours up to 18 hours. During this time the dough will develop a wonderful flavor, almost verging on a light sourdough flavor.
Before you endeavor to make this delicious bread, make sure you have a heavy covered pot that is either cast iron (Dutch oven), enamel, ceramic or Pyrex. And that's it! It'll only take a time or two making this bread before you'll be doing it weekly.
No-Knead Bread
3 cups all-purpose or bread flour, plus more for dusting
1/4 tsp. yeast
1 1/2 tsp. salt
1 1/2 cups plus 1 Tbsp. water
In a large bowl, combine flour, yeast and salt. Add water and stir until combined. Dough will be sticky. Cover with plastic wrap or a loose fitting lid and let rise, undisturbed, at least 12 hours, preferable 18 hours at room temperature; about 70 degrees F.
Lightly flour a work surface and place dough on it; sprinkle it with a little more flour and fold it over on itself once or twice. Cover loosely with plastic wrap and let rest about 15 minutes.
Using just enough flour to keep dough from sticking to work surface or to your fingers, gently and quickly shape dough into a ball. Generously coat a cotton towel (not terry cloth) with flour, wheat bran or cornmeal; put dough seam side down on towel and dust with more flour, bran or cornmeal. Cover with another cotton towel and let rise for about 2 hours. When it is ready, dough will be more than double in size and will not readily spring back when poked with a finger.
At least a half-hour before dough is ready, heat oven to 450 degrees. Put a 6- to 8-quart heavy covered pot (cast iron, enamel, Pyrex or ceramic) in oven as it heats. When dough is ready, carefully remove pot from oven. Slide your hand under towel and turn dough over into pot, seam side up; it may look like a mess, but that is O.K. Shake pan once or twice if dough is unevenly distributed; it will straighten out as it bakes. Cover with lid and bake 30 minutes, then remove lid and bake another 15 to 20 minutes, until loaf is beautifully browned. Cool on a rack.
SOURCE: Adapted from Jim Lahey, Sullivan Street Bakery via nytimes.com
Labels:
Bread
Tuesday, May 21, 2013
Chocolate Raspberry Truffle Cake
This was my birthday cake this year and I'd say I spoiled myself! I haven't indulged this much in a long time! But birthdays for me are that time of year where you can break all the rules, eat whatever you want make it all about YOU. It's ok for one day a year....tomorrow I can go back to everything being about mostly everyone else (just fine by me), and eating more green things than brown (aka chocolate). In my defense I did drink a green smoothie today AND ate a green salad as my dinner...so it all balances out right?
So, I think I actually wanted to make this cake for my birthday two years ago but it didn't happen, and last year either, so this was the year. I do have to admit that while I love the cake as a whole, the chocolate cake recipe I used is not my favorite, a bit dense and crumbly for this type of cake. So, the chocolate cake recipe below is one I've made for a previous cake, and is lighter with a more tender crumb.
Chocolate Raspberry Truffle Cake
for the cake:
1 3/4 cup plus all-purpose flour
12 Tbsp. dark cocoa powder
2 tsp. baking soda
1 tsp. baking powder
1 tsp. salt
2 cups sugar
1/2 cup oil
2 large eggs
2 cups buttermilk
1 Tbsp. vanilla extract
for the ganache filling:
4 oz. heavy cream (1/2 cup)
4 oz. dark chocolate, chopped
for the raspberry filling:
1 1/2 cups frozen raspberries
1/4 cup sugar
1 Tbsp. water
for the raspberry buttercream:
1 cup butter (2 sticks)
4 cups powdered sugar
3 Tbsp. strained raspberry puree (need about 1/4 cup frozen raspberries)
for the chocolate glaze:
2 oz. dark chocolate
2 oz. heavy cream (1/4 cup)
2 Tbsp. light corn syrup
1 tsp. vanilla extract
for garnish:
a small handful of fresh raspberries (about 3 oz.)
Preheat the oven to 350˚ F. Grease and flour the edges of 2, 9-inch, round cake pans, shaking out the excess flour. Line the bottom with a round of parchment. In a small bowl, combine the flour, cocoa powder, baking soda, baking powder and salt; whisk to blend and set aside. In the bowl of an electric mixer, combine the sugar, oil and eggs. Beat on medium speed until smooth, about 1-2 minutes. With the mixer on low speed, blend in half of the dry ingredients, beating just until incorporated. Blend in the buttermilk and vanilla just until smooth. Beat in the remaining dry ingredients, mixing just until incorporated.
Pour the batter into the prepared pan and bake, rotating halfway through, until a toothpick inserted in the center comes out clean, about 35 minutes. Transfer to a wire rack and let cool in the pan for 20 minutes. Run a knife around the edges, then turn the cake out onto the rack and let cool completely. Wrap in plastic wrap and chill at least an hour, up to overnight. (note: I usually bake the cake part the night before and once it's cooled, wrap it in plastic wrap and put it in the fridge so it's nice and firm to work with the next day.)
Next, prepare the raspberry and ganache fillings. In a small saucepan boil raspberries, sugar and water. Boil about 5 minutes, until mixture thickens slightly. Set aside to cool. For the ganache, chop chocolate and place in a bowl. Bring cream just to a boil then remove from heat and pour over chocolate. Cover with a clean plate and let sit about 4-5 minutes. Stir chocolate and cream together until smooth and allow to cool a bit.
While ganache is cooling, carefully cut each cake round in half vertically, making two layers. (note: you may have to level your cake off a bit first.) Place bottom layer of one cake round on a cake plate or other flat serving dish. Pour half of the raspberry filling on the layer and spread out just about to the edges. Replace the top layer of first cake round, making sure edges are even and flush with each other. Next, pour the ganache over the layer you just placed down and spread it evenly out all the way to the edges. Refrigerate until firm, about 10-15 minutes.
Remove cake from fridge. Next take the TOP layer of the remaining cake round and invert it over the ganache layer. Spread the other half of the raspberry filling on top, then place the last layer of cake on top of the raspberry filling BOTTOM UP!
Next prepare raspberry buttercream. Puree about 1/4 cup raspberries and strain through either cheesecloth or a fine mesh sieve. (note:you can also boil them a minute or two to get more juice out of them.) Set aside to cool. In a mixing bowl fitted with a whisk attachment, place butter and whisk about 2 minutes. Add strained raspberry puree and powdered sugar and whisk again another 2-3 minutes, until light an fluffy.
Crumb coat the cake. Take a very thin layer of frosting and coat top and sides of cake. Chill about 10 minutes. Remove cake and frost the top and sides of the cake with the rest of the frosting.
To make the glaze prepare chocolate and cream as for the ganache. Stir chocolate and cream until smooth and combined. Add in corn syrup and vanilla extract. Allow to cool a bit; enough so that you can pour it and it will make it's way slowly over the edge, but not so thin that it all goes over quickly. Pour glaze; allow to drip over edges. Garnish with fresh raspberries and chill about 10 minutes before serving.
(yes, that is finger swipe in the frosting; my daughter's to be exact!)
SOURCE: Inspired by Annie's Eats
Sunday, May 19, 2013
Menu Plan Monday Week 21 (2013)
If you read the menu post last week, you'll know that I celebrated my birthday last week. It was fun and wonderful and I had chocolate cake coming out my ears, especially since my mom sent us home with some on Sunday after a Mother's Day dinner. BUT, that didn't keep us from eating it. It was all delicious. I can't wait to share with you the cake I made for my birthday. A little time intensive, but WELL worth it!
So I tried to keep everything on this week's menu in the quick and tasty department. As we are going into warmer weather and spending more time outside I need things I can prep ahead or whip up in a flash.
Dinner Menu Week 21 (2013)
Monday
Split Pea Soup with Smoked Ham and Kale
Artisan bread
Tuesday
Sun-dried Tomato and Basil Fettuccine
Salad
Wednesday
The Perfect Hamburger (homemade burger buns)
salad, fresh watermelon
Thursday
Thai Quinoa Salad with Ginger Peanut Dressing
Friday
Homemade pizza night!!!
Saturday
Pretzel Crusted Chicken Strips with Honey Mustard Dipping Sauce
salad
steamed broccoli
Sunday
Lentil Veggieballs in Lemon Pesto
Roasted Fennel Salad with Raspberries
So I tried to keep everything on this week's menu in the quick and tasty department. As we are going into warmer weather and spending more time outside I need things I can prep ahead or whip up in a flash.
Dinner Menu Week 21 (2013)
Monday
Split Pea Soup with Smoked Ham and Kale
Artisan bread
Tuesday
Sun-dried Tomato and Basil Fettuccine
Salad
Wednesday
The Perfect Hamburger (homemade burger buns)
salad, fresh watermelon
Thursday
Thai Quinoa Salad with Ginger Peanut Dressing
Friday
Homemade pizza night!!!
Saturday
Pretzel Crusted Chicken Strips with Honey Mustard Dipping Sauce
salad
steamed broccoli
Sunday
Lentil Veggieballs in Lemon Pesto
Roasted Fennel Salad with Raspberries
Labels:
Menus
Friday, May 17, 2013
Berry Chicken Salad with Arugula and Basil
This salad will be perfect for spring and summer, definitely going to find it's place into the dinner rotation. And who doesn't love dinner done in under 20 minutes?
Berry Chicken Salad with Arugula and Basil
for the salad:
2-3 chicken breasts, butterflied
1/2 head of romaine lettuce, chopped and washed
3 oz. arugula (3-4 big handfuls)
1/2 lb. strawberries, hulled, rinsed and sliced
small clam shell fresh blueberries
small clam shell fresh raspberries
thinly sliced red onion (some like more, I like less, so however much you want)
handful of large basil leaves, about half a cup, chopped
1/2 cup sliced almonds
1/4 cup grated parmesan cheese
for the dressing:
1/4 cup light olive oil
1/4 cup balsamic vinegar (really versatile though; you can use red wine vinegar, rice or white wine vinegar or even fresh lemon juice)
2 Tbsp. good quality strawberry jam (I prefer homemade freezer jam)
pinch of salt
a few good cracks of black pepper; about 1/4 tsp.
Preheat outdoor grill or indoor grill pan. Drizzle chicken with olive oil and liberally salt and pepper. Cook chicken until no longer pink. Allow to cool and chop into bite-size pieces.
In a large salad bowl, gently toss salad ingredients together. Whisk dressing ingredients together and serve with salad. Store leftovers in the fridge.
Labels:
Fruit,
grilled,
Quick n' Easy,
Salads
Wednesday, May 15, 2013
Roasted Strawberry Muffins
I'm so happy to have another muffin recipe in my collection. I like to have a lot of healthy options for breakfast since I dont' really buy boxed cereal anymore and these are great. My girls loved these muffins, but I was really surprised when they ate them without picking out the strawberries. Usually they don't like pieces of fruit in baked goods, but whatever...they ate them, loved them and didn't complain! I'd say that's a win!
Roasted Strawberry Muffins
Makes 1 dozen
1 lb. strawberries
2 eggs
1/2 cup greek yogurt
1/4 - 1/2 cup milk
2 tsp. vanilla
1/2 cup sugar
1/4 cup coconut oil, melted
1 1/2 cups whole wheat flour
1/2 cup all-purpose flour
1 Tbsp. baking powder
1/2 tsp. salt
coarse sugar, for sprinkling
Preheat oven to 400 degrees F. Rinse, hull and cut strawberries into small pieces. Lay on a cookie sheet and sprinkle with a few pinches of sugar. Toss to coat. Roast in oven for about 15 minutes, then set aside to cool. Increase oven temperature to 425 degrees F.
In a mixing bowl, whisk together by hand eggs, yogurt, 1/4 cup of milk, vanilla, sugar and melted coconut oil. Add flours, baking powder and salt. If the batter seems thick, add a little more milk, but do not over stir. Scrape strawberries off the cookie sheet into the bowl and gently fold them in.
Put paper liners in muffin tin and divide batter evenly between them. Sprinkle tops with a pinch of coarse sugar. Bake at 425 degrees F for 13-15 minutes. Allow muffins to cool about 5 minutes in the pan before removing them to a wire rack to cool completely Store in an airtight container.
SOURCE: Adapted from Annie's Eats
Monday, May 13, 2013
Menu Plan Monday Week 20 (2013)
I hope everyone had a happy mother's day yesterday. We were busy celebrating with my mom so I didn't have time yesterday to get this week's menu up. Luckily I had been thinking of some things already so all I had to do this morning was jot them down. I actually had a couple leftover meal ideas from last week. Since we spent a couple long days putting in our garden, dinner got pushed aside and they were kind of fend for yourself nights...unfortunately. Oh well garden is in and looking forward to a great summer of fresh produce.
Dinner Menu Week 20 (2013)
Monday
Sweet Potato and Tamarind Curry with Basil and Lime
Thai Coconut Rice
fresh veggies
Tuesday-Celebrating my birthday!!
Fettuccine with Mushrooms and Hazlenuts
Sauteed Brussels Sprouts with Rosemary and Pine Nuts
fresh fruit
Chocolate Raspberry Truffle Cake
Wednesday
Macadamia and Coconut Crusted Tilapia with Mango Salsa
leftover rice
Salad
Thursday
Roast Chicken with Balsamic Sweet Peppers
Creamy Polenta
steamed broccoli
Friday
Lentil Veggieballs in Lemon Pesto
salad
fresh fruit
Saturday
Leftovers
Sunday
Pasta with Cilantro-Peanut Pesto
fresh veggies
Dinner Menu Week 20 (2013)
Monday
Sweet Potato and Tamarind Curry with Basil and Lime
Thai Coconut Rice
fresh veggies
Tuesday-Celebrating my birthday!!
Fettuccine with Mushrooms and Hazlenuts
Sauteed Brussels Sprouts with Rosemary and Pine Nuts
fresh fruit
Chocolate Raspberry Truffle Cake
Wednesday
Macadamia and Coconut Crusted Tilapia with Mango Salsa
leftover rice
Salad
Thursday
Roast Chicken with Balsamic Sweet Peppers
Creamy Polenta
steamed broccoli
Friday
Lentil Veggieballs in Lemon Pesto
salad
fresh fruit
Saturday
Leftovers
Sunday
Pasta with Cilantro-Peanut Pesto
fresh veggies
Labels:
Menus
Sunday, May 12, 2013
Blackberry Balsamic Pie with Sea Salt Walnut Crumble
I don't eat much pie, even less fruit pie, so it goes without saying that I pretty much NEVER even make pie, except this one maybe once a year on Thanksgiving. Sad for my husband because he likes pie and, again, I rarely make them. So, making this pie was BIG for me!
I found this recipe on Pinterest and pinned it quite a while ago but never found much occasion to make it...'cause I never make pie, hehe! But the ingredients intrigued me and it did look good. Anyway, blackberries came in season and I got a killer deal on a bunch recently so I bought quite a bit, mostly to freeze for smoothies but I saved a few containers out.
We had some friends over for dinner and served these sliders and I thought this pie would be a good accompaniment, especially since my friend loves fruit desserts. WOW! It was love at first bite. I couldn't wait to devour the whole piece.
Now, I'm sure you pie lovers have your own favorite pie crust recipe that you use, so go ahead and use whatever you like . For the rest of you non-pie makers, like me, go ahead and buy a crust, I give you permission.
Pie-lover or not, you need to make this pie!! It will convert even the stubbornest.
Blackberry Balsamic Pie with Sea Salt Walnut Crumble
for the crust:
1 store bough deep-dish pie crust, or your favorite homemade one
for the filling:
4 1/2 cups fresh blackberries (about 3 6-oz containers)
1/2 cup granulated sugar
1/4 cup brown sugar
2 Tbsp. + 1 tsp. cornstarch
2 Tbsp. balsamic vinegar
zest of 1 lime (I squeeze a little juice in there too)
for the crumble:
1 cup rolled oats
1 cup chopped walnuts
1/2 cup flour
1/2 cup brown sugar
1 tsp sea salt
4 oz. unsalted butter, chilled and cut into pieces
Prepare pie crust and preheat oven to 400 degrees F.
Combine all filling ingredients in a mixing bowl and lightly toss to evenly coat blueberries.
In a food processor with a chopper blade add the ingredients for the crumble. Pulse a few times until mixture resembles a coarse meal-same process for making a pie crust. If you don't want the oats to become powder, you could leave them out until the butter is cut in, then add them in a pulse a time or two more to mix them in.
Spoon pie filling into prepared (unbaked) crust. Sprinkle the crumble over the blackberries, completely covering them. Bake for 45-50 minutes or until filling is bubbly and topping is brown and crisp. About half way through baking, lightly tent a piece of foil over the pie so it doesn't brown too quickly.
Cool and serve warm or at room temperature.
SOURCE: Design Sponge
I found this recipe on Pinterest and pinned it quite a while ago but never found much occasion to make it...'cause I never make pie, hehe! But the ingredients intrigued me and it did look good. Anyway, blackberries came in season and I got a killer deal on a bunch recently so I bought quite a bit, mostly to freeze for smoothies but I saved a few containers out.
We had some friends over for dinner and served these sliders and I thought this pie would be a good accompaniment, especially since my friend loves fruit desserts. WOW! It was love at first bite. I couldn't wait to devour the whole piece.
Now, I'm sure you pie lovers have your own favorite pie crust recipe that you use, so go ahead and use whatever you like . For the rest of you non-pie makers, like me, go ahead and buy a crust, I give you permission.
Pie-lover or not, you need to make this pie!! It will convert even the stubbornest.
Blackberry Balsamic Pie with Sea Salt Walnut Crumble
for the crust:
1 store bough deep-dish pie crust, or your favorite homemade one
for the filling:
4 1/2 cups fresh blackberries (about 3 6-oz containers)
1/2 cup granulated sugar
1/4 cup brown sugar
2 Tbsp. + 1 tsp. cornstarch
2 Tbsp. balsamic vinegar
zest of 1 lime (I squeeze a little juice in there too)
for the crumble:
1 cup rolled oats
1 cup chopped walnuts
1/2 cup flour
1/2 cup brown sugar
1 tsp sea salt
4 oz. unsalted butter, chilled and cut into pieces
Prepare pie crust and preheat oven to 400 degrees F.
Combine all filling ingredients in a mixing bowl and lightly toss to evenly coat blueberries.
In a food processor with a chopper blade add the ingredients for the crumble. Pulse a few times until mixture resembles a coarse meal-same process for making a pie crust. If you don't want the oats to become powder, you could leave them out until the butter is cut in, then add them in a pulse a time or two more to mix them in.
Spoon pie filling into prepared (unbaked) crust. Sprinkle the crumble over the blackberries, completely covering them. Bake for 45-50 minutes or until filling is bubbly and topping is brown and crisp. About half way through baking, lightly tent a piece of foil over the pie so it doesn't brown too quickly.
Cool and serve warm or at room temperature.
SOURCE: Design Sponge
Sunday, May 5, 2013
Menu Plan Monday Week 19 (2013)
So, this week I have not emptied out my fridge like I should have been doing. We started a 30 day challenge to eat more greens, especially in the form of green smoothies. While we've been getting our smoothies in, I haven't made as much salad as I normally do because of it. So I have a huge bag of spinach and kale we're slowly knocking out each day, as well as some risidual veggies from last week that didn't get eaten. So, I'm gonna use up the rest of those veggies this week, hopefully before I have to go grocery shopping again.
I am also in LOVE with hummus lately!! And not just any hummus...Trader Joe's Organic Hummus. It's absolutely delicious. I know it's VERY easy to make but the few times I have made it, the flavor was just off for me so I didn't really want to try again. Finally I realized I think it was the olive oil I was using when I made it. It's a big part of the flavor so it's important to get a good one. So I'll be making a go at that again this week, along with some garlic naan and mint chutney to make a well rounded Mediterranen meal.
Dinner Menu Week 19 (2013)
Monday
Burritos with homemade flour tortillas and smashed pinto beans (I know we just had these but my kids LOVED them and asked for them again.)
corn on the cob
Tuesday
Hamburgers
Sauteed Brussels Sprouts with Rosemary and Pinenuts
Wednesday
Tortilla Soup w/ Southwest Slaw
Thursday
Spicy Garlic Shrimp with Tomatoes and Snow Peas
Friday
Leftovers
Saturday
Sweet Potato Curry with Basil and Lime
Sunday
Easy Sesame Peanut Noodles
chopped peppers, carrots and cucumbers
On the side...(feeling ambitious this week )
Garlic Naan
Mint Chutney
Hummus
Banana Scones with Brown Butter Glaze
Spicy Bok Chow Rice Bowl-lunch (can't get enough of this, I'm already salivating!)
Strawberry Mint Smoothie
I am also in LOVE with hummus lately!! And not just any hummus...Trader Joe's Organic Hummus. It's absolutely delicious. I know it's VERY easy to make but the few times I have made it, the flavor was just off for me so I didn't really want to try again. Finally I realized I think it was the olive oil I was using when I made it. It's a big part of the flavor so it's important to get a good one. So I'll be making a go at that again this week, along with some garlic naan and mint chutney to make a well rounded Mediterranen meal.
Dinner Menu Week 19 (2013)
Monday
Burritos with homemade flour tortillas and smashed pinto beans (I know we just had these but my kids LOVED them and asked for them again.)
corn on the cob
Tuesday
Hamburgers
Sauteed Brussels Sprouts with Rosemary and Pinenuts
Wednesday
Tortilla Soup w/ Southwest Slaw
Thursday
Spicy Garlic Shrimp with Tomatoes and Snow Peas
Friday
Leftovers
Saturday
Sweet Potato Curry with Basil and Lime
Sunday
Easy Sesame Peanut Noodles
chopped peppers, carrots and cucumbers
On the side...(feeling ambitious this week )
Garlic Naan
Mint Chutney
Hummus
Banana Scones with Brown Butter Glaze
Spicy Bok Chow Rice Bowl-lunch (can't get enough of this, I'm already salivating!)
Strawberry Mint Smoothie
Friday, May 3, 2013
Chicken Enchilada Pizza
By the time I get to Fridays I'm spent, totally and completely! I leave pizza for the weekend because, HEY! it's Friday, it's the weekend! Let's have something fun and easy. My girls ALWAYS choose cheese pizza, I just don't ask anymore. One day, their taste buds will be a little more distinguished, ONE DAY!
Don't get me wrong, my cheese pizza is pretty dang good, especially when I make it on my garlic bread pizza dough (which I have yet to post), but I don't want to forever and always eat cheese pizza when I do eat it. So, this is my latest installment of our adult pizzas. It was really delicious, especially all that fresh on top and the zingy lime juice! If you don't like or want the chicken, it is easily swapped out for black beans and just as tasty.
Chicken Enchilada Pizza
1 recipe Perfect Pizza Dough
Enchilada Sauce
1 chicken breast, cooked and shredded
1 - 1 1/2 cups Colby Jack cheese, shredded (or use half Cheddar and half Monterey Jack cheese)
Romaine Lettuce, thinly shredded; about 1 leaf
1-2 Tbsp. cilantro, chopped
Avocado, sliced
grape tomatoes, halved
fresh lime
Mix up pizza dough according to directions and allow to rise. While dough is rising, cook the chicken, shred and set aside. Also, make the enchilada sauce and strain as instructed. Add about half of the onion mixture and a couple tablespoons of the sauce to the shredded chicken and toss.
Preheat oven (along with pizza stone if you are using one) to 450 degrees F. Roll out dough and brush edges with olive oil. Spread about 1/4 cup of the strained encilada sauce onto the dough. Layer with about half of the cheese, then the chicken/onion mixture and top with the other half of the cheese. Slide pizza onto hot baking stone (or inverted baking sheet) and bake for about 8-10 minutes, or until cheese has browned a bit and is bubbly.
While pizza is cooking, prepare the rest of the toppings; lettuce, cilantro, avocado and tomatoes.
Remove pizza from oven and allow to cool slightly. Top with remaining toppings, then squeeze fresh lime juice all over pizza and serve.
*Use some remaining enchilada sauce for dipping, if desired, and the rest plus the onion mixture can be stored in the freezer for later use (more pizza yay!!!).
Wednesday, May 1, 2013
Whole Wheat Peanut Butter Apple Pancakes
Just what I need right? Another pancake recipe. My mom was on here a while back looking for a recipe and told me I had way too many. Hmm, I don't think so. I am always up for a new pancake to try. It's one of my absolute favorite things to make for breakfast.
So the story behind this pancake is this...hubs' birthday was last month and my mom baked him an apple cake. I had just made homemade buckeye (peanut butter and chocolate) ice cream and threw it on top of a piece of leftover cake one night (also drizzled homemade caramel sauce on top) and it was so good!! A match made in heaven if you ask me. And from there, the flavor combination morphed into pancakes; 'cause it doesn't take much to get me thinking about pancakes.
So, these are really delicious and don't take much more effort than a typical batch of pancakes. All the extra you're going to have to do is just peel, cut and shred an apple and thin out some peanut butter to drizzle on top and that's it.
Whole Wheat Peanut Butter Apple Pancakes
1 1/2 cups buttermilk
1 fresh egg
3 Tbsp. brown sugar
2 Tbsp. natural peanut butter , plus more for topping
1 1/2 whole wheat flour
1 1/2 tsp. baking powder
3/4 tsp. baking soda
1/4 tsp. salt
1 large apple, peeled, cut into fourths and shredded
Prepare apple and set aside.
In a mixing bowl, whisk together peanut butter and sugar. Gradually whisk in egg and buttermilk, a little at a time. *If you add too much liquid at once, the peanut butter will not mix in well and will be clumpy. You can also warm the peanut butter a little first to make it easier to whisk in. Whisk mixture until smooth and uniform.
Add the dry ingredient and whisk until just incorporated. Stir in shredded apple last and let batter sit while griddle preheats.
Drop batter by 1/4 cup onto hot griddle and cook until bubbles start to form and edges begin to look dry; about 2-3 minutes. Flip and cook another 1-2 minutes.
Serve warm. If you want to drizzle peanut butter on top, just whisk in some water until it's pourable. Otherwise you can just spread it on top with a knife. Drizzle with syrup.
Subscribe to:
Posts (Atom)