Showing posts with label Beans n' Legumes. Show all posts
Sunday, June 28, 2015
Smoky Black Bean Chili
I know it's summer time and hot, hot, hot! But my oldest daughter has fallen in love with chili since eating it at a friend's house recently. I don't know about you, but I'm so over the dinner time struggle!! I know I still have to deal with it for years to come, but hey, if I can find a few more healthy things my kids like that I can add in to the dinner rotation, I'm all over it. My middle daughter already LOVES this black bean soup, as well as taco soup, so I didn't think it would be hard to get her to try this delicious chili! Plus, you can totally eat it with chips. That always gets their attention, haha! To my surprise both girls told me they didn't like the chili, they LOVED it! I was so happy, I literally jumped up and down with them. Dinner time was happy time that night.
This chili, like most soups, is open to a little interpretation. I didn't add a ton of heat because I knew my three littles would be eating most of it. I wanted to add a couple chipotles in adobo during cooking but I knew it would be too spicy, but feel free to do so. Instead, I decided to just use the chipotle tabasco sauce on the side instead; my husband loves that stuff anyway and puts it on everything. Whatever you do, don't leave out the smoked paprika, ginger ale and cocoa powder!! They lend such a unique element to the dish, I think that's why I loved it so much.
This chili would be lovely served with some cornbread, fresh tortillas or even hot cooked rice.
Smoky Black Bean Chili
1 Tbsp. olive oil
1 lb. ground beef
1/2 onion, finely diced
1 red pepper, diced
3 cloves garlic
1 tsp. salt
1/2 tsp. ground pepper
2 tsp. chili powder
2 tsp. cumin
2 tsp. cocoa powder
1/2 tsp. oregano
1 tsp. smoked paprika
1 Tbsp. brown sugar
1 1/2 cups ginger ale
1 8-oz can tomato sauce
3 cans black beans, drained and rinsed
1 can RoTel
1 can diced or crushed tomatoes
garnishes:
sour cream
shredded cheese (cheddar, monterey jack, mozzarella or my personal favorite smoked cheddar)
cilantro
diced avocado
chipotle tabasco sauce
tortilla chips
Heat olive oil in a large sauce pan or Dutch oven over medium high heat. Add onion and ground beef and cook until onions are translucent and beef is browned. Drain off all but a tablespoon or two of the fat. Add chopped red pepper, garlic, salt, pepper, chili powder, cumin, cocoa powder, oregano, smoked paprika, and brown sugar. Sauté 2-3 minutes, until fragrant. Add ginger ale, tomato sauce, black beans, RoTel and tomatoes to the Dutch oven. Stir to combine. Bring to a boil, then reduce heat to a simmer, cover and cook about 15-20 minutes.
Serve warm, with desired garnishes.
Labels:
Beans n' Legumes,
Beef,
Kid-Friendly,
Quick n' Easy,
Soups
Thursday, October 2, 2014
Etta's Black Bean and Ham Hock Soup with Roasted Tomatillo Salsa
Last summer my family and I made the long trek to Seattle to visit my brother and his family. Near the end of our trip I was trying to think of some kind of souvenir to bring home. Nothing came to mind. I mean, I could have brought home a dozen Top Pot donuts, but I don't think they would have lasted, honestly. Then I remembered my friend told me that she always bought a cookbook, featuring local fare, when visiting other places. Since we didn't have time to go cookbook shopping, I jumped on amazon when we got home and found not one but two great cookbooks. The first was the Macrina Bakery & Cafe Cookbook, a carb and breakfast-lovers dream (me!!), and the second was Tom Douglas' Seattle Kitchen. Anyone familiar with Seattle knows that Tom Douglas is where it's at when it comes to food. Owner of Etta's Seafood, Dahlia Lounge and Palace Kitchen, how could I not buy one of his books!!
So, remember I said our trip was LAST summer?? Yeah, it's taken me that long to start going through all the recipes I've bookmarked. The other day I grabbed Seattle Kitchen off the shelf and this recipe popped out and I almost immediately made it.
I'm pretty sure you'll find that ham and bean soup is delicious comfort food almost anywhere you go. I grew up eating just a basic ham and bean soup, but this one will knock your socks off. It is still a super simple, healthy and delicious meal to make but the extra flavors and roasted salsa on top take it just over the top.
Tom Douglas said this soup has been on the menu at Etta's for lunch and dinner every day since the restaurant opened! If it's good enough for him, it's definitely good enough for me.
Black Bean and Ham Hock Soup with Roasted Tomatillo Salsa
2 cups dried black beans, picked over and rinsed
12 cups chicken stock, or more if needed
1 smoked ham hock (check local butcher or save your own when you buy a ham)
2 Tbsp. olive oil
1 1/2 cups finely chopped onions
1/2 cup chopped carrots, half-inch dice
1/2 cup chopped celery, half-inch dice
1 Tbsp. minced garlic
2 cups drained canned tomatoes, chopped
2 tsp. tomato paste
2 tsp. coriander seeds, toasted and ground
2 tsp. cumin seeds, toasted and ground
1 tsp. paprika
1 tsp. smoked paprika
3/4 tsp. cayenne, or to taste
juice of a lime
salt and pepper
1/4 cup cilantro
Place beans in a large pot with the chicken stock and bring to a boil. Reduce to a simmer and cook until beans are soft, about 2-3 hours (depending on freshness of beans).
Meanwhile, heat the olive oil in a large saute pan over medium-high heat and slowly cook the onions, carrots and celery until onions are golden and caramelized, 10-15 minutes. Stir in the garlic the last minute of cooking. Add the onion mixture to the pot of beans, along with the tomatoes, tomato paste, and ground spices. Continue simmering until beans are soft.
Pull out ham hock and remove fat and skin. Remove meat from the bone, shred or finely chop it and put it back in with the beans. Season beans with paprika, cayenne, cilantro, lime juice, salt and pepper.
To serve: Ladle soup into bowls and top with sour cream or soft cheese, such as cojita, and a few dollops of tomatillo salsa. Also great served with cornbread.
Roasted Tomatillo Salsa
8 oz. (2 1/2 cups) tomatillos, husked, rinsed and dried
oliive oil
1 poblano chile or other mild green chile, such as Anaheim, roasted, peeled and seeded and finely chopped
1 Tbsp. finely chopped red onion
2 Tbsp. chopped fresh cilantro
1 Tbsp. minced garlic
1 Tbsp. fresh lime juice (about half a lime)
1 tsp. seeded and minced canned chipotle in adobo
salt and pepper, to taste
Preheat oven to 400 degrees F. Toss tomatillos in a drizzle of olive oil, place on a small metal pan and place in the oven, tossing a few times until lightly browned; about 10 minutes. Allow to cool.
Turn oven to broil. Place poblano pepper on a small metal baking tray and place under broiler until skin is blackened slightly, about 5 minutes. Flip pepper over and broil another 5 minutes or so. Remove from oven and immediately place it in a container with a lid to cool. Once cooled, skin easily peels off.
Chop cooled tomatillos and poblano pepper and place in a small mixing bowl. Add the rest of the ingredients and taste for seasoning. Adjust as necessary. Best used the same day but will keep in the fridge, covered, for 2 days.
SOURCE: Tom Douglas' Seattle Kitchen
Labels:
Beans n' Legumes,
Pork,
Quick n' Easy,
Soups
Tuesday, August 19, 2014
Crock Pot Ham Beans
I thought this recipe deserved a re-post. It has been on my blog since I began, in 2008, but didn't even have a photo or description of it!
This is one of my favorite childhood recipes I remember my mom making often. I'm not sure how often we had it with cornbread, at least until later in life, but either way if was one of our favorites. Beans are incredibly easy to prepare and knock the socks off any commercially prepared beans if you ask me. Whenever I buy a ham, I like to stick the bone in the freezer, making sure to leave some meat on it, so I can have it for these beans. If you don't happen to have a ham or ham bone, you can usually get a ham bone, or ham hock, from your local butcher or in the deli section of your grocery store.
I love that these beans are made in the crockpot, for two reasons especially this summer. First of all it so, so HOT!! I don't know if I'm just not as tough or what but I am having a hard time dealing with the heat this year. The other is that we now get out of church at 6pm on Sundays, and the crockpot seems to be the way to go. These beans start long before church and are waiting for us as we walk in the door.
These beans go great with either rice or cornbread. My hubby loves the rice, I love the cornbread so I usually make a little of each. Try this Maple Cornbread or even this Skillet Cornbread if you don't have a favorite yet.
Crockpot Ham Beans
1 lb. red beans (pinto work too)
1 meaty ham bone
1 onion, large diced
salt and pepper
water or chicken stock
Soak beans in crock pot over night. (NOTE: I buy my beans in the bulk section of my grocery store. They tend to be more fresh, so I don't soak them overnight. They also cook up faster than those prepackaged.) The next moring, drain beans and rinse.
Put beans back into crockpot; add ham bone, onion and enough water or broth to come about 2 inches above beans (Don't worry if ham bone sticks above water a bit.)
Cook on high about 2-3 hours, then on low for another 3-4, or until beans are tender. Turn off crock pot and remove ham bone. Pull off any ham from bone and stick it back in with the beans. Salt beans to taste and serve warm.
Labels:
Beans n' Legumes,
Crock pot,
Meatless
Monday, February 3, 2014
Black Bean Soup
This has been a favorite of ours for a few years. I had actually kind of forgotten about it until my 5 year old started asking me about "that bean soup that you crush the tortilla chips in." It took me a minute to remember which bean soup she was talking about, because I was kind of shocked she was actually asking for bean soup!
I LOVE this soup for a couple of reasons. First, it comes together so quickly and second, my kids don't fuss about it because there's no chunky things in it they have to fish out haha! (Not because they're not there though, because it's pureed they just can't tell.) So sneaky, I love it.
The day after I made this soup my 5 year old asked me if there were any leftovers she could have for dinner. She was ecstatic when I told her there was and then she ate two bowls full. This is my daughter who LOVES junk food and candy, who will snoop out and find ANY piece of candy in the house if there is one. This soup is definitely a keeper!
Black Bean Soup
1 Tbsp. olive oil
2 medium carrots, diced
2 celery ribs, diced
1 small onion, diced
4 large cloves garlic, minced
1 3.5-oz can green chilies
1/2 tsp. chili powder
1/4 tsp. cumin
1/2 tsp. dried oregano
2 15-oz cans black beans, rinsed and drained
4 cups beef broth
1 bay leaf
1 lime, juiced
salt and pepper, to taste
optional toppings: sour cream, tortilla chips, shredded cheese, chopped cilantro, diced avocado
Heat olive oil in a large stockpot over medium-high heat. Add carrots, celery and onion; saute about 5-6 minutes, or until onions are translucent and soft. Add garlic and saute another 60 seconds. Add green chilies, chili powder, cumin and oregano and cook about 1-2 minutes, until the spices are fragrant. Add beans, broth and bay leaf. Bring to a boil and simmer, uncovered, about 20 minutes.
Remove soup from heat. Remove bay leaf from the soup. Using a stick blender, puree the soup to your liking (you can leave is as chunky or smooth as you'd like). Alternately you can work in batches pureeing it in a blender. Squeeze in fresh lime juice and add in salt and pepper to taste. Check for seasoning and adjust as necessary.
Ladle hot soup into bowls and add toppings as desired.
SOURCE: Our Best Bites
Labels:
Beans n' Legumes,
Quick n' Easy,
Soups
Tuesday, August 27, 2013
Stacked Chicken Enchiladas with Roatsted Tomatillo Salsa
The first time I made these, it was kind of a last minute deal, I just threw them together really and they turned out much better than I imagined. I think I had originally planned on grilled chicken or something that night but forgot to defrost the chicken in time so had to do it in the microwave. Well, I must have forgotten to decrease the power because before I knew it the chicken was poaching in it's own juices!! Argh!
So, some quick thinking led me to my very last jar of bottled tomatillo salsa, some tortillas in the freezer and a few other fixings I found in the fridge. I thought it would be edible at best but to my surprise my husband and I really enjoyed it and stacking the enchiladas this way made them fun to eat.
This time around I was actually prepared for this meal and had a few extras I didn't have last time. You're sure to love it!
Stacked Chicken Enchiladas with Roasted Tomatillo Salsa
serves about 8 (1 serving: half a stack)
for the salsa:
1 lb tomatillos, husked, rinsed and halved or quartered
3-4 garlic cloves, skins on
small onion, quartered
1 jalapeno pepper, halved and seeded
1-2 anaheim peppers, halved and seeded
olive oil
salt and pepper
half a bunch of cilantro
juice of a lime
for the chicken:
2 chicken breasts
1 cup chicken broth
for the filling:
1 can black beans, drained and rinsed (or about 2 cups cooked beans)
1 cup frozen corn
1 cup monterey jack cheese, shredded
remaining ingredients and garnishes:
12 corn tortillas
chopped cilantro
avocado, diced or sliced
caramelized onion
monterey jack cheese
Preheat oven to 500 degrees F. Line a cookie sheet with foil and. Put tomatillos, garlic, onion and peppers on the sheet. Drizzle with olive oil and sprinkle with salt and pepper. Toss to coat. Bake for about 15-20 minutes or until the tomatillos begin to char. Remove from oven and cool slightly. Slip garlic from the skins and add it, along with the rest of the roasted veggies, to a blender or food processor. Add cilantro and lime juice. Blend until desired consistency. Taste for seasoning and adjust as necessary. Set aside.
While veggies are cooking, cook chicken. In a Dutch oven or a pot with a lid, add chicken and chicken broth. Bring to a boil. Reduce heat to medium, cover with lid and cook about 30 minutes. Remove and cool slightly then shred with a fork. Return chicken to broth and add about 1/2 cup of the tomatillo salsa. Add beans and corn and let simmer on low for about 5 minutes, or until heated through. Remove from heat, add 1 cup cheese and stir to combine.
*If you want caramelized onion, start it while the chicken and veggies cook. Slice 1 large onion and place in a large saute pan. Drizzle with a little olive oil and cook over medium heat until onions are soft and brown; about 15-20 minutes.
Reduce oven temperature to 350 degrees F.
To assemble enchiladas, line a cookie sheet with a slipat or spray with cooking spray. Lay out 4 tortillas layer with about 1/3 cup chicken mixture and another tablespoon or so of the tomatillo salsa. Lay another tortilla, more chicken mixture and salsa. Top with a final tortilla, a spoonful of salsa and a little extra cheese. Place in oven and cook about 20 minutes or until cheese on top is bubbly and slightly browning.
Remove from oven and top with caramelized onion, cilantro and avocado. Serve warm.
Michele's Notes:
-I actually made the salsa the night before which made dinner much quicker to throw together. You can also do the chicken the night before as well to save time.
-I only made two stacks since we have many wee mouths in this house. I saved the remaining chicken mixture and little bit of salsa I had left for a double duty meal the next night!! I cooked about 6 oz. homestyle noodles in 6 cups chicken broth, then added the chicken and salsa and made a delicious soup.
SOURCE: Salsa adapted from Our Best Bites
Labels:
Beans n' Legumes,
Chicken
Thursday, August 22, 2013
Black Beans and Coconut Rice with Mango Salsa
So, when my siblings and I were growing up, we would go through times here and there when my mom would say to us something to the effect of "we're going to be eating beans and rice for a while," meaning money is tight and we're eating cheap. I, being my mother's daughter, have also used that phrase a time or two in our marriage, to which my husband would respond, "Great! I love beans and rice!!"
This is, in fact, a cheap easy meal, but it's still packed with lots of nutrition and flavor! I was actually drawn to making beans this time because I needed to increase my iron and potassium intake and turns out beans are great for that.
I couldn't help but make this colorful salsa to top of the rice and beans. Don't get me wrong, rice and beans are great by themselves but the fresh mango, avocado and tomato and the nice bite from the cilantro really brought it home for me. Enjoy!
Black Beans and Coconut Rice with Mango Salsa
serves about 4
for the beans:
1 cup thinly sliced celery
2 cans black beans, drained and rinsed
1/2 small red onion, small diced
juice of 1 lime
1 tablespoon olive oil
1/4 tsp. cumin
pinch of smoked paprika
for the rice:
1 cup jasmine rice
1 cup canned coconut milk (preferably full-fat)
1 cup water
pinch of salt
2 Tbsp. flaked coconut (optional)
for the salsa:
1 mango, diced
2 roma tomatoes, diced
1 avocado, diced
1 small anaheim pepper, finely diced (can substitute jalapeno for more heat)
2 green onions, chopped
1/2 cup cilantro, chopped
juice of 1 lime
salt and pepper
In a medium sauce pan, add rice, coconut milk, water, salt and flaked coconut (if desired). Bring to a boil. Reduce heat, cover and cook for 20 minutes.
Add the celery, black beans and onion to a salad bowl. Squeeze lime, drizzle the olive oil and add the cumin and paprika. Toss to coat. Add a pinch of salt, if necessary.
In a smaller bowl, add the mango, tomato, avocado, pepper, onion and cilantro. Squeeze lime over it and add salt and pepper to taste. Stir to coat.
Once rice is finished cooking, allow to cool slightly.
Serve rice warm or at room temperature, topped with bean mixture and salsa.
Labels:
Beans n' Legumes,
Quick n' Easy,
Rice
Wednesday, July 31, 2013
Homemade Refried Beans
These beans are simple goodness, to put it plainly. They are part of my ever-growing list of pantry items that I now make homemade. Let me tell you they are well worth the small effort it takes, as they basically make themselves. I love these beans because they just taste fresh and free from extra sodium, sugar and others stuff often found in the canned ones.
Beans are a wonderful food! They are cheap and healthy, loaded with lots of fiber, iron and potassium, as well as protein.
Homemade Refried Beans
1 lb. dry pinto beans
8-10 cups water
1 Tbsp. granulated garlic
1/2 medium onion, cut in large chunks
1 1/2 Tbsp. chicken bouillon granules (or sub part of the water for broth)
2 Tbsp. butter
salt, to taste
Rinse the beans thoroughly and put them in a large pot. Add water, granulated garlic, onion and bouillon. Bring to a boil, then reduce heat to medium or medium-low. Off-set a lid on top of the pot and cook until beans are tender. Depending on the freshness of the beans it could take as little as 1 1/2 hours, up to 3 hours.
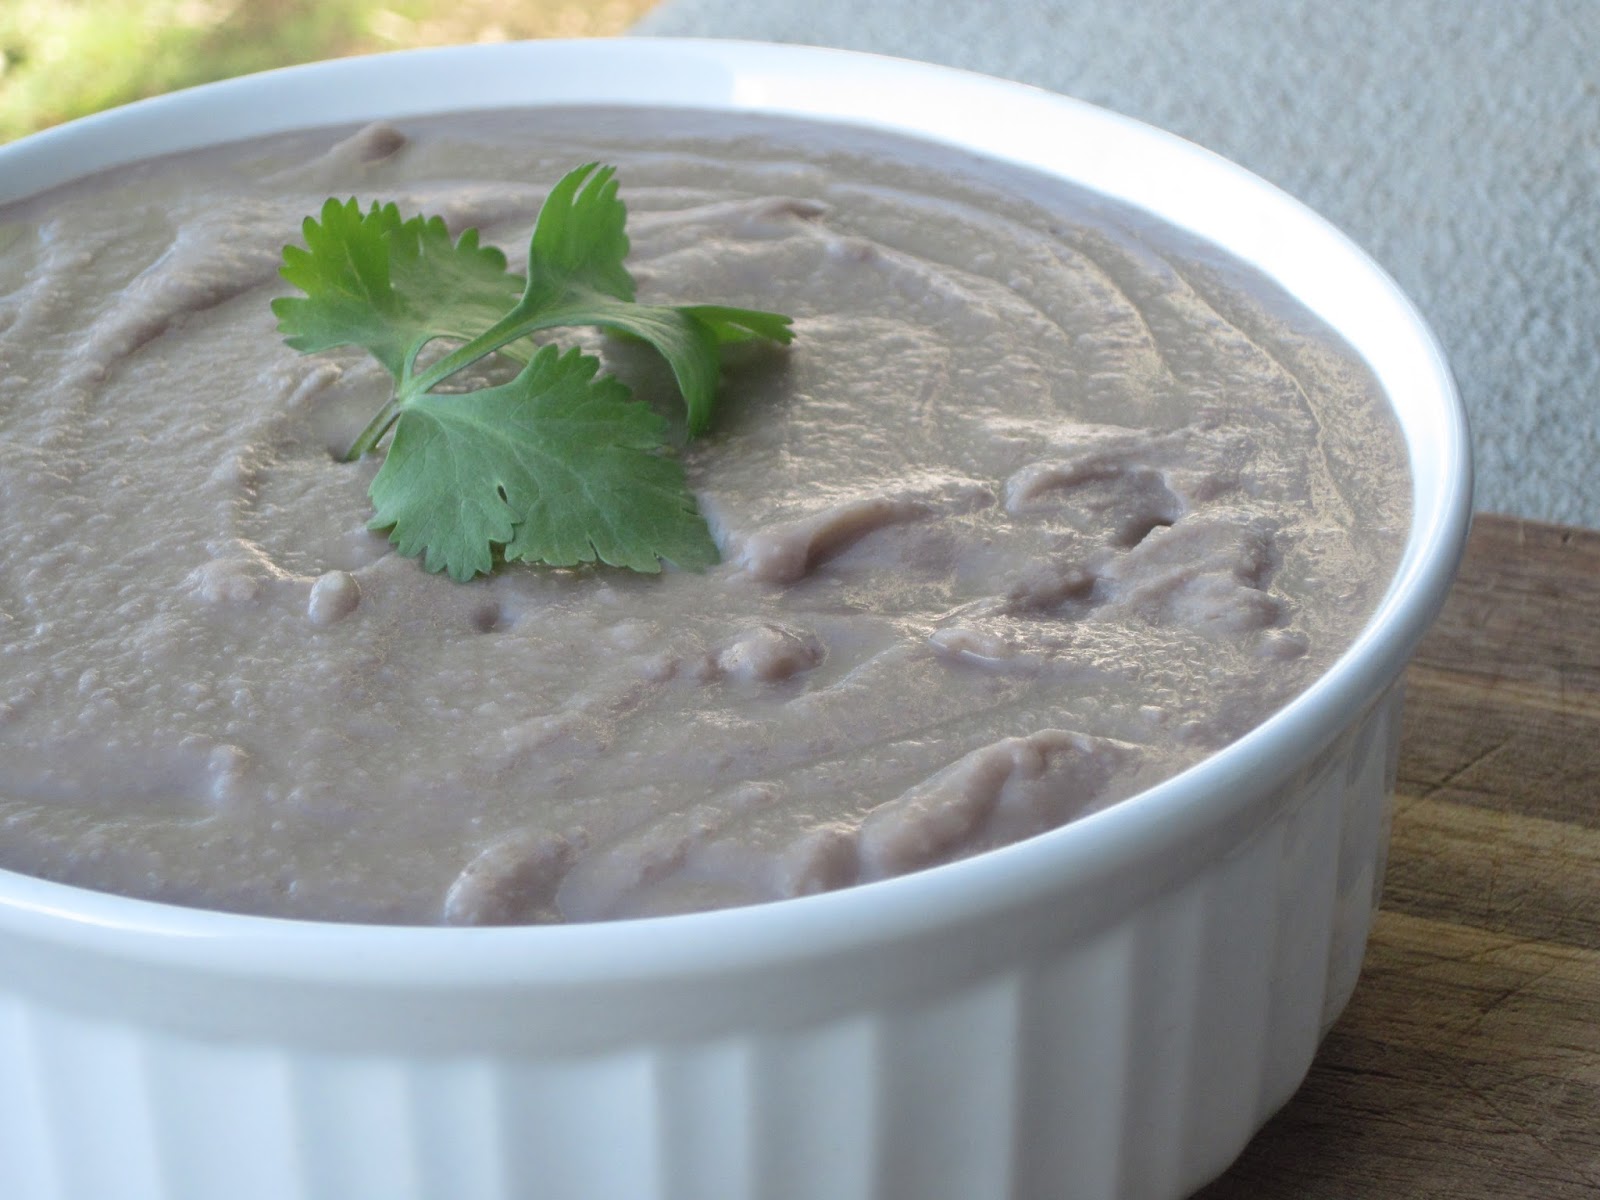
When beans are finished cooking, pour off about half, or more, of the liquid, reserving about a cup, if desired. Using an immersion blender, puree the beans and onions until smooth. You'll want to keep them a little runny because they will set up as they cool. If they are too dry, add some of the reserved liquid to thin them out. Add butter and salt, to taste.
*Michele's notes:
-I like to make a large pot at once because then I can freeze the rest into 1-2 cup portions for later use. I often add a little more liquid to the ones I'm going to freeze, because as they are reheated, they will lose some liquid. This keeps them from getting to dry.
-I also like to buy my beans in the bulk section of my grocery store. They tend to be much more fresh and cook up on the lower end of the cooking time. The 1-lb bags at the grocery store are much older and often take a long time to cook; although they still should taste fine.
Labels:
Beans n' Legumes
Saturday, May 25, 2013
Hummus
I'm so happy to finally have a hummus recipe that I love and is quick and easy to throw together. I know it's not rocket science and there's about a bajillion recipes out there for hummus but this one's a keeper for me.
I have recently had this obsession with Trader Joe's Organic Hummus, which is so good if you have never tried it. Every time my hubby goes into Salt Lake I plead with him to stop at Trader Joe's for me to pick up a few key items, hummus being one of them. Sadly though, we don't make it there far enough, haha, so I decided it was time to make my own, and spend a fraction of the cost!
Hummus
1 Tbsp. olive oil
1 15-oz canned chickpeas (garbanzo beans)-drained
1/2 cup sesame seeds, toasted
1/4 cup fresh lemon juice (about 1 lemon)
1 clove garlic, minced
pinch of salt
Heat a skillet over medium-high heat. Add sesame seeds and cook until lightly browned.
Put everything in the blender in order listed. You may need to pulse it a couple times to get it going. Let blender run until it reaches desired consistency. If you want to thin it out a little, add either water or olive oil about a tablespoon at a time. Check for seasoning and adjust if necessary.
Serve with pita chips or fresh veggies.
SOURCE: Blendtec
Labels:
Beans n' Legumes,
Condiments,
Quick n' Easy
Thursday, April 4, 2013
Harvest Grains & Spinach Salad w/ Basil Balsamic Dressing
Harvest Grains & Spinach Salad with Basil Balsamic Dressing
1/2 lb. harvest grains blend-about 1 1/4 cups (I got mine from Trader Joe's, has yellow lentils, red quinoa, orzo, baby garbanzo beans, and Israeli couscous.)
1 Tbsp. butter or olive oil
1 3/4 cups organic chicken broth (or water)
1/4 cup Sun-dried Tomatoes
2 cups baby spinach leaves, chopped
1/4 cup raw cashews, lightly toasted
2 oz. goat cheese, crumbled
Basil Balsamic Dressing (below)
for the dressing:
1/4 cup finely diced onion
1 cup tightly packed basil leaves
1 clove garlic
1/2 tsp red pepper flakes
1/3 cup olive oil
1/4 cup balsamic vinegar
1 tsp salt
Bring 1 3/4 cups broth or water to a boil. Add butter/oil and 1 1/4 cups of the grains blend. Bring back to a boil, reduce heat and simmer, covered for 10 minutes. Remove from heat and allow to cool to room temperature.
In the meantime, put tomatoes in a small saucepot and add water until just covered. Boil 5 minutes and cool. Chop and set aside.
Prepare dressing by adding ingredients into a blender and whiz until smooth.
If desired, toast cashews in a small frying pan over medium heat about 3-4 minutes.
Once grains have cooled, add chopped spinach, sun-dried tomatoes and cashews. Pour some dressing over the salad and toss. Add more as necessary. top with crumbled goat cheese.
SOURCE: Salad adapted from Cookin' Canuck, dressing from What's Gabby Cooking.
Labels:
Beans n' Legumes,
Quick n' Easy,
Salads,
Tomatoes,
Vegetables
Monday, February 25, 2013
Asparagus and Pepper Wrap with Tomato Basil Lentil Hummus
I know hummus is pretty popular and healthy and I have even made a few versions of it myself. I don't know what it was about it but I just couldn't fall in love with it, although I really, really wanted to, it was not my favorite thing to eat.
Then I stumbled upon hummus with a totally different flavor profile; tomatoes and basil. Well, I was sold at basil, I didn't even care what else was in it. Turns out this was absolutely delicious . The original recipe had a white bean base instead of chick peas, but when I went to make it, what do ya know, the can I thought was in my pantry was not! So I quickly improvised and cooked up some lentils and used that as a base instead and I couldn't have been happier.
I made the hummus for my lunch wrap early last week and got to nibble on the leftovers the next few days after that. So yummy! I used sweet baby bell peppers. carrots and asparagus, along with the fresh baby spinach, but you could use whatever veggies you had on hand.
Asparagus and Pepper Wrap with Tomato-Basil Lentil Hummus
For the hummus:
3/4 cup uncooked lentils + 1 1/2 cups water
1 cup loosely packed fresh basil leaves
1/3 cup sun-dried tomatoes (feel free to use oil-packed from the store)
1/3 cup water
2 tbsp.balsamic vinegarJuice from ½ of a lemon (about 2 tablespoons)
2 cloves fresh garlic, chopped
1/4 tsp.onion powder
1/4 cup extra-virgin olive oil
For the wrap:
any kid of flat bread or wraps
sweet bell peppers, thinly sliced
thin, tender asparagus (blanch 1-2 minutes in boiling water then chill, if desired)
carrots, thinly sliced
fresh baby spinach
While the lentils are cooking, place sun-dried tomatoes in a shallow pan and cover with water. Boil about 5 minutes. Remove from heat and cool. Use the water as part of the 1/3 cup called for in the recipe. Add more as needed.
Add tomatoes to the lentils, along with the rest of the ingredients and blend until smooth. Store in an airtight container.
To assemble wrap, lay flatbread out on counter and spread hummus on the inside. layer with baby spinach and veggies. Roll up and enjoy!
SOURCE: Adapted from Perry's Plate
Labels:
Beans n' Legumes,
Quick n' Easy,
Vegetables
Tuesday, February 19, 2013
Lentil Veggieballs with Lemon Pesto Dipping Sauce
A couple weekends ago my girls and I stayed with my high school aged sister for an extended weekend while my parents were out of town. While discussing what to make while I was there I happened to come across these lentil "veggieballs" and decided to ask my sister if she even liked lentils. When she replied whole-heartedly that she loved them I knew I would be in good company if I made these, so on the menu they went!
I'm so glad we decided to try them, they were delicious. And the lemon pesto...wow! Lick the plate good. Such a great condiment for the lentils. These veggieballs are great served warm, along side a nice dinner salad.
Lentil Veggieballs in Lemon Pesto
For the veggieballs:
2 cups cooked lentils, cooled
2 eggs, lightly beaten
1 large carrot, diced
1/2 onion, diced
3/4 cup Ricotta cheese
1/4 cup fresh grated parmesan cheese
1 clove garlic, minced
1/2 tsp. fennel seed, crushed
2 Tbsp. finely chopped fresh parsley
1/2 tsp. dried thyme
1 tsp. salt
1/2 tsp. pepper
2/3 cup breadcrumbs
for the lemon pesto sauce:
1 clove garlic, minced
1/4 cup pinenuts
zest and juice of one lemon
1/2 tsp. Sea Salt
1 cup packed basil leaves
1/4 - 1/3 cup olive oil
2 Tbsp. grated parmesan
2 Tbsp. water to thin
Wash 1 cup dried lentils then place them in a saucepan with 2 cups water and bring to a boil. Reduce heat, cover and let simmer for about 20-30 minutes, until tender.
In the meantime, prepare the pesto by combining pesto ingredients in a food processor with a chopper blade. Process untiil smooth, adding oil or water as necessary to desired consistency. Scoop out into a containter with a tight fitting lid and set aside.
Heat a drizzle of olive oil in a medium-sized frying pan. Add onions and carrots and saute over medium heat until tender. Remove from heat and allow to cool.
Once lentils, onions and carrots have cooled, place them in a food processor with a chopper blade and process until smooth and well combined. Remove to a mixing bowl and add the rest of the ingredients. Stir until well combined.
Preheat oven to 400 degrees F. Make balls by using a small scoop to scoop out lentil mixture. Place closely together on a baking sheet. Brush with a little olive oil then place them in the oven and bake for about 15-20 minutes, or until slightly golden. You can turn them half way so both sides are a littl golden, but I didn't.
Serve warm with lemon pesto.
SOURCE: Slightly adapted from Sprouted Kitchen
Labels:
Beans n' Legumes,
Citrus,
Condiments,
Quick n' Easy
Friday, November 16, 2012
Lentil and Kale Pasta
It's so good to get back to healthy! After spending the better part of a week in Las Vegas indulging and splurging, my body started craving warm, earthy and hearty flavors and food. This totally fit the bill. I was pleasantly surprised how much I liked the lentils. They are a lot more flavorful than I remember them being. It's been a while, but like I said, I'm trying to clean out my pantry so I really wanted to use them up.
The kale is amazing here too, adding not only color and texture but a ton of nutrition too. I used my own sun-dried tomatoes that I dehydrated then reconstituted but you could also use oil-packed sun-dried tomatoes from the store.
Lentil and Kale Pasta
1/2 lb. whole wheat pasta (I used shells)
1 1/2 cups cooked lentils
1/2 cup sun-dried tomatoes, reconstitued and chopped
4 cups kale, rinsed and chopped
3 cloves garlic, minced
pinch red pepper flakes
12-15 oz jar marinated artichoke hearts, drained and choped
1/2 cup crumbled feta
olive oil
juice of half a lemon (about 1-2 Tbsp.)
1/4 cup fresh basil, chopped
salt and pepper, to taste
garnish: finely grated parmesan cheese (to your liking)
Start cooking the lentils first or even ahead of time, they will take the longest; about 15-20 minutes. Follow package directions. Cook, drain and set aside.
In the meantime, cover sun-dried tomatoes in about 1-inch of water in a small saucepan. Bring to a boil and cook about 5 minutes. Remove from heat, drain and chop.
Bring a large pot of water to boil and cook pasta according to package directions. Drain and rinse with cold water for about 10 seconds to cool it off a bit. Put pasta and lentils and chopped tomatoes in a large salad bowl.
Using the same pot as you cooked the pasta in, drizzle a good amount of olive oil on the bottom. Drop the kale and sprinkle with a pinch or two of red pepper flakes. Saute 2-3 minutes, adding the garlic in the last 20 seconds or so, to avoid burning. Add the kale to the salad bowl. Wait for it to cool slightly before stirring it in.
Add chopped artichokes, feta, 1-2 tablespoons olive oil, lemon juice, basil and salt and pepper to the lentils and pasta, stirring to incorporate. Taste for seasoning and adjust as necessary.
Serve at room temperature, topped with finely grated parmesan cheese.
Saturday, November 3, 2012
Fall Vegetable Curry
Here is another quick and nutritious meal you can add to your fall repertoire of dinners. It's also meatless (if that's your thing)! If you're a fan of curry, you'll definitely like this one.
This curry is similar to this other Bean Curry on the blog in that it uses Garam Masala spice and turmeric. However, I've kicked up the spiciness with some jalapeno and topped it with a yummy cilantro-yogurt sauce and fresh tomatoes.
Fall Vegetable Curry
1-2 Tbsp. olive or coconut oil
1 cup diced peeled sweet potato (about 1 medium)
1 cup small cauliflower florets
1/2 cup thinly sliced yellow onion
1 (15-ounce) can chickpeas (garbanzo beans), rinsed and drained
1 sweet bell pepper (I used red), chopped
1 small jalapeno, finely diced
3 cloves garlic, minced
1 Tbsp. fresh ginger, grated
1 tsp. Garam Masala
1/2 tsp. turmeric
1/2 tsp. salt
1/2 cup canned coconut milk (can sub vegetable broth as well or add to make it more saucy)
2 medium vine-ripened tomatoes, chopped
1/4 cup chopped fresh cilantro
1/2 cup plain yogurt
Heat oil in a large skillet over medium-high heat. Add sweet potato and saute about 3-4 minutes. Add onion, cauliflower and cook another 2 minutes or so. Add chick peas, pepper, jalapeno, garlic, ginger,Garam Masala, turmeric and salt and saute about 30 seconds. Add coconut milk, cover with lid, reduce heat and simmer for about 10 minutes, or until vegetables are tender.
Meanwhile, finely chop cilantro and stir it together with the yogurt and a pinch of salt. Alternately you can blend it together in a small food processor.
Once vegetables are tender, remove from heat and add the fresh tomatoes. Garnish individual portions with cilantro-yogurt sauce. Serve warm with Thai Coconut Rice, Naan bread or cous cous.
SOURCE: Adapted from Cooking Light
This curry is similar to this other Bean Curry on the blog in that it uses Garam Masala spice and turmeric. However, I've kicked up the spiciness with some jalapeno and topped it with a yummy cilantro-yogurt sauce and fresh tomatoes.
Fall Vegetable Curry
1-2 Tbsp. olive or coconut oil
1 cup diced peeled sweet potato (about 1 medium)
1 cup small cauliflower florets
1/2 cup thinly sliced yellow onion
1 (15-ounce) can chickpeas (garbanzo beans), rinsed and drained
1 sweet bell pepper (I used red), chopped
1 small jalapeno, finely diced
3 cloves garlic, minced
1 Tbsp. fresh ginger, grated
1 tsp. Garam Masala
1/2 tsp. turmeric
1/2 tsp. salt
1/2 cup canned coconut milk (can sub vegetable broth as well or add to make it more saucy)
2 medium vine-ripened tomatoes, chopped
1/4 cup chopped fresh cilantro
1/2 cup plain yogurt
Heat oil in a large skillet over medium-high heat. Add sweet potato and saute about 3-4 minutes. Add onion, cauliflower and cook another 2 minutes or so. Add chick peas, pepper, jalapeno, garlic, ginger,Garam Masala, turmeric and salt and saute about 30 seconds. Add coconut milk, cover with lid, reduce heat and simmer for about 10 minutes, or until vegetables are tender.
Meanwhile, finely chop cilantro and stir it together with the yogurt and a pinch of salt. Alternately you can blend it together in a small food processor.
Once vegetables are tender, remove from heat and add the fresh tomatoes. Garnish individual portions with cilantro-yogurt sauce. Serve warm with Thai Coconut Rice, Naan bread or cous cous.
SOURCE: Adapted from Cooking Light
Tuesday, October 16, 2012
Crispy Quinoa Sliders
At first glance atf these, I knew I wanted to make them, but was a little apprehensive. I wasn't sure how my all-of-a-sudden picky eater oldest daughter would handle these and it didn't seem like they would be flavorful enough.
With my oldest daughter I thought I would pull THIS trick and just serve it to her like it was a regular hamburger and not let her on about it. Hmm, that didn't work so much. She looked at it, then looked at me and asked why it was that color. Needless to say, daughter #1 didn't eat it. Daughter #2 needed a little coaxing and distraction, plus some ketchup dipping action, and she ate hers right up. Daughter #3 eats just about anything, so we're good there.
Hubby and I actually really loved these. As it turns out they really are flavorful! Never underestimate the power of simple ingredients. It is really key in this recipe to get the patties nice and golden. It not only helps them stick together, it really adds to the flavor. I love that these patties are so healthful. Lots of protein from the beans and quinoa and some good, healthy (and tasty) fats from the olive oil and avocado. I opted for just the avocado rather than the mayo to top my patties, in keeping with the whole foods idea, but top yours however you desire and enjoy!!
Crispy Quinoa Sliders
2 cups quinoa, cooked in chicken or vegetable stock
1 cup cooked white beans
1/2 cup carrots, diced
1/2 small onion, finely diced
2 garlic cloves, minced
2 eggs
1/2 cup freshly grated Parmesan cheese
1/4 cup panko bread crumbs
1/2 teaspoon salt
1/4 teaspoon pepper
2 Tbsp. olive oil
12 whole wheat slider buns or dinner rolls
2 avocados, mashed
1/2-1 tsp. chipotle powder
Cook quinoa in chicken or vegetable stock, according to package directions.
Mash avocado and add chipotle powder according to your likeness. Set aside.
1 cup cooked white beans
1/2 cup carrots, diced
1/2 small onion, finely diced
2 garlic cloves, minced
2 eggs
1/2 cup freshly grated Parmesan cheese
1/4 cup panko bread crumbs
1/2 teaspoon salt
1/4 teaspoon pepper
2 Tbsp. olive oil
12 whole wheat slider buns or dinner rolls
2 avocados, mashed
1/2-1 tsp. chipotle powder
Cook quinoa in chicken or vegetable stock, according to package directions.
Mash avocado and add chipotle powder according to your likeness. Set aside.
Drizzle about 1 tablespoon of olive oil in a skillet and saute onions and carrots over medium high heat until soft and onions are translucent. Add garlic the last 30 seconds of cooking. Mash beans and add them to the onion mixture. Place mixture into a large bowl, along with the cooked quinoa and allow to cool slightly.
Once mixture is cool, add eggs, cheese, bread crumbs, salt and pepper and olive oil. Either using hands or a wooden spoon, stir together until all ingredients are well-incorporated.
Heat a large skillet over medium-high heat and add a couple drizzles of
olive oil. Once good and hot, make the patties. I found it easiest to use a large scoop, like a muffin scoop, to make the patties and just just scoop it out right into the pan, flattening it out a little bit with the tips of your fingers. Add 5-6 quinoa patties, or however many fit in your pan, and cook until DEEPLY golden
brown and crispy, about 5 minutes. If you cook it any less, patties will be too tender and will begin to crumble. Gently flip and cook 5 minutes more.
Remove and continue with remaining olive oil and patties.
Serve warm on slider or dinner rolls topped with mashed avocado. (Feel free to embellish here. You can add mayo if you like, or my daughter even liked them dipped in ketchup!)
Labels:
Beans n' Legumes,
Quick n' Easy
Monday, October 1, 2012
Creamy White Bean and Chicken Sausage Pasta
I'm so glad it's fall! And can you believe it's already October? That mean's Halloween is just around the corner, cooler weather and lots of holiday cheer for months to come. I absolutely love this time of year. It's my favorite.
One of my most favorite things about fall is the FOOD. I love not only eating but also making warm, comforting food that makes my belly full and happy. The great thing about this dish is that it delivers all that plus it's healthy too (minus the bacon). I'm not usually a leftover person, but I ate this for the next two days after I made it, it was that delicious.
Creamy White Bean and Chicken Sausage Pasta
2 cups whole wheat pasta shells
1/2 small onion, chopped
3 garlic cloves, minced
1 roasted red pepper chopped
1 can (15 oz) cannellini beans
1 Tbsp. butter
1 tablespoon flour
1 can lite coconut milk (or 1 cup full-fat coconut milk plus 1 cup water)
1/2 cup almond milk (not vanilla flavored!)
salt and pepper to taste
1/2 lb. bacon, cooked and crumbled
1/2 lb Chicken Sausage (omit dried apples), cooked and crumbled*
4 cups fresh spinach, coarsely chopped
10-12 fresh basil leaves, chopped
2 large tomatoes, chopped
1/4 cup parmesan cheese
*This dish comes together pretty quickly, but to make even more effective use of your time, make and cook the sausage ahead of time. Keep it warm while you're making the rest of the dish.
Bring a pot of water to a boil and cook pasta according to package directions.
While pasta is cooking, heat a large skillet over medium-low heat. Drizzle a bit of olive oil in the pan and add onions, tossing to coat. Cook for 5-7 minutes, until softened and translucent. Stir in the garlic the last 30 seconds or so, then toss in the red pepper, beans and chicken sausage.
When pasta is done cooking, drain and add to the skillet with the rest of the ingredients. Keep it on low while you make the sauce.
In a small saucepan, melt butter. Whisk in flour. When it starts to bubble, cook for about a minute. Whisk in both milks, then bring the mixture to a boil; stirring constantly. Let simmer about 5 minutes, until it thickens a bit. Taste and season with salt and pepper.
Remove the bean and pasta mixture off the heat and pour in the sauce, tossing to coat. Stir in the bacon and spinach and let sit about 5 minute. The sauce will slightly thicken and get absorbed by the pasta and the spinach will begin to wilt. Toss in the tomatoes and fresh basil at the last minute, right before serving. Garnish with parmesan cheese.
SOURCE: Adapted from How Sweet It Is
One of my most favorite things about fall is the FOOD. I love not only eating but also making warm, comforting food that makes my belly full and happy. The great thing about this dish is that it delivers all that plus it's healthy too (minus the bacon). I'm not usually a leftover person, but I ate this for the next two days after I made it, it was that delicious.
Creamy White Bean and Chicken Sausage Pasta
2 cups whole wheat pasta shells
1/2 small onion, chopped
3 garlic cloves, minced
1 roasted red pepper chopped
1 can (15 oz) cannellini beans
1 Tbsp. butter
1 tablespoon flour
1 can lite coconut milk (or 1 cup full-fat coconut milk plus 1 cup water)
1/2 cup almond milk (not vanilla flavored!)
salt and pepper to taste
1/2 lb. bacon, cooked and crumbled
1/2 lb Chicken Sausage (omit dried apples), cooked and crumbled*
4 cups fresh spinach, coarsely chopped
10-12 fresh basil leaves, chopped
2 large tomatoes, chopped
1/4 cup parmesan cheese
*This dish comes together pretty quickly, but to make even more effective use of your time, make and cook the sausage ahead of time. Keep it warm while you're making the rest of the dish.
Bring a pot of water to a boil and cook pasta according to package directions.
While pasta is cooking, heat a large skillet over medium-low heat. Drizzle a bit of olive oil in the pan and add onions, tossing to coat. Cook for 5-7 minutes, until softened and translucent. Stir in the garlic the last 30 seconds or so, then toss in the red pepper, beans and chicken sausage.
When pasta is done cooking, drain and add to the skillet with the rest of the ingredients. Keep it on low while you make the sauce.
In a small saucepan, melt butter. Whisk in flour. When it starts to bubble, cook for about a minute. Whisk in both milks, then bring the mixture to a boil; stirring constantly. Let simmer about 5 minutes, until it thickens a bit. Taste and season with salt and pepper.
Remove the bean and pasta mixture off the heat and pour in the sauce, tossing to coat. Stir in the bacon and spinach and let sit about 5 minute. The sauce will slightly thicken and get absorbed by the pasta and the spinach will begin to wilt. Toss in the tomatoes and fresh basil at the last minute, right before serving. Garnish with parmesan cheese.
SOURCE: Adapted from How Sweet It Is
Labels:
Beans n' Legumes,
Chicken,
Coconut,
main dishes,
Quick n' Easy,
Tomatoes
Monday, September 17, 2012
Split Pea Soup with Curried Brown Butter
So, just as I was hanging on to summer with my last post, I'm stepping into fall with this one! I just love soups in the fall. Not only are they a vehicle for an incredible amount of nutrition, they just warm you body and soul!
I know it's not technically fall yet and the weather is still reaching the mid 80's, so I take chose the coolest day of the week last week (85 I think) to make this soup. I was kind of holding my breath because I had no idea the kind of response I would get from my girls-it's green and kind of thick and maybe looks like something Shrek would eat (according to my kids anyway). Well, actually getting them to take the first bite was the hardest because they actually loved it! I was kind of in shock-not that it wasn't delish though, just that they ate it.
This is an absolutely delicious rendition of the simple split pea soup I ate as a child. Cooking the veggies in coconut oil really adds depth of flavor and gives it just a hint of coconut-divine! You won't be sorry about the curried brown butter either-I mean who doesn't love brown butter? And the curry is the perfect spice for the peas.
I served the soup up with a sourdough baguette, but just about any other artisan loaf would be delicious as well.
Split Pea Soup
2 Tbsp. unsalted butter, ghee, or extra-virgin coconut oil
1/2 yellow onion, chopped
1 cup carrot, peeled and chopped
3 cloves garlic, minced
1/2 teaspoon red pepper flakes (optional)
5 1/2 cups vegetable or chicken stock
1 1/2 cups green lentils or green split peas, picked over and rinsed
1/2 cup coconut milk
Curried Brown Butter
3 Tbsp. unsalted butter
1 tablespoon curry powder
Combine the 2 tablespoons coconut oil, onion, carrot, garlic, and red pepper flakes in a large soup pot over medium heat, stirring regularly, until the onions soften, a couple minutes. Add the vegetable broth and lentils and simmer, covered, until the lentils are tender. This usually takes 20 to 30 minutes, but can take as long as 50 minutes.
In the meantime, warm the 3 tablespoons butter in a small saucepan over medium heat and let it brown. When it starts to smell nutty and fragrant, stir in the curry powder and sauté until the spices are fragrant, less than a minute.
When the lentils are finished cooking, remove from the heat, stir in the coconut milk and 1/4 teaspoon of salt, and puree with an immersion blender. You can leave the soup a bit chunky if you like, or puree until it is perfectly smooth.
Stir in half of the curried butter, taste, and add more salt, if needed. Serve drizzled with the remaining curried butter.
SOURCE: Adapted from 101 Cookbooks, originally from Heidi Swanson's Super Natural Every Day.
I know it's not technically fall yet and the weather is still reaching the mid 80's, so I take chose the coolest day of the week last week (85 I think) to make this soup. I was kind of holding my breath because I had no idea the kind of response I would get from my girls-it's green and kind of thick and maybe looks like something Shrek would eat (according to my kids anyway). Well, actually getting them to take the first bite was the hardest because they actually loved it! I was kind of in shock-not that it wasn't delish though, just that they ate it.
This is an absolutely delicious rendition of the simple split pea soup I ate as a child. Cooking the veggies in coconut oil really adds depth of flavor and gives it just a hint of coconut-divine! You won't be sorry about the curried brown butter either-I mean who doesn't love brown butter? And the curry is the perfect spice for the peas.
I served the soup up with a sourdough baguette, but just about any other artisan loaf would be delicious as well.
Split Pea Soup
2 Tbsp. unsalted butter, ghee, or extra-virgin coconut oil
1/2 yellow onion, chopped
1 cup carrot, peeled and chopped
3 cloves garlic, minced
1/2 teaspoon red pepper flakes (optional)
5 1/2 cups vegetable or chicken stock
1 1/2 cups green lentils or green split peas, picked over and rinsed
1/2 cup coconut milk
Curried Brown Butter
3 Tbsp. unsalted butter
1 tablespoon curry powder
Combine the 2 tablespoons coconut oil, onion, carrot, garlic, and red pepper flakes in a large soup pot over medium heat, stirring regularly, until the onions soften, a couple minutes. Add the vegetable broth and lentils and simmer, covered, until the lentils are tender. This usually takes 20 to 30 minutes, but can take as long as 50 minutes.
In the meantime, warm the 3 tablespoons butter in a small saucepan over medium heat and let it brown. When it starts to smell nutty and fragrant, stir in the curry powder and sauté until the spices are fragrant, less than a minute.
When the lentils are finished cooking, remove from the heat, stir in the coconut milk and 1/4 teaspoon of salt, and puree with an immersion blender. You can leave the soup a bit chunky if you like, or puree until it is perfectly smooth.
Stir in half of the curried butter, taste, and add more salt, if needed. Serve drizzled with the remaining curried butter.
SOURCE: Adapted from 101 Cookbooks, originally from Heidi Swanson's Super Natural Every Day.
Labels:
Beans n' Legumes,
Figure Friendly,
main dishes,
Meatless,
Quick n' Easy,
Soups
Tuesday, July 31, 2012
Double Bean Burgers with Avocado-Basil Cream
Haha, I'm so proud of myself for pulling off this meal with my kids. I hijacked their normal burger and replaced it with this delicious and flavorful double bean burger and they weren't even the wiser! My oldest daughter even told me how yummy it was and ate most of it as well.
I had to give my husband the "ojo" across the table to make sure he didn't spill the beans about the beans in the burgers. Cause I know if my girls got one wiff of the fact that there were beans on those buns instead of a "real" burger, they for sure would have turned up their noses at it and not eaten another bite. Luckily the man caught my drift and we were safe.
I have actually been wanting to make bean burgers forever. I've bookmarked many many recipes, only to delete them thinking it would be a waste of my time because no one would eat them but me. I finally got up the nerve when I saw this recipe. They looked yummy and flavorful, but to tell you the truth the basil avocado cream totally SOLD me. Anything with basil and I SWOON.
Truly this does make a delicious and light burger and it's a great addition to any repertoire of meatless meals.
Double Bean Burgers
1 (15 oz) can black beans, drained and rinsed
1 (15 oz) can cannellini beans, drained and rinsed
1 large egg
1/2 cup panko bread crumbs
3 tablespoons olive oil, divided
3 tablespoons fresh cilantro, chopped
4 garlic cloves, minced or pressed
1/2 teaspoon smoked paprika
1/2 teaspoon onion powder
1/4 teaspoon salt
1/4 teaspoon pepper
6 whole grain buns, toasted if desired
In a large bowl, mash beans with a potato masher or fork. Add in the rest of the ingredients, using only 1 tablespoon of the oil, and mix thoroughly to combine, bringing it together with your hands if needed. Separate the beans into 6 equal sections and form patties.
Heat a large skillet over medium-high heat and add 1 tablespoon olive oil (or as much as you need). Add burgers and cook on each side until golden, about 5 minutes. Remove and serve with avocado cream on whole wheat buns.
Avocado-Basil Cream
1 avocado
1/3 cup mayonnaise
10 basil leaves, chopped
pinch of salt and pepper
Mash the avocado, then mix with the mayonnaise to combine. Stir in the basil leaves and salt and pepper, to taste. Serve over bean burgers.
SOURCE: Slightly adapted from How Sweet It Is
Wednesday, June 6, 2012
Homemade Honey Roasted Peanut Butter
Make my own peanut butter???? I think I can die a happy woman now! Next to chocolate, peanut butter is probably my second favorite food. Ever! I could eat it every day. I used to when I was a kid going to school and I still do more often than not.
With a bunch of kids running around here peanut butter is pretty much a staple in our house. We could not live without it. Although I'm usually not a food label snob, when it comes to peanut butter, I subscribe to the school of thought that "choosy mom's choose JIF." I have very rarely bought another brand. I'm oh so loyal.
So, why make homemade peanut butter if I love JIF so much? I have this thing for making everything from scratch that I possible can. Over the past few years we have been trying to get away from processed foods as much as we can. It is much healthier, gives the consumer more control over what goes in the food and it's down right satisfying knowing that you can provide for your family like that.
I've made peanut butter once or twice before and haven't been overly thrilled with the results, so I stuck with the brand name stuff. But, I was pumped about it again when I read about making honey roasted peanut butter, which I have tried before and practically fell flat on my face it was so good. I think I'm ready now to replace that jar of JIF in my cupboard for good with the homemade stuff...and that's saying a lot!
This is a super simple recipe and you don't even need a high-powered blender to make it. You can use a regular blender or a food processor with a chopper blade as well.
Homemade Honey Roasted Peanut Butter
1 lb. raw peanuts* (a scant 3 cups)
1-2 Tbsp. honey
1/2 tsp. salt
2-3 Tbsp. coconut oil
Preheat oven to 350 degrees F.
In a medium bowl, combine peanuts, honey and salt. Spread out on a cookie sheet and bake for about 15-20 minutes, stirring half-way through. Remove from oven and cool slightly.
Place peanuts in a blender or food processor with a chopping blade and blend for about a minute. Scrape sides down and blend for another minute or so.
Scrape sides again and add coconut oil, 1 tablespoon at at time and blend until desired consistency is reached. Check flavor and adjust honey and salt as necessary.
Store in an airtight container for about 2 months in the fridge.
*According to Alton Brown, Spanish peanuts are good for making peanut butter because they have a higher oil content, so that is what I've used. You can choose to leave the skins on or off. I've left them on.
SOURCE: A Sweet Pea Chef
Labels:
Beans n' Legumes
Thursday, May 10, 2012
Baked Chicken and Roasted Red Pepper Taquitos
I guess I still have Cinco de Mayo on the brain from last week because I keep thinking of Mexican-style meals to make. It's a good thing though, because we love Mexican food here and I don't make it enough!
I am always looking for quick and healthy meals that a) don't involve a lot of dairy and b) don't involve a lot of meat. I saw a version a of these taquitos a while ago and knew with some tweaking they would be a new family favorite. I love the combination of beans, corn and chicken with Mexican flavors. The roasted red pepper was a great addition that lends a unique flavor and the spinach and cilantro not only pump up the health factor, they add great color and eye appeal! If you don't have roasted red pepper, you can roast your own (tip below) or just use fresh and saute it with the onion.
You'll want to add these to your dinner rotation soon! Tasty and quick to prepare, they make a perfect weeknight meal.
Baked Chicken and Roasted Red Pepper Taquitos
olive oil
1/2 small onion, finely diced
1 clove garlic, minced
2 tsp. cumin
pinch cayenne pepper (optional, especially if you have little mouths to feed)
salt and pepper, to taste
1 cup chicken, cooked and chopped into bite-sized pieces
1 can black beans, drained and rinsed
1 cup frozen corn, un-thawed
*1 roasted red pepper, small-diced
1/2 cup chicken broth
2 cups fresh spinach, washed and chopped
1/4 cilantro, chopped
1 cup shredded cheese (Monterrey or Pepper Jack, Mexican blend, etc.)
12 8-inch whole wheat tortillas
In a large skillet, heat a good drizzle of olive oil (about a tablespoon). Add onion and saute over medium heat until soft and translucent. Add garlic, cumin, cayenne, salt and pepper and saute about 30 seconds. Add the rest of the ingredients, except the cheese, and stir to coat evenly with the spices. Cook until the chicken broth has just about evaporated completely. Turn off the heat, but keep pan on burner and stir in the spinach and cheese. The residual head from the burner with wilt the spinach and melt the cheese. Add cilantro just before filling taquitos.
Preheat oven to 425 degrees F. Wrap tortillas in a clean kitchen towel and warm them in the microwave for about 30-60 seconds. Spray a large baking sheet, such as a cookie sheet, with cooking spray. Lay one tortilla at a time on a large plate. Scoop about 1/4-1/3 cup filling across the bottom third of the tortilla. Roll it up, leaving the ends open. Place on cookie sheet, seam side down. Repeat with remaining filling and tortillas.
Once all the taquitos have been assembled, brush the tops with olive oil and bake for about 10-15 minutes or until golden brown. (This would also work as a great freezer meal. You could stop before brushing the tops with olive oil, cover the cooking sheet with plastic wrap and freeze. Once frozen, remove taquitos from cookie sheet and place in a zip-top freezer bag. When you're ready to bake, remove desired amount of taquitos, brush with olive oil and bake about 5 minutes longer.)
Serve warm with desired garnished: fresh lime, sour cream, guacamole, salsa
*To make your own roasted red peppers, cut fresh red peppers in half removing stem and seeds, and place them on a cookie sheet. Place under the broiler until they are mostly black and charred. Remove from oven and immediately place in a bowl with a lid or a paper bag. Once they are cooled, remove as much of the skin as you can (sometimes it's tricky and it doesn't all come off, but it's not a big deal). Use immediately, refrigerate for 3-5 days or freeze. If you plan to freeze them, I suggest you portion them into 1-2 peppers pr baggie. I usually place each pepper in a little sandwich bag, then place all the sandwich bags into a larger zip-top freezer bag so they are all together.
SOURCE: Adapted from Savour the Senses
I am always looking for quick and healthy meals that a) don't involve a lot of dairy and b) don't involve a lot of meat. I saw a version a of these taquitos a while ago and knew with some tweaking they would be a new family favorite. I love the combination of beans, corn and chicken with Mexican flavors. The roasted red pepper was a great addition that lends a unique flavor and the spinach and cilantro not only pump up the health factor, they add great color and eye appeal! If you don't have roasted red pepper, you can roast your own (tip below) or just use fresh and saute it with the onion.
You'll want to add these to your dinner rotation soon! Tasty and quick to prepare, they make a perfect weeknight meal.
Baked Chicken and Roasted Red Pepper Taquitos
olive oil
1/2 small onion, finely diced
1 clove garlic, minced
2 tsp. cumin
pinch cayenne pepper (optional, especially if you have little mouths to feed)
salt and pepper, to taste
1 cup chicken, cooked and chopped into bite-sized pieces
1 can black beans, drained and rinsed
1 cup frozen corn, un-thawed
*1 roasted red pepper, small-diced
1/2 cup chicken broth
2 cups fresh spinach, washed and chopped
1/4 cilantro, chopped
1 cup shredded cheese (Monterrey or Pepper Jack, Mexican blend, etc.)
12 8-inch whole wheat tortillas
In a large skillet, heat a good drizzle of olive oil (about a tablespoon). Add onion and saute over medium heat until soft and translucent. Add garlic, cumin, cayenne, salt and pepper and saute about 30 seconds. Add the rest of the ingredients, except the cheese, and stir to coat evenly with the spices. Cook until the chicken broth has just about evaporated completely. Turn off the heat, but keep pan on burner and stir in the spinach and cheese. The residual head from the burner with wilt the spinach and melt the cheese. Add cilantro just before filling taquitos.
Preheat oven to 425 degrees F. Wrap tortillas in a clean kitchen towel and warm them in the microwave for about 30-60 seconds. Spray a large baking sheet, such as a cookie sheet, with cooking spray. Lay one tortilla at a time on a large plate. Scoop about 1/4-1/3 cup filling across the bottom third of the tortilla. Roll it up, leaving the ends open. Place on cookie sheet, seam side down. Repeat with remaining filling and tortillas.
Once all the taquitos have been assembled, brush the tops with olive oil and bake for about 10-15 minutes or until golden brown. (This would also work as a great freezer meal. You could stop before brushing the tops with olive oil, cover the cooking sheet with plastic wrap and freeze. Once frozen, remove taquitos from cookie sheet and place in a zip-top freezer bag. When you're ready to bake, remove desired amount of taquitos, brush with olive oil and bake about 5 minutes longer.)
Serve warm with desired garnished: fresh lime, sour cream, guacamole, salsa
*To make your own roasted red peppers, cut fresh red peppers in half removing stem and seeds, and place them on a cookie sheet. Place under the broiler until they are mostly black and charred. Remove from oven and immediately place in a bowl with a lid or a paper bag. Once they are cooled, remove as much of the skin as you can (sometimes it's tricky and it doesn't all come off, but it's not a big deal). Use immediately, refrigerate for 3-5 days or freeze. If you plan to freeze them, I suggest you portion them into 1-2 peppers pr baggie. I usually place each pepper in a little sandwich bag, then place all the sandwich bags into a larger zip-top freezer bag so they are all together.
SOURCE: Adapted from Savour the Senses
Labels:
Beans n' Legumes,
Chicken,
Figure Friendly,
Mexican,
Quick n' Easy,
Tomatoes
Monday, April 4, 2011
Chipotle Bean Tostadas
Have you ever made a fresh pot of beans? There is nothing like them and they don't even compare to what you buy in a can at the store. They taste so fresh and just free of "stuff." If you've never made your own beans, you should at least try once, it's about the easiest thing you can do. Just add water and boil. You can buy uncooked beans in 1-2 pound packages at your local market but they are not usually the freshest and take longer to cook, though they can still turn out a good product as long as you cook it long enough. I like to buy my beans at my local WinCo where they have a nice selection of bulk foods that tend to be more fresh since they are stocked more frequently.
I grew up eating tostadas a lot so this concept was nothing new to me, but I was used to topping them a little differently. I think these more closely resemble an authentic Mexican Tostada and boy are they good! Topped with beans, tomatoes, cilantro, radishes and queso fresco, they are pretty simple, but feel free to add salsa, Crema Mexicana (or sour cream), lettuce, guacamole, olives, you name it! You can buy pre-made tostada shells, but frying them up at home only takes a little time and effort.
Chipotle Bean Tostadas
For the beans
1 lb. dry pinto beans (about 2 cups)
2 quarts of water
salt
Rinse beans and remove any bad beans, pieces of dirt or stones.
Put the beans in a pot and cover with water and bring to a boil. Lower heat and simmer, covered for about 2-3 hours (time will vary depending on the freshness of the beans). The beans are done when they are soft and skins are just beginning to break open.
Strain beans of cooking water and return them to the pot. Add about 1/4 cup (or more) water and either mash with a potato masher or use a stick blender to puree the beans. Add salt to taste.
For the tostada shells
1/2 cup high flash-point vegetable oil, such as grapeseed oil, peanut oil, or canola oil
1 dozen corn tortillas
To prepare the tortillas, heat the oven to 200°F. Line a baking pan with paper towels and place next to the stove. Heat 5 Tbsp of oil in a small skillet on medium high heat, until the bubbles form immediately when you insert the edge of a tortilla in it. Using tongs, place a tortilla in the hot oil and let cook until golden brown on both sides, about 30 seconds per side. You can use a metal spatula to flatten down the tortilla while cooking.
Use tongs to lift the cooked tortilla out of the pan, allowing the excess oil to drip off of it, back into the pan. Place the cooked tortilla on the paper towels to absorb more of the oil. Sprinkle a little salt onto each warm tortilla. Do each tortilla one at a time this way. As you fill up a baking pan, put the pan in the oven to keep the tortillas warm.
Add more oil as needed. Carefully monitor the oil temperature. Don't let it get too hot, or the tortillas will burn, or too cool - they won't fry up crisp enough.
For the Tostadas
4 cups smashed pinto beans
4 tsp. Chipotle Tabasco Sauce (not regular)
1 tsp. cumin
1 dozen tostada shells
Cotija, Queso Fresco or Feta cheese
finely diced fresh tomato
thinly sliced red radishes
cilantro leaves, roughly chopped
Just after finishing cooking the beans and while they are still warm, add the chipotle tobasco sauce and cumin. Adjust seasonings if necessary. If beans are too thick, add more water, if they are too thin, cook them down a bit.
To assemble the tostadas, spread 3-4 Tbsp. of the beans on each tostada shell. Either top with tomatoes, cilantro, radishes and cheese and serve or put the topping in separate bowls on the table and let each person top their tostada how they wish. Garnish with additional toppings as desired.
SOURCE:Adapted from Simply Recipes
Linked to...
Recipe Swap Thursday @ Prairie Story
It's A Keeper Thursday @ It's A Keeper
Seasonal Sunday @ Real Sustenance
Subscribe to:
Posts (Atom)