Showing posts with label Brownies. Show all posts

Friday, February 7, 2014

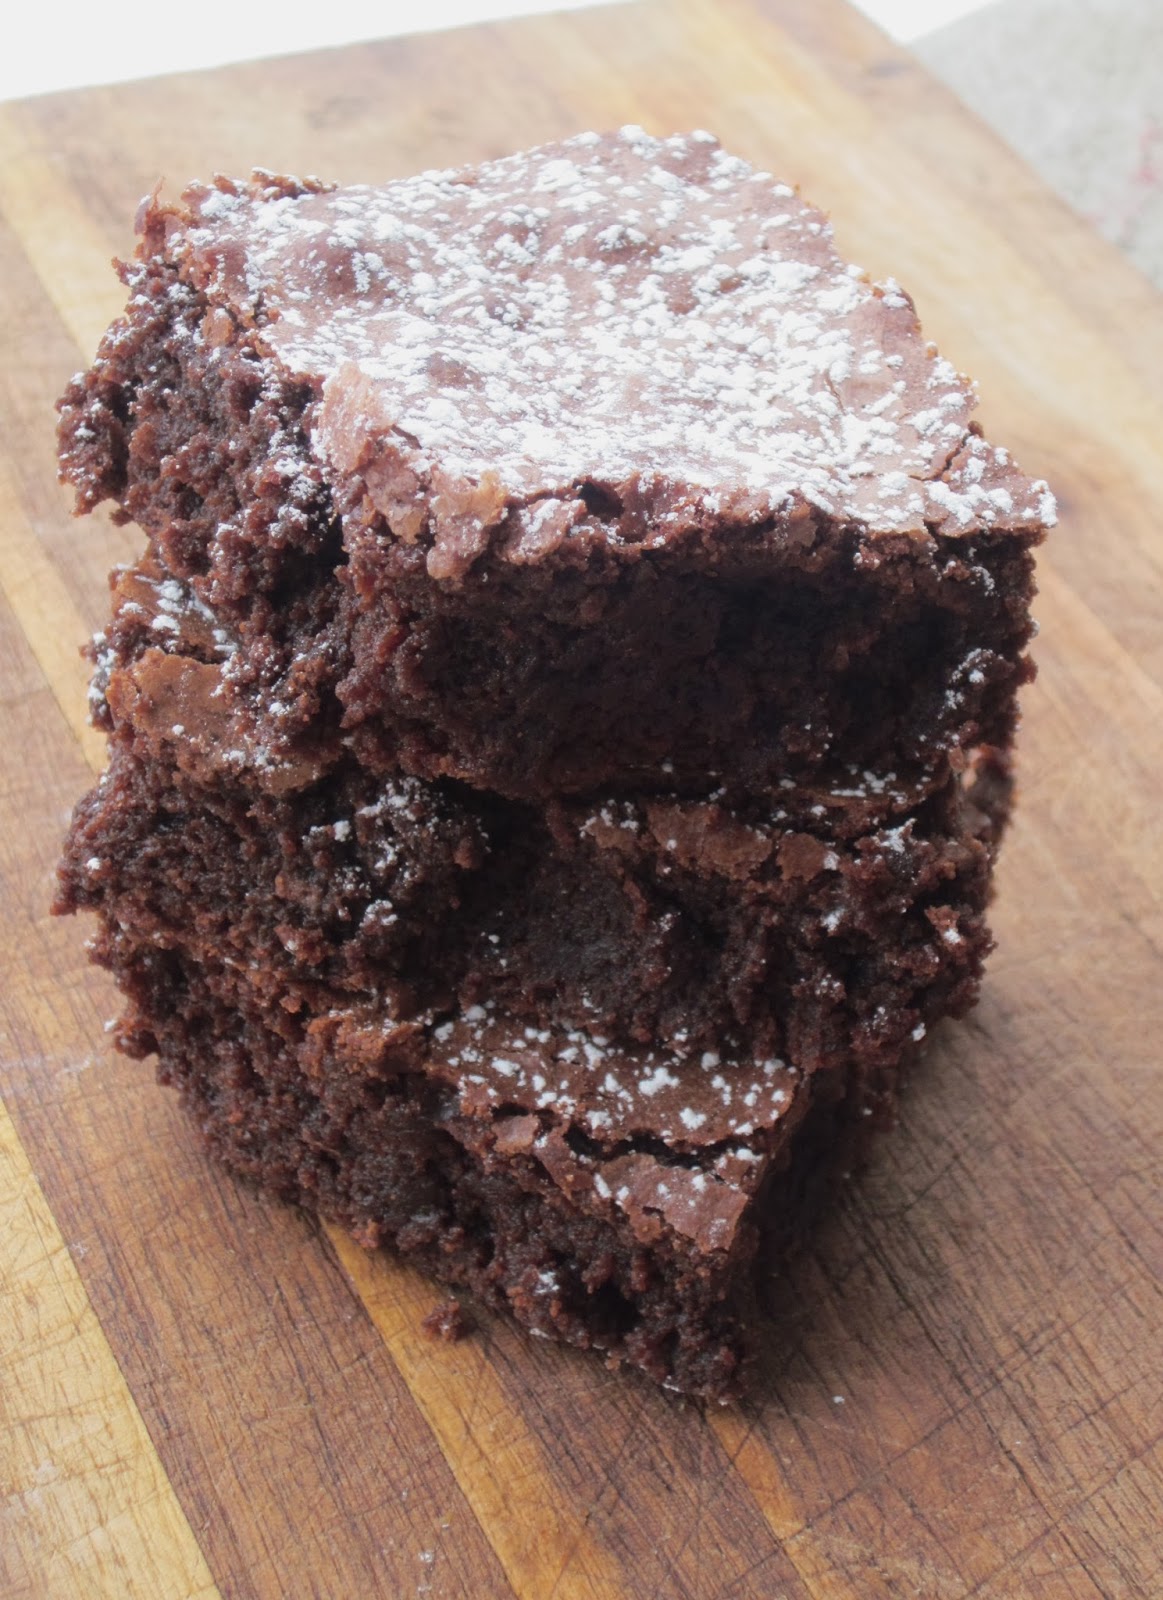
One Bowl Brownies (AKA: The Baked Brownie)


For years, my go-to treat, when I needed a chocolate fix or even just a sweet fix, was brownies, and not the scratch kind.  I used brownie box mixes forever, mostly because of convenience, but also, I was hard-pressed to find a homemade recipe that was as thick and fudgey and ooey-gooey as the box mix kind. By the way, if you're more of a cake-like brownie lover, this may not be the brownie for you. 

I was SOOOO excited when I found this recipe a few years.  Not only did they fit my high expectations for a homemade brownie, they were so easy and I only had to dirty ONE bowl.  SCORE! If you've never checked out the Baked Cookbook you should.  It has some amazing dessert recipes that are a little off the cuff.  Amazing.

So, if you're in the mood for a quick treat this weekend, whip these up in your favorite mixing bowl and just try and wait until they are cool enough to dig in...I dare ya.


The Baked Brownie
3/4 cup flour
1/2 tsp. salt
5.5 oz dark chocolate, chopped (I like to use Trader Joe's Pound Plus bars)
1/2 cup butter, cut into chunks
3/4 cup granulated sugar
1/4 cup brown sugar
1 Tbsp. cocoa powder
1 tsp. vanilla
*3 eggs


Preheat oven to 350 degrees F.  Grease an 8 or 9 inch baking pan and set aside.

In a microwave-safe bowl, place butter and chopped dark chocolate.  Microwave on 50% power, 30 seconds at a time, stirring after each interval, until smooth.

Add sugars, cocoa powder and vanilla and whisk to combine.  Make sure mixture isn't too hot, then add eggs and whisk to combine again.

Sift in flour and salt.  Stir until just combined.  Pour batter into prepared baking pan and bake 28-30 minutes, rotating pan half way through baking time.  Brownies are done when toothpick inserted in center comes out just the tiniest bit sticky.

Place brownies on a wire rack until completely cooled.


*If doubling recipe for a 9x13-inch pan, only use 5 eggs.


SOURCE: Slightly adapted from Baked: New Frontiers in Baking, by Matt Lewis & Renato Poliafito  

Monday, September 24, 2012

Mug Brownie (Vegan)


You're either going to love me or hate me for this post. Love me because it's soooooo delicious, so good and so quick. Hate me because it's addicting, and not very high up there on the healthy factor.  But hey, you can't be 100% all the time.  A girl's gotta have her chocolate once in a while!

Brownie in a mug is the perfect treat for one (or 2) when you've got an intense craving to satisfy, or you don't want to make very much.   I've tried a few "mug" recipes and I really absolutely love this one.  The brownie comes out nice and moist and has a deep chocolate flavor.  NO cake-like brownies here!

This is vegan only because there is no dairy or eggs, but don't let that fool you, it has one of the best flavors in a brownie that I have tasted!

Mug Brownie
 2 Tbsp. coconut oil
4 Tbsp. brown sugar
pinch salt
splash of vanilla
2 Tbsp. almond milk
2 Tbsp. unsweetened cocoa powder
4 Tbsp. flour
(Optional: tiny splash rum extract OR tiny pinch cayenne pepper and cinnamon)

Melt coconut oil in mug of choice.  You only need to microwave it for about 10 seconds or so, it melts pretty easily. Add sugar, salt and vanilla and stir well.  Add milk; stir.  (You don't want to add the milk with the coconut oil because it will harden back up since, so add it after the sugar is mixed in.) Add cocoa powder and flour and stir well.  Microwave for about 45-70 seconds, or until cooked.  Time will depend on your microwave and your mug.  I used 2 different mugs; one was done at 45 seconds, the other, closer to 75.  Check as you go, starting at about 45 seconds. Enjoy!


SOURCE: Adapted from Industrious Justice

Friday, June 1, 2012

S'mores Brownies (Take Two)

Man, we haven't even hit the first day of summer and I'm already craving s'mores. S'mores are one of my most favorite summer treats and I love eating them all summer long. I love that you can throw them in the microwave if you want to do it quick, put them over the grill when you don't have a camp fire around or even use a kitchen torch (which I have done more often than I care to admit!).

Last summer I made s'mores all sorts of ways to curb that craving: s'mores pancakes, s'mores cake in a jar, s'mores pops, and s'mores ice cream. Even before that I made these delectable s'mores bars, as well as s'mores cookies and a different s'mores brownie. Oh, and the s'mores addiction doesn't end there. Thanks to pinterest, I have yet to try the s'mores truffles, turnovers, rice crispie treats, pudding, cupcakes... and oh my gosh, does it ever end? I don't think I'll ever get tired of those things.

The other day I was going to make s'mores with my girls and it ended up not happening, but I still wanted them! I opened my pantry to find a box of brownies, some mini marshmallows, some milk chocolate chips and graham crackers and the wheels in my head started turning. Luckily, thanks to google, I didn't have to reinvent the wheel and found a recipe rather quickly that embodied what I had envisioned.

These brownies were exactly what I had in mind and they were absolutely perfect. I love the crumbly buttery graham cracker crust on the bottom, and the milk chocolate on top of the brownies. When it comes to me and chocolate, it's usually the darker the better. But, when it comes to s'mores, you HAVE to use milk chocolate to get the right taste. You just have to ok?


S'mores Brownies
For the crust:
7 Tablespoons unsalted butter, melted
1 1/2 cups graham cracker crumbs (8 or 9 whole graham crackers)
2 Tbsp. granulated sugar
pinch of salt

For the brownies:
Your favorite recipe or box mix to fit an 8x8 or 9x9-inch pan

For the topping:
1 cup milk chocolate chips
2 cups mini marshmallows
about 1/4 cup of graham cracker crumbs (1 whole cracker, crumbled)


Preheat oven to 350 degrees F. Line 8x8-inch pan with foil so it hangs over the edges a bit. Spray with nonstick spray.

Prepare crust: In a medium bowl, mix butter with crumbs, sugar and salt. Press crumb mixture into the bottom of the pan. Bake until golden; about 10 minutes.

Prepare and bake brownies according to directions.

Remove pan from oven. Turn up heat on the oven to broil. Sprinkle the chocolate chips over the brownie, then top with the marshmallows. Sprinkle graham cracker crumbs on top.

Place pan back into the oven. Toast under the broiler until golden- KEEP AN EYE ON IT- it can go from golden to burned in a matter of seconds. 1 to 2 minutes under the broiler should be plenty.

Cool for a few minutes, then use foil to remove brownies from the pan and set on a cutting board. Carefully pull the sides of the foil away from the marshmallows and brownies. Cut brownies into squares. Helpful tip: Use a large, WET & SHARP KNIFE to cut the brownies. Slice through the brownie, then clean the knife and slice through again with a clean, wet knife. Keep cleaning off the knife after each cut for the cleanest cuts.


SOURCE: Slightly adapted from RecipeGirl

Saturday, August 27, 2011

Peanut Butter Pretzel Brownies


You're gonna want to unbutton your pants right now, or go slip on something with an elastic waistband. I'm telling you, these babies are RICH and slightly decadent! What a perfect combination though, chocolate, peanut butter and pretzels. It reminds me of one of my favorite Ben and Jerry's Ice Cream flavors: chubby hubby. My husband and I discovered it on our honeymoon and it became our guilty pleasure for a while.

I love the salty sweet combination and these brownies have layers of it. First, the pretzel layer on the bottom actually lends a little of both and adds a great crunchy texture. The brownie layer is obviously nice and sweet, and dense if you make your brownies like me. I love a good dense brownie. To top it off, the peanut butter frosting is OUT OF THIS WORLD! I've used it on brownies and cupcakes before and practically can't keep my fingers out of it. It's got the sweet and salty thing going on too. Just can't resist that!

You'll want to take these to a potluck or family party to keep you from eating half the pan. Maybe a few minutes on the treadmill wouldn't hurt either. Enjoy!

Peanut Butter Pretzel Brownies

For the pretzel layer:
2 cups pretzel, crushed (but not to a powder)
1/2 cup butter, melted
1 Tbsp. sugar

For the brownie layer:
1 box of your favorite brownie mix (9x13 size), or your favorite brownie recipe

For the peanut butter frosting:
1 cup powdered sugar
1/2 cup creamy peanut butter
2 1/2 Tbsp. unsalted butter, at room temperature
1/2 tsp. vanilla extract
1/4 tsp. salt
3 Tbsp. heavy cream

Preheat the oven to 350 degrees F. While oven is preheating, put the butter in a 9x13 cake pan to melt. Crush the pretzels. When butter is completely melted, stir in the sugar then add the pretzel pieces. Stir the pretzels around until they are completely coated in the butter/sugar mixture, then spread them evenly across the bottom of the pan. Put the pan back in the oven and bake 10 minutes. Remove and cool.

Prepare brownies (enough for a 9x13 pan) according to directions and pour over cooled pretzels. (I didn't wait quite long enough for the pretzels to cool, so they were still a little warm when I poured the brownies on, thus resulting in the pretzels sinking into the brownies a little more than I had wished.) Bake brownies according to directions, then cool completely!

To prepare the frosting, put the powdered sugar, peanut butter, butter, vanilla, and salt in the bowl of an electric mixer fitted with a paddle attachment. Mix on medium-low speed until creamy, scraping down the bowl with a rubber spatula as you work. Add the cream and beat on high speed until the mixture is light and smooth; a minute or two. Do not whip or the cream will start to separate.

Frost brownies and cover. Refrigerate for an hour two before serving.

SOURCE: Frosting from Ina Garten


Linked to...
Sweet Indulgences Sunday @ A Well-Seasoned Life
Sweets For A Saturday @ Sweet As Sugar Cookies

Thursday, February 24, 2011

Decadent Brownie Pie


This decadent dessert was actually part of our Valentine's Day celebrations, which we had about 5 days late because I was sick. When I was thinking what kind of dessert I wanted to make, I remembered back a couple of years ago when my husband bought me this flourless chocolate cake for my birthday. It cost a whopping $40 but it was every bit worth it. It was so delicious. I wanted to try something similar this year but couldn't find a recipe for a flourless chocolate cake I was happy with. I decided to look through all my desserts that I have bookmarked and came across this recipe for a brownie pie. Hello! I totally love brownies, and ganache, well that stuff just leaves me speechless. The recipe was so simple, I was worried it would deliver that intense, dense chocolaty goodness I was hoping for. Thankfully I was wrong.

This brownie pie practically melts in your mouth. If you want to eat it straight up, with out any toppings, I would suggest letting it sit out at room temperature first; and then, maybe even nuke it for 4-5 seconds. If you want to top it, I would HIGHLY suggest something raspberry, be it preserves, sauce, fresh or frozen. The dark chocolate is a perfect match with the raspberry. Other toppings you could try are caramel, ice cream, mints, peanut butter chips, you get my drift.

Decadent Brownie Pie

For the brownie layer:
2/3 cup butter, melted
1 1/4 cups sugar
1/2 cup light corn syrup
2 eggs
1 1/4 cups all-purpose flour
1/2 cup cocoa
1/2 teaspoon salt
3 tablespoons milk

For the ganache:
1 cup heavy whipping cream
12 ounces semisweet chocolate, chopped

In a large bowl, add melted butter, sugar and corn syrup. Whisk to combine. Add eggs, one at a time, beating well after each addition. Combine the flour, cocoa and salt in a separate bowl; gradually add to the butter mixture alternately with milk, beating well after each addition. Spread batter into a greased 10-inch springform pan. Bake at 325° for 35-40 minutes or until a toothpick inserted 1 inch from side of pan comes out clean. Cool on a wire rack.

For the ganache: In a small saucepan, bring cream to a boil. Remove from the heat and pour in chocolate; let sit for 3-4 minutes, then stir until smooth. Set aside about 10 minutes until slightly cool. Pour ganache over brownie layer and refrigerate until ganache is completely set.

Take out of the fridge about 30 minutes before serving and let it sit at room temperature. Garnish as desired.

SOURCE:Let's Dish

Linked to...
Recipe Swap Thursday @ Prairie Story
It's A Keeper Thursday @ It's A Keeper
Sweets For A Saturday @ Sweet As Sugar Cookies
Potluck Sunday @ Mommy's Kitchen

Thursday, January 27, 2011

Coconut Brownies with Creamy Coconut Frosting


I really like brownies, in fact, I used to joke all the time that they were my favorite food group. Years ago, when brownies were one of the few desserts I used to make, I would experiment a lot. I'd throw in chocolate chips, add chocolate frosting, add some orange extract, you get the picture.

I have always liked coconut too, but it wasn't until last year that I started eating it with any frequency. I found this fabulous Thai Coconut Rice and Bean Curry, which both use coconut milk. I also throw shredded coconut in all of my homemade granola that I make usually once or twice a month. Amazingly enough, I've learned recently how good coconut is for you. You can read more about it here if you want.

Coconut and chocolate are an amazing combination, which I absolutely love. I did a little experimenting with this recipe and I really liked the outcome. I did use a box mix, please don't judge, I've had a hard time finding one from scratch that I love enough to give up the box. I used coconut milk to replace most of the oil in the batter and used coconut oil (which is solid at room temp) in place of butter in the frosting. The end result was a moist brownie, although not as dense, with a frosting that was different and delicious and I'd say out-of-this-world, but that's me, and I like coconut.


Coconut Brownies with Creamy Coconut Frosting
For the brownies:
1 box brownie mix
1/2 cup coconut milk
1/4 cup oil
2 eggs

For the frosting:
1/2 cup coconut oil (room temp, not melted)
3-4 cups powdered sugar
1 tsp. vanilla
2-3 Tbsp. coconut milk
1/4 cup shredded coconut
toasted coconut for garnish

Preheat oven to 350 degrees F. Mix all brownie ingredients together and pour batter into a greased 8 or 9-inch baking pan (I used a brownie pan). Bake 30-35 minutes, or until just barely done. (Sometimes I slightly under bake my brownies because I like them really chewy and soft.) Cool completely.

To make frosting, cream coconut oil (you can substitute butter) until creamy. Add powdered sugar and vanilla and 2 Tbsp. of coconut milk. Add more milk/sugar to desired consistency. Add shredded coconut last. Spread on cooled brownies.

To toast shredded coconut, put them in a frying pan on medium heat and toss them gently until they start to brown. Sprinkle over frosted brownies.


Linked to...
Recipe Swap Thursday @ Prairie Story
Sweets For A Saturday @ Sweet As Sugar Cookies
Feed Me, Tweet Me, Follow Me Home @ 21st Century Housewife's Kitchen
Potluck Sunday @ Mommy's Kitchen

Monday, June 21, 2010

Brownie S'mores


When the weekend rolls around, I am always in the mood to bake something fun for dessert. I had actually planned to make somthing different but I thought my girls would enjoy these brownies I spied on Picky Palate the other day. When we were buying the marshmallows, chocolate and graham crackers at the store, my three-year-old asked me if we were going camping because she recognized the ingredients for s'mores. I had to chuckle. This is a yummy treat that will be enjoyed by all!

1 box of your favorite brownie mix
4 1/2 full Graham Crackers
3 1/2 Full size Hershey’s Bars
16 large marshmallows

Preheat oven to 350 degrees F. Prepare brownie mix according to package directions. Spray an 8x8 inch or brownie pan with cooking spray.
Pour half the brownie batter into the pan. Layer graham crackers over brownies followed by Hershey Bars and marshmallows. Pour remaining brownie batter over the marshmallows. Bake for 35-38 minutes or until toothpick inserted in center comes out mostly clean. Cool completely and cut into squares.

SOURCE:Picky Palate

Friday, May 28, 2010

Peanut Butter Cup Trifle


If you're going to be having a gathering for Memorial Day, you should really make this! It is a definite crowd-pleaser and someone might go as far as to lick the bowl clean! It's that good. I made it for a family gathering, not thinking all of it would get eaten. However, once the first serving was dished, it was a mad dash to get it before it was gone. This makes a whole trifle bowl full, perfect for a few more than usual for dessert.

Peanut Butter Cup Trifle
1 (9x13) pan of baked brownies, cut into 1 inch pieces
1 (5.1 ounce) package instant vanilla pudding
3 cups milk
1/2 cup creamy peanut butter
2 tsp vanilla
1 (8 ounce) container thawed Cool Whip, divided
20 peanut butter cups, crumbled (or more if you're using minis)
6-8 peanut butter cups to garnish.

Mix pudding according to package directions. With a whisk or beaters, beat in peanut butter until fully incorporated. Fold in 2 cups cool whip.

Layer in trifle dish 1/2 the brownies, 1/2 the crumbled peanut butter cups, ½ the pudding mixture. Repeat. Top with cool whip and peanut butter cups. Chill at least four hours before serving.


SOURCE:The Girl Who Ate Everything

Linked to...
Potluck Sunday @ Mommy's Kitchen
Sweets For A Saturday @ Sweet As Sugar Cookies
These Chicks Cooked @ This Chicks Cooks

Tuesday, April 13, 2010

Peanut Butter Cookie Dough Brownies


If you're a chocolate and peanut butter lover you have just got to try these! They are totally out of this world. I made them a while back for my extended family and haven't made them since for fear I would eat the whole pan if I did. Well, I found occasion to make these again recently but I didn't have any plans for sharing them-BIG mistake! I kept eating and eating them. Luckily my husband came home during his dinner break the day after I made them and asked if he could take the rest back with him. Whew! That was a close one. I quickly packed the rest up for him and they were outta my hands.

For the brownies:
1 box of your favorite brownie mix (13x9 size)
1/3 cup vegetable oil
1/4 cup water
2 eggs
1 pouch peanut butter cookie mix (1 LB 1.5 OZ)
1/2 cup butter, softened
1 egg

For the Ganache:
12 oz. semi-sweet chocolate chips
1 cup heavy cream
4 Tbsp. unsalted butter

Preheat oven to 350 degrees. Grease bottom of *13x9-inch pan. Make brownie mix as directed on box, using oil, water and 2 eggs. Spread in pan.

Make cookie mix as directed on pouch, using butter and 1 egg. Drop by rounded tablespoonfuls evenly onto brownie batter; press down lightly.

Bake 35 to 40 minutes or until toothpick inserted in center come out ALMOST clean. Cool.

To make ganache, pour chocolate chips into a medium sized mixing bowl. Heat cream and butter in small saucepan until just a boil. Pour over chocolate chips and let it sit for about 5 minutes. Stir until the cream and chocolate are completely incorporated and ganache is smooth and glossy. Pour over brownies and cool completely.


*I always cook my brownies in a smaller pan because I like them thick. I used an 8x11.5-inch pan and had to bake them for about an hour, but I was checking every 5-7 minutes after they had been baking 40 minutes. I also halved the ganache recipe but I think I would even go for a little more and do 2/3 the recipe next time. If you use a dark, non-stick pan, decrease the oven temperature to 325 degrees.

SOURCE: Adapted from Betty Crocker

Wednesday, March 24, 2010

BYU Mint Brownies


This post is dedicated to my siblings and their spouses who all attended BYU (even though I didn't). (Oh, and to my youngest sibling, you're included even though you haven't gone YET and don't have a spouse YET.) I'm sure they know how legendary this BYU Creamery treat is and while I don't, I can still vouch for how delicious they are. I don't usually make brownies from scratch because, let's be honest, you really can't beat brownies from a box-most of the time. However, this just might become my go-to brownie recipe. They are absolutely wonderful. They are rich and chocolaty without being overly sweet. I love having both the mint and the chocolate frosting, but you can certainly do just one or the other. Make sure you have glass of milk handy.

For the brownie:
1/2 cup butter
1/2 cup cocoa
1 Tbsp. honey
2 eggs
1 cup white sugar
3/4 cup flour
3/4 tsp. baking powder
1/4 tsp. salt

Melt butter and mix in cocoa. Allow to cool. Add honey, eggs, sugar, flour, baking powder, and salt. Mix well. Pour batter into a greased brownie pan or 8x11.5 inch baking pan. Bake at 350 degrees for 25 minutes. Cool. Frost with mint icing and place in fridge or freezer for a few minutes to stiffen it up. Then frost with chocolate frosting.

For the mint icing:
2 Tbsp. butter
dash of salt
1-2 Tbsp. milk
1 Tbsp. light corn syrup
1 1/4 cup powdered sugar
1/4 tsp. peppermint extract
1-2 drops green food coloring

Soften butter. Add salt, corn syrup, and powdered sugar. Beat until smooth and fluffy. Add mint extract and food coloring. Mix. Add milk gradually until the consistency is a little thinner than cake frosting.

Hershey's Perfectly Chocolate Chocolate Frosting:
1/4 cup butter
1/3 cup Hershey's cocoa
1 1/2 cups powdered sugar
3-4 Tbsp. milk
1/2 teaspoon vanilla extract

Melt butter. Stir in cocoa. Alternately add powdered sugar and milk, beating to spreading consistency. Add small amount additional milk, if needed. Stir in vanilla.

SOURCE:The Girl Who Ate Everything, originally from BYU Dining.

NOTES:If you're a BYU mint brownie purist, here's what I changed; I only adapted it slightly from the original BYU Dining recipe. First off, I halved the recipe, which makes a 9x13 pan of brownies. They used margarine, I only use butter. I doubled the cocoa. They also added walnuts (1 cup for full recipe); sorry, I don't do walnuts in brownies. They give no recipe for the chocolate frosting and I think the Hershey's is the best there is when it comes to frosting.

Saturday, December 26, 2009

Hershey's Candy Cane Kiss Brownie Bites


For the brownie:
1 brownie mix 9×13 inch size
Candy Cane Hershey Kisses, unwrapped, about 36

For the ganache:
2 Tablespoons heavy cream
1/2 cup semi-sweet chocolate chips

Garnish:
3 original candy canes, crushed

Preheat oven to 325 degrees F. Prepare mini muffin tin(s) by generously spraying with cooking spray, both inside the cups and over the top. Prepare brownie mix according to package directions.


Spoon batter into tins, filling about half way. Press kisses into center of brownie batter, pushing them in only about a quarter to a third of the way down; do not push all the way to bottom, some of the tip should stick out the top. Bake for 15-17 minutes or until brownies are cooked through.

As they bake the kisses will sink down a little...

and the brownie will start to envelop them...

until they are completely covered. Notice how the brownie bites didn't spill over even though they came over the top. If you do not spray the tops as well as the insides, the brownie will spill over, stick to to the top and make it virtually impossible to remove the bites intact.

Let brownie bites cool COMPLETELY in the tins, they are difficult to get out otherwise. Once cool, gently run a thin knife around them and ease them out onto a cooling rack.

Put candy canes in plastic baggie and gently crush, making sure not to make them into a powder.

Melt chocolate chips in microwave at 30 second intervals until smooth and melted. Stir in cream until silky smooth. If needed, microwave 10 seconds more. Dip tops of brownies into melted chocolate, then sprinkle with crushed candy canes.

NOTES:These can be kind of tricky, but if you are careful to completely spray the tins and cool the brownies before taking them out they should be ok. The flavor is wonderful. The Hershey's Kisses are amazing!

SOURCE:Adapted from Picky Palate

VARIATION: Raspberry Kiss Brownie Hearts

Use the following substitutions with the recipe above:
*use Hershey's Raspberry Hugs in place of the Candy Cane kisses
*use a pan with heart-shaped cavities (the pan I used had 6 cavities and could hold about as much or a little more than a standard muffin tin cavity)
*only fill cavities about 2/3 to 3/4 full; you won't need to spray the top of the tin, it shouldn't spill over.
*Bake about 18-20 minutes
*Makes 9 heart-shaped brownies


Linked to...
This Week's Cravings @ Mom's Crazy Cooking
Related Posts Plugin for WordPress, Blogger...