Showing posts with label Kid-Friendly. Show all posts

Saturday, April 2, 2016

Overnight Yeasted Waffles


Up until about 2 years ago, I had almost never made waffles my entire life.  Sure, I grew up with a mom that made them often and I enjoyed them. But I always considered myself a pancake connoisseur.  I've made LOADS of pancakes I can make just about any kind with my eyes closed, no recipe needed. Waffles, to me, were just not on my radar because there were those little extra steps of separating the eggs, whipping the whites and folding them in the batter. Just not my thing (ok there could be a time and place for it-but not for breakfast).

Then it happened.  I found LOVE.  Waffle Love that is.  About two summers ago the Waffle Love food truck started showing up around the corner from where I live and I just HAD to try.  I mean I can make a mean breakfast so if they can sell this thing from a truck, it MUST be good.  And it was.  And I died with my first bite.

You see these aren't your typical buttermilk, whip 'em up in the morning waffles.  These waffles have yeast and the batter sits out overnight for the flavor to develop (kind of like you would a sourdough starter).  And when you cook them in the waffle maker, oohhhhh the smell that fills your house.  I just died again.

These have become a tradition we do twice a year, in the spring and in the fall.  We enjoy these waffles with Nutella, Biscoff cookie butter, whipped cream and fresh fruit-usually berries. Once you try these you will NEVER (maybe almost never) go back again.


Overnight Yeasted Waffles

the night before:
1/2 cup warm water
1 Tbsp.  active-dry yeast
1/2 cup melted butter
2 cups whole milk
1 tsp. salt
2 Tbsp.  sugar
3 cups all-purpose flour 

the next day:
2 large eggs, beaten
1/2 tsp. baking soda 

Combine the yeast and the water in a large mixing bowl and let stand for a few minutes. Stir to make sure the yeast dissolves into the water. Melt the butter over low heat. Combine the butter with the milk, salt, and sugar (if using). Test with your finger to make sure the mixture has cooled to lukewarm, then stir it into the dissolved yeast mixture. Add the flour and stir until a thick, shaggy dough is formed and there is no more visible flour.

Cover the bowl with either plastic wrap or a loose fitting lid and let it sit on the counter overnight. The batter will double in bulk as it rises.

The next morning, beat the eggs  and baking soda  into the batter until completely combined.
 
Make the waffles according to your waffle maker's instructions, cooking until the waffles are golden-brown. Cooking time will vary with your waffle maker, but it is typically 4 to 6 minutes.

Waffles are best if served immediately, but re-heat well in the toaster. Leftovers can be kept refrigerated for up to a week. Leftover waffles can also be frozen for up to 3 months and toasted straight out of the freezer.


SOURCE:  The Kitchn

Tuesday, August 11, 2015

Peanut Butter Baked Oatmeal


School is right around the corner, in fact just one week away for us!  We are on A Track this year, meaning I need to get my kids up, ready and fed before 8am!!  Wow, considering they've been staying up until 10pm, waking up at 9am and not eating breakfast until 10am sometimes, this is going to be quite an undertaking.  I don't do cold cereal, mostly hot breakfasts and sometimes they take longer than 5 minutes. I'm going to have to make sure I plan ahead, which is why I LOVE baked oatmeal.

My girls and I enjoy oatmeal in it's many forms, but baked is our favorite.  It's so versatile too.  Sometimes I like to add berries or mashed bananas to change up the flavor, or even throw some chocolate chips on top while it's warm.  Adding peanut butter this time was genius though!!  To say we loved it is an understatement.  I baked this ahead in a big pan (doubling works wonders and keeps well too) and we ate it two days in a row.  Talk about a time saver!  This will definitely be a keeper  and something I can make ahead and pull out quickly on those early school mornings.


Peanut Butter Baked Oatmeal
1 egg
1/4 cup brown sugar
1/4 cup unsweetened applesauce
1/4 cup smooth peanut butter
1 tsp. vanilla
1/2 tsp. salt
1 tsp. baking powder
1 tsp. cinnamon
1 1/2 cups milk
2 cups rolled oats

Preheat oven to 350 degrees F.  Grease an 8 or 9 inch baking pan.

In a mixing bowl combine egg, brown sugar, applesauce and peanut butter and whisk until peanut butter is well incorporated and there are not lumps.  Add in vanilla, salt, baking powder, cinnamon and milk and whisk to combine.  Stir in the oats then pour into prepared baking pan.  Bake in preheated oven 35 minutes or until lightly golden on top.  Serve warm with a splash of milk, fresh fruit, nuts or even a few chocolate chips.

Store leftovers in an airtight container in the fridge.


Sunday, June 28, 2015

Smoky Black Bean Chili


I know it's summer time and hot, hot, hot! But my oldest daughter has fallen in love with chili since eating it at a friend's house recently.  I don't know about you, but I'm so over the dinner time struggle!!  I know I still have to deal with it for years to come, but hey, if I can find a few more healthy things my kids like that I can add in to the dinner rotation, I'm all over it.  My middle daughter already LOVES this black bean soup, as well as taco soup, so I didn't think it would be hard to get her to try this delicious chili!  Plus, you can totally eat it with chips.  That always gets their attention, haha! To my surprise both girls told me they didn't like the chili, they LOVED it!  I was so happy, I literally jumped up and down with them.  Dinner time was happy time that night.

This chili, like most soups, is open to a little interpretation.  I didn't add a ton of heat because I knew my three littles would be eating most of it.  I wanted to add a couple chipotles in adobo during cooking but I knew it would be too spicy, but feel free to do so.  Instead, I decided to just use the chipotle tabasco sauce on the side instead; my husband loves that stuff anyway and puts it on everything.  Whatever you do, don't leave out the smoked paprika, ginger ale and cocoa powder!! They lend such a unique element to the dish, I think that's why I loved it so much.

This chili would be lovely served with some cornbread, fresh tortillas or even hot cooked rice.


Smoky Black Bean Chili
1 Tbsp. olive oil
1 lb. ground beef
1/2 onion, finely diced
1 red pepper, diced
3 cloves garlic
1 tsp. salt
1/2 tsp. ground pepper
2 tsp. chili powder
2 tsp. cumin
2 tsp. cocoa powder
1/2 tsp. oregano
1 tsp. smoked paprika
1 Tbsp. brown sugar
1 1/2 cups ginger ale
1 8-oz can tomato sauce
3 cans black beans, drained and rinsed
1 can RoTel
1 can diced or crushed tomatoes

garnishes:
sour cream
shredded cheese (cheddar, monterey jack, mozzarella or my personal favorite smoked cheddar)
cilantro
diced avocado
chipotle tabasco sauce
tortilla chips

Heat olive oil in a large sauce pan or Dutch oven over medium high heat.  Add onion and ground beef and cook until onions are translucent and beef is browned.  Drain off all but a tablespoon or two of the fat.  Add chopped red pepper, garlic, salt, pepper, chili powder, cumin, cocoa powder, oregano, smoked paprika, and brown sugar.  Sauté 2-3 minutes, until fragrant. Add ginger ale, tomato sauce, black beans, RoTel and tomatoes to the Dutch oven.  Stir to combine.  Bring to a boil, then reduce heat to a simmer, cover and cook about 15-20 minutes.

Serve warm, with desired garnishes.


Friday, June 5, 2015

Nutella Stuffed Croissant French Toast


It is a rare occasion that I make something like this for breakfast.  I almost can't stand to serve my kids something that's over the top sweet that early in the morning.  However, I think I can get away with this french toast because croissants aren't really sweet at all, and neither is the whipped cream (unless you buy it premade at the store), and I just serve it with fresh berries. So I'm totally good right!! 

I almost never buy croissants because they're kind of expensive.  But I love to shop the reduced bakery rack at a couple of my favorite grocery stores. Occasionally there will be a package or two of these babies, so I just grab them and throw them in the freezer for when I'm ready to use them. Day old bread is perfect for french toast since it's a little dry it'll soak up the egg mixture a little better.

This french toast is easier than it looks and SOOOO worth it!! It just takes a few minutes to pull everything together and you'll be on a roll flipping these babies on the griddle in no time.


Nutella Stuffed Croissant French Toast
1 package of croissants (either 5-6 large ones or about 12 small ones)
Nutella
2 large eggs
2-3 Tbsp. whole milk, heavy cream or half and half
1 tsp. vanilla
1/2 tsp. cinnamon
1 Tbsp. sugar

garnish:
whipped cream (homemade or store bought)
fresh berries

Preheat pancake griddle to about 300 degrees F.  Alternately you can cook these in a large frying pan, heated to medium-low. Add a little butter to the pan when you're ready to cook the croissants.

In a small shallow dish whisk together the eggs, milk, vanilla, cinnamon and sugar. Set aside.

Slice each of the croissants in half and spread on nutella as desired.  Place the croissants in the egg mixture and let them hang out to soak it up.  Flip them to soak on the other side.

Place croissants on the griddle and let cook about 3-4 minutes, or until golden brown.  Flip and cook another 3-4 minutes.

Serve warm with whipped cream and fresh berries.


Tuesday, March 10, 2015

Pesto Chicken Bacon Ranch Taquitos


Man oh man, when I first started making taquitos, my kids could not get enough of them!  Especially my oldest daughter.  I make the same ones every time (these Chili-Lime Taquitos) because they don't like to branch out much.  Much to my chagrin, but kids will be kids right!  So, I thought it was high time to switch it out.

Adding bacon and ranch was a no-brainer, where the kids are concerned, and hey, us adults too.  I mean really, who doesn't love THAT? These are super simple, with just a few ingredients, to throw together and they whip up real quick. I can even make them on a busy weeknight!  I prefer to use the uncooked tortillas because you don't have to cook them beforehand and they taste MUCH better!


Pesto Chicken Bacon Ranch Taquitos
4 chicken breasts
1 ranch seasoning packet
4 Tbsp. basil pesto, divided
1/4-1/2 cup chicken broth
1 cup mozzarella cheese, shredded
1/2 lb. bacon, cooked and crumbled
uncooked flour tortillas 

Place chicken, contents of the ranch seasoning packet, 2 tablespoons of the pesto and chicken broth into a crockpot. Cook on low for 4-6 hours or until chicken easily shreds.  Remove chicken to a large tray or cookie sheet and cool enough to be able to handle it.  Shred chicken and return it to the crock pot.  Add the remaining pesto, mozzarella and bacon and stir until combined. 

*Note: Don't discard juices when initially taking chicken out of the crockpot.  Once chicken is shredded and added back in, it will soak up most of the juice.  If there is a lot of excess, remove some, leaving enough remaining to keep the chicken moist. 

Preheat oven to 425 degrees F. Line a cookie sheet with a silicone baking mat.

Depending on size of tortilla, scoop a scant 1/4 cup of the chicken mixture onto the tortilla and spread it out close to one end of the tortilla.  Roll it up and place it seam side down on prepared baking sheet.  Repeat until all the filling is gone.

If you have an olive oil spritzer, spritz the tops of each of the tortillas with olive oil.  Otherwise you can use a pastry brush to brush with olive oil. Sprinkle a pinch of coarse salt over the top of each one.  Bake for about 15 minutes, or until tops are lightly golden. Serve warm with ranch dip or sour cream.


Monday, January 12, 2015

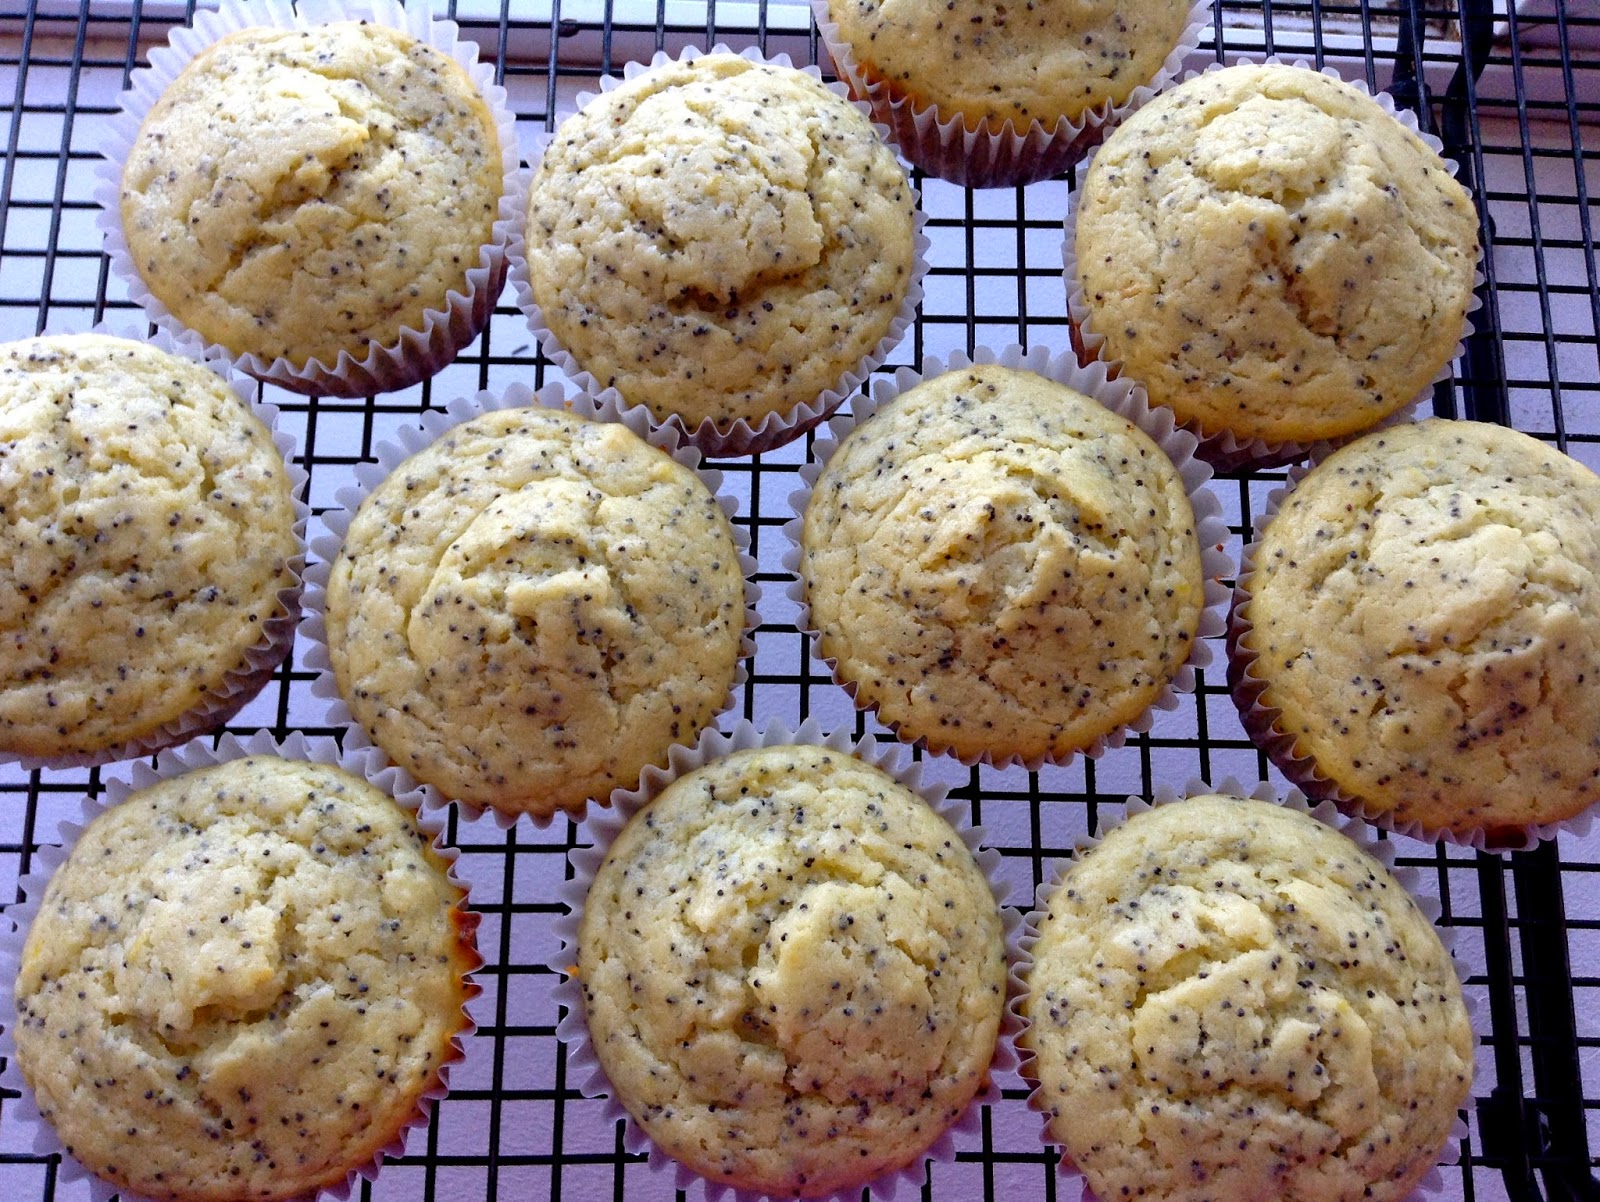
Lemon Poppy Seed Muffins


What's not to love about a muffin?  They're quick and easy to make and their flavor variations are pretty much limitless.  I love to make a big batch of muffins, eat some warm and fresh, save a few for the kids' lunches then throw the rest in the freezer.  They make for a quick breakfast when we're short on time or even for a snack.  I typically use half whole wheat and half white flour and about half of the sugar of traditional muffin recipes, so no guilt here serving them to my family.

My oldest daughter fell in love with these muffins last year and I've made them numerous times since.  We all love them!  But if you're not a fan of lemon or don't have it on hand, try adding a touch of almond extract and a small handful of sliced almonds.  Just not sweet enough for you? Sprinkle some coarse sugar on top of each muffin before baking, or add a simple glaze on top of a little powdered sugar and milk mixed together.


Lemon Poppy Seed Muffins
2/3 cup sugar
zest and juice of 1 lemon
1/3 cup Greek yogurt
1/3-1/2 cup buttermilk
2 large eggs
1 stick butter, melted and slightly cooled
1 tsp. vanilla
1 cup all-purpose flour
1 cup whole wheat flour
2 tsp. baking powder
1/4 tsp. baking soda
1/4 tsp. salt
2 Tbsp. poppy seeds

Preheat oven to 400 degrees F. Line muffin tin with liners and set aside.

In  mixing bowl, combine sugar and lemon zest.  Rub together with your fingers until very fragrant.  Add lemon juice,yogurt, buttermilk, eggs, melted butter and vanilla and whisk until well combined.  Sift the remaining dry ingredients, except the poppy seeds. Stir dry ingredients into the wet ingredients until just combined.  Gently fold in the poppy seeds.

Using a large scoop, divide batter evenly into the muffin tin.  Bake 15-17 minutes or until slightly golden on top.

Cool muffins on a wire rack and store in an airtight container on the counter about 4 days.


SOURCE: Adapted from Two Peas and Their Pod

Thursday, January 23, 2014

Chili-Lime Chicken Taquitos


I seriously can't believe I have not posted about these taquitos until now.  They have become the number one thing requested for dinner lately.  I don't even know how I stumbled upon making them the first time around, but they were a HUGE hit from the get-go.  After that my oldest daughter has consistently asked to have them for dinner about once a week.  Thankfully they are so quick and easy to throw together and just take a few simple ingredients; you're sure to have most of them on hand.


Chili-Lime Chicken Taquitos
3 cups shredded cooked chicken
1 Tbsp. chili powder
juice of 1 lime
1/4 cup chopped cilantro
1 cup shredded Monterrey Jack cheese (mozzarella or Mexican blend  is good too)
salt and pepper 
uncooked flour tortillas

sour cream
guacamole
salsa

Cook chicken using your preferred method.  For a quick and easy method, add uncooked chicken to a pot with 3 cups water, 1/4 tsp. salt, 8 black peppercorns, half an onion, quartered, and a bay leaf.  Bring to a boil, reduce heat and cover.  Cook 20 minutes or until done.  Remove from pot, cool and shred.
 
Add shredded chicken,  chili powder,  lime juice and cilantro to a large skillet.  Gently warm over medium heat.  Stir and taste for seasoning.  Add salt and pepper as necessary.  Stir in cheese and remove from heat.

Lay out one uncooked tortilla at a time.  Place 3-4 tablespoons of filling along one end, pushing it out to the edges.  Roll up and place seam side down on a baking sheet.  Continue with remaining filling and tortillas.  Make sure you leave a little space in between each taquito so they will be cooked all around.  Using a pastry brush, lightly brush olive oil over the tops of each taquito (you could also use an olive oil spritzer).  Sprinkle a pinch of coarse salt over each.

Preheat oven to 425 degrees F.  Bake taquitos about 15 minutes or until tops are lightly golden.  Serve warm, with your choice of guacamole, salsa or sour cream. 

Thursday, October 31, 2013

Pumpkin Coconut Baked Oatmeal


Can I tell you, we eat A LOT of oats around here.  Like, I buy my oats by the 50 lb bag!  My oldest loves oats in almost any form, so I try to do them a couple different ways.  I mostly do steel cut oats and regular old fashion oats, but I still need some variety.  Baked oats was next.  I used to make it a lot more often and decided to start making it again.  It's no surprise all the girls loved it!

Well, 'tis the season to make everything either pumpkin or apple flavored so I decided to hang towards pumpkin on this one, since I made lots of puree this year.  And I adore coconut, especially in my granola and since oatmeal is kind of like granola, it totally works.

I LOVED the results of this oatmeal.  It turns out nice and tender but a little crunchy on top.  And, of course, all those warm spices swimming through it.  I decided to serve mine up with a splash of milk and topped with some chocolate chips and chopped pecans.  But pumpkin seeds and cranberries would also be delish, whatever you're craving.

Pumpkin Baked Oatmeal
3/4 cup canned coconut milk
1 egg
1/4 cup oil (I used coconut, melted)
1/2 cup pumpkin puree
1 tsp. vanilla
1/4 cup brown sugar
1/2 tsp. salt
1 1/2 tsp. baking powder
1 tsp. cinnamon
pinch of ground nutmeg
pinch of ground cloves
1/2 cup coconut, shredded or shaved
3 cups rolled oats

Preheat oven to 350 degrees F.  Grease a 9-inch baking dish and set aside.

In a mixing bowl, combine coconut milk, egg, melted coconut oil, pumpkin puree, vanilla and brown sugar.  Whisk until smooth and well-incorporated.  Add the rest of the ingredients and stir to coat evenly.  Spread into greased baking dish and bake 25-27 minutes or until slightly golden on top.

Serve warm with any desired mix-ins (i.e. milk, pumpkin seeds, walnuts, pecans, chocolate chips,  coconut, cranberries etc.)

Monday, August 19, 2013

Peanut Butter Banana-Oat Muffins

I've been gearing up for school to start for the past few weeks.  We're breakfast people, so not a whole lot of boxed cereal here, mostly home-cooked.  So, I decided to start doubling my recipes lately and throwing the rest in the freezer to stock up for those rushed early mornings.

Peanut butter and banana are one of my most favorite combinations when it comes to breakfast foods.  I thought about throwing chocolate chips in there, but I decided I shouldn't have chocolate with EVERY meal!!  Plus, we're trying to reduce the amount of sugar, especially refined, in our diets.  What's lovely about these muffins is the banana adds a natural sweetness so you can keep the amount of added sugar lower; remember the blacker the better when it comes to bananas for baking.

Another thing I love about these muffins is they are light and and have a very tender crumb.  No heavy whole wheat bricks here!!

Peanut Butter Banana-Oat Muffins
2 Tbsp. coconut oil
1 cup mashed banana, about 2 large
1/4 cup unrefined sugar (like sucanat)
1 egg
1 tsp. vanilla
1/4 cup natural peanut butter
1/4 cup Greek yogurt (preferably not low-fat)
1/2 milk (I use almond)
1 cup whole wheat flour
1/2 cup oat flour (put oats in blender or spice grinder to grind them up)
3/4 tsp. baking powder
1/2 tsp. baking soda
1/2 tsp. salt
1 tsp. cinnamon
1/4 tsp. nutmeg

Preheat oven to 400 degrees F.

In a mixing bowl, mash banana.  Add coconut oil and sugar and whisk until coconut oil is well incorporated.  Add egg, vanilla, peanut butter, yogurt and milk and whisk.  Add they dry ingredients and stir just to combine.  Do not over mix.

Line muffin tin with liners and divide batter evenly into wells.

Bake at 400 degrees F for about 12-14 minutes.  Cool on wire rack.  Store in an airtight container.

Monday, December 3, 2012

Fresh Tomato Soup


This soup is a staple at our house during the fall and winter months. At the end of summer when tomatoes are at their ripest, I buy boxes and boxes of them (when I don't have a garden) to preserve. A lot of the tomatoes I turn into salsa and spaghetti sauce. The rest I just peel and puree, then freeze in about 2 quart quantities. It makes preparing this soup a cinch, since most of the work is already done!! Even in the middle of winter, we can have this soup and it still tastes like it just came out of the garden. Simple, fresh ingredients are key to making this soup taste "soup"er.


Fresh Tomato-Basil Soup
8 cups (2 quarts) fresh tomato puree (about 10-12 vine-ripened tomatoes)
chicken soup base 
1 cup heavy cream (can substitute full-fat coconut milk for non-dairy)
Coarse salt and black pepper
20 leaves fresh basil, cut into chiffonade, for garnish

To blanch and peel tomatoes, bring a large stockpot of water to a boil. Fill a sink full of ice water. Working in batches, score the bottom of the tomatoes. Place in boiling water for 60 seconds. Remove immediately and place in ice bath. Repeat with remaining tomatoes.

Once tomatoes are cooled, drain water from sink. Core tomatoes and slip skins off. Puree tomatoes either with a food processor or working in batches in a blender. Don't worry If you have a little more or less than 8 cups.

Add tomato puree to a large stock pot. Add enough chicken soup base for 2 cups and bring to a boil. Once chicken base is completely dissolved, taste for seasoning and add more, to taste.

Gently simmer for about 5 minutes, add cream and simmer another 2-3 minutes. Taste again for seasoning and adjust as necessary. Remove from heat and add most of the basil, leaving some for garnish.

Serve warm.


*If you don't have access to fresh tomatoes, you can use 2 28-oz can of good quality crushed tomatoes (Cento, San Marzano).

Friday, September 14, 2012

Zucchini Bites


I know I'm totally hanging onto summer with this post, but I know there are some of you out there that still have zucchini coming out your ears and need something to do with it besides make bread....for the tenth time!

I love that each of these is one perfect little mouthful. You can pop them almost as mindlessly as chips or tater tots, but feel no regret because they are totally healthy!

These haven't quite yet made it to the dinner table because they are just do darned good to snack on, but they would make a great addition to any dinner menu!

Zucchini Bites
Yields 24

2 cups finely shredded zucchini, water squeezed out
2 eggs
1/2 cup whole grain or panko bread crumbs
1/2 cup parmesan cheese, finely shredded
1/2 red bell pepper, finely diced
1/4 cup onion, finely diced
4-6 fresh basil leaves, chopped
salt and pepper

Preheat oven to 400 degrees F. Spray a mini muffin pan with cooking spray.

Squeeze as much water out of the zucchini as you can, otherwise it will become soggy.  Place everything in a mixing bowl and either stir with a spoon, or you can use your hand and give it a few good squeezes through your fingers to get it all nice and mixed up.

Using a tablespoon, or I like a small cookie scoop best, scoop mixture into prepared pan and bake for about 15-18 minutes or until slightly golden. Remove to a cooling rack and cool completely.  Enjoy!


SOURCE: Adapted from The Curious Country Cook

Monday, September 3, 2012

End-of-Summer Smoothies

Not having my computer is totally killing me. My husband has a MacBook Air, which I have been using a little but I don't like it. I can't wait to get my own laptop back! I just couldn't wait another second to post though, I know it's been sparse the past few weeks. I've got not one but TWO wonderfully delicious end-of-summer smoothies to share with you today. Have a great holiday!!

This first smoothie was born out of necessity. Like, howmagonnauseupallthosepeaches my mom just gave me (from her tree)? I know, what a problem right? I knew I liked peaches and blueberries in my green smoothies, but had yet to try them in just an all fruit smoothie (something my girls would more likely like and finish). So, my first trial was a big score, didn't have to change a thing. It was absolutely love at first sight.

Fresh peaches at their peak are the most wonderful thing in the world to eat. I crave them every summer and am always very sad to see them go. If you can get your hands on some before they're gone, you gotta give this a try!

Blueberry Peach and Basil Smoothie
1 cup frozen blueberries
2 fresh, ripe peaches, peeled if you prefer and pitted
1/2 cup water
1/2 cup almond milk
about 4 fresh basil leaves

Put everything in your blender and whiz away!


I couldn't get this next smoothie out of my mind after I saw it. I think I made it that very day. Watermelon is another one of those quintessential fruits of summer that only lasts so long. So we gorge ourselves on it while it lasts then bid farewell until next time.

This smoothie is also paired with basil. I know you're thinking really??? c'mon here! Not more basil. But, seriously, don't underestimate the basil. It adds flavor and life to so many things. It's a subtle flavor that just knocks your socks off. If you're really not a fan, fresh mint would actually be a great substitution.

This is a super refreshing smoothie with the watermelon and cool cucumber. No need to add any extra liquid because the fruit is already full of it.

Watermelon Strawberry and Basil Smoothie
2 heaping cups watermelon
1/2 cup cucumber
1 cup frozen strawberries
3-4 fresh basil leaves

Put it all in your blender and whiz to you liking. Slurp away.

Enjoy!


SOURCE: Watermelon smoothie from My Green Diet

Friday, August 24, 2012

Berry-Oat Breakfast Smoothie

Oh my goodness, I know I have been MIA for the past two weeks. Things have been crazy around here with school starting. My oldest is starting kindergarten and I'm kind of freaking out about it-ahhh! Plus, my computer is being worked on so I have to steal my husband's mac when he's not looking for only tidbits of time here and there. Hopefully I'll get it back soon and I can start kicking out regular posts again! But for now, enjoy this breakfast smoothie, perfect for the start of school.


We have been rockin' these smoothies lately and my girls especially love them. The first one that I made was just strawberry though, so they probably loved it FIRST because it was pink and only SECOND because it tasted good. Regardless of why they like it, I'm glad they do and happy they drink it. At least I know they're getting good nutrition at least ONE meal a day.

This would be a perfect meal to tuck away in your breakfast arsenal for those crazy school mornings. Quick. Easy. Delicious! It only take a few minutes to throw together and is loaded with healthful ingredients that are sure to send everyone off to a great start for the day!


Berry-Oat Breakfast Smoothie
1 cup ice
1/2 cup frozen berries (single berries or a mix)
1/2 cup plain yogurt
1 banana
1/2 cup rolled oats
1 Tbsp. honey
1 cup water (or other liquid such as almond milk, coconut water, low-sugar juice)

Put everything in a blender and blend until completely smooth.


SOURCE: Martha Stewart

Monday, August 6, 2012

Vegan Oatmeal Banana Pancakes with (not so vegan) Chocolate Chips

I think my pancake addiction keeps getting worse and worse! I NEVER tire of eating them. They are just so versatile. You could make a different recipe every week for a year and never repeat.

So the other day I was thinking about making these pancakes that I LOVE, one of my favorites, but decided to try to make them healthier, by omitting the dairy, egg and added sugar, and using whole wheat flour.

Well, all the little tweaks paid off, because I think the pancakes are just as fabulous. I used a super ripe banana so it would add all that natural sweetness instead of adding white sugar. I replaced the chicken egg with a flax egg, definitely multiplying the health factor and supplying the fatty acids that my growing girls need. The whole wheat flour is pretty much a no-brainer for me any more, it's the norm, as well as the almond milk.


Vegan Oatmeal Banana Pancakes with Chocolate Chips
1 very ripe large banana, mashed
1 cup almond milk
1 flax egg (1 Tbsp. ground flax + 3 Tbsp. water)
2 Tbsp. oil
1 tsp vanilla
1/2 whole wheat flour
1/2 cup oats
pinch salt
1 tsp. baking powder
3 Tbsp. chocolate chips (vegan-friendly if you choose)

Preheat skillet.

In a small bowl, stir together the ground flax and water. Let sit about 5 minutes.

In a large mixing bowl, add mashed banana, milk, flax egg, oil and vanilla. Whisk until well-incorporated. Add the dry ingredients, stirring to combine, tossing in chocolate chips in last.

Pour batter by 1/4 cup onto preheated skillet. Cook until bubbles start to form and edges look a bit dry. Flip and continue cooking another minute or so.


SOURCE: Adapted from Minimalist Baker

Monday, July 23, 2012

Strawberry-Banana-Orange Green Smoothie


The other day I wanted to share this smoothie recipe with some friends so I went back through my post list and couldn't find it! I can't believe I haven't shared it with you before. This smoothie, or spinach drink as I used to call it, is the first one I had ever tried, over 10 years ago, albeit with some modifications.

I got the main idea for this smoothie, from a college roommate who had celiac and couldn't eat wheat, so she ate a lot of fruits and veggies, and this smoothie. Back then you didn't hear about celiac and gluten-free, so at first I thought it was a little weird, but then I tried it and loved it. I didn't even have a powerful blender back then and my drinks came out a little chunky and the spinach wasn't very well blended, but I didn't care, it was healthy and good.

So, here I am finally sharing what has evolved into my favorite green smoothie. If you have been reluctant to try the green drinks past, I think you will be pleasantly surprised.


Strawberry-Banana-Orange Green Smoothie
1 cup water
splash of almond milk
1 tsp. vanilla
1 whole orange, peeled*
1 cup frozen strawberries
1/2 frozen banana
2 handfuls baby spinach

*If you do not have a powerful blender, I suggest just using the juice of the orange or about 1/2 cup orange juice.

**If your strawberries are not frozen, use ice for part of the water.

Place ingredients in blender in order listed. Blend to your liking-may take a few minutes if you do not have a powerful blender. Drink immediately or store in a jar with a tight-fitting lid for up to 48 hours. Shake well before drinking.

Makes about 3-4 cups

Friday, June 8, 2012

Apricot-Strawberry Smoothie

At our previous house we had apricot trees and I canned and froze those apricots until I had no room left! I'm a little ashamed to say that I still have some left in the far dark corners of my freezer and pantry. I made it my goal to finish them up in the next few months. It has led me on an apricot-smoothie-making journey. As I went down my list of combinations, I crossed them off as I went, knowing that I was not going to make THAT one again-blech! However, I when I threw this combination together, I knew it was a keeper...FINALLY! I've made this over and over the past month or so and we've all loved it.

Apricots are just about in season and strawberries are already here, so it's the perfect time to make this refreshing smoothie. Treat yourself, and your health.

Apricot-Strawberry Smoothie
1 cup apricots, pitted and halved
1 cup strawberries, hulled
1 banana
2 big handfuls spinach, rinsed
1 cup fresh orange juice
handful of ice
water as needed

Put all ingredients in blender, adding juice first, and blend well. Add water as needed for desired consistency. Pour into jar or container with tight fitting lid. Will last up to 48 hours, just shake well before drinking.

Wednesday, May 16, 2012

Whole Wheat Spaghetti with Spicy Broccoli

This right here is my kind of meal. It's healthy, quick and easy, and with just a few ingredients. It's also something my kids would eat and that I would enjoy as well. Broccoli is one of my girls' most favorite veggies and what kid doesn't like noodles? It was a thumbs up all around!

Because of it's simplicity, this dish is pretty adaptable. You can add some cooked meat (grilled chicken, bacon, Italian sausage or ham). You can also pump up the veggie factor by adding in sauteed mushrooms and onions, grape tomatoes or really whatever you'd like. I can't wait to try this again.

Whole Wheat Spaghetti with Spicy Broccoli
2 large crown of broccoli
3 tablespoons extra-virgin olive oil
3 garlic cloves, minced
1/2 teaspoon dried hot red pepper flakes
Salt
1/2 pound (8 ounces) whole wheat, whole grain or regular spaghetti
1/2 cup Parmesan, shredded, or to taste


Bring a large stock pot full of water to a boil.

Cut the he stalks off the broccoli and cut the florets into bite-size pieces. Set aside.

Warm the oil in a large skillet over medium heat. Add garlic and red pepper flakes, and sauté about 1 minute. Turn off the heat, and stir in 1/2 teaspoon salt.

When the water comes to a boil, drop the pasta and cook until the almost al dente, about 5 minutes, then add the broccoli.
Continue cooking until the pasta is al dente and the broccoli is tender, about 2 minutes. Drain, reserving 1/4 cup of the cooking liquid.

Add the spaghetti and broccoli to the skillet and toss over high heat. Add the reserved cooking liquid to moisten the dish. Divide into bowls, top with cheese, and serve immediately.


SOURCE: Ezra Pound Cake

Friday, April 27, 2012

Blueberry Banana Granola


I've been making my own granola for quite a while now and I think I can say with fair certainty that this granola is my favorite one yet! In terms of crunchiness and flavor, this is a real winner. To kick up the crunch a little, I added just a bit of brown sugar to my wet ingredients and while I usually use applesauce as a binder, I decided to use pureed banana. It not only added a touch of natural sweetness but flavor too. Blueberries and bananas go so well together.

If you have never made granola before, don't hesitate, it couldn't be easier. The few minutes it takes to throw together is well worth the end result, and in our house it lasts a couple of weeks. By making your own granola, you get to control what goes in it; that means no preservatives and the amount of sugar you like. If you're not sure where to pick up the nuts, seeds and dried fruit, typical in granolas, check out your local grocery or health food stores that have a bulk foods section. There you can purchase what you want and in the quantities you want as well.

Blueberry Banana Granola
6 cups rolled oats
3/4 cup walnuts, roughly chopped
3/4 cup almonds, roughly chopped
1/3 cup sunflower seeds
1/3 cup pepitas (green pumpkin seeds)
1 cup shredded coconut
1/4 cup honey or maple syrup
1/4 cup coconut oil
1/3 cup pureed banana (about 1 medium banana)
3 Tbsp. brown sugar
1/2 tsp. ground cinnamon
1/2 tsp. ground cardamom (if you don't have cardamom, just use more cinnamon)
1/2 tsp. salt
1 1/2 cups dried blueberries

In a large mixing bowl, add the oats, nuts, seeds and shredded coconut and toss. In a smaller, microwave-safe bowl, add the honey, coconut oil and brown sugar. Microwave it on about half power until coconut oil is melted. Add banana puree, cinnamon, cardamom (or another 1/2 tsp. or cinnamon) and salt and stir until combined. Pour honey mixture over oat mixture and toss until evenly coated. Spread over 2 cookie sheets and bake at 325 for 20-30 minutes, stirring every 5-10 minutes. Cool and toss in blueberries. Store in an airtight container (in the fridge if you want it to keep longer).


SOURCE: adapted from Bob Vivant

Sunday, April 22, 2012

Lemon Basil Penne with Grilled Chicken


One of the things I love to cook with most of all is fresh basil. Is that weird? I love the bright, fresh flavor that just makes a dish pop! I've tried growing it on my window sill, but we don't get very much direct sunlight here and we don't have a yard (because believe me I would be growing mounds of it if we did). I have a couple of local grocery stores near me that sell fresh basil for a reasonable price, so I splurge every once in a while.

Fresh basil is one of those hallmark flavors of spring and summer fare and pairs perfectly with fresh lemon. I grabbed my basil at the store the other day, not knowing before hand I was going to with it (even though I just had to have it). When I got home and found three lemons in my fridge that needed to be used, I immediately knew I wanted to make this pasta dish. It is so quick and easy and delivers up tons of flavor! I love how just a few fresh and simple ingredients can make some of the best food. This pasta can be served with or without the chicken.


Lemon Basil Penne with Grilled Chicken
for the marinade:
4 chicken breasts, pounded to an even thickness
good drizzle of olive oil
juice of 3-4 lemons
a good squirt of Dijon mustard (about 1 Tbsp.)
dash of salt

for the pasta:
1 pound penne Pasta
4 Tbsp. butter
3 whole lemons, juiced
1 cup heavy cream
1 1/2 cup grated Parmesan cheese
salt and freshly ground black pepper, to taste
20 basil leaves, chopped into ribbons
1 pint cherry tomatoes, halved

Pour all the marinade ingredients into a gallon zip-top bag and add chicken, tossing to coat. Marinate several hours, up to overnight.

Cook pasta according to package directions, reserving 1 cup of hot pasta water when you drain. Set pasta aside in a colander.

While pasta is cooking, grill chicken either on an outdoor grill or indoor grill pan. Cook until no longer pink. Let cool at least 5 minutes, then slice into strips.

In the same pot used to cook the pasta, melt butter over medium heat. Squeeze in the juice of 3 lemons. Whisk together. Pour in cream and whisk until hot. Add cheese and whisk until melted. Add salt and pepper, to taste. Check consistency, adding some of the hot pasta water to loosen the sauce if needed.

Pour pasta back into the pot, along with the basil and tomatoes, stirring to coat. Pour into a large serving dish. Top with sliced chicken breasts. Serve immediately.


SOURCE: Lightly adapted from Pioneer Woman

Monday, April 16, 2012

Balsamic Chicken Tortellini Salad


This little salad has easily become one of my new favorite quick and easy dinners. It's kind of funny because it's also the salad that got my two older girls to eat sweet peppers. I had brought home a big bag of mini sweet peppers one day, primarily for this salad, and they thought they were the cutest thing and just ate them whole! Now they love them.

You can tackle this salad in the time it takes the tortellini and chicken to cook, making it ideal for a soccer night or any weeknight for that matter. I use fresh baby spinach as well as a little fresh basil, which makes the flavor just pop! Fresh basil can be pricey if you don't know what to look for. Sometimes grocery stores will carry small, unpackaged bunches that are near the fresh herbs like parsley and cilantro. That seems to be the least expensive that I have found, but I have also found a living basil plant that comes with roots, which you can keep for a while at home. Of course, the easiest and most definitely least expensive would be to grow your own in your garden or even on your window sill.


Balsamic Chicken Tortellini Salad
For the salad:
1 7-10 oz. package cheese tortellini (or multiple smaller packages)
2 boneless, skinless chicken breasts (pounded thin if they are thick)
1 pint cherry tomatoes, halved
2 sweet bell peppers, seeded and diced
fresh baby spinach, chopped (about half a 10-oz bag)
1/2 cup fresh basil leaves, cut into ribbons
1/2 cup freshly grated parmesan cheese

For the balsamic vinaigrette:
1/2 cup olive oil
1/2 cup balsamic vinegar
1 Tbsp. brown sugar
salt and pepper to taste

To prepare the vinaigrette, put all ingredients in a small jar with a tight fitting lid and shake to combine. Add about 1/3 of the vinaigrette to a zip-top bag. Add the chicken and marinate for 1-2 hours. When it's time to cook the chicken, remove it from the zip-top bag and discard the marinade. Cook either on indoor grill pan or outdoor grill. Once cooled, chop into bite-sized pieces.

Bring a large pot of water to boiling and cook tortellini according to package directions. Drain and cool.

While the chicken and tortellini are cooking, chop the veggies and greens and add them to a large salad bowl. Add cooled chicken and tortellini. Toss with remaining dressing and parmesan cheese.
Related Posts Plugin for WordPress, Blogger...